Duet3D Logo Duet3D
    • Tags
    • Documentation
    • Order
    • Register
    • Login
    1. Home
    2. martinv
    3. Best
    • Profile
    • Following 0
    • Followers 0
    • Topics 7
    • Posts 38
    • Best 12
    • Controversial 0
    • Groups 0

    Best posts made by martinv

    • RE: Help identifying connector for Tevo bed cable

      @droftarts the parts arrived in due course and here is the made up adapter cable. I'm happy with it.

      Note to all, this cable carries mains voltage and should be tucked out of the way and safely covered where you cannot touch it. This photo is with the cover removed for photo purposes.

      power-connector-adapter.jpg

      posted in General Discussion
      martinvundefined
      martinv
    • RE: Active chamber heater

      @T3P3Tony The heater is a combined 24V fan and 400W mains voltage heating element mounted towards the top on the left hand side of the enclosure. It brings in air from outside the enclosure, and, while it's not easily visible, the rear of the enclosure hangs over the back of the work bench, so the cooler air lower in the enclosure air exits at that point. I debated for a long time whether to just recycle (reheat) the air in the enclosure, but I hadn't worked with this kind of heater before and didn't know how hot the 'input' air could safely be, so I went for the safe option, and heat room temperature air. It looks like the heater is designed to be mounted on the outside of an enclosure, but I couldn't find any more guidance on the data sheet. This work space is not occupied, so I have no problems with potentially harmful ASA and other particles from engineering filament being blown into the room.

      20241227_170011.jpg

      There is a blower fan that is used for the initial stage of heating in order to mix the air thoroughly throughout the enclosure.

      20241227_170103.jpg

      I have a single DS18B20 temperature sensor.

      I'm using a simple heating thermostat algorithm (bang bang) to turn the heating element on and off. I found the location of the temperature sensor is critical and sensitive. At one extreme, if the sensor is in the hot air stream the heater will of course turn off far too early. At the other extreme, say if the sensor is tucked away in the enclosure frame tubing, the air in the enclosure gets far too hot before the heater will turn off. What I have found is that it's best where it is in the photo. I think it's best to have a sensor that reacts a little on the fast side, and just let the whole setup stabilise for a while, than risk wild temperature swings of a too slow sensor response. Yes, I could implement a PID system, but that would be more work.

      20241227_170131.jpg

      The heater unit spec is as follows.

      20241227_170151.jpg

      As I say, this is not hooked up to a Duet, but the controller does have a serial interface that I designed to work with my Duet equipped machines. I'm hoping that one day I'll have an enclosure ready for those, and can do something similar.

      Incidentally the enclosure is made from 8mm twin wall polycarbonate (roofing material), which is cheap, and for the parts where I want to see in it's made from 4mm Lexan (polycarbonate). This was about the best bang for the buck I could manage here in New Zealand, but it still cost a few hundred NZ dollars (maybe USD$200). The panels are joined together using brackets printed from eSun ABS-MAX which is UL94V0 rated filament. There is also a smoke detector nearby and a second one that is wired to an occupied area.

      Regards,

      -Martin

      posted in Duet Hardware and wiring
      martinvundefined
      martinv
    • RE: Input shaping user interface bug? Or just user confusion?

      @Electriceye How it's possible to get the effector to move in a plane when it's controlled by 3 independent arms amazes me every time.

      I hear what you're saying regarding the accelerometer. I think the weight of the wire running to the accelerometer is negligible compared to the weight of the print head, but I agree that less is better.

      I did not have high expectations for the long ribbon cable (which had to be that long because the printer is, well, big). I wired to the temperature daughter board. It's an easy IDC connection at the Duet end, and I break out the Dupont connectors at the accelerometer end. There is a GND on pin 2 that separates the CS from the other signals. I think that might help. I didn't experience any issues or problems (for once!). The data looks reasonable, though it's transferred digitally so I'm sure problems would show up quite readily, though how it manifests I'm not sure.

      I lied above. There were two issues. First one, I carefully checked all wires to make sure, absolutely, that I had the right signals from the accelerometer going to the right pin on the 10-way IDC. Then I went and plugged the 10-way connector into the wrong header. $#%!@#^& Fortunately the pin out on the other 10-way header meant I didn't kill anything.

      The other thing that happened was that at one point I homed, then went to Z=0 on the big delta, and while the (5' cable from Digikey) was long enough for the initial testing, if the cable wraps itself around the effector, as wires like to do, it wasn't quite long enough and my 3D printed mount for the accelerometer went to 3D print heaven. $%#%&# again.

      posted in Duet Web Control
      martinvundefined
      martinv
    • Duet 3 Mini 5+ Tevo Little Monster conversion

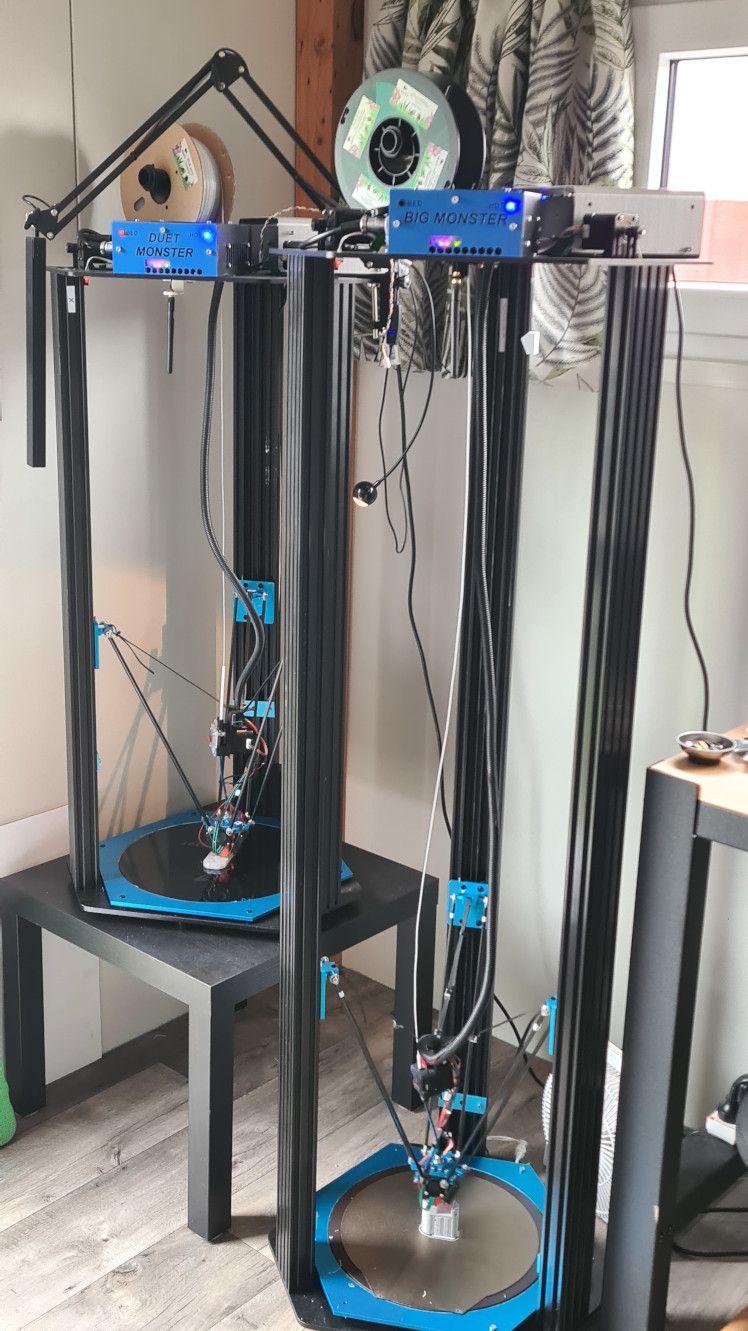
      A few months back I bought a second hand Tevo Little Monster delta printer. I had always wanted a delta, just for the cool motion of the arms as they print. This particular printer came with a bunch of extra parts, which was in fact a second non-working Tevo Little Monster.

      I played around with the working printer, but never really got it to print anything more than a simple test print. I found the firmware horrendous; if anything didn't work as planned the printer would just freeze. One time it seemed to be cooking my filament - PLA smells like baking candy when it's too hot. Enough was enough, so I looked for a suitable brain to perform a transplant! What I needed was a Duet 3D brain!

      More than one Little Monster has been converted to use a Duet 2 board - these printers are after all quite old. This one is around 7 years. I was going to buy a Duet 2 and convert, but helpful people on the forum suggested the Duet 3 Mini 5+ might be a better choice. So I ordered a WiFi one and went down the rabbit hole...

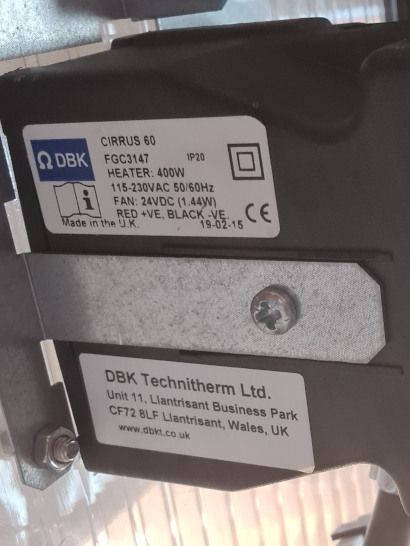
      Figuring my time is actually valuable I decided to upgrade other bits of the printer that were of unknown condition. In the end I replaced the hotend fan, part cooling fans, hotend block (E3D Volcano), heat break, nozzle (now 0.8mm brass), controller fan (Noctua), heater (40W E3D), thermistor (E3D), E3D extruder (but kept using the slimmer extruder motor on the original printer). There was some fabrication of the mount for the controller board and for the WiFi aerial, and I made a new face plate to control air flow better (also blocking off side air to promote air flow under the controller).

      The first print had poor adhesion which I traced to too much fan cooling. I was fiddling with 0.55mm layer height. I have since found that I might as well use 0.3mm layer height as volumetric flow seems to be the limiting factor, though I'm using a max of 15mm^3/s and it can probably go higher. Next I want to try the Bondtech CHT 3 into 1 nozzle but like nearly everything, importing this stuff into New Zealand where I live ends up costing a small fortune; a single nozzle will cost an estimated USD$60, landed. Be thankful those who live on large land masses.

      The printer is working well. I'm still getting used to a 0.8mm nozzle. Apart form that the only noteworthy thing is that my X and Y don't quite seem to be a 90 degrees to each other. This is a problem as I print electronics enclosures and need accuracy. It does my head in thinking about what I have to change to get this right.

      Anyway, here are some photos.

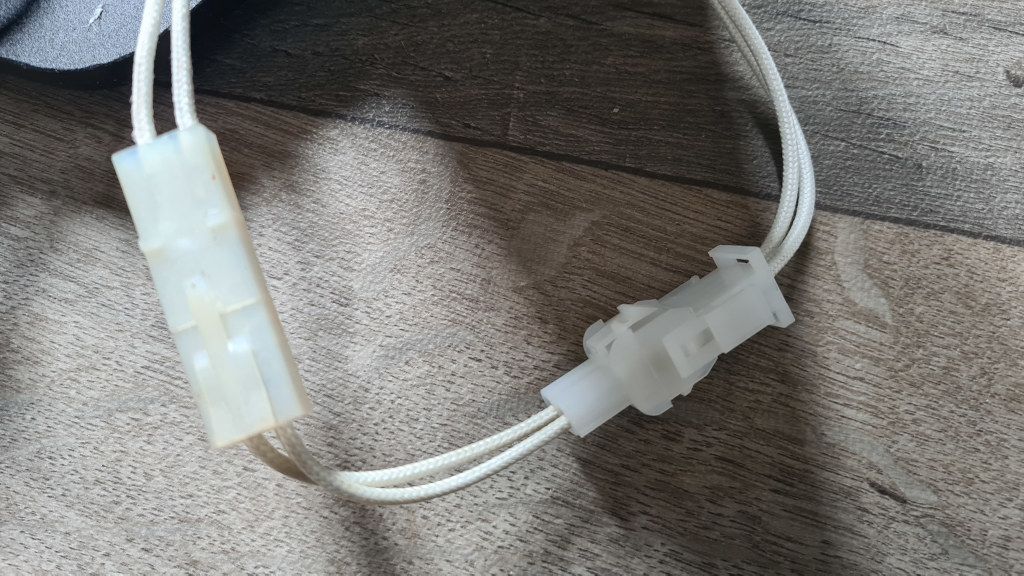
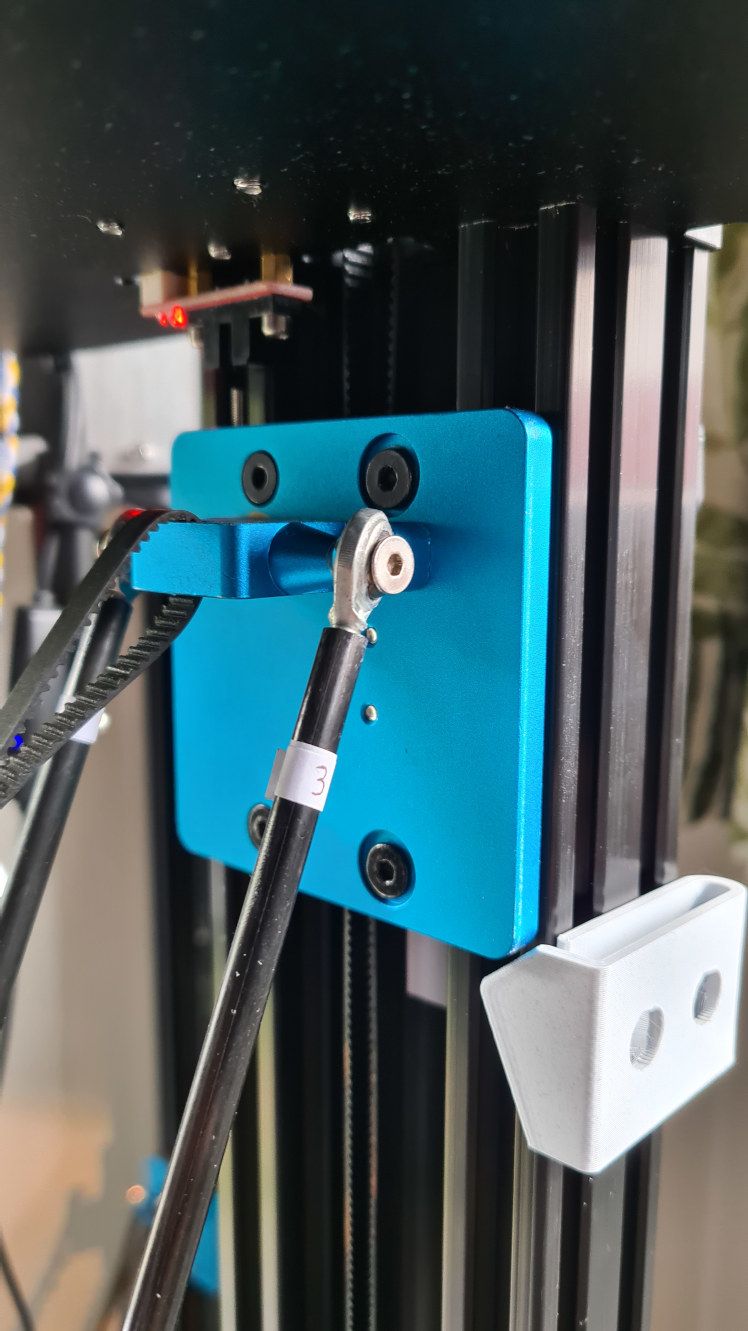
      Under the hood... Trying to route cables, always a challenge. Every wire had to be re-crimped to the Molex KK Duet 3D seem to love. I'm very lucky to have access to a genuine crimper which makes a big difference in speed and quality.

      20231005_172442.jpg

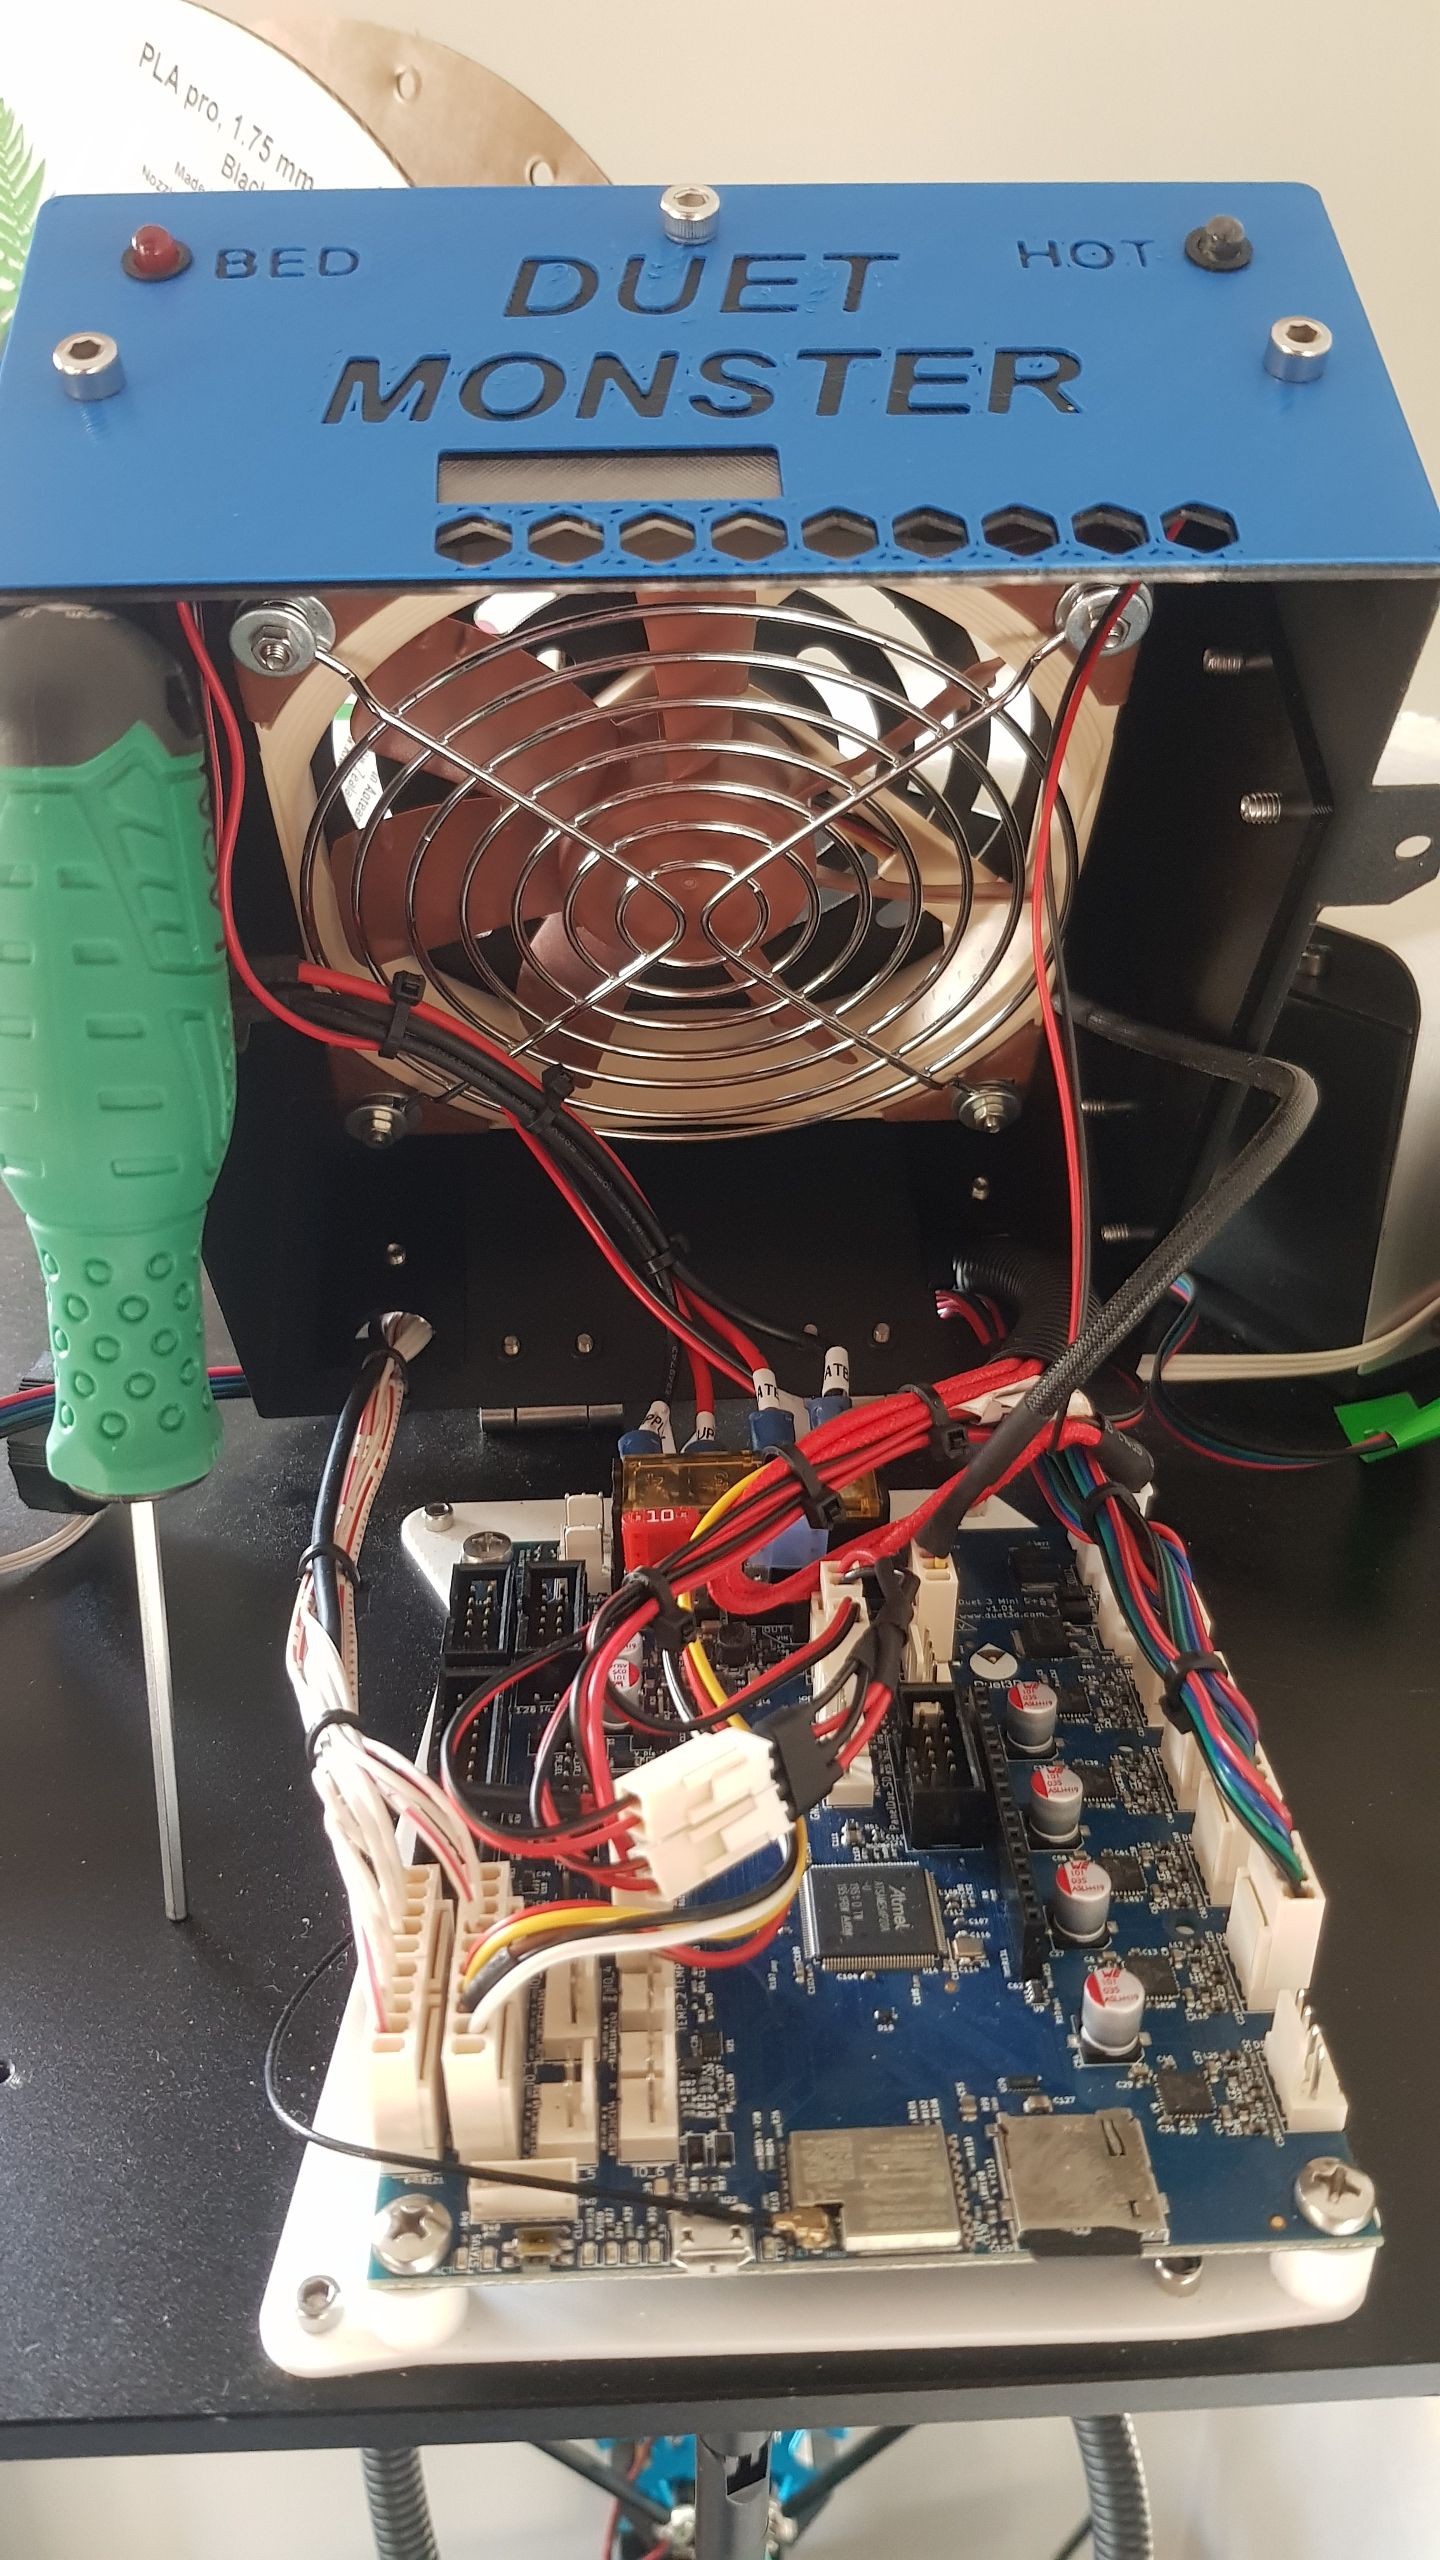
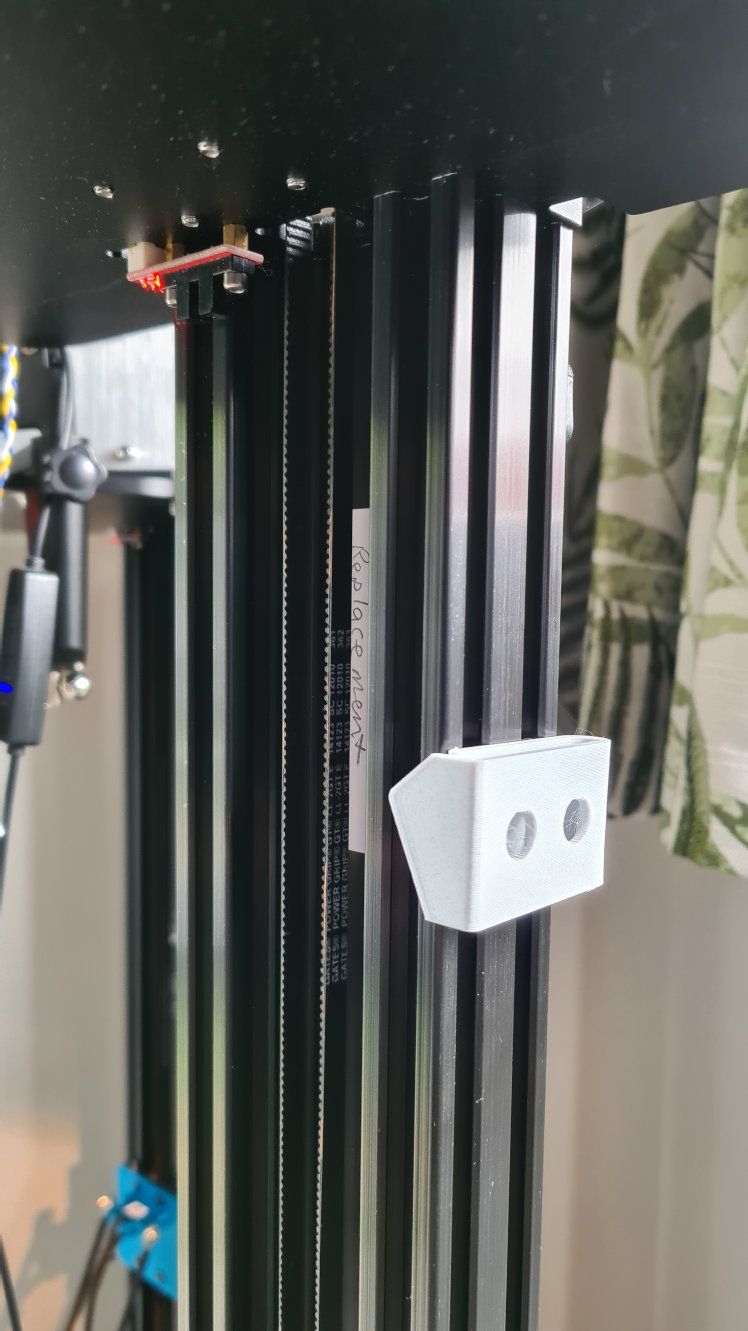
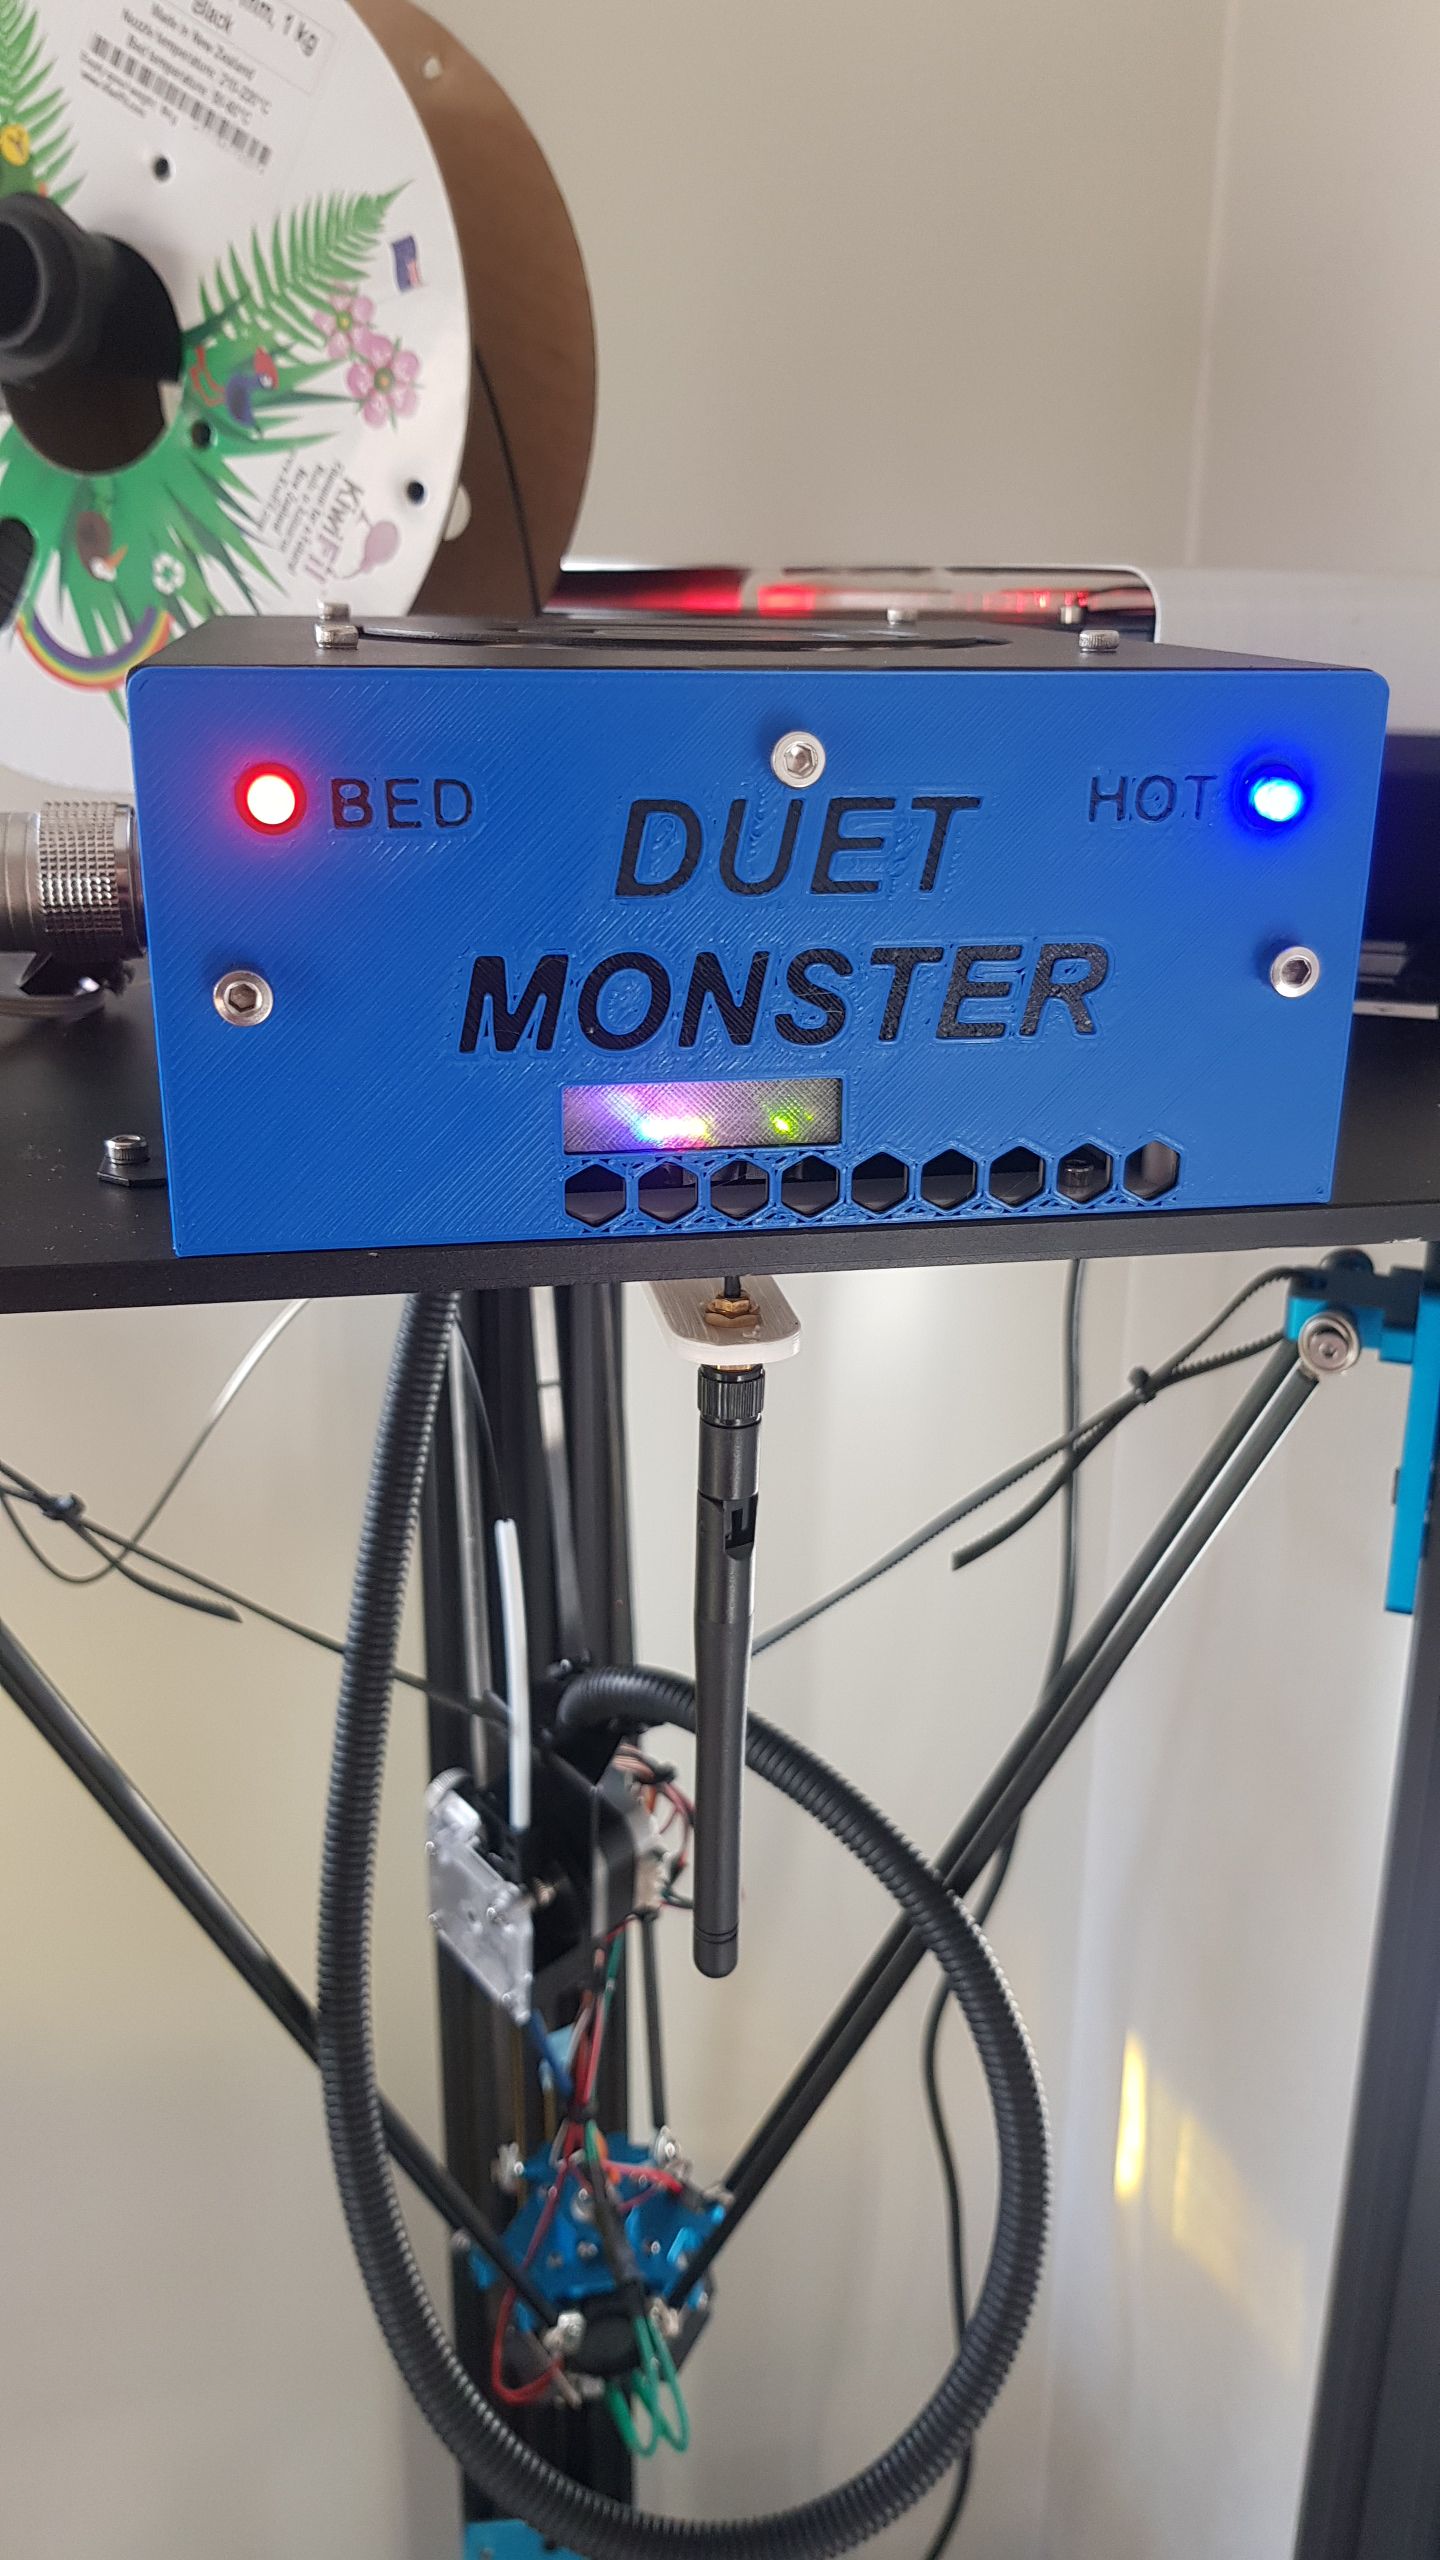
      Front plate is a 3 layer print; transparent, black, then blue. Duet controller LEDs are visible without impeding air flow. WiFi aerial mounts off the old mount for the LCD display which is no longer used after the conversion.

      20231005_172648.jpg

      With 0.8mm nozzle infill becomes quite... thick.

      20230911_100048.jpg

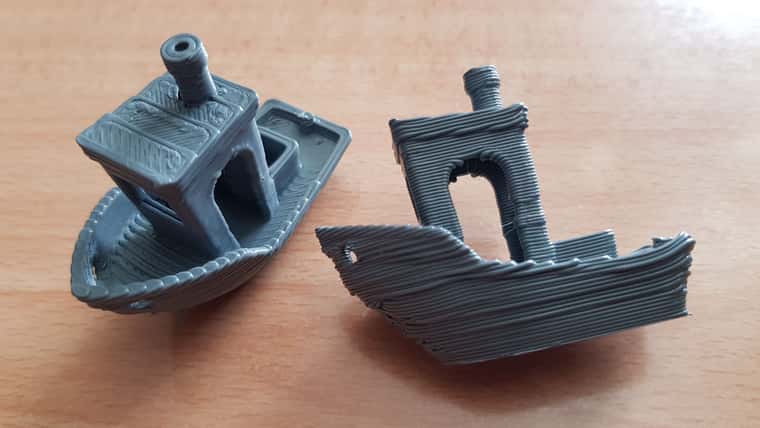
      Boat on the left is about what I'm getting. One on the right I increased speed, too far...

      20230915_143152.jpg

      Thoughts, questions and suggestions welcome.

      posted in My Duet controlled machine
      martinvundefined
      martinv
    • RE: Duet 3 Mini 5+ WiFi losing network connection never to return

      @KenW interesting. Well it's been about a month now and I haven't had the controller WiFi issue at all since then, so it seems that avoiding allocating Wi-Fi channel 1 on the access point has indeed turned out to be a successful workaround. I mention this for anyone else having issues.

      I decided that this was good enough and have ordered another Duet 3 Mini 5+ WiFi for my next Tevo Little Monster upgrade/conversion.

      posted in Duet Hardware and wiring
      martinvundefined
      martinv
    • RE: Input shaping user interface bug? Or just user confusion?

      @Electriceye I had success with this LIS3DSH module:

      AliExpress Feiyang store: https://www.aliexpress.com/item/1005006579261261.html

      posted in Duet Web Control
      martinvundefined
      martinv
    • Solution to delta printer falling arms and effector at power off

      This is not specific to a Duet powered printer, but I thought I'd write about it here anyway.

      TL;DR Stop your delta printer effector crashing into the bed at power off using this small part.

      For a while I've been tinkering with a Tevo Little Monster that I "repowered" with a Duet Mini 5+ board. The printer uses a BL Touch for sensing bed height. What I have found is that when the printer was powered off, the effector and arms would sometimes start to slide down and hit the print surface with a thunk. This wasn't the end of the world, but when powering the printer back on the BL Touch performs a self test, and with the effector firmly on the print surface this self test fails. The upshot is having to turn the printer off again, raise the effector off the bed by hand, and, while holding it off the bed, reach up and power on the printer.

      More recently I modded another Little Monster with another Duet Mini 5+ board, and gave it 1.5m rails instead of the 1m rails on the original. This printer has the same problem when the power is turned off, except now it's even harder to reach the power switch on the top of the machine without raising the effector a long way up. A hassle more than anything. Anyway I wondered about how I could fix this issue and here is my solution.

      It's a flexible bracket that has enough resistance to stop the arms falling at power off, but not so much resistance as to stop the arms moving while under power. I position it a couple of mm below the rear carriage while the effector is in the parked position.

      As these printers use 80x40mm C-beams the bracket I designed works with those only, however I think the idea could be applied to any other design. It's possible others have come up with something similar, but I didn't find anything in my searching. As is often the case the biggest problem may be figuring out what it's called!

      Anyway, here are some photos. I use two screws with T-nuts to hold it on the rail.

      bracket-1.jpg
      bracket-2.jpg

      Here is a photo of the two monsters, showing the bracket in place.

      monsters.jpg
      inplace-1.jpg
      inplace-2.jpg

      posted in My Duet controlled machine
      martinvundefined
      martinv
    • Active chamber heater

      Hi everyone. I have been experimenting with an Arduino controlled active chamber heater for a Prusa i3. This has been successful and so my next step is to build a chamber heater for my Duet 3 Mini 5+ delta machine. This got me thinking as to how I might control the chamber heater. Presently the Arduino
      does everything, so brings the chamber up to temperature and then I start the printer printing. Then later when I see the print is done I can slowly cool the part down. All very manual.

      For the Duet I'm thinking there is possibly a better way to do this. So I took a look in the Duet instructions and I see info on how to connect a simple chamber heater with thermistor and heating element. The thing is my chamber heater is more elaborate (Eg. multiple independently controlled fans) and so it would be better if the Duet could somehow tell the Arduino the desired temperature and the Arduino could report back the current temperature. Or something like that. I'm wondering if there is a meaningful way to do this and how. My brief searches suggest that canbus is used by a number of external boards, but if I went down this path would this require changes to the Duet firmware?

      On one hand I have experience building and writing code for canbus devices for my day job. On the other hand, I don't want to embark on a massive mission.

      posted in Duet Hardware and wiring
      martinvundefined
      martinv
    • RE: Tevo Little Monster - 80 mm + Direct Drive and Remote Fans

      @moocowsia Neat to see all you have done.

      I was wondering how to get a bit more speed from the Little Monster. Those blue aluminium carriages felt quite heavy, and by the looks of it quite a lot of material could be removed with no effect whatsoever. Have you thought about that as a mod?

      What were the changes that you made that had the biggest effect?

      The best thing I did was to move from an original (not knock off) E3D titan to a Bondtech LGX. Plus the change to textured PEI print sheet. I love textured PEI. I would like to try a direct mount Orbiter as they seem quite light, and I'm not a fan of the (even short) Bowden tube.

      posted in My Duet controlled machine
      martinvundefined
      martinv
    • RE: Active chamber heater

      @droftarts Ahh! I think I might have found something useful - M118.

      Eg. M118 P2 S"SET_TEMP 60"

      This looks to send the string "SET_TEMP 60" to serial port 2 of the Duet, which I could pick up using the Arduino. Not sure yet how I could send info in the other direction though; like chamber presently at 53C. Or how I could get the Duet to wait until the temperature hits 60.

      posted in Duet Hardware and wiring
      martinvundefined
      martinv
    • RE: Solution to delta printer falling arms and effector at power off

      @moocowsia I'm still tuning it in, but I just recently printed a 50mm tube that's 950mm long. The delta printer is curious - the actual max height is just on 1000mm but the print volume is like a cylinder with a cone on top. If you want a flat topped anything it can't be the full height.

      Here is the cylinder, on the right

      20250106_181750.jpg

      Unfortunately I couldn't be there while it was printing and I think it wobbled a bit as the print got taller, so from about 300mm upwards it's got minor irregularities. This is printed on a PEI sheet with magnetic sheet stuck to the original little monster glass print plate.

      20250106_181815.jpg

      The shorter print is from the shorter delta. It's only 400mm tall, but could have been a bit taller. This doesn't have any wobble, being shorter, and I think also because it was printed on a glass print surface with little flex. Curiously, the print quality of the shorter tube is better, but I forget the print settings - it may just have been printed more slowly.

      20250106_181831.jpg

      The circular shape on this one looks more like many straight lines rather than a smooth circle. Not sure why; there are many differences from software (different versions of PrusaSlicer) through to lots of hardware differences (stepper motors).

      I'm still thinking of neat things to print. Any ideas? LOL.

      posted in My Duet controlled machine
      martinvundefined
      martinv
    • RE: Active chamber heater

      I thought I'd post an update on the enclosure heater design. While I still don't have an enclosure for the Duet3D delta printers I've built, I have an enclosure on a Prusa i3 that I do heat, using the same heater controller design.

      Splash screen:
      enclosure_heater-1.jpg

      The unit measures temperature, current flow through the heater element fan and RPM of the 'mixer' fan. I have only briefly hooked up the serial port and it wasn't working, so something to investigate there. So it's all manual for now.
      enclosure_heater-2.jpg

      Driving the mains powered heater element is handled by a separate box using a relay.
      enclosure_heater-3.jpg

      posted in Duet Hardware and wiring
      martinvundefined
      martinv