Is there anyway to set a wipe setting with firmware retraction? Slic3r has it greyed out when firmware retraction is enabled.
Best posts made by mlaustin6
-
Firmware retraction wipe settingsposted in General Discussion
Latest posts made by mlaustin6
-
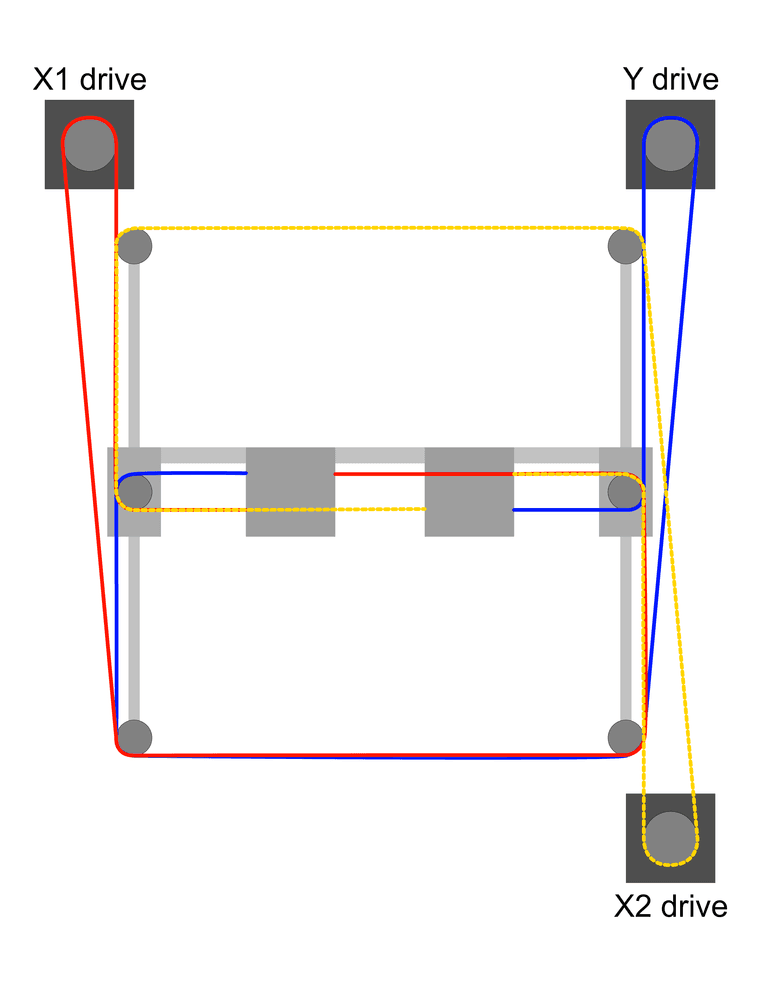
RE: Core XY IDEXposted in General Discussion
Hi All,
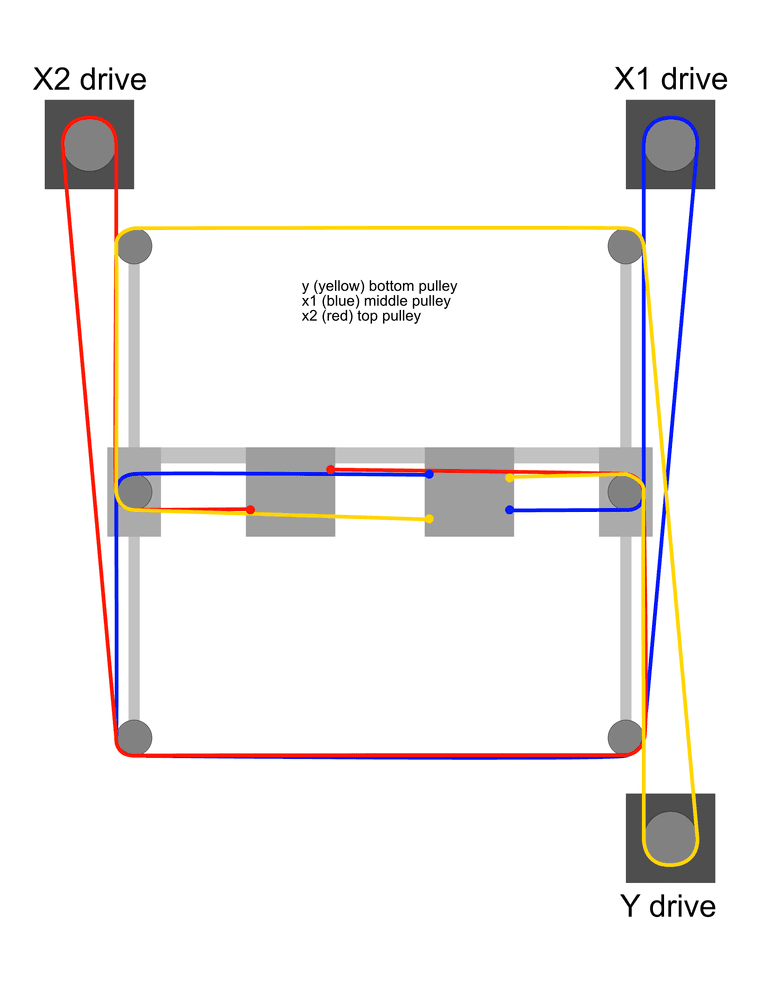
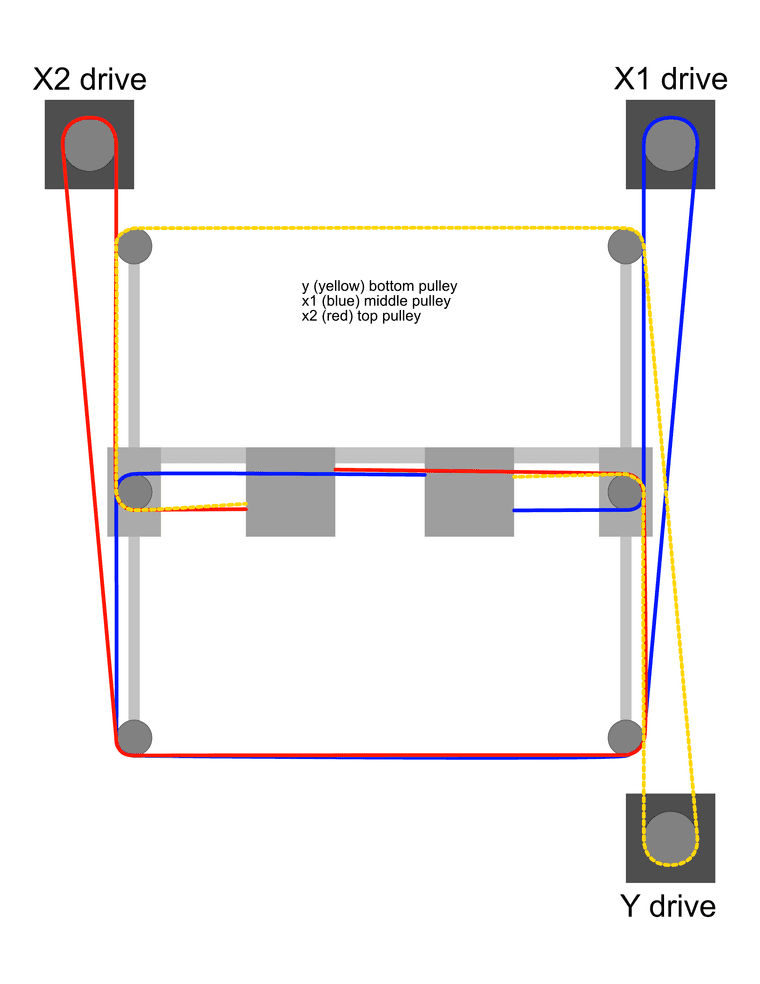
Doing some more research, I reworked the belt layout based on how duet firmware can support an IDEX setup in corexy format, which seems to be corexyu. I've added the belt connection points to the extruders in the CAD design. I've also made it more clear on the diagram how the belts route. Can someone please confirm this will work as designed?
-
RE: Core XY IDEXposted in General Discussion
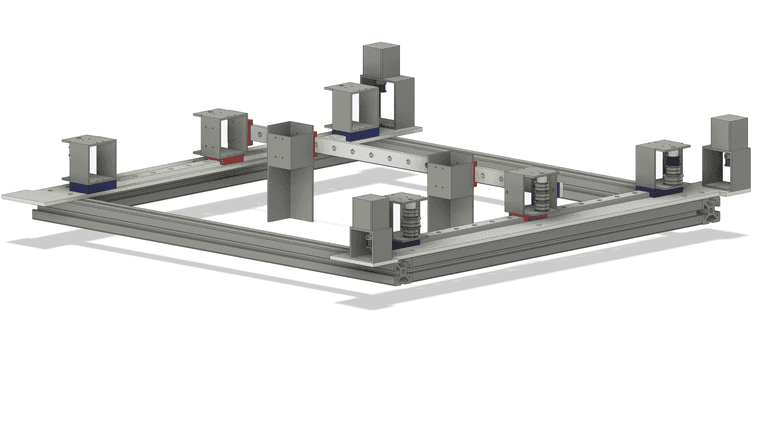
I've made some progress on designing this in software. I'm attaching a copy of the xy plane without the hotends (hotend assemblies are there) as well as a redesigned belt path. Much of the design was based off of digitaldentist's build out. Before continue, some things came to mind. I'd like some feedback.
- Belt layout - The Y belt is attached on the outside of each extruder assembly. Since I don't have a corexy machine now, my question is around movement. Will the y path work properly with both motors moving in this IDEX setup? I know it works with 1 tool head, and I'm thinking the firmware would make this setup work.
- Bed leveling. The bed is going to be 1/4 inch aluminum driven by 1 motor and belts. Once it's aligned on a 3-point plane, I don't see much fluctuation. I don't think the x linear rail will have slop to cause issues but don't know for sure. Then there is the variation on the hotends. I'm not sure how equal one hotend is to another across the same brand. If there is any variation, that is going to be an issue. If don't drill holes exactly on one of the hotend assemblies they can be off. Any thoughts on this ?
I would love some feedback. I want the ability to print multiple parts at the same time or be able to use different materials and colors.
-
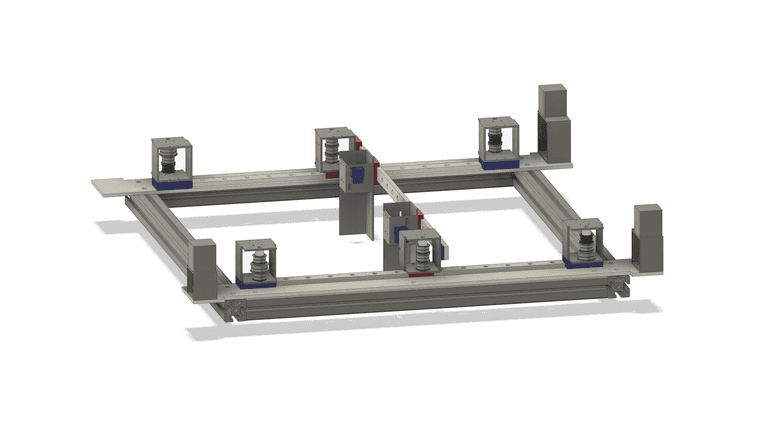
Core XY IDEXposted in General Discussion
Hi All,
I'm building a new 3d printer using many of digital dentist's concepts. I want to make this one an IDEX build. First, can I reuse my Duet 2, or do I need to buy a Duet 3? I'd setup endstops on opposite ends, but would I need one between the extruders? Here is a picture of what I'm thinking for the motor setup. Would this work? Thanks.
M
-
RE: Heater 0 fault: exceeded allowed temperature excursionposted in General Discussion
I used my multimeter to check the thermistor, and it was good. I ended up redoing all the crimps on the heater line, and it is back up and running again. I did not see any loose connections. Maybe one of the connectors was bad. I replace the hotend with mini Tamiya connectors. Thanks for the guidance.
-
RE: Heater 0 fault: exceeded allowed temperature excursionposted in General Discussion
@Phaedrux said in Heater 0 fault: exceeded allowed temperature excursion:
Is there something about that spot? Does the fan kick in? Is there some feature of the print that causes the fan to have more effect? Higher extrusion rate causing a temp drop?
No. It is the beginning of a top layer on one of the parts. The prior runs before this file had the fans going for 75% of the print without issue.
@deckingman said in Heater 0 fault: exceeded allowed temperature excursion:
Most likely the part cooling fan coming on and too much cold air being blown over the nozzle. However, can you post your full config.g file please. The reason I ask is that heater 0 is usually the bed heater yet the temperatures you mentioned are those that one would expect for a hot end. I suspect that you have configured the heaters in a different way to the norm but we need to be sure which heater is actually showing a fault condition.
My apologies. It was H!. The hottest my bed needs is 80 degrees Celsius.
I'm thinking it's either the heater itself or the thermistor is going bad. I have extra thermistors so I can check that first. Just a bit of a pain to replace which is why I asked here.
-
Heater 0 fault: exceeded allowed temperature excursionposted in General Discussion
I got this error twice in the last day in the same spot on the same print file, about 7 layers in. The target was 250.0°C and actual 234.4°C. All connections are intact. I'm wondering if this is the thermistor or the heat rod. I'm on firmware 3.4.4.
I just went through several prints in the prior days without issue.
Does anyone have any suggestions?
-
Duet 2 Wifi Cartesian M593 Rough and Stringy Printposted in General Discussion
Hi All,
I have an accelerometer and ran the input shaping plugin. I get a peak at 40hz, and have configured M593 with P"zvd" F40. The ringing is gone, but the prints are rough and stringy. Also the print head gets globs of filament on it. There is no fan. I don't have pressure advance on.
This is supposed to make ti better, but it is worse. What would cause rough and stringy prints?
-
RE: first layer heightposted in General Discussion
@Phaedrux
Hmm interesting. I ran M122 after a print finished.. I am on firmware 3.0. -
RE: first layer heightposted in General Discussion
Looking at M122 results, the hiccups are as follows:
Hiccups: 9898(0)
I'm guessing that means zero and not 9898 hiccups.