@infiniteloop As I had problems to begin printing with one hot end the second one is present but totally disabled and mechanically removed. Nothing runs on the second hot end during using the first one.
Posts made by redax27
-
RE: The nozzle scratches the partposted in General Discussion
-
RE: The nozzle scratches the partposted in General Discussion
@infiniteloop To remove some causes, I launch the test as discussed before: the benchy made of PLA+ without part cooling fan and with a lower retraction parameter = 0.8 with all the other parameters as currently used. I begin with a temperature of 205°C. If I have a clogging problem, I remove the clogging and continue with 5°C more.I'm now at 220°C and it has clogged 5 times. The test is finished... We can remove the part cooling fan as the problem source. As you said the hot end cooling fan is small and covers the cylindrical part over the hot end with a commercial covering part made for this feature. As you said, it is triggered at 45°C.
I have already replaced the extruding device to check if it's the problem source and it isn't. The Bowden pipe has been shortened. I could now replace the complete hot end (I have a second one for the other head).
The problem is that I don't understand the reason why... -
RE: The nozzle scratches the partposted in General Discussion
@infiniteloop said in The nozzle scratches the part:
Staring at your "amazing picture", I’m not quite sure of the enormous blob on top: is this a) at the final position of the nozzle after the print was terminated, or b) did you kill the job mid-print due to the blob?
it wasn't the last layer. After this bubble appeared, the hot end clogged and I had to stop it. We have case b).
OK, in that case, you will have to re-design the air duct of the part cooling fan so that it no longer cools the tip of the nozzle.Until then, you cannot avoid stringing.
For sure, I have to work to redesign the air duct. In this case the stringing was awaited; I reduce the retraction to let the part building. Before the bubble, the result was what I was looking for. Before having a new fan duct, I'll try to remove completely the part cooling and reduce the retraction (0.8)
lets me think that there might be some parts of the air duct from your part cooling fan reaching down below the nozzle’s tip. It’s all black in black, so I can’t be sure of that. Maybe you can have a quick look at that?
After a quick check, I'm sure my problem doesn't come from the fan duct scratching the part. The scratching comes from the nozzle as I listen to it but not always during the printing.
multiple 100 mm/s at least - Sorry, just kidding.
The printing is not so quick. I have printed it at 50mm/s. Regarding the quality, you're right, I have to tighten the belts again.
Thanks a lot for your advises, I'll come back when I have some other results...

-
RE: The nozzle scratches the partposted in General Discussion
@ctilley79 Thank you for your comment; this parameter wasn't accessible from my Cura fitted for my core xy printer. I'm not a specialist but when I forced it by replacing M82 by M83 in my start G-Code, the result was catastrophic with strange noises in the extruder and material strange bubbles... I stop it before the end of the first layer. Not sure but I think this change isn't applicable to a core xy printer.
-
RE: The nozzle scratches the partposted in General Discussion
@infiniteloop Hi, regarding my previous comment about the part cooling fan, I have finally changed my calibration by calibrating the tool. Like that the calibration is done with both fans. The part cooling is not so bad, but the nozzle always scratches the part… I begin to have less and less hairs…
See below an amazing picture.
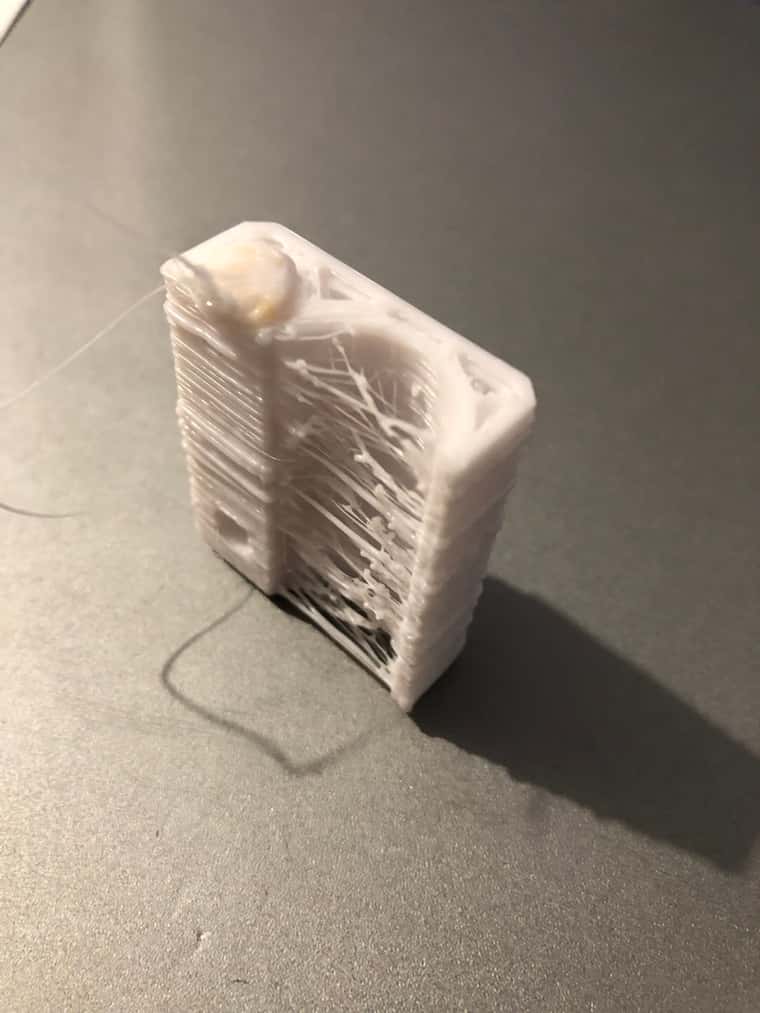
There is really a big material bubble. My Bowden extruder has a long pipe (around 500mm). I suspect to have too much pressure with a too long pipe. I will try to install a shorter pipe this week-end. Only to verify if it’s the reason of my problem. I have tried maybe not everything but almost… and begin to loose my mind! -
RE: The nozzle scratches the partposted in General Discussion
@dc42 Thank you for this comment, I think I had a little problem with my part cooling which wasn’t piloted at the good moment. It’s solved now.
-
RE: The nozzle scratches the partposted in General Discussion
@infiniteloop Hi, thanks for your last comments, it's really interesting.
Sorry to answer after a so big time; unfortunately, I haven't always enough time to proceed on my tests and try solving this problem.
Enclosed some pictures; the head is really not finished and I would like to print new parts with this new printer because the old one is also difficult to run correctly. But my problem is close to the story of the egg and the hen.
I make a little test tonight, completely stop the part cooling fan and what a surprise, the part continue to grow up. It hasn't been finished because of a first layer badly fixed on the bed but nothing I can't solve. I will continue my tests in this direction but I think the main problem is the part cooling fan blowing out on the hot end and not on the part.
I come back asap with news. I hope at the end close this thread!!
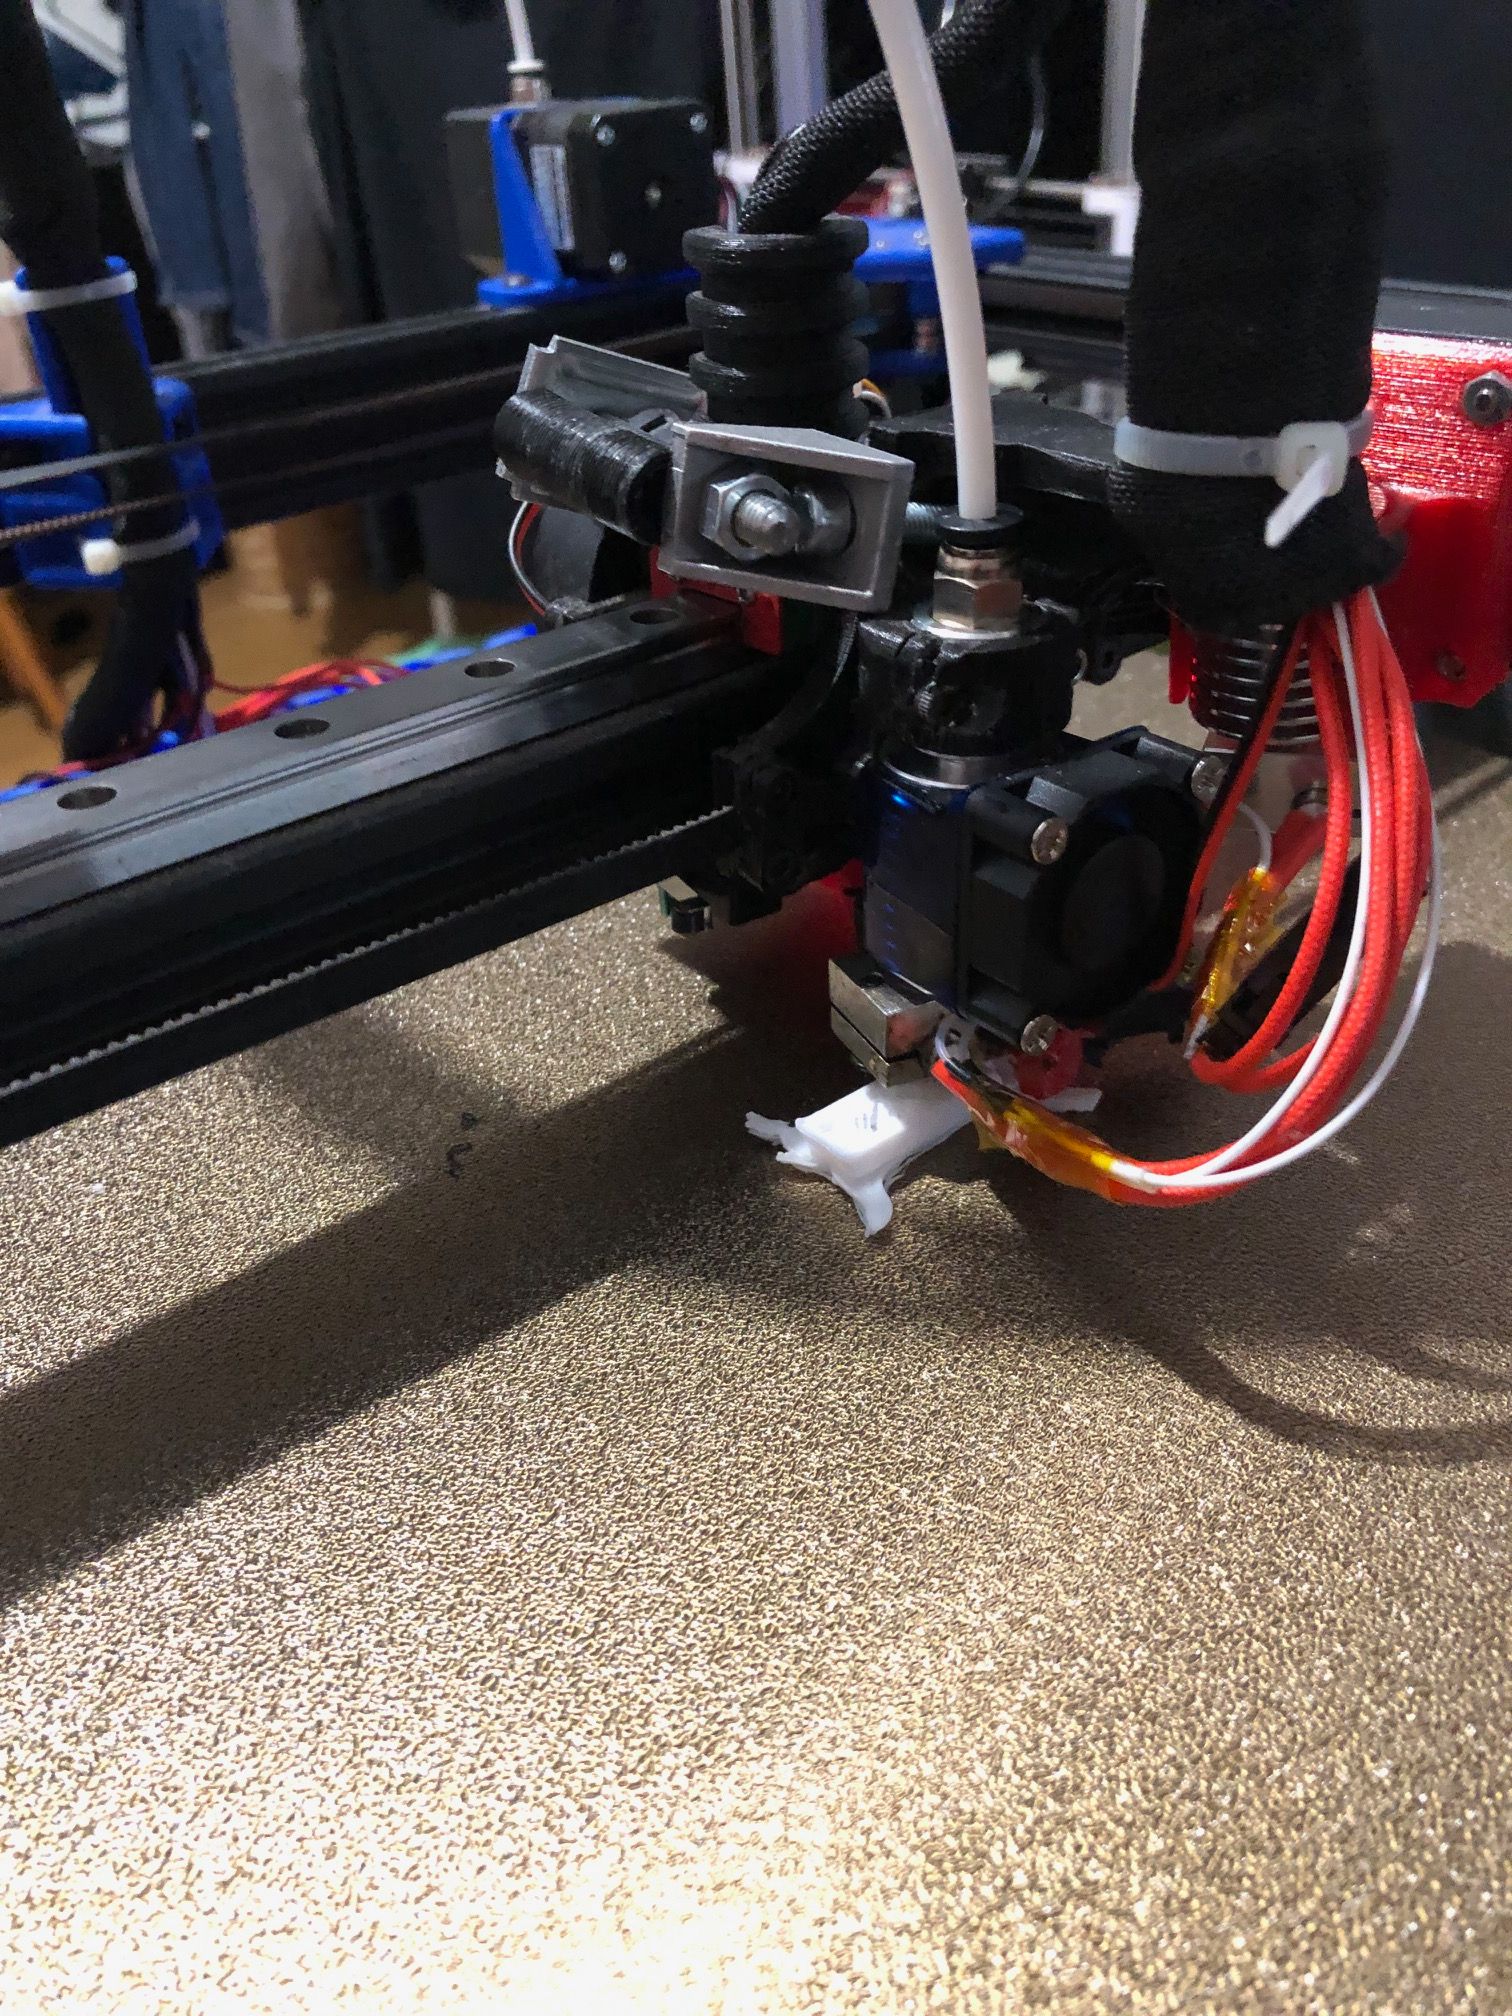
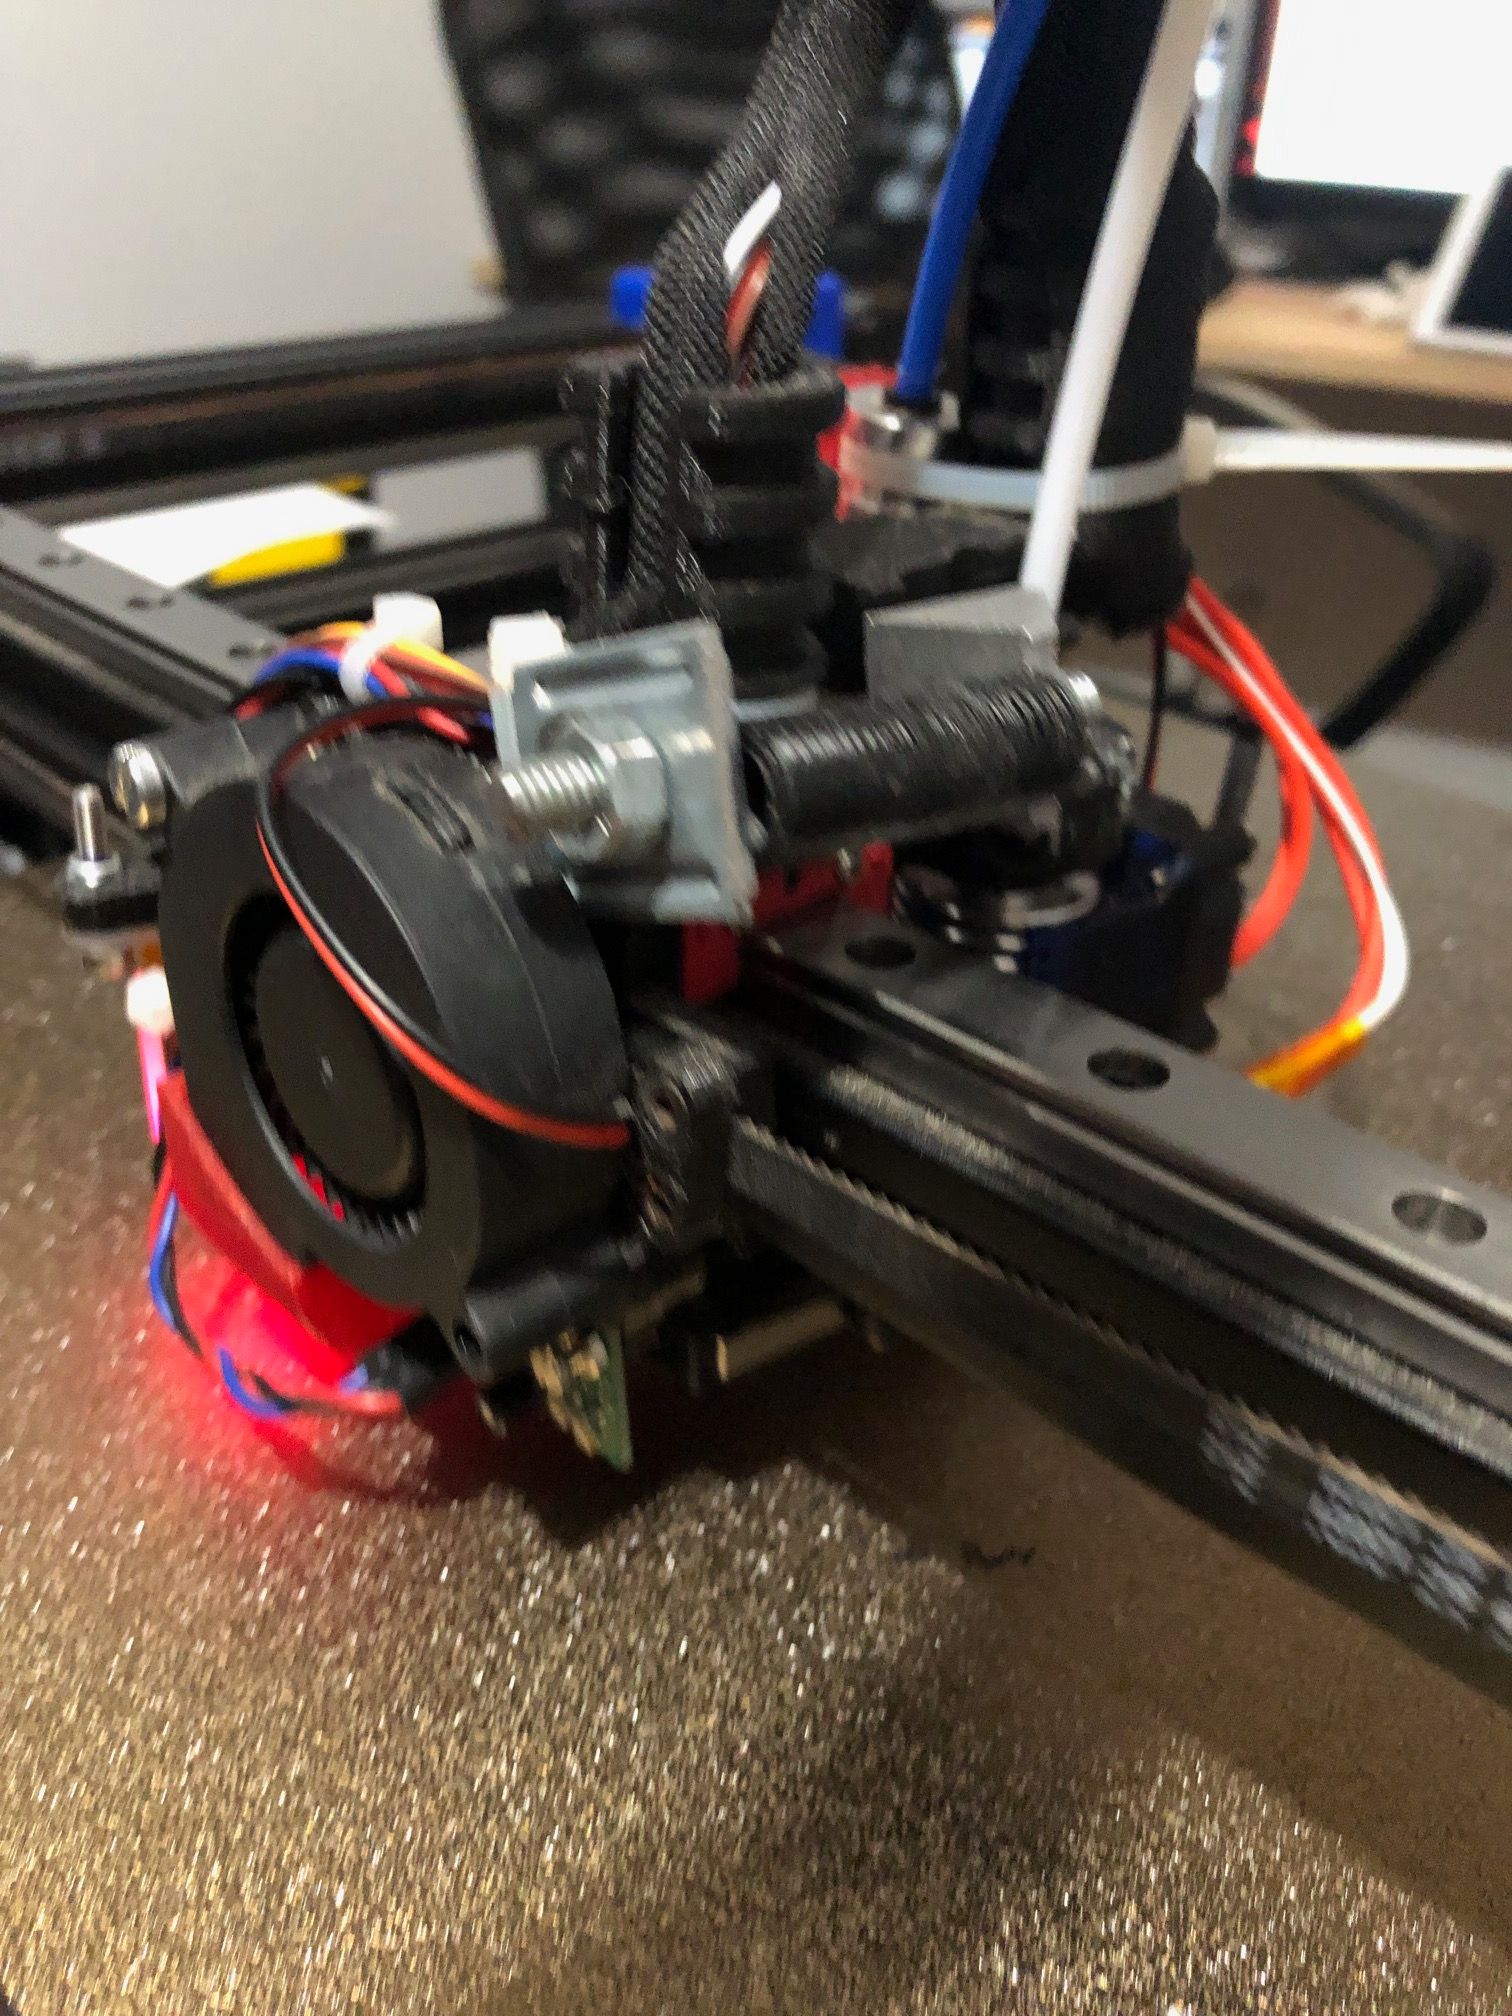
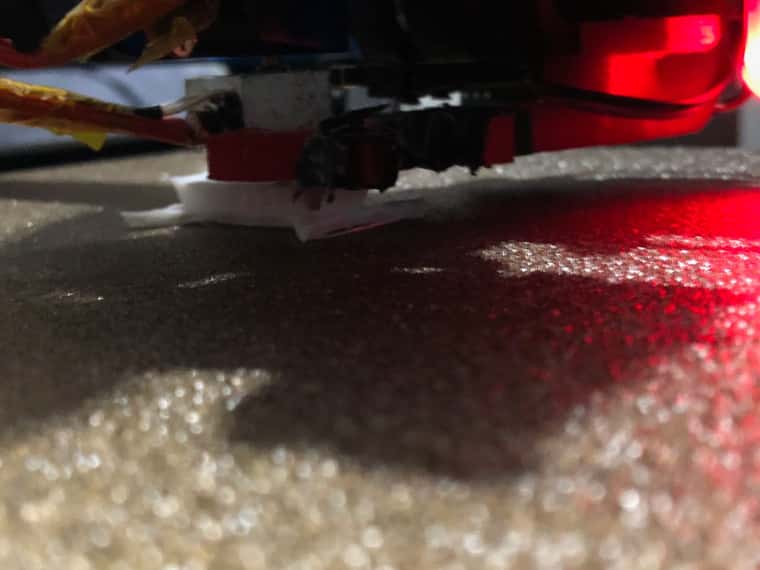
-
RE: The nozzle scratches the partposted in General Discussion
@infiniteloop first of all, thanks for your last message, it was a good basis for me to investigate and debug my config. I found mistakes, wrong fan numbers, inverting printing fan and nozzle fan. I finally also exchange the mounting of the nozzle fan direction which blowed out and not in.
I had long time ago calibrated the bed heating but not the nozzle heater. It’s now done and, and… I have always the same problem. The last thing not done (as I don’t know how to do it) is the thermistor calibration but really not sure it’s the reason of my problem.
Which method to choose to calibrate my thermistor? And do you have other idea?
I will post later my updated config and the last benchy G-code used at the end.Regards
-
RE: The nozzle scratches the partposted in General Discussion
@infiniteloop, Hi, thank you for your interest.
My last post follows the beginning of the post; at a moment, the nozzle finishes by scratching the part and blocks the material feeding. Below some additional requested information :- filament type: PLA+
- wattage of the heater: 40W
- heater temperature: 210 °C
- nozzle diameter: 0,4
- print speed: 100mm/s
- retraction settings 3mm - no Z hop - no combing mode - 40mm/s
- setup of the customised print head: Bowden head designated to be twice. Running at the moment with a single head (as it’s difficult to make it run, I prefer to begin with a single head). The fan 0 pipe is a weak point, I know it and I have to print a new part. It could be an explanation but I have also the same problem with long time layers (on other parts) where the cooling is less important. But, not 100% sure that it’s not the reason of the problem…
-
RE: The nozzle scratches the partposted in General Discussion
@sebkritikel Hi, after some week-end tests, I go ahead but not completely cancelled my problem.
Adding B1 to M558 during measurement cycle is appropriate and cut the heating during measures.
After applying this new feature, G29 seems correct and the printing of the first layer is better. But after several layers the extruder forces again and stops the material feeding.
I begin to be really disappointed because it’s difficult to print something simple.
Below my last test. Could it be the atmosphere moisture?
-
RE: The nozzle scratches the partposted in General Discussion
@sebkritikel As you say, I think it's an interference when heating. If I do G30-S-1 alone or G30 S-1 with the heating, I have a big measurement difference (around 0,5/0,6). I will add B term as proposed to M558 . For information, see enclosed my map. I have done it by heating the bed @60°C and cut it during the process. It's not perfect because the bed cools down but better than nothing.
heightmap.csv -
RE: The nozzle scratches the partposted in General Discussion
@sebkritikel Hi,
Thank you for your answer; the reason why I do it like that is an accuracy measurement problem.
As I let the bed heat during the bl-touch measurement causes a big error (more than 0.5/0.6mm).
If I have no heating and no fans, in this case I have a good measurement and always the same.
I can maybe begin to heat and stop the heating only during the short measurement.
Do you think it's a good idea? The best way is to solve the measurement mistake, but I have no idea how to solve that.
Regards -
RE: The nozzle scratches the partposted in General Discussion
@droftarts:
Hi,
Did you have a little moment to see my file?
This evening, I try another print coming from another version of Cura on another computer.
It's worse and stops earlier after the first layer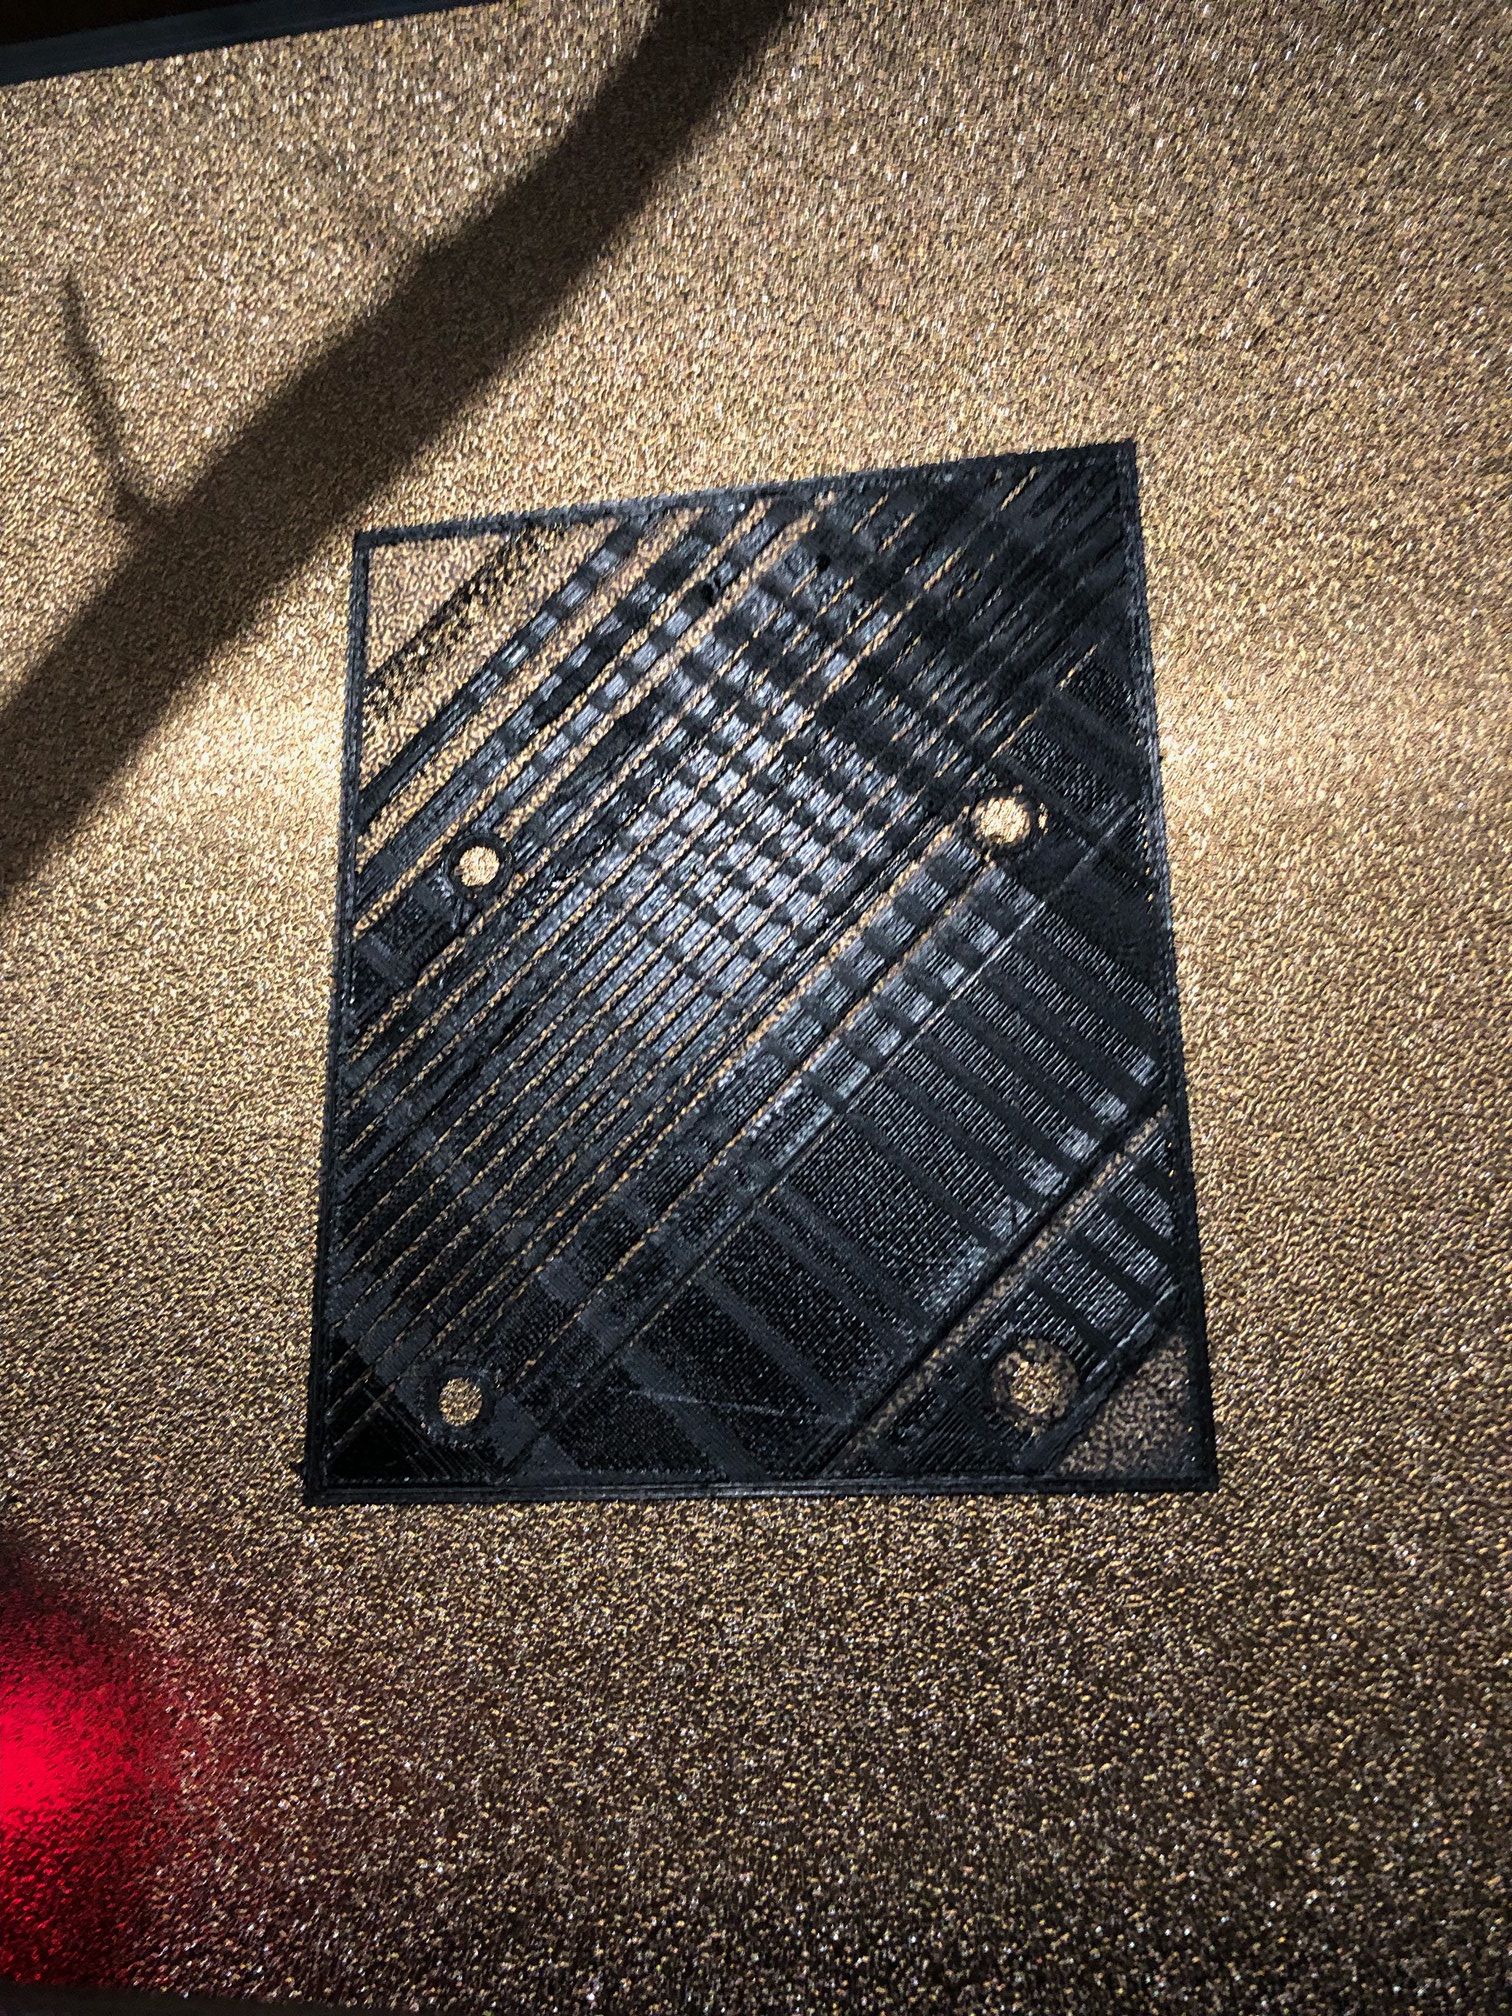
-
RE: The nozzle scratches the partposted in General Discussion
@droftarts First of all, thank you to participate to solve my problem!
See below a picture of a part aborted; We can see strange traces like that from the first layer. I attach also the G-code but it is too big; I post only the beginning of the file.
I note also frequently strange over-speeds...
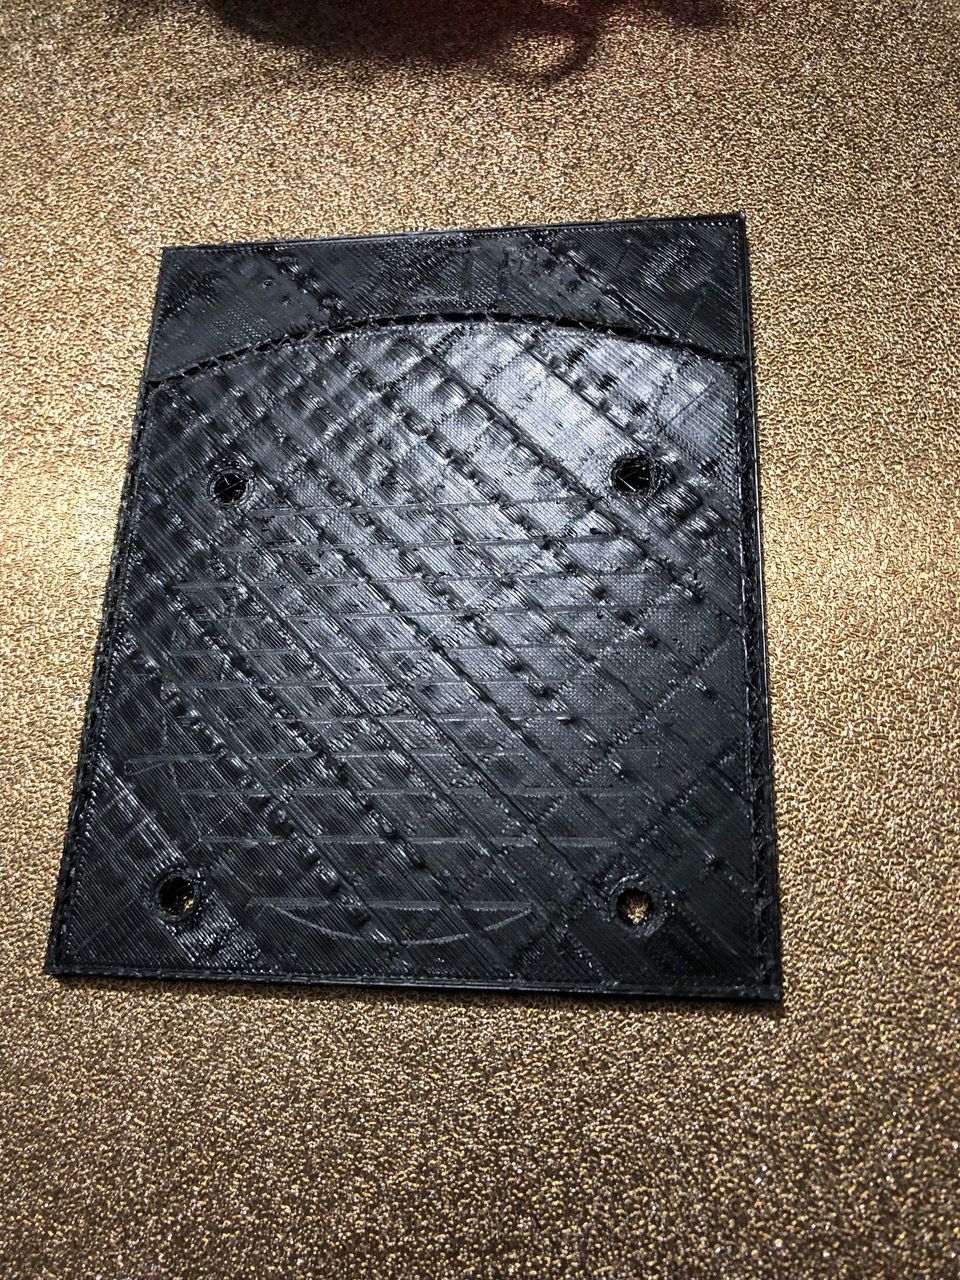
-
RE: The nozzle scratches the partposted in General Discussion
@engikeneer Sorry for this newbie question… do you know where to change volumetric settings in Cura? Regards
-
RE: The nozzle scratches the partposted in General Discussion
@engikeneer Hi, I will check each proposition.
-
It doesn’t seem to be the Z calibration (second motor to be checked to remove a problem on one of both motors.
-
I have already calibrated the extrusion by measuring the effective length processed
-
The thermistors settings could be also checked again. As I remember, I followed a procedure to set each thermistor PID, I could do it again.
-
I will check on my slicer the extruding type. I don’t remember to change something…
Anyway, thank you for your suggestions !
-
-
RE: The nozzle scratches the partposted in General Discussion
@deckingman Hi, I try this morning to move the Z 50mm and the bed moves exactly 50mm. I have no time enough to check separately each screw, I measured in front of the right screw, I will try this evening the left screw; maybe I have a problem on the second motor…
-
RE: The nozzle scratches the partposted in General Discussion
@deckingman Thank you for your answer; I will try it (again) at home. I have already done it at the beginning of the commissioning and as I remember it was ok. I have 200 steps/rev; 2mm/rev; and micro stepping 1/16. I have:
M350…Z16
M92 … Z1600
I think it’s correct -
The nozzle scratches the partposted in General Discussion
Hi everybody,
I’m going to try explain my issue; first of all, some information regarding the machine and it’s config:
My machine is a BLV cube (Core XY) 310x310x600 with a Duet 2 Wifi. The heated plate is piloted by 2 drives.
The updated firmware is: 3.2.2
The panel isn’t updated at the moment and everything is directly piloted by my machintosh via the Duet Web Control 3.2.2.(Duet WiFi Server Version: 1.25)I finish the main mounting around 2 months ago and had begun to print.
An important information : The head is completely customised and is now running with a first nozzle (with external extruder) but the head is ready for running with a second nozzle. As I have some problems to make it run , I begun with a single nozzle.Now the main issue: the nozzle scratches the part and it’s impossible to finish a job. The first level is sometimes difficult to launch but I generally finish to launch it. After this first layer, as the printing continues, the nozzle begins to scratch the part until the PLA plugs the nozzle and after 3/4 layers the PLA stops feeding the nozzle and it’s finished…
I already tried many ways to solve the problem (feeding calibration,speed reducing, Z hop, avoid retracting,…)The last improvements done without real improvement: I changed the lead screws: now I install 2 screws TR8x2 to replace TR8x8 and multiply by 4 the resolution. Interesting but no result… I changed also the rigidity of the printing head. Also interesting on the paper but without result.
At the end I begin to be lost and would like to investigate the problem with more rigour… If you have other ideas, you’re welcome …
Below my config:
; Configuration file for Duet WiFi (firmware version 3)
; executed by the firmware on start-up
;
; generated by RepRapFirmware Configuration Tool v3.2.3 on Fri Apr 30 2021 20:09:39 GMT+0200 (CEST); General preferences
M80 ; Turns on the ATX power supply
G90 ; send absolute coordinates...
M83 ; ...but relative extruder moves
M550 P"RD Cube" ; set printer name
M669 K1 ; select CoreXY mode; Network
M552 S1 ; enable network
M586 P0 S1 ; enable HTTP
M586 P1 S0 ; disable FTP
M586 P2 S0 ; disable Telnet; Drives
M569 P0 S1 ; physical drive 0 goes forwards
M569 P1 S1 ; physical drive 1 goes forwards
M569 P2 S0 ; physical drive 2 goes backwards
M569 P3 S1 ; physical drive 3 goes forwards
M569 P4 S1 ; physical drive 4 goes forwards
M584 X0 Y1 Z2 E3:4 ; set drive mapping
M350 X16 Y16 Z16 E16:16 I1 ; configure microstepping with interpolation
M92 X200 Y200 Z1600 E425:425 ; OLD E405.18:405.18 ; Set steps per mm for Bondtech.
M566 X600 Y600 Z24 E300:300 ; Set maximum instantaneous speed changes (Jerk) (mm/min)
M203 X20000 Y20000 Z600 E2000:2000 ; Set maximum speeds (mm/min)
M201 X2000 Y2000 Z100 E5000:5000 ; Set accelerations (mm/s^2) (before X=Y=3000)
M906 X1600 Y1600 Z1600 E1600:1600 I30 ; Set motor currents (mA) and motor idle factor in per cent
M84 S30 ; Set idle timeout; Axis Limits
M208 X-23 Y-30 Z0 S1 ; set axis minima
M208 X315 Y315 Z665 S0 ; set axis maxima; Endstops
M574 X1 S1 P"xstop" ; configure active-high endstop for low end on X via pin xstop
M574 Y2 S1 P"ystop" ; configure active-high endstop for low end on Y via pin ystop
M574 Z1 S2 ; configure Z-probe endstop for low end on Z; Z-Probe
; OLD: M574 Z1 S2 P"probe.in" ; Set endstops controlled by probe
; OLD: M558 P1 C"zprobe.in" H5 F120 T6000 I0 R0.5 ; set Z probe type to unmodulated and the dive height + speeds
; OLD: G31 P500 X6.875 Y62.6 Z1.587 ; set Z probe trigger value, offset and trigger height
; OLD: M557 X15:300 Y40:280 S28.5:24 ; define mesh grid
M950 S0 C"exp.heater3" ; create servo pin 0 for BLTouch
M558 P9 C"^zprobe.in" H5 F120 T6000 ; set Z probe type to bltouch and the dive height + speeds
G31 P25 X60 Y70 Z2.565 ; set Z probe trigger value, offset and trigger height
M557 X40:310 Y40:270 S27:23 ; define mesh grid; Heaters
M308 S0 P"bedtemp" Y"thermistor" T100000 B3950 ; configure sensor 0 as thermistor on pin bedtemp
M950 H0 C"bedheat" T0 ; create bed heater output on bedheat and map it to sensor 0
M307 H0 R2.429 C100:140 D5.5 S1.00 V0 B0 ; set process parameters for bed H0
M140 H0 ; map heated bed to heater 0
M143 H0 S100 ; set temperature limit for heater 0 to 100C
;Heater 0 model: heating rate 2.429, cooling time constant 140.0, dead time 5.50, max PWM 1.00, calibration voltage 0.0, mode PID
;Computed PID parameters: setpoint change: P13.4, I0.482, D51.4, load change: P13.4, I0.949, D51.4
M308 S1 P"e0temp" Y"thermistor" T100000 B4138 ; configure sensor 1 as thermistor on pin e0temp
M950 H1 C"e0heat" T1 ; create nozzle heater output on e0heat and map it to sensor 1
M307 H1 B0 S1.00 ; disable bang-bang mode for heater and set PWM limit
M143 H1 S260 ; set temperature limit for heater 1 to 260C
M308 S2 P"e1temp" Y"thermistor" T100000 B4138 ; configure sensor 2 as thermistor on pin e1temp
M950 H2 C"e1heat" T2 ; create nozzle heater output on e0heat and map it to sensor 2
M307 H2 B0 S1.00 ; disable bang-bang mode for heater and set PWM limit
M143 H2 S260 ; set temperature limit for heater 2 to 260C; Fans
M950 F0 C"fan0" Q500 ; create fan 0 on pin fan0 and set its frequency
M106 P0 S0 F500 H-1 ; set fan 0 value. Thermostatic control is turned off
M950 F1 C"fan1" Q500 ; create fan 1 on pin fan1 and set its frequency
M106 P1 S1 F500 H1 T45 ; set fan 1 value. Thermostatic control is turned on
M950 F2 C"fan2" Q500 ; create fan 2 on pin fan2 and set its frequency
M106 P2 S1 F500 H2 T45 ; set fan 1 value. Thermostatic control is turned on; Tools
M563 P0 S"T0" D0 H1 F1 ; define tool 0
G10 P0 X0 Y0 Z0 ; set tool 0 axis offsets
G10 P0 R0 S0 ; set initial tool 0 active and standby temperatures to 0C
M563 P1 S"T1" D1 H2 F2 ; define tool 1
G10 P1 X-30 Y0 Z0 ; set tool 1 axis offsets
G10 P1 R0 S0 ; set initial tool 1 active and standby temperatures to 0C; Automatic power saving
M911 S21 R22 P"M913 X0 Y0 G91 M83 G1 Z3 E-5 F1000" ; Set voltage thresholds and actions to run on power loss; Custom settings are not defined
; Miscellaneous
T0 ; select first tool
;T1 ; select second tool
M575 P1 S1 B57600 ; enable support for PanelDue -
RE: Duet 2 wifi failuresposted in Duet Hardware and wiring
@tia79
Hello, I don’t know if you finally found a solution but I have the same issue: “Duet reject http request...”. I have understood the system didn’t find the config.g file and also nothing else (after trying to install a new firmware).
I finally found the solution by reformatting the SD CARD. It has to be Fat 32 formatted. But this information isn’t sufficient. If you use a Mac, you can also choose the partition map type to format your card. It has to be the master boot record partition map and nothing else. If you use the guid partition map, the duet doesn’t recognise your config.
I hope this information could be helpful.