Duet3D Logo Duet3D
    • Tags
    • Documentation
    • Order
    • Register
    • Login
    1. Home
    2. Stevo
    3. Posts
    • Profile
    • Following 0
    • Followers 0
    • Topics 20
    • Posts 93
    • Best 4
    • Controversial 0
    • Groups 0

    Posts made by Stevo

    • RE: Stupid question.

      @gtj0 said in Stupid question.:

      @Stevo said in Stupid question.:

      Is it possible to hook up to the duet2 via wifi using simplify 3d software so I can use the live preview tracking feature of the software?

      I've only been able to get it to work via USB.

      Thanks for the reply I had to ask more out of curiosity

      posted in General Discussion
      Stevoundefined
      Stevo
    • Stupid question.

      Is it possible to hook up to the duet2 via wifi using simplify 3d software so I can use the live preview tracking feature of the software?

      posted in General Discussion
      Stevoundefined
      Stevo
    • RE: PID tuning

      @dc42 said in PID tuning:

      Those figures look about right for a V6 with a 40W heater and a silicone sock over the heater block. But a 40W heater is over-powered for that configuration, you should use 25W or 30W. 40W is appropriate when using a copper heater block and no silicone sock, for high temperature operation.

      Thank you for the advise and reassurance appreciated as always

      posted in Tuning and tweaking
      Stevoundefined
      Stevo
    • PID tuning

      Evening Guys,
      Wondered if I could get an opinion on the screen grab attached please thought I would do a pid on the E3d V6 40w bit concerned on the readings.
      Screenshot 2020-02-09 at 20.35.48.png

      Screenshot 2020-02-09 at 20.43.20.png

      posted in Tuning and tweaking
      Stevoundefined
      Stevo
    • RE: Core xy odd behaviour?

      @deckingman said in Core xy odd behaviour?:

      @Stevo .....and answers to my questions?

      Hey,
      I cannot hear any differences between the motors and neither of them are noisy or hot in any way. I will be printing the lid for the box over the weekend and will rotate this on the bed as you suggest by 45 degrees.

      This being a snap shot of the third layer being printed which looks fine the rough area to be seen top right the layer in question as being rough.

      Screenshot 2020-01-11 at 07.40.02.png

      I cannot hear any differences between the motors and neither of them are noisy or hot in any way. I will be printing the lid for the box over the weekend and will rotate this on the bed as you suggest by 45 degrees.

      The box turned out ok in the end two small supports didn't make it as I had decided to try printing without any supports. but it will serve its purpose momentarily.

      IMG_2760.jpg IMG_2759.jpg IMG_2758.jpg IMG_2757.jpg

      posted in Tuning and tweaking
      Stevoundefined
      Stevo
    • RE: Core xy odd behaviour?

      Good morning both and thank you for the replies,
      So if you were to stand the printer on its side and both of the motors towards the bottom and the print to be done square as per facing the machine infill will be done on a diagonal.
      I am printing a tray for the duet the 4 initial perimeter shells went down perfectly followed by the initial infill which is going from bottom left to top right with one of the motors rotation controlling the back and forth motion and the other motor controlling the side stepping to start the next line of infill and this went down perfectly as the initial shells ( smooth to the touch and reflective to view.
      With the 2nd layer again outer 4 shells went down perfectly however this infill is now going 90 degrees to the previous layer from bottom right to top left. The motors now having swapped roles with each other doing the side step and the other controlling the back and forth movement.
      Visually to look you can see and feel its rough by comparison to the first initial glossy layer !
      Once layer 2 completed it again prints perimeter shells for the third layer perfectly followed by equally good infill same as layer one glossy.

      Thanks again for your input

      posted in Tuning and tweaking
      Stevoundefined
      Stevo
    • Core xy odd behaviour?

      Wonder if anyone has encountered this before my core xy prints far superior in one direction than it does in the other when doing infill on layers.
      Almost rough in one direction under the control of one stepper but when movement is switched to the other to do the next layer 90degrees to the previous its perfect.
      Both belts are of equal tension

      Could it be motor or a driver ? any thoughts appreciated

      posted in Tuning and tweaking
      Stevoundefined
      Stevo
    • RE: Control of Keenovo heat bed.

      Could I use something like this ? any recommendations on which connections on the duet wifi to make and break the heatbed circuit relay ?

      https://www.t-uk.co.uk/product/so942470-single-phase-relay/?gclid=EAIaIQobChMIhfyqqJHb5gIVF-DtCh2BOgYMEAQYASABEgIYsPD_BwE

      posted in Duet Hardware and wiring
      Stevoundefined
      Stevo
    • Control of Keenovo heat bed.

      I wondered if I could ask if there was anyway to turn off a Keenovo heat bed by means of an output from the duet ?

      So I guess I'm asking is there anyway to turn off a 240v manis socket via an output from the duet.

      Thanks

      posted in Duet Hardware and wiring
      Stevoundefined
      Stevo
    • RE: Odd homing behaviour

      I have changed P1 to P2 for modulated and removed the H3 which is a heater setting remaining from previous BLTouch does it need to stay for the ir sensor?

      posted in Duet Hardware and wiring
      Stevoundefined
      Stevo
    • RE: Odd homing behaviour

      Hi finally got around to trying this and although it repeats itself consistently I still don't have the correct offset when I home the printer.
      I have tried placing different surfaces underneath the sensor thinking it can't see the printed clearly but when it homes it literally doubles the gap it should be once homed.

      posted in Duet Hardware and wiring
      Stevoundefined
      Stevo
    • RE: Odd homing behaviour

      Thank you for the info what will this do for me in regards to the random z height ?

      Paste into "send G code" and let it do its thing

      M291 P"Probe will be tested 10 times and return mean and standard deviation. Ok or Cancel?" R"WARNING" S3 ; User must click OK or cancel.
      G28
      G30 P0 Z-9999
      G30 P1 Z-9999
      G30 P2 Z-9999
      G30 P3 Z-9999
      G30 P4 Z-9999
      G30 P5 Z-9999
      G30 P6 Z-9999
      G30 P7 Z-9999
      G30 P8 Z-9999
      G30 P9 Z-9999 S-1

      posted in Duet Hardware and wiring
      Stevoundefined
      Stevo
    • Odd homing behaviour

      Evening all I recently swapped out the bltouch sensor for an aus3d ir sensor I'm getting some random homing heights.
      I have it wired into the z probe connector on the duet wifi 2 board with the connector viewed at the bottom from left to right yellow black green and finally red.
      Is there likely to be anything residual in the settings ?
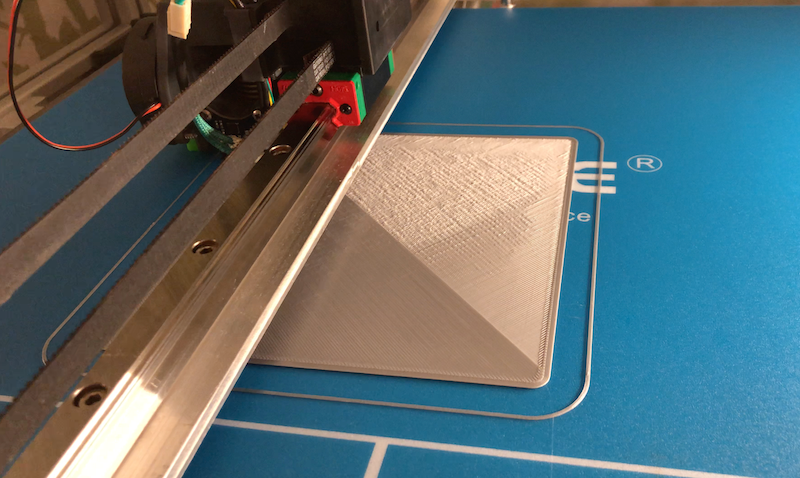
      I'm using a cctree (textured blue surface) wondered if this could be causing an issue!
      Just wondered if i had covered all my bases before suspecting the sensor at fault have attached my config is there anything I should enter g code wise prior to executing the G28 command within simplify to home all .
      It looks as if its doubling my z height as it looks to start printing where it should be starting from lol

      ; Configuration file for Duet WiFi (firmware version 2.03)
      ; executed by the firmware on start-up
      ;
      ; generated by RepRapFirmware Configuration Tool v2.1.2 on Tue Nov 12 2019 21:26:56 GMT+0000 (GMT)

      ; General preferences
      G90 ; send absolute coordinates...
      M83 ; ...but relative extruder moves
      M550 P"COREXY" ; set printer name

      M669 K1 ; select CoreXY mode

      ; Network
      M552 S1 ; enable network
      M586 P0 S1 ; enable HTTP
      M586 P1 S0 ; disable FTP
      M586 P2 S0 ; disable Telnet

      ; Drives
      M569 P0 S1 ; physical drive 0 goes forwards
      M569 P1 S1 ; physical drive 1 goes forwards
      M569 P2 S0 ; physical drive 2 goes backwards
      M569 P3 S1 ; physical drive 3 goes forwards
      M584 X0 Y1 Z2 E3 ; set drive mapping
      M350 X16 Y16 Z16 E16 I1 ; configure microstepping with interpolation
      M92 X80.00 Y80.00 Z1600.00 E420.00 ; set steps per mm
      M566 X600.00 Y600.00 Z120.00 E300.00 ; set maximum instantaneous speed changes (mm/min)
      M203 X6000.00 Y6000.00 Z600.00 E1200.00 ; set maximum speeds (mm/min)
      M201 X1200.00 Y1200.00 Z500.00 E1000.00 ; set accelerations (mm/s^2)
      M906 X800 Y800 Z2000 E800 I30 ; set motor currents (mA) and motor idle factor in per cent
      M84 S30 ; Set idle timeout

      ; Axis Limits
      M208 X-220 Y-220 Z0 S1 ; set axis minima
      M208 X220 Y220 Z660 S0 ; set axis maxima

      ; Endstops
      M574 X1 Y1 S0 ; set active low endstops
      M574 Z1 S2 ; set endstops controlled by probe

      ; Z-Probe
      M558 P1 H3 F150 T6000 A5 S0.015 ; set Z probe type to modulated and the dive height + speeds
      G31 P25 X2 Y32 Z4.55 ; set Z probe trigger value, offset and trigger height
      M557 X-205:215 Y-205:195 S20 ; define mesh grid

      ; Heaters
      M140 H-1 ; disable heated bed
      M305 P1 T100000 B4725 C7.060000E-8 R4700 ; set thermistor + ADC parameters for heater 1
      M143 H1 S280 ; set temperature limit for heater 1 to 280C

      ; Fans
      M106 P0 S0 I0 F500 H-1 ; set fan 0 value, PWM signal inversion and frequency. Thermostatic control is turned off
      M106 P1 S1 I0 F500 H1 T30 ; set fan 1 value, PWM signal inversion and frequency. Thermostatic control is turned on

      ; Tools
      M563 P0 D0 H1 F0 ; define tool 0
      G10 P0 X0 Y0 Z0 ; set tool 0 axis offsets
      G10 P0 R0 S0 ; set initial tool 0 active and standby temperatures to 0C

      ; Custom settings are not defined

      ; homeall.g
      ; called to home all axes
      ;
      ; generated by RepRapFirmware Configuration Tool v2.1.2 on Tue Nov 12 2019 21:26:56 GMT+0000 (GMT)

      G91 ; relative positioning
      G1 Z15 F6000 S2 ; lift Z relative to current position
      G1 S1 Y-445 F1800 ; move quickly to Y axis endstop and stop there (first pass)
      G1 Y5 F6000 ; go back a few mm
      G1 S1 Y-445 F360 ; move slowly to Y axis endstop once more (second pass)
      G1 S1 X-445 F1800 ; move quickly to X axis endstop and stop there (first pass)
      G1 X5 F6000 ; go back a few mm
      G1 S1 X-445 F360 ; move slowly to X axis endstop once more (second pass)
      G90 ; absolute positioning
      G1 X0 Y0 F6000 ; go to first bed probe point and home Z
      G30 ; home Z by probing the bed

      ; Uncomment the following lines to lift Z after probing
      ;G91 ; relative positioning
      ;G1 S2 Z5 F100 ; lift Z relative to current position
      ;G90 ; absolute positioning

      posted in Duet Hardware and wiring
      Stevoundefined
      Stevo
    • RE: DLP resin printer.

      Thanks for the info

      posted in General Discussion
      Stevoundefined
      Stevo
    • RE: DLP resin printer.

      @Veti thanks will look into that!

      posted in General Discussion
      Stevoundefined
      Stevo
    • DLP resin printer.

      Hi I have a MoonRay S resin printer that I have had for some time now can anyone recommend a replacement board to be able to take full control of the machine as the software for printer limits its usability.

      posted in General Discussion
      Stevoundefined
      Stevo
    • RE: IR sensor

      @Veti Hey thank you it was the deploy and retract files remaining error message gone!
      Much appreciated help as always

      posted in General Discussion
      Stevoundefined
      Stevo
    • RE: IR sensor

      @insertnamehere said in IR sensor:

      M558 P1 H3 F300 T6000 A5 S0.015

      So taking into account I used to have a BLtouch and now I have the Aus3D ir sensor which homes fine thank you using the command line given earlier is there something else I have to reverse as I now have an error message following the homing.

      Error M280; invalid servo index 7 in M280 command.(repeat text)

      posted in General Discussion
      Stevoundefined
      Stevo
    • RE: IR sensor

      @insertnamehere
      Many thanks for the info much appreciated!
      Would I be correct in assuming the R value in my line of code is a repeat measurement feature until two consecutive measurements are of the same value it will keep repeating.
      This is the line of code I was using with my BLT but with P9 and it still worked after I fitted the Aus3d. I was just worried that I may create other issues by not altering it.

      posted in General Discussion
      Stevoundefined
      Stevo
    • IR sensor

      Evening all just wanted to clarify that mode P2 is correct for the Aus3d IR height sensor please.

      M558 P2 H15 F100 T6000 R0.5 A5 B1

      posted in General Discussion
      Stevoundefined
      Stevo