I just installed Prusa Slicer 2.8 on Windows. It has a new top level tab structured with the new tab 'Physical Printer' which shows the Duet3D web dashboard. Very nice integration. The IP address is taken automatically from the upload setting.
Posts made by zapta
-
Duet dashboard within Prusa Slicerposted in General Discussion
-
RE: Long pre-heat period with reasonable print time estimations?posted in General Discussion
Thanks @Phaedrux.
I like the automation aspect, that is, one click in the browser and a printed part a few hours later. Any creative idea for an automated workaround?
Or, should this be a feature request?
-
RE: shutting down a servo?posted in General Discussion
@Tinchus, I have a non Duet project where a servo needs to be quiet between moves and I solved it by stopping the signal to the servo (PWM output stays at zero volts) instead of pulsating. Potentially you can do the same with the Duet. E.g. by reconfiguring the IO point.
-
Long pre-heat period with reasonable print time estimations?posted in General Discussion
My gcode files includes a 1 hour preheating time that is injected by the Prusa Slicer's custom gcode (holding the bed at 100c to let the heat the chamber and stabilize the frame). This works well but makes the time estimations of the RRF significantly less accurate.
Is there a way to let RRF know about that heating period such it can handle it correctly in regard to the estimations? E.g. basing the estimations only on the behavior after the preheating period?
-
RE: Accelerometer suggestion for Voron & V6 hotend & Afterburnerposted in General Discussion
@aytact, I am using the Duet accelerometer with a 3D printed adapter. Easy to install and remove without changing the baby step setting.
https://forum.duet3d.com/topic/33664/custom-input-shaping-accelerator-board/7?_=1713546874157
-
RE: Is the Duet3D IR height sensor open sourced?posted in General Discussion
Thanks @jay_s_uk ! This is exactly what I was looking for.
-
Is the Duet3D IR height sensor open sourced?posted in General Discussion
Are the schematic and firmware of the Duet3D IR height sensor available as open source? I couldn't find them at https://github.com/Duet3D.
https://www.filastruder.com/products/mini-differential-ir-height-sensor
-
RE: Duet 3 Scanning Z probeposted in General Discussion
@T3P3Tony, I see.
I am trying to find a way to speed up touch sensors such as BL Touch but this approach should apply also to other sensors types. My hypothesis is that if instead of a binary state they provide a small hysteresis-free continuous region around a known point, the meshing can be speed up significantly since it requires only minor Z adjustments during the scan to tack that point. Not much different from the mesh compensation during the actual printing.
Will see how it goes.
-
RE: Duet 3 Scanning Z probeposted in General Discussion
@T3P3Tony, with the current approach, you rely of the scale calibration of the sensor, or the K1 in the linear approximation below:
L[mm] = K0 + K1*SensorTicks
With this approach you are K1 agonistic since the Z measurement is inherently calibrated by the Z steps which is also what the printing process uses. In other words, you relax the requirements from the sensor, and at the same time, can still mesh faster than the traditional stop-and-probe.
Does this make sense?
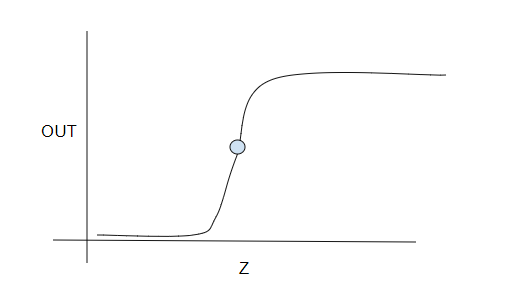
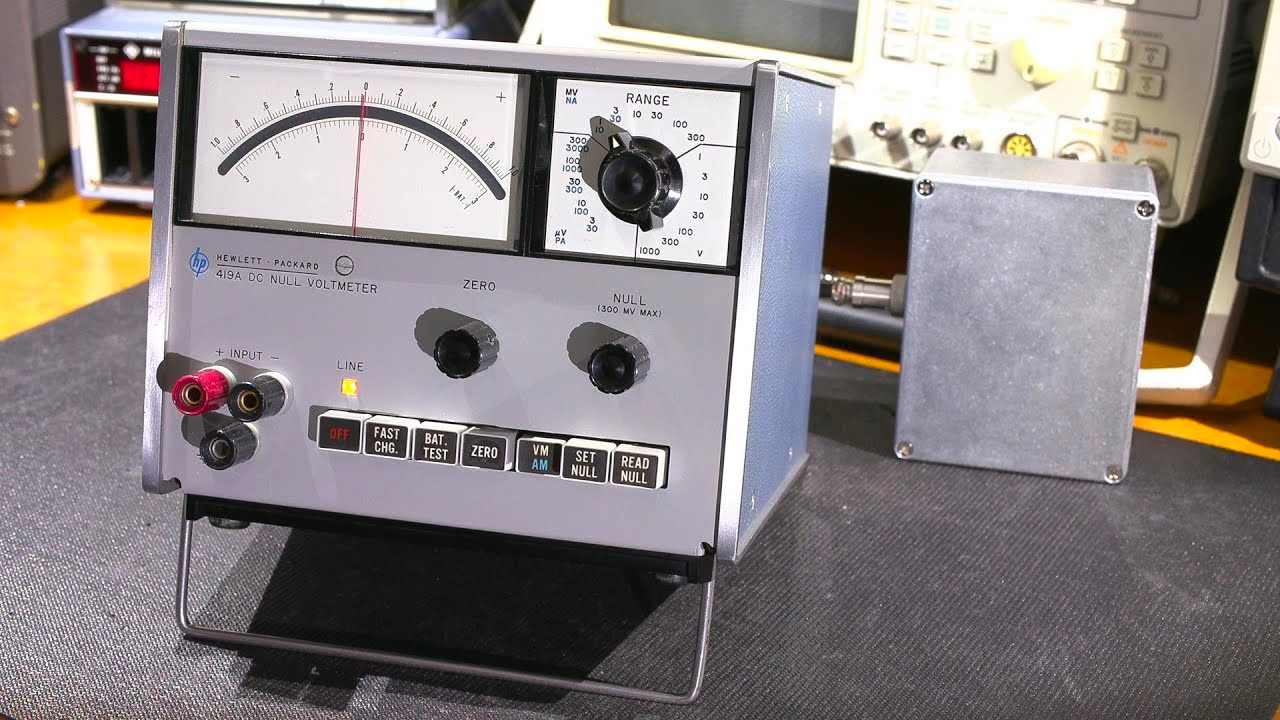
EDIT: it's same concept as using a null meter instead of a volt meter.
-
RE: Duet 3 Scanning Z probeposted in General Discussion
@dc42, I was thinking about the Z probe and meshing issue.
Since you control also the Z while scanning in X,Y, instead deducing height in mm from the probe, you can just pick a certain probe measurement value and then, while scanning in X,Y, dynamically adjust the Z to maintain that level.
This will equal-height surface that is well calibrated to mm by the accuracy of the Z steps, and will still be must faster than the stop-and-probe approach of BL Touch.
BTW, the same approach can possibly also be used with your IR sensor, assuming that its differential mechanism can give you a on-target/above/below indication.
Does this make sense?
-
RE: macro debugging?posted in General Discussion
You can write a macro that will wait for some user action and then call it from the places where you want to stop halt your tested macro.
https://forum.duet3d.com/topic/12897/wait-for-input
https://docs.duet3d.com/User_manual/Reference/Gcodes -
RE: Help with component identificationposted in General Discussion
@Idodgeads, as @dc42 said, they can be diodes. The difference between 'diodes' and 'zeners' is that the zeners are intended to operate at their breakdown voltage.
You can test the breakdown voltage using a power supply (same voltage as the target circuit) and a resistor. Connect the diode in series to a resistor (e.g. 10K) to your power supply such that the diode gets reverse voltage (+ on the cathode, - on the anode) and measure the voltage across the diode. If the voltage on the diode is significantly less than the power supply than this is the voltage rating of the zener, otherwise, it's most likely a diode.
To test zeners, the tester needs to have voltage higher than the zener breakdown voltage and I think this tester is limited to 5V. Same with most digital voltmeters which tests diodes but not zeners.
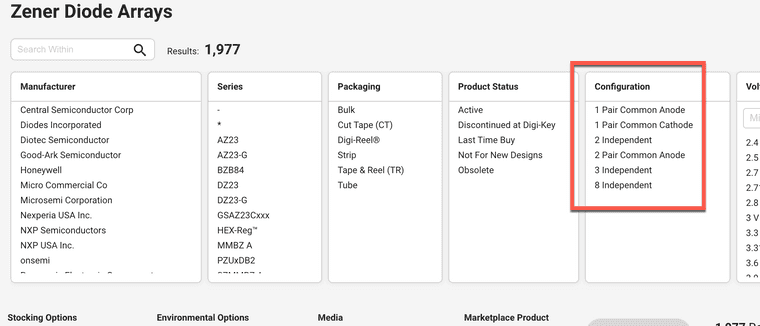
Looking at Digikey, I don't see a zener array with the arrangement you mentioned.
-
RE: MAX31856 duet2 wifi board pin numberposted in General Discussion
@gorf32 said in MAX31856 duet2 wifi board pin number:
MAX31856
If it helps, this is the schematic of 1.04.
https://github.com/Duet3D/Duet-2-Hardware/blob/master/Duet2/Duet2v1.04/DuetWifi_Schematic_v1.04.pdf
-
RE: Can't edit/save daemon.g that contains a 1 sec loop.posted in General Discussion
Once you check the flag once and enter the infinite loop, the flag is not examined anymore so the loop will not stop when runDaemon becomes false.
How do you sent the flag to false to stop the daemon and do you restart the machine to do so?
-
RE: Can't edit/save daemon.g that contains a 1 sec loop.posted in General Discussion
@Tinchus, to post code here you can use the </> button. It will preserve the indentation.
example:
code1 code2 code3 -
RE: Can't edit/save daemon.g that contains a 1 sec loop.posted in General Discussion
@Tinchus, I believe that you need to have a conditional exit with the loop such that the code keeps evaluating the condition.
-
RE: daata gathered from gcodeposted in General Discussion
@Tinchus , can you inject from your slicer custom Goode that will identify the profile? E.g. setting a global variable or passing a parameter to a macro?
-
RE: Help with component identificationposted in General Discussion
@Idodgeads, a simple multimeter, even a very cheap one, will be able to measure what @dc42 suggested.
As for accessing the broken terminals, can you see any part of the broken terminal? If not, can you scrap/file gently around it to have minimal access?
If you want to try something new, you can buy on Aliexpress and other places an electronic component identifier. You connect a two or three leads components and it identifies the type and the pinout. Not perfect but amazingly good for the money.
-
RE: How to format an int as a zero padded string?posted in General Discussion
@dc42, must be fixed along the way. On 3.4.6 this is what i get
var x = "123"
echo "String: " ^ var.x
echo "Length: " ^ #var.x
-
RE: How to format an int as a zero padded string?posted in General Discussion
@fcwilt, I am generating a unique id that is used to form a file name. Ideally would do it with a timestamp such as 231219-071453 but couldn't find a reliable way to generate it using gcode.