WIP CoreXY with heated chamber
-
@Turbo What's the gear ratio of the planetary box on the Z axis? Does it keep the bed from moving when power is cut? Any backlash?
-
@mrehorstdmd
Not sure of the gear ratio on the box. I'll ask. When power is cut it doesn't fall, but i can move it down by hand. As for backlash, none as far as I can tell, still tuning though.
Edit: Z Motor (5.18:1)
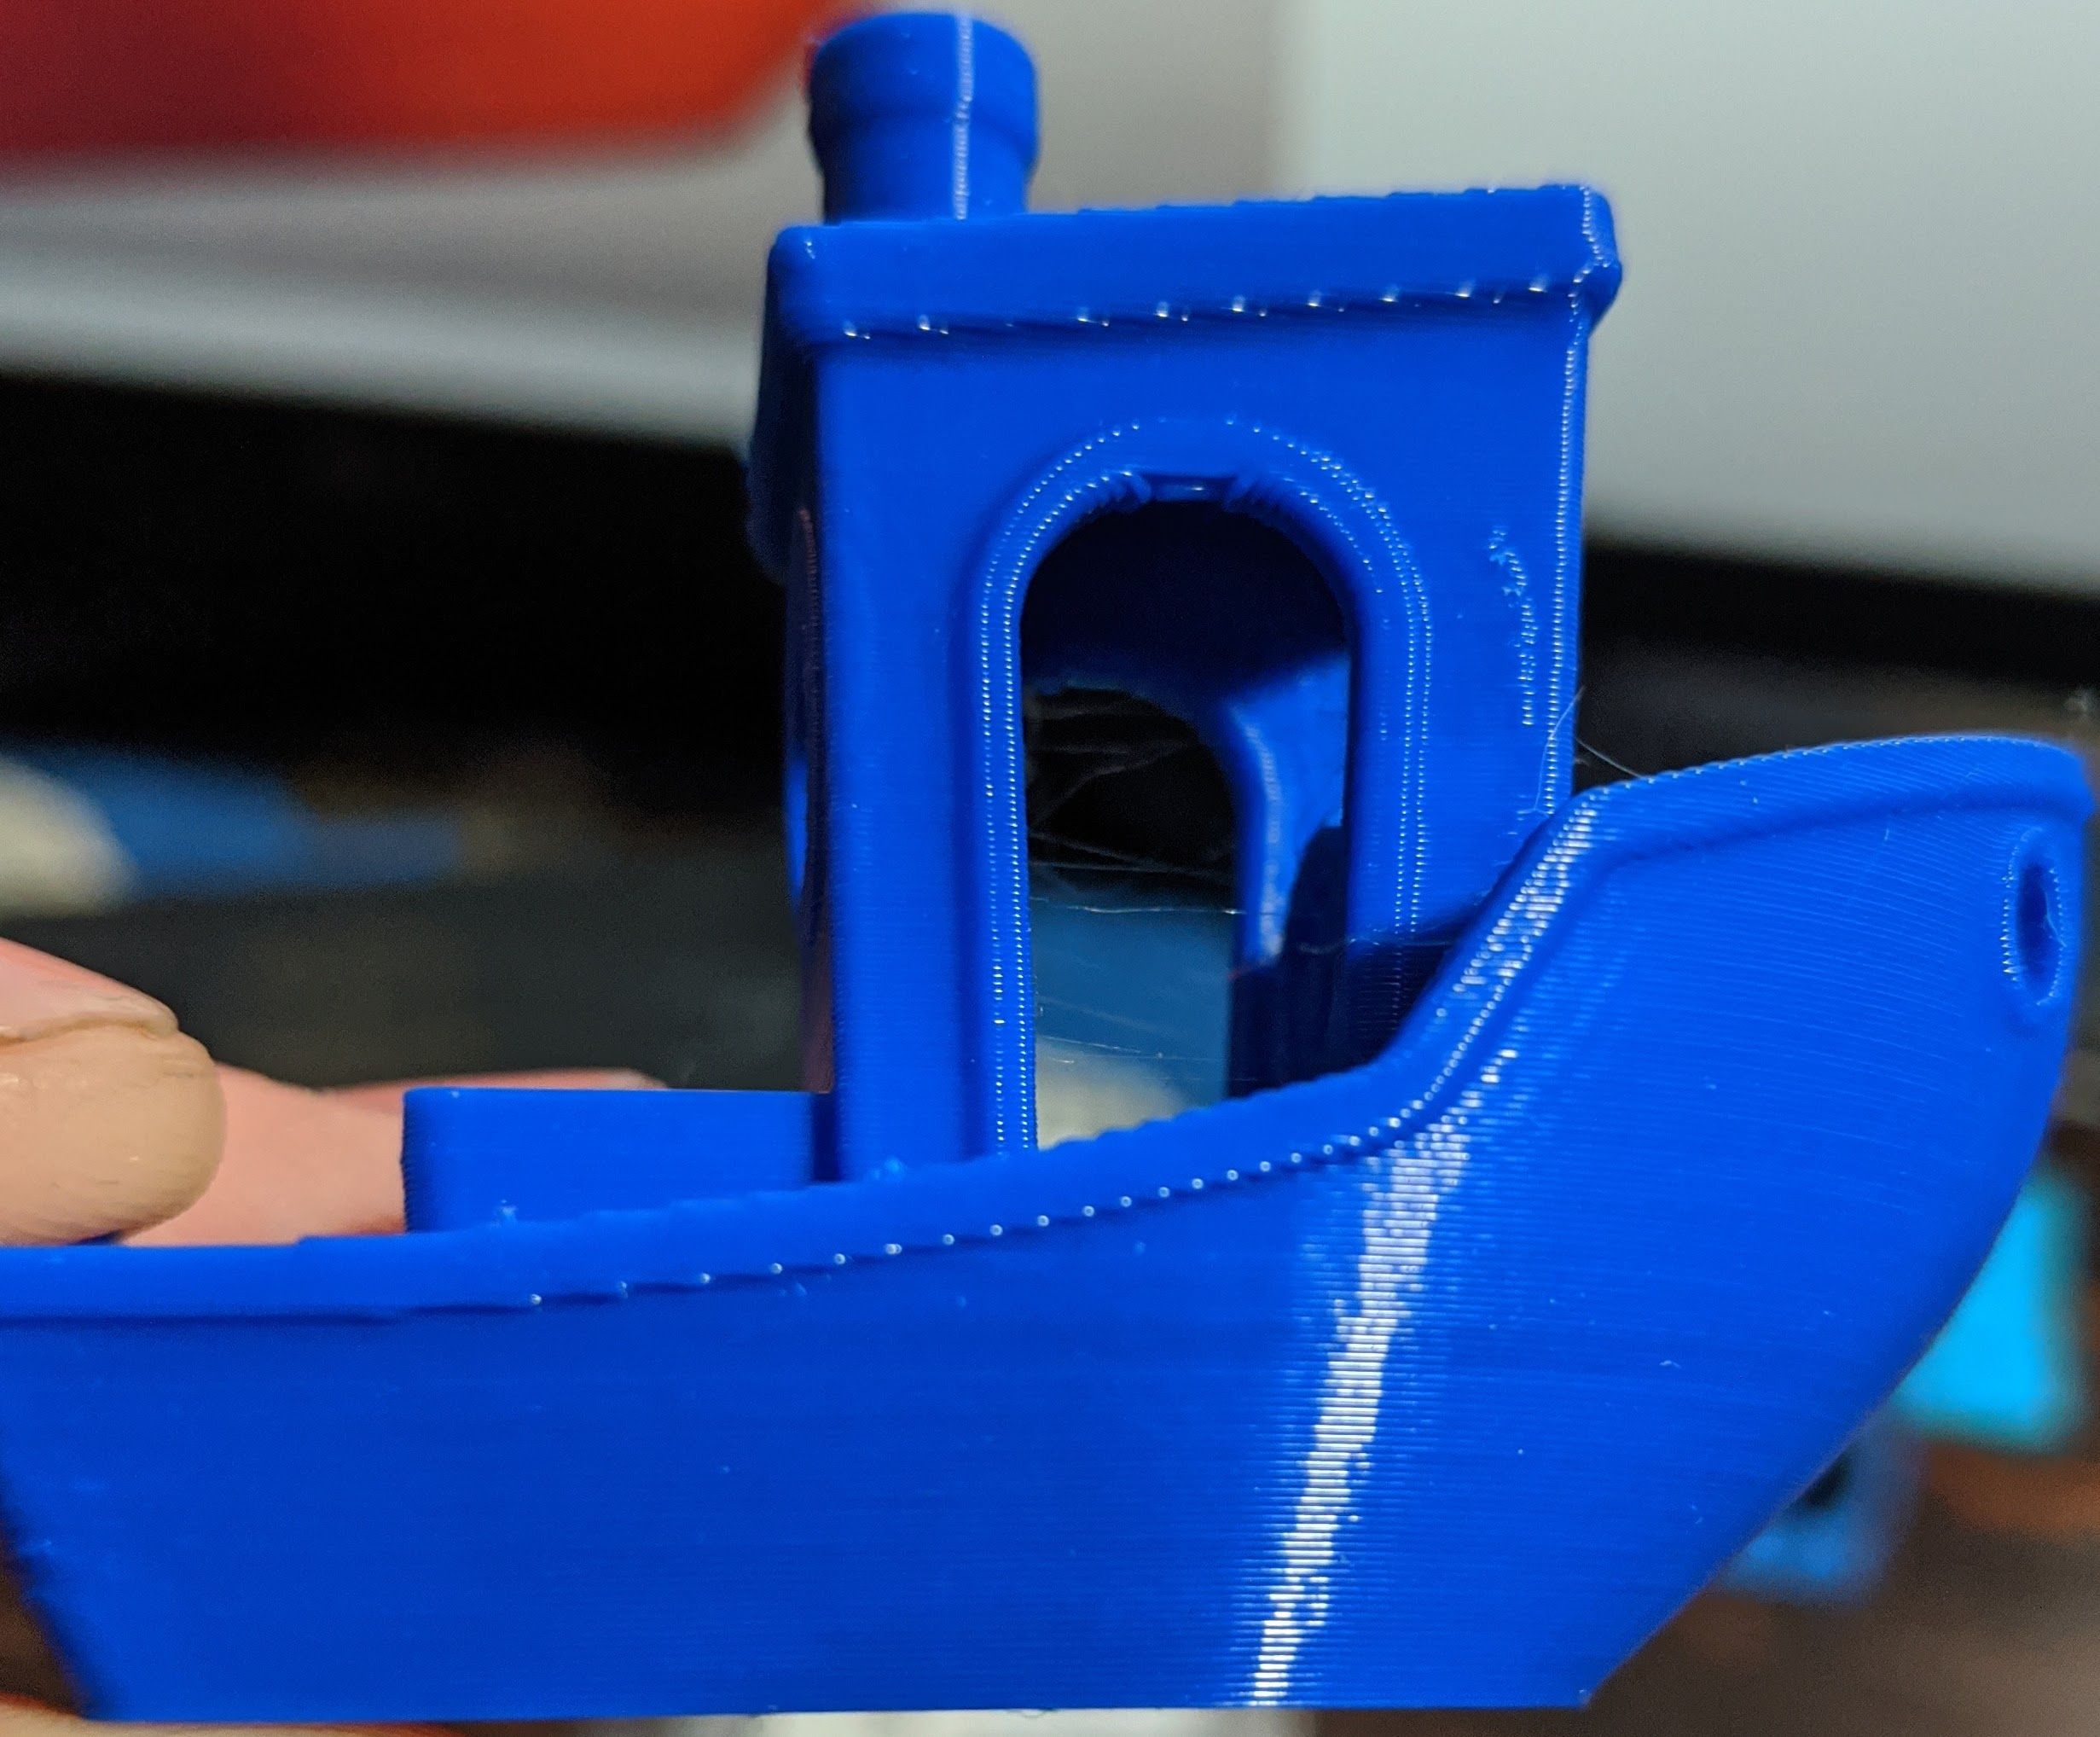
Most Recent Benchy: .4 nozzle, .2layer height, 60mm/s.
Where I'm at currently

(Where I wanna be: My custom i3 at .2mm LH, 80mm/s)

-
@Turbo said in WIP CoreXY with heated chamber:
@Phaedrux It was a custom design my friend made. I got this printer from him. I could see about putting them somewhere if hes cool with it, as he also gave me the files, but id have to make instructions or something.
If you can get some files or anything really that would be cool. I'm more interested to see how it was done than to implement it myself exactly as is. My Dbot is already pretty far off stock. The Z axis has always been a sore point and going to a belted design has always been in the back of my mind.
-
Thank you! Nice machine you have too! Therefore you mentioned what you replaced wheels to linear rails. I was considering doing the same, but after I understand how wheels should be aligned and tightened I got almost perfect prints from it (to my needs), I don't think I need to change to rails? Maybe you can shine some light and tell the difference?
")
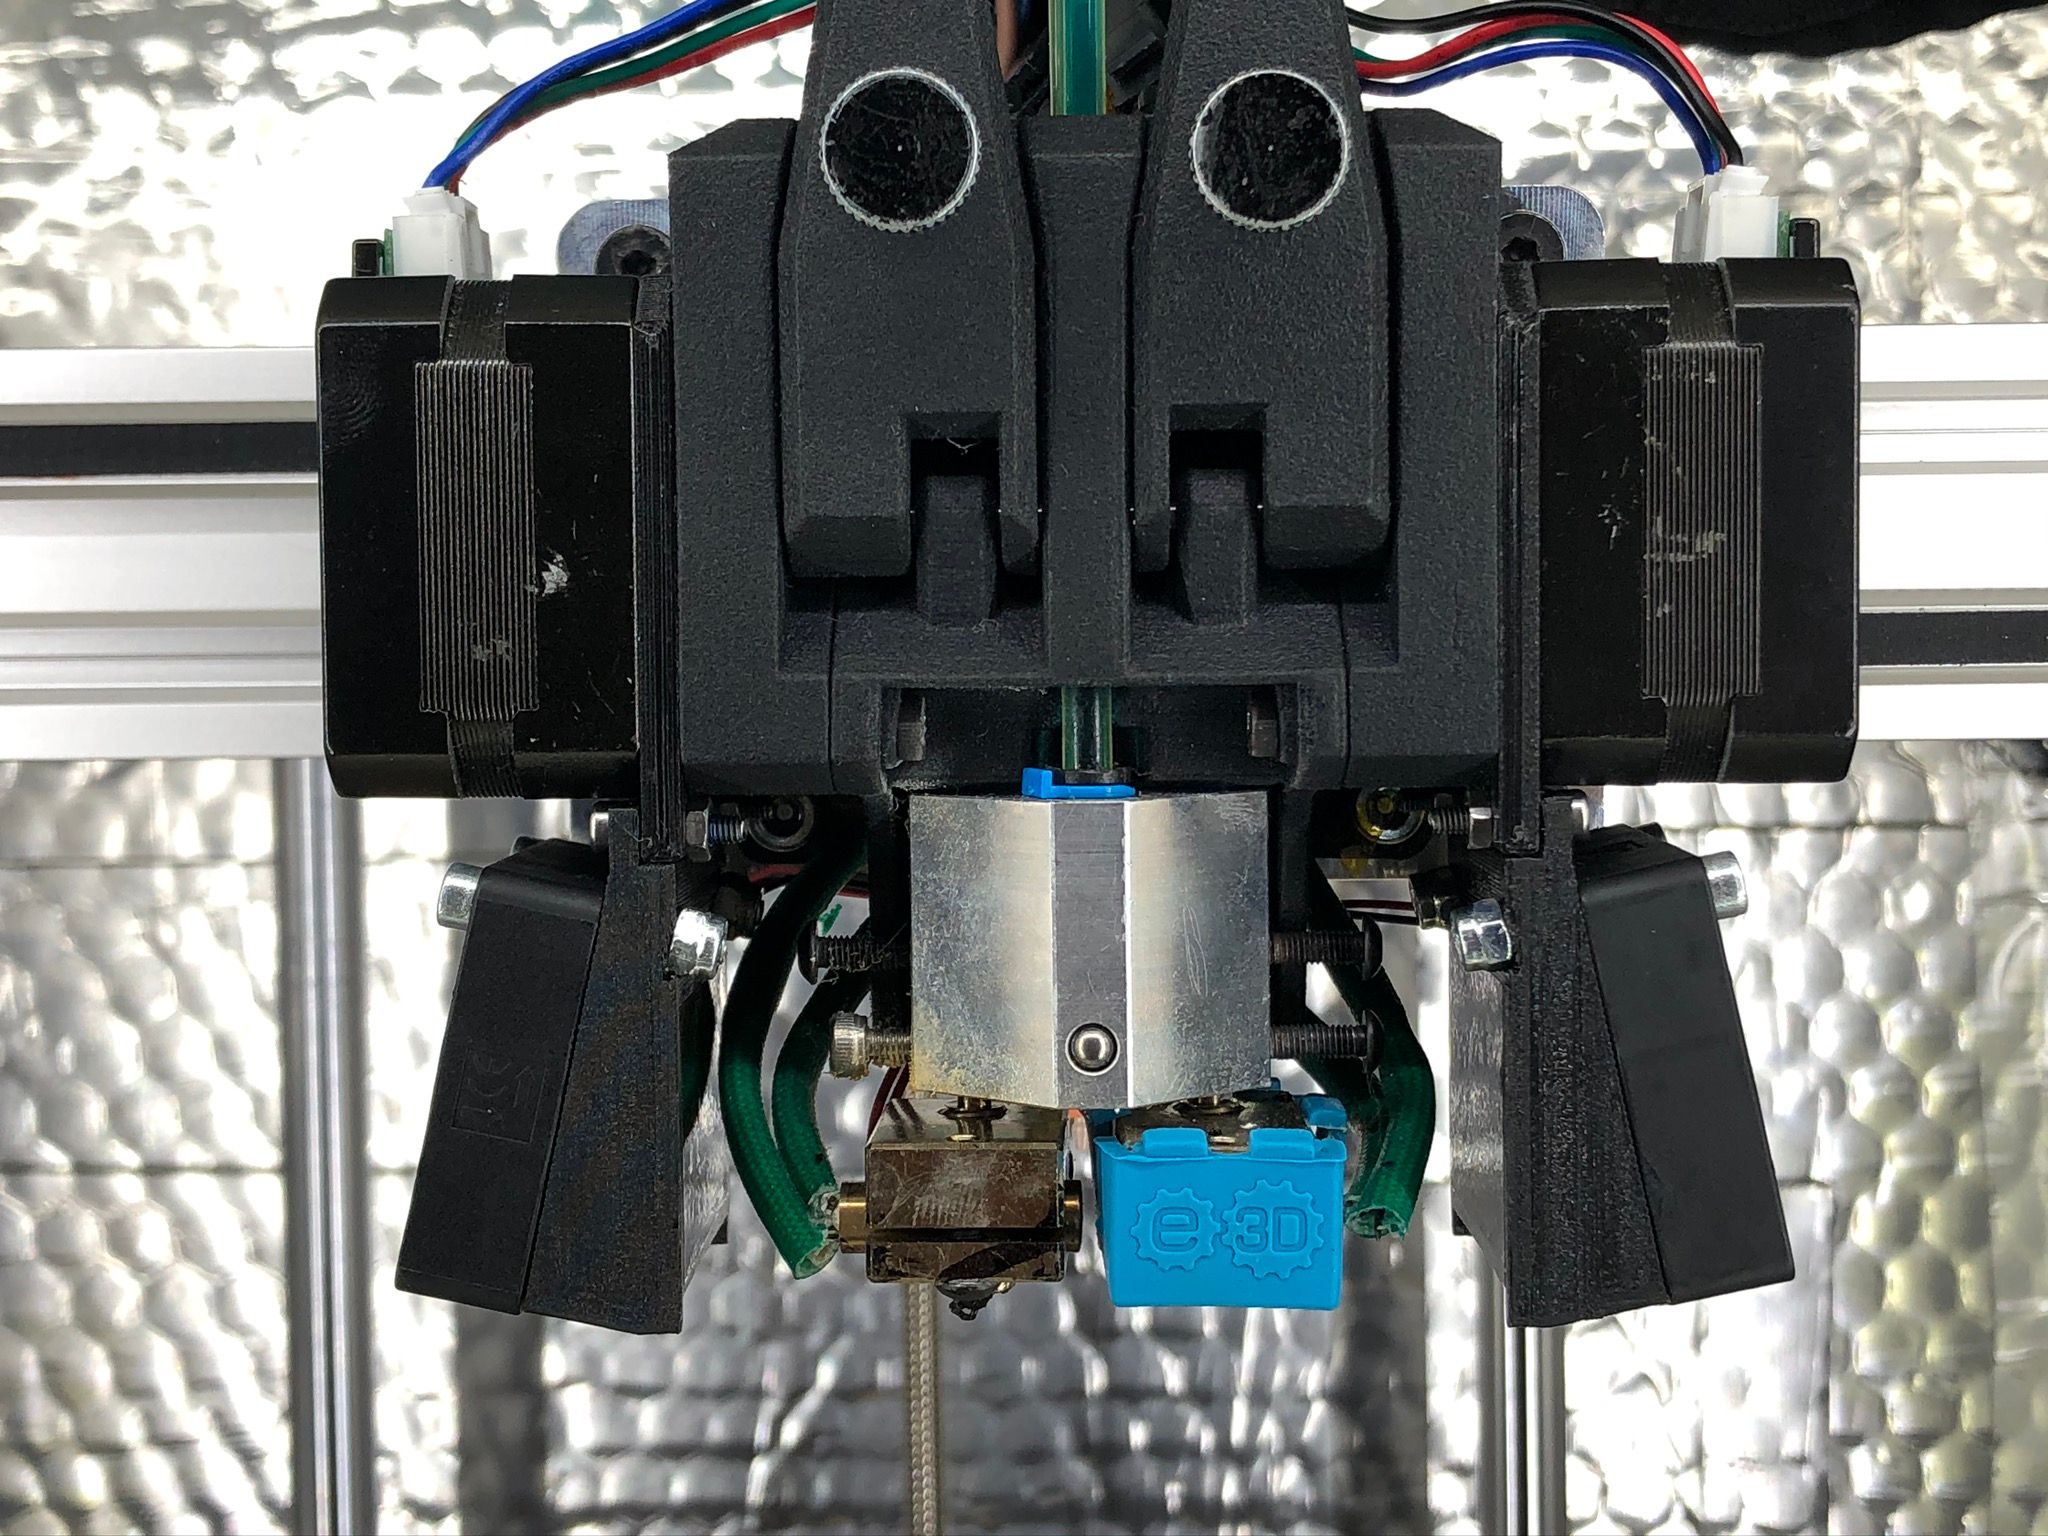
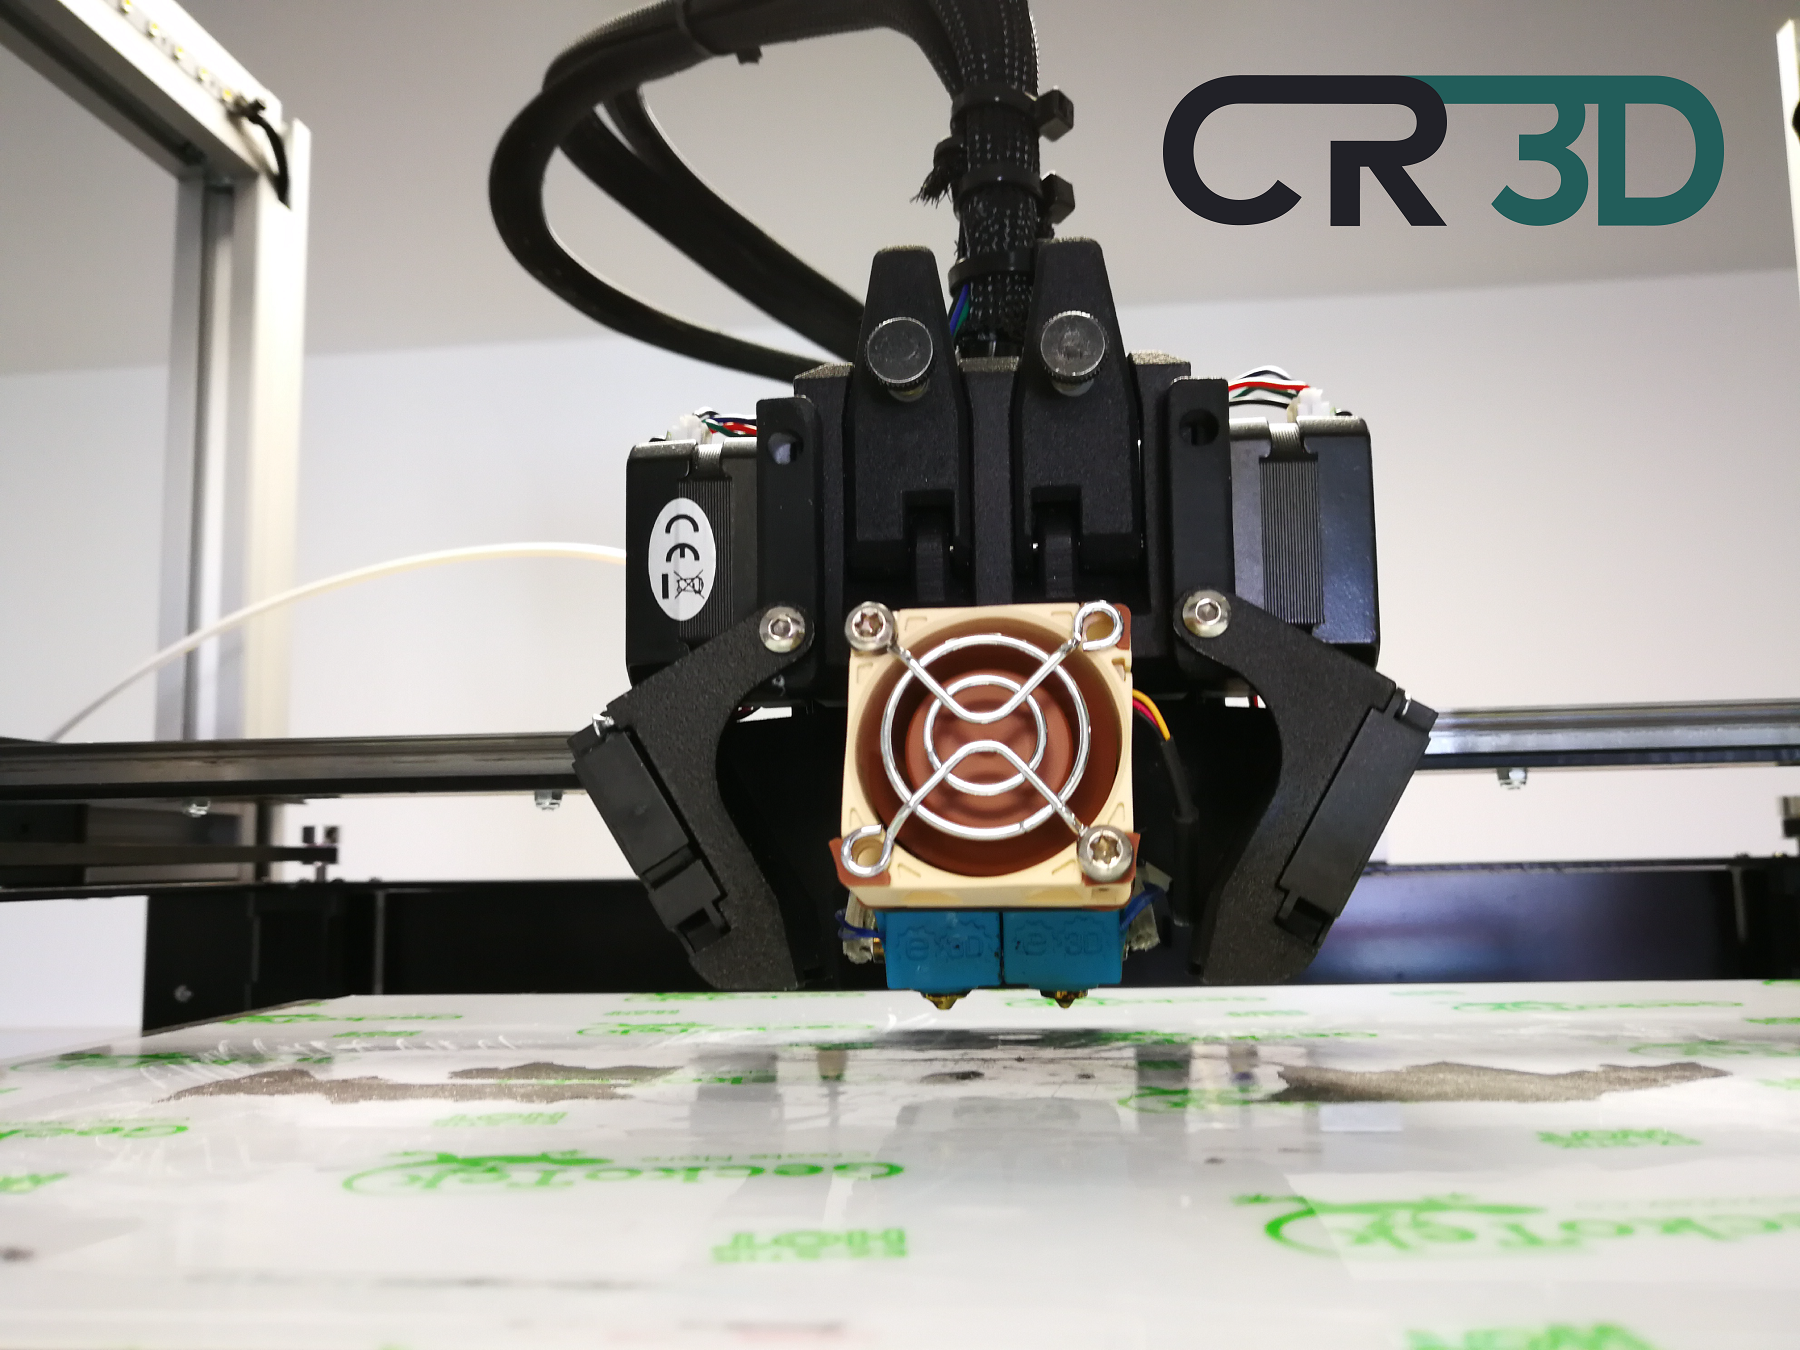
The direct drive extruder - is from Bondtech BMG x2. They have neat setup for chimera. Also, I like how you placed blowers, I might do the same. -
With that odd 5+2/11 ratio the minor flaws may be due to not using layer thickness that is a multiple of a full step in the motor. What value do you use for steps/mm in Z? If you tweak the layer thickness a bit it might get better. Do you use lift on retract? You might try turning that off, too.
That odd ratio is why I have been suspicious of using planetary gearboxes for Z axis. All the ones I have seen have odd ratios. Someone built a corexy printer at the makerspace using one of these and it produces prints that are as good as any I have ever seen. I don't know what ratio he used, but the gear boxes are whole number ratios that make it easy to set layer thickness to multiples of a full step.
-
@felt342 said in WIP CoreXY with heated chamber:
I don't think I need to change to rails?
Nothing wrong with wheels. The only issues i've found are that the V slots and wheels must be cleaned occasionally, and the bearings of the mini V wheels can fail sometimes, especially if they are cheap chinese bearings and if they are over tensioned.
-
Yes, I found out it always accumulate some dust/debris on wheels. Hopefully enclosed box can decrease the amount of dust inside. I do have wheels from openbuilds original. Do you have experience with the polycarbonate wheels from them?
-
The polycarbonate wheels are harder and so might be more noisy or have more vibration. The Delrin wheels are still very durable and will settle in a bit over time. The only reason I've seen for using polycarbonate wheels would be in industrial applications where chemical and heat resistance would be required or when there would be very heavy loads. The heated enclosure in your case might qualify.
-
Aha thank you! Will se in a future how it will work with heated enclosure.
-
@felt342 HOnestly if you can get the rollers perfect, don't mess with it. The only advantage I've found for linear rails is they're basically maintenance free once you align 'em properly. and they are more compact than the roller design.
-
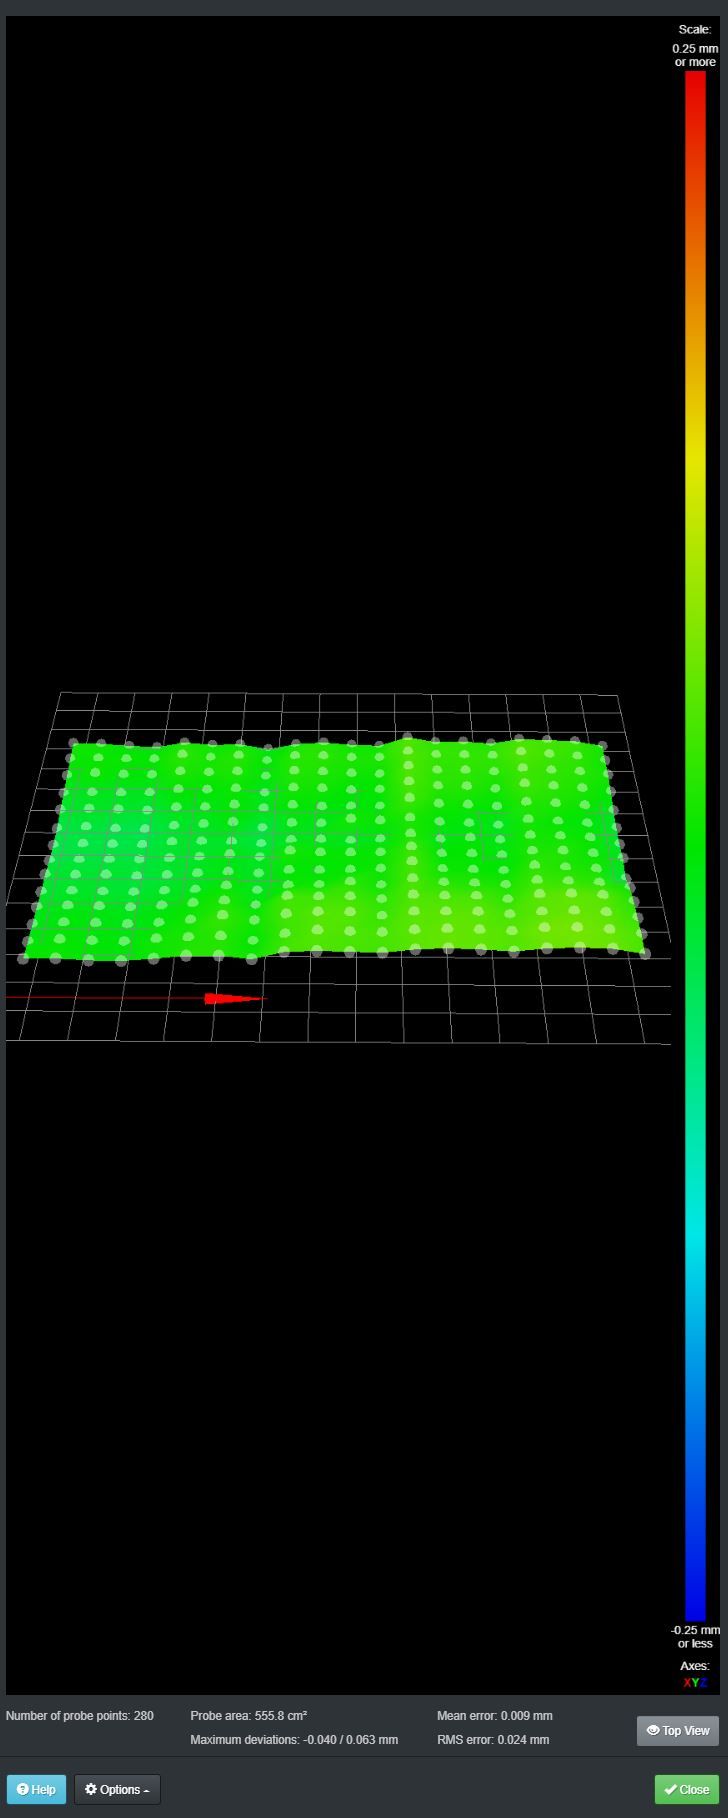
@mrehorstdmd 415 Steps on the Z axis, although i need to tweak it since my cubes are about .2mm too short right now, but i also need to make sure its not my first layer or anything else. No lift on retract. I may adjust layer height, but for now .25Lh is my go to since i already have a printer for high detail stuff.
-
@Turbo It's generally accepted practice to set layer thickness to a whole number multiple of the full step movement of the Z axis. For example, if the full step Z movement is 15 um, you would not use 200 um for the layer thickness, you'd use something like 210 um instead. That ensures that the motor is always in the same position relative to a full step at each layer position and should maximize print quality, at least with regard to layer thicknesses being the same. With the odd ratio of your gearbox, the whole step travel is going to be a number with lots of digits to the right of the decimal which makes getting a repeatable whole step multiple tricky. 5+2/11 ratio = 5.181818... I'm not sure how many digits you'd need to use before you reach the resolution limit of the system.
Let's say your whole step travel worked out to be 51.8181818... um. If you went with a 4 full step multiple the layer thickness would be 207.272727... um. I don't know if you'd enter that as 207.3, 207.27, 207.273, etc. in the slicer to ensure that the motor was always in the same position relative to a full step at each layer.
-
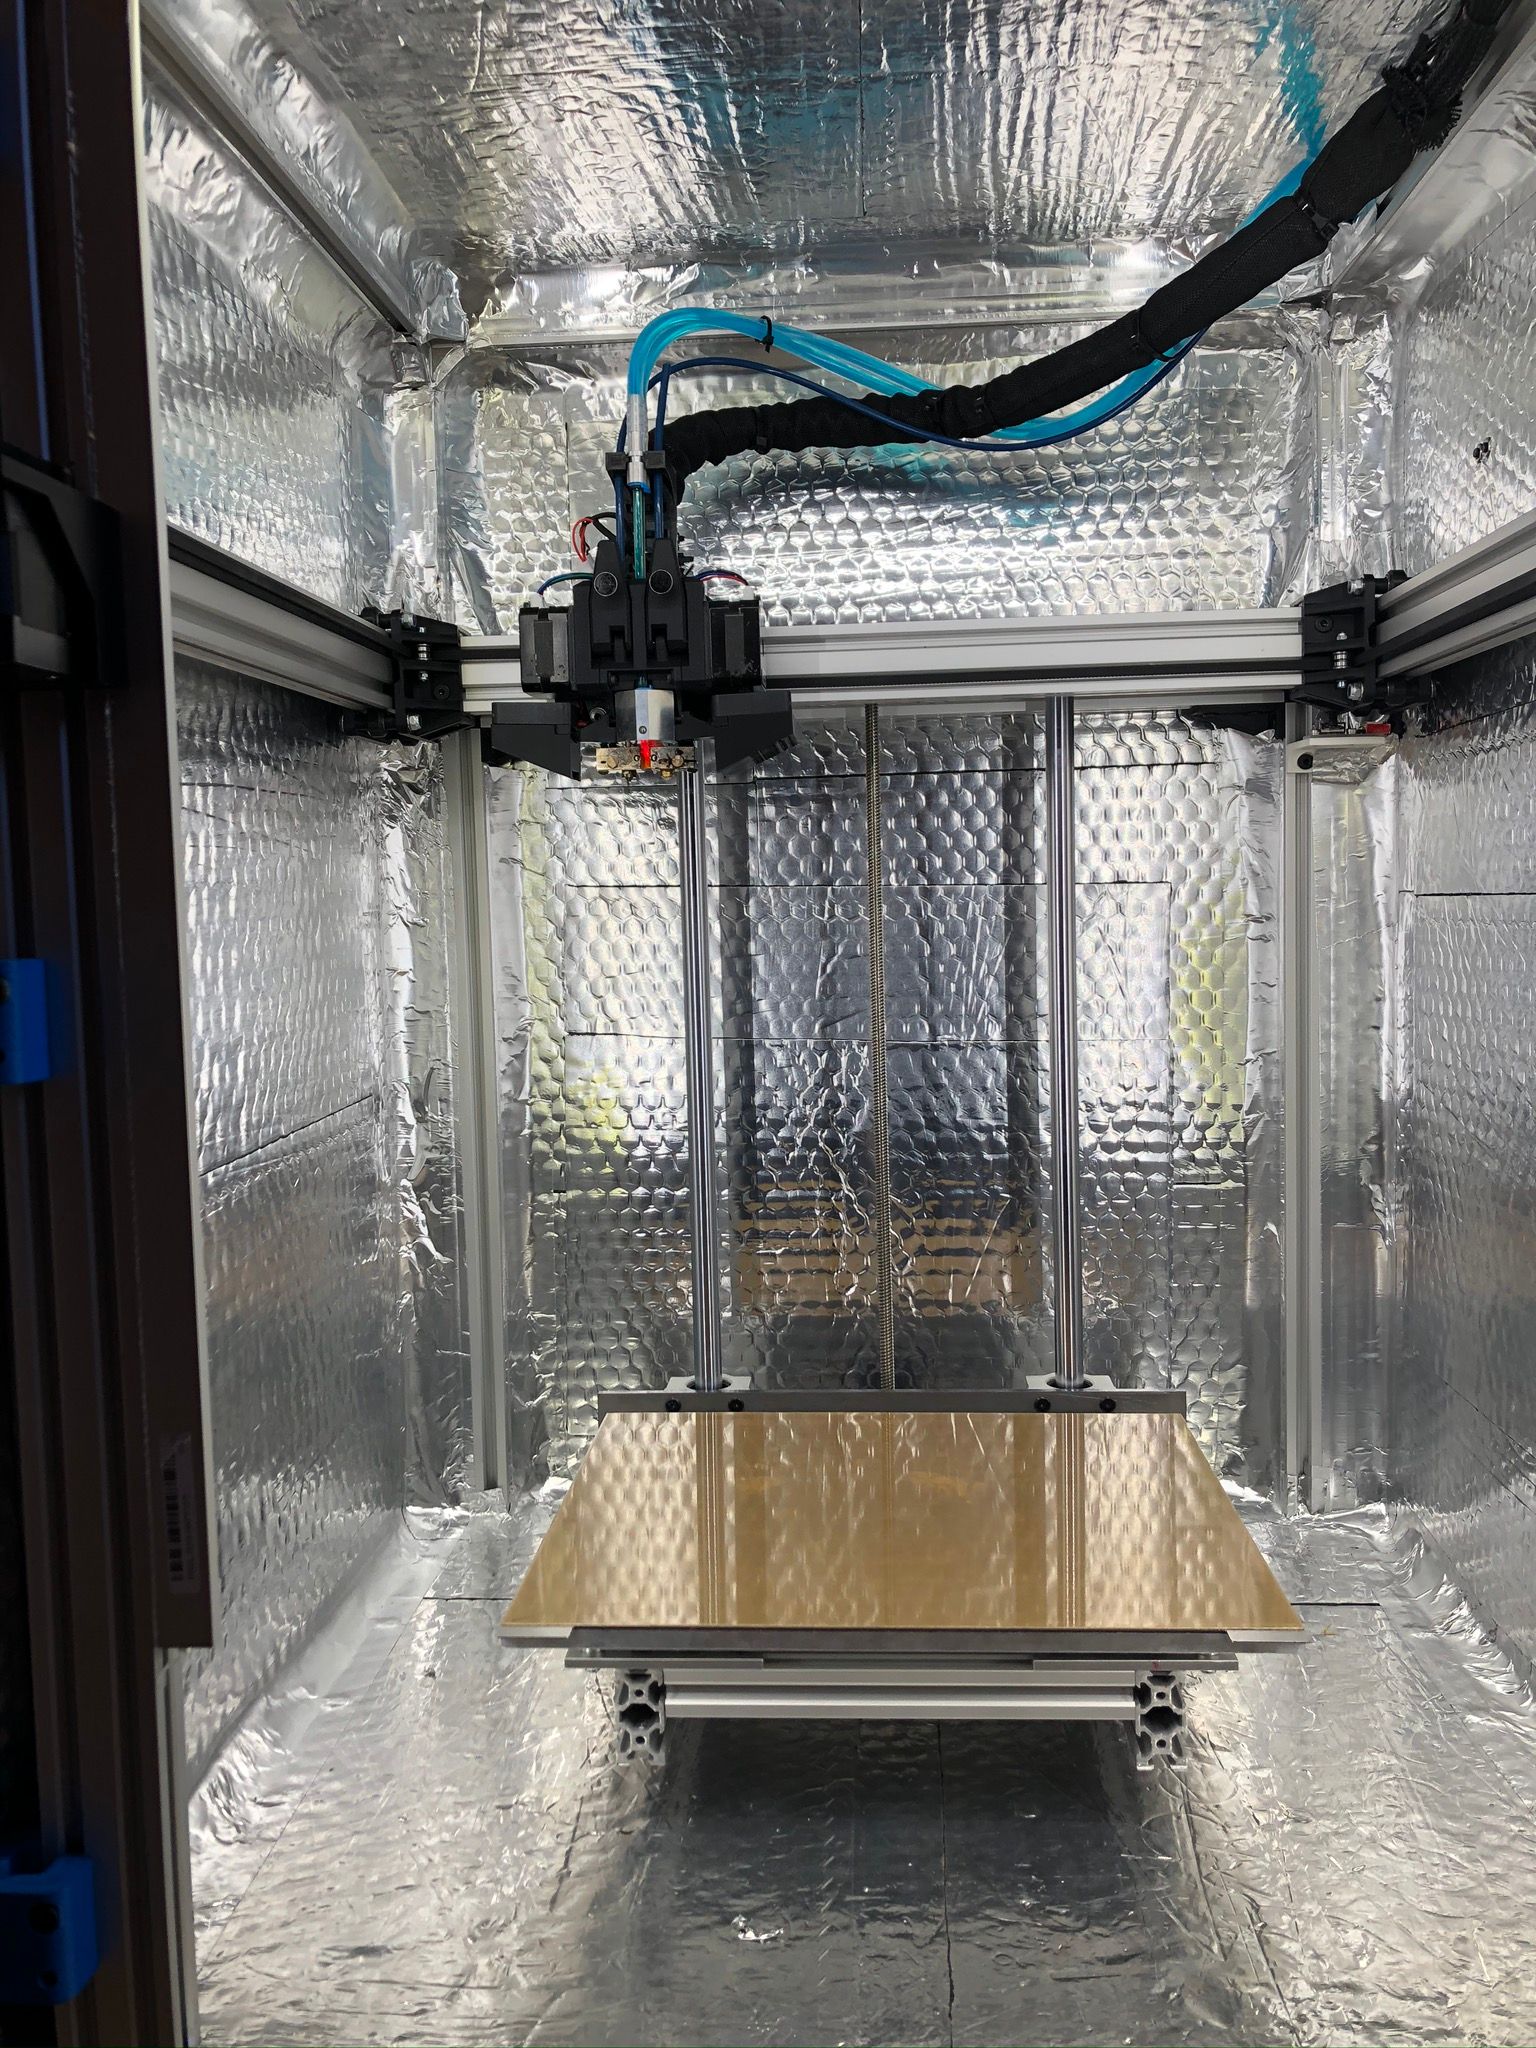
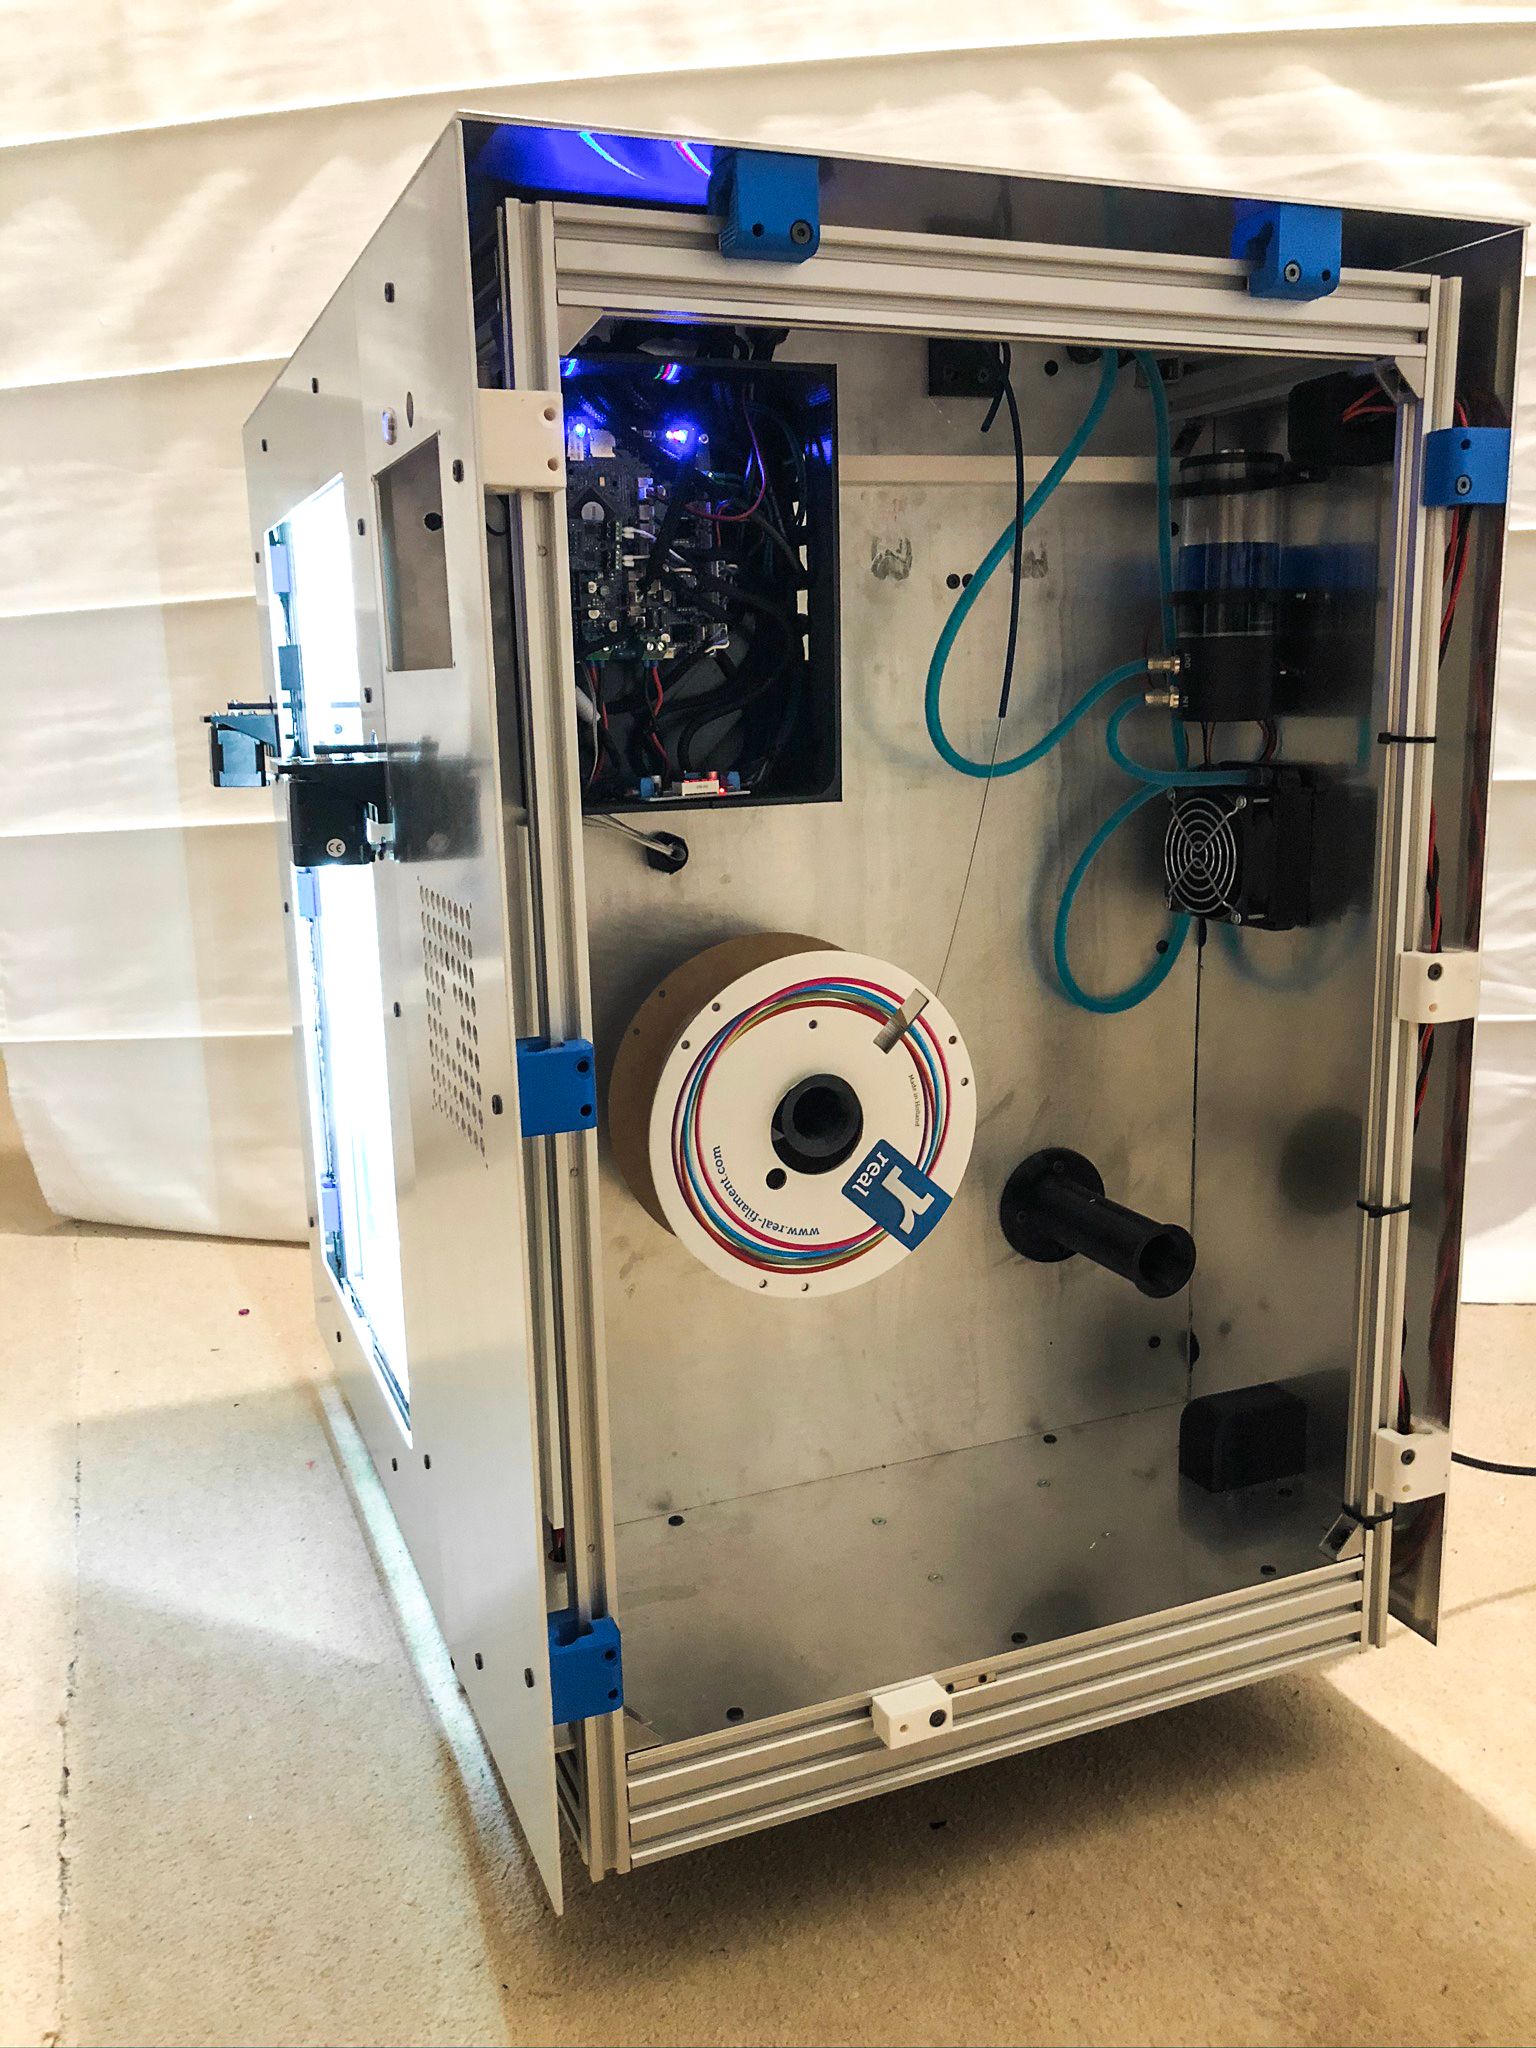
Update - quick wrapping in aluminum foil. Hopefully I don't need to open it any soon


-
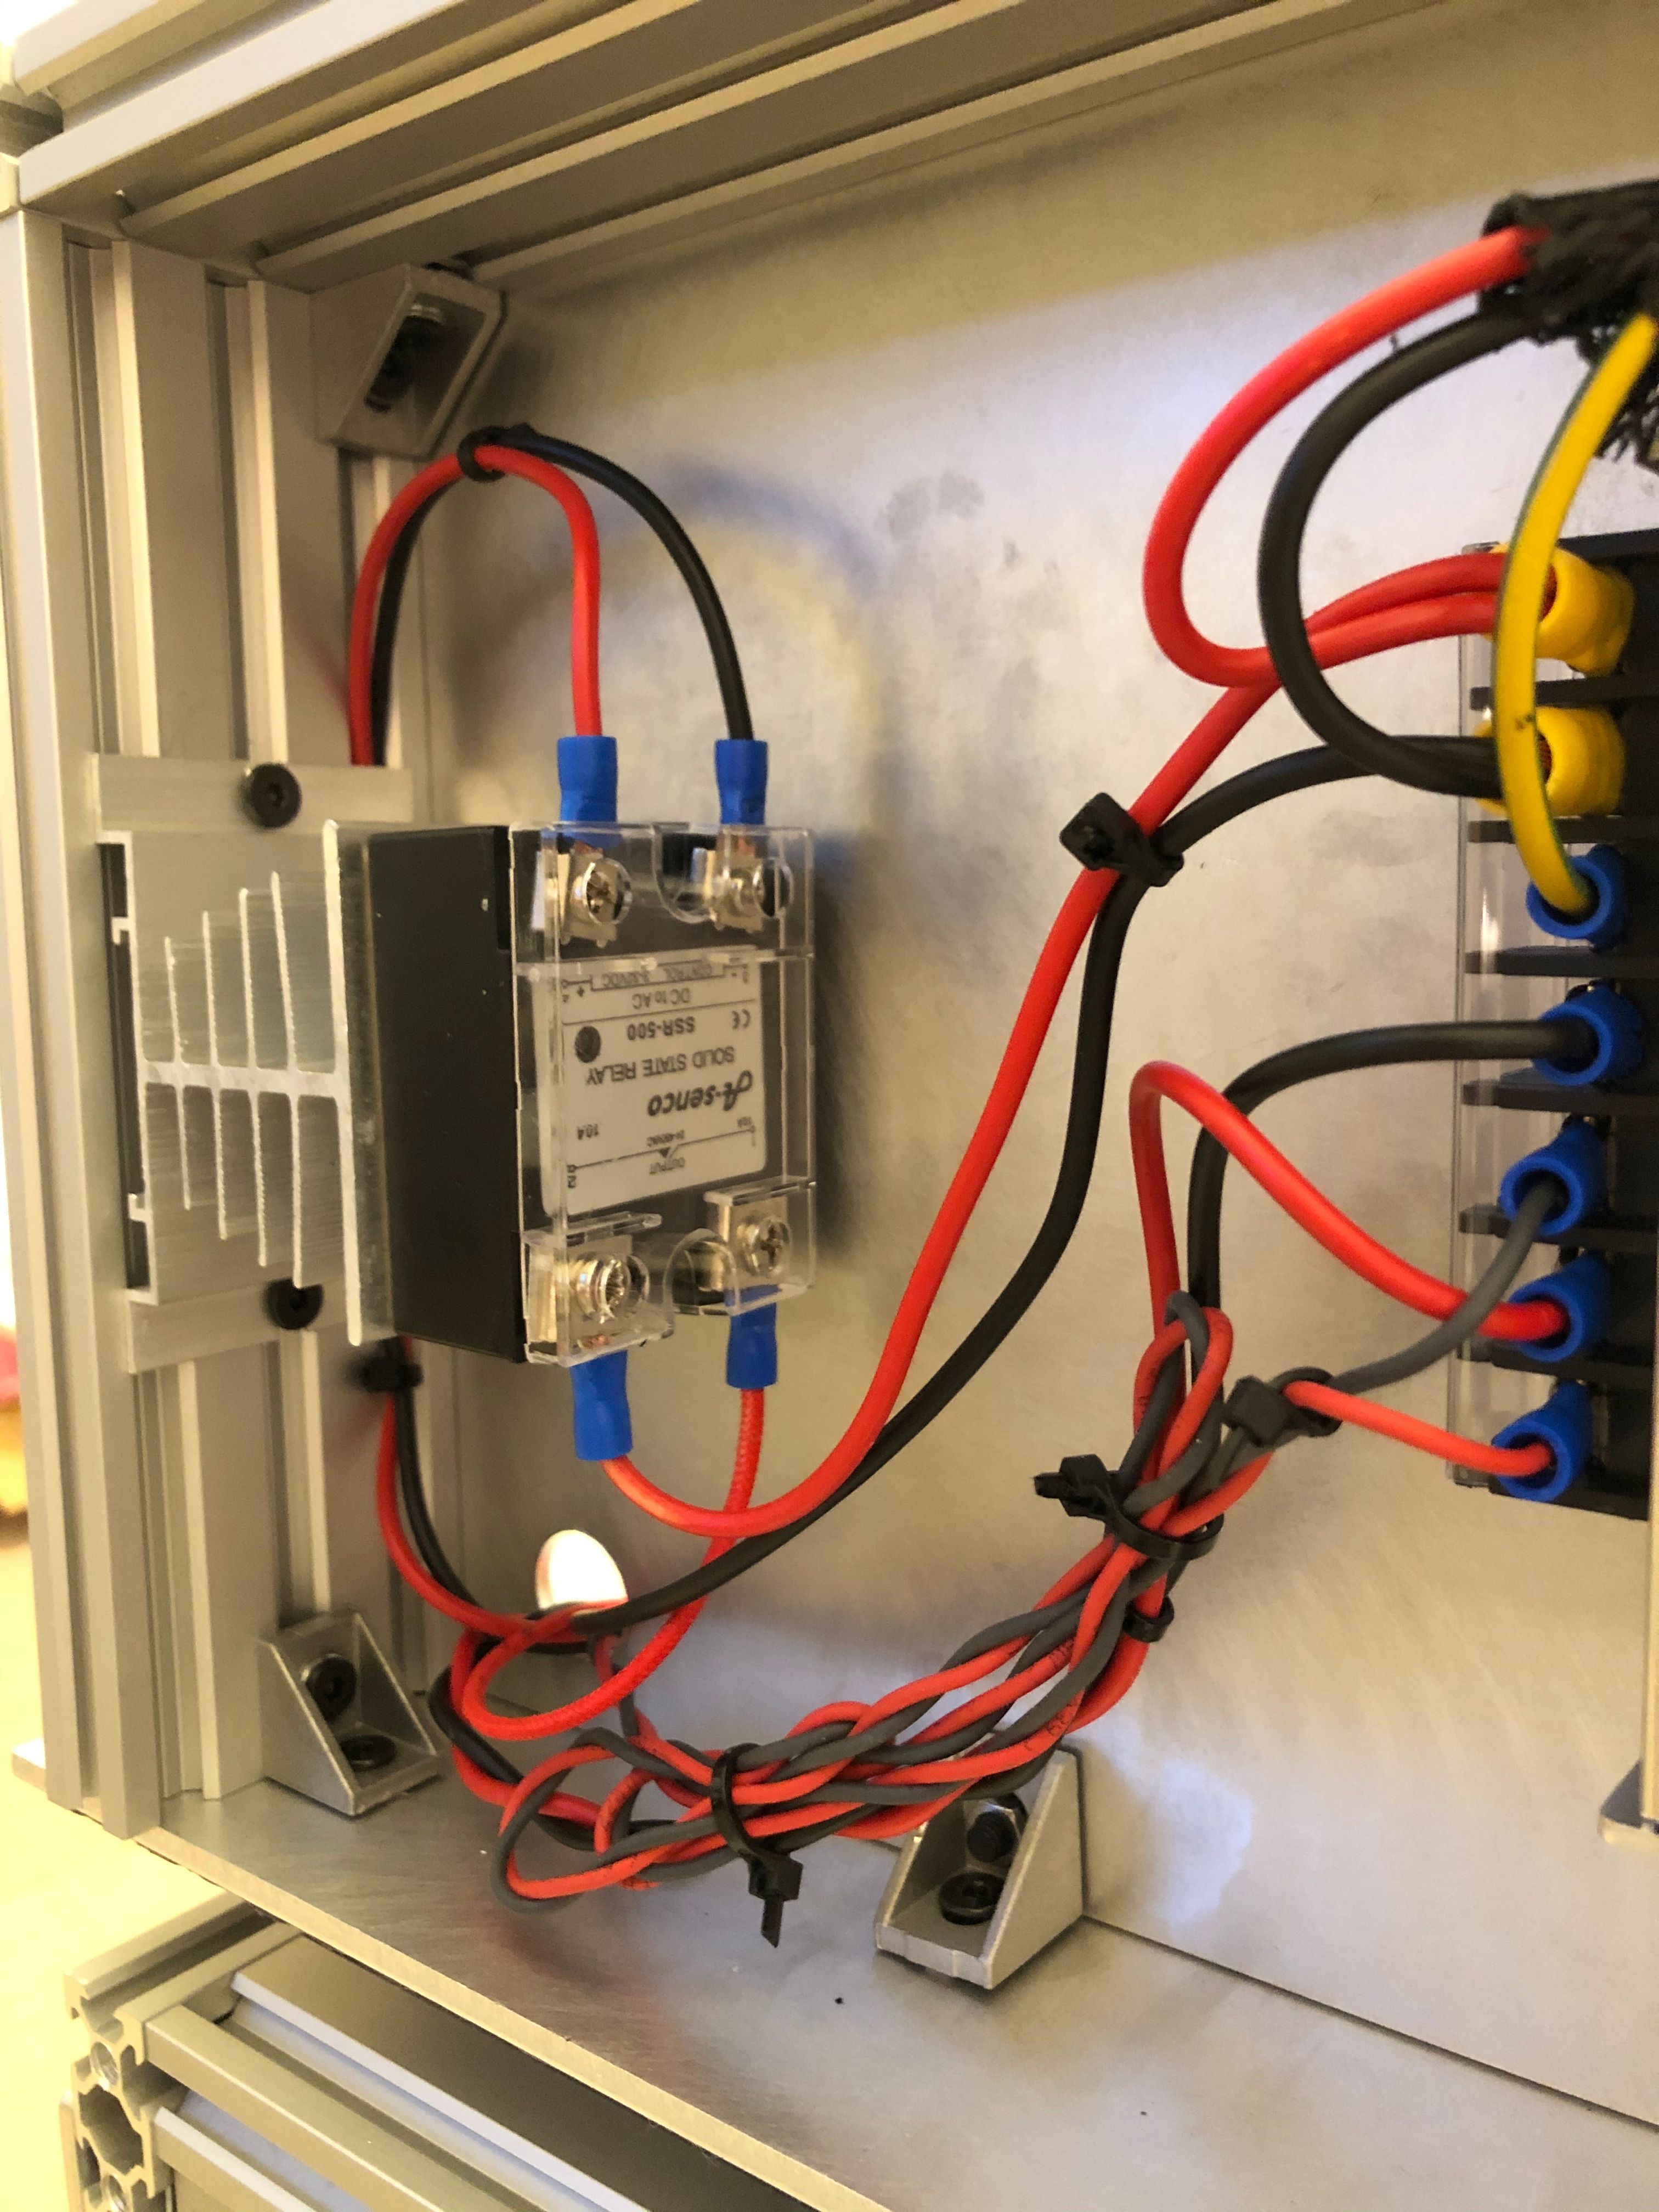
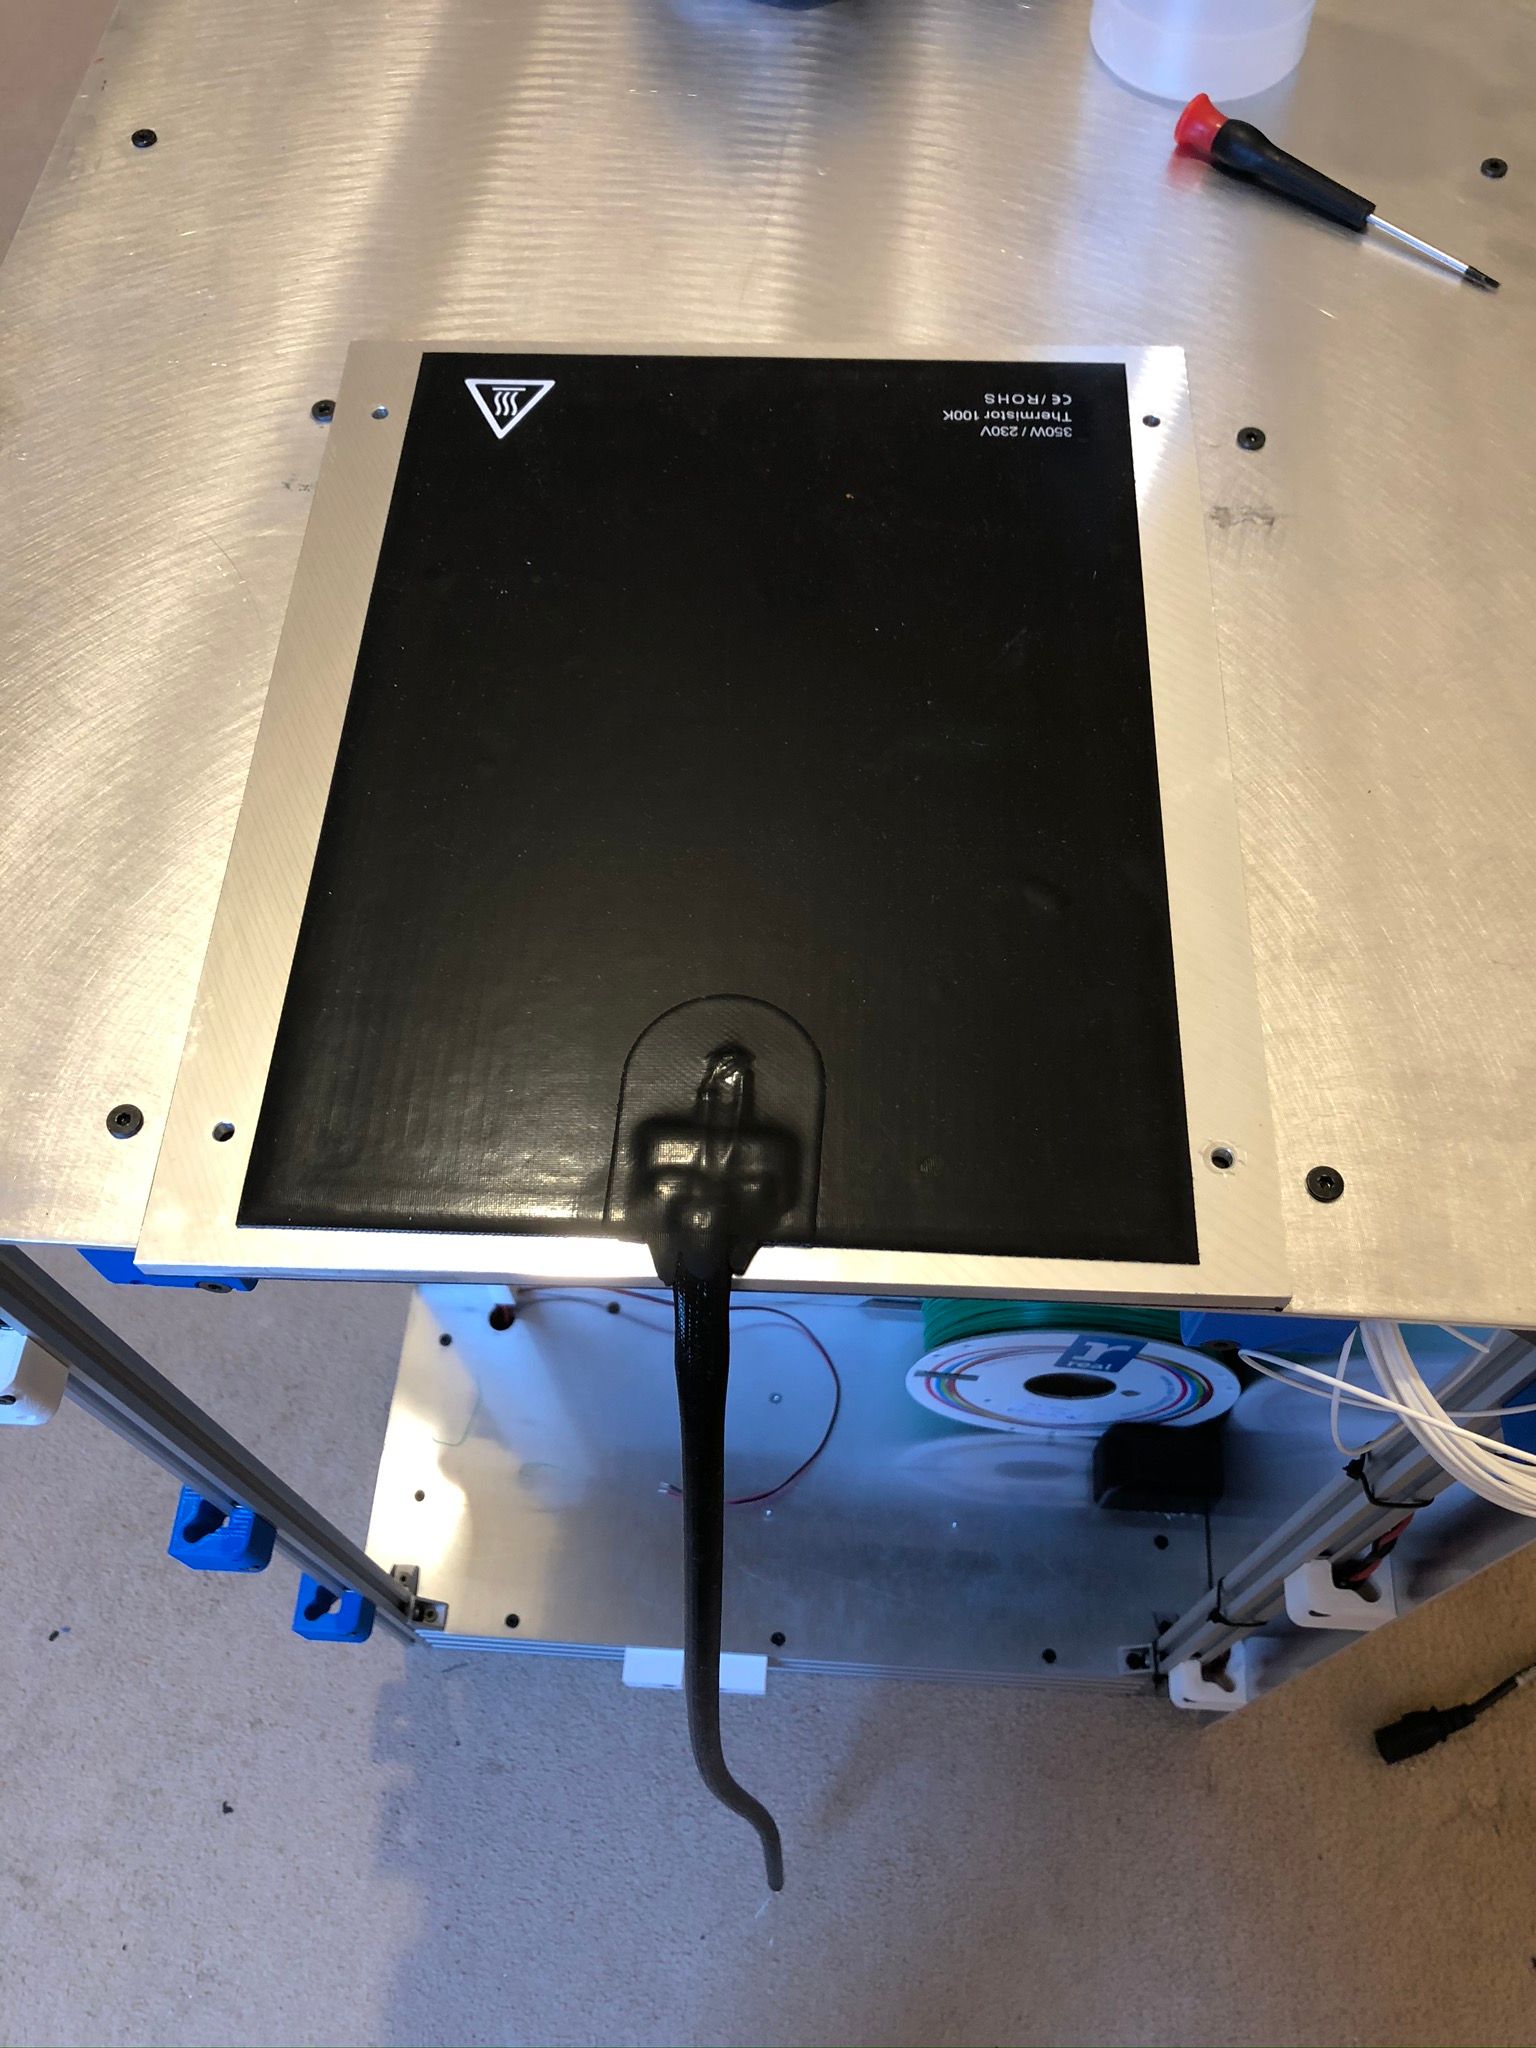
And finally I got a bed heater! I am working now on a way to constrain the cable from the bed and installing TCO for safety. Overall I am very happy with this bed its get to 140C in 15 minutes and its only 350W on 8mm mic6 plate.
 077-671d0cf8-066a-46e8-9c76-5b216a9b77ed-resized.jpeg)

-
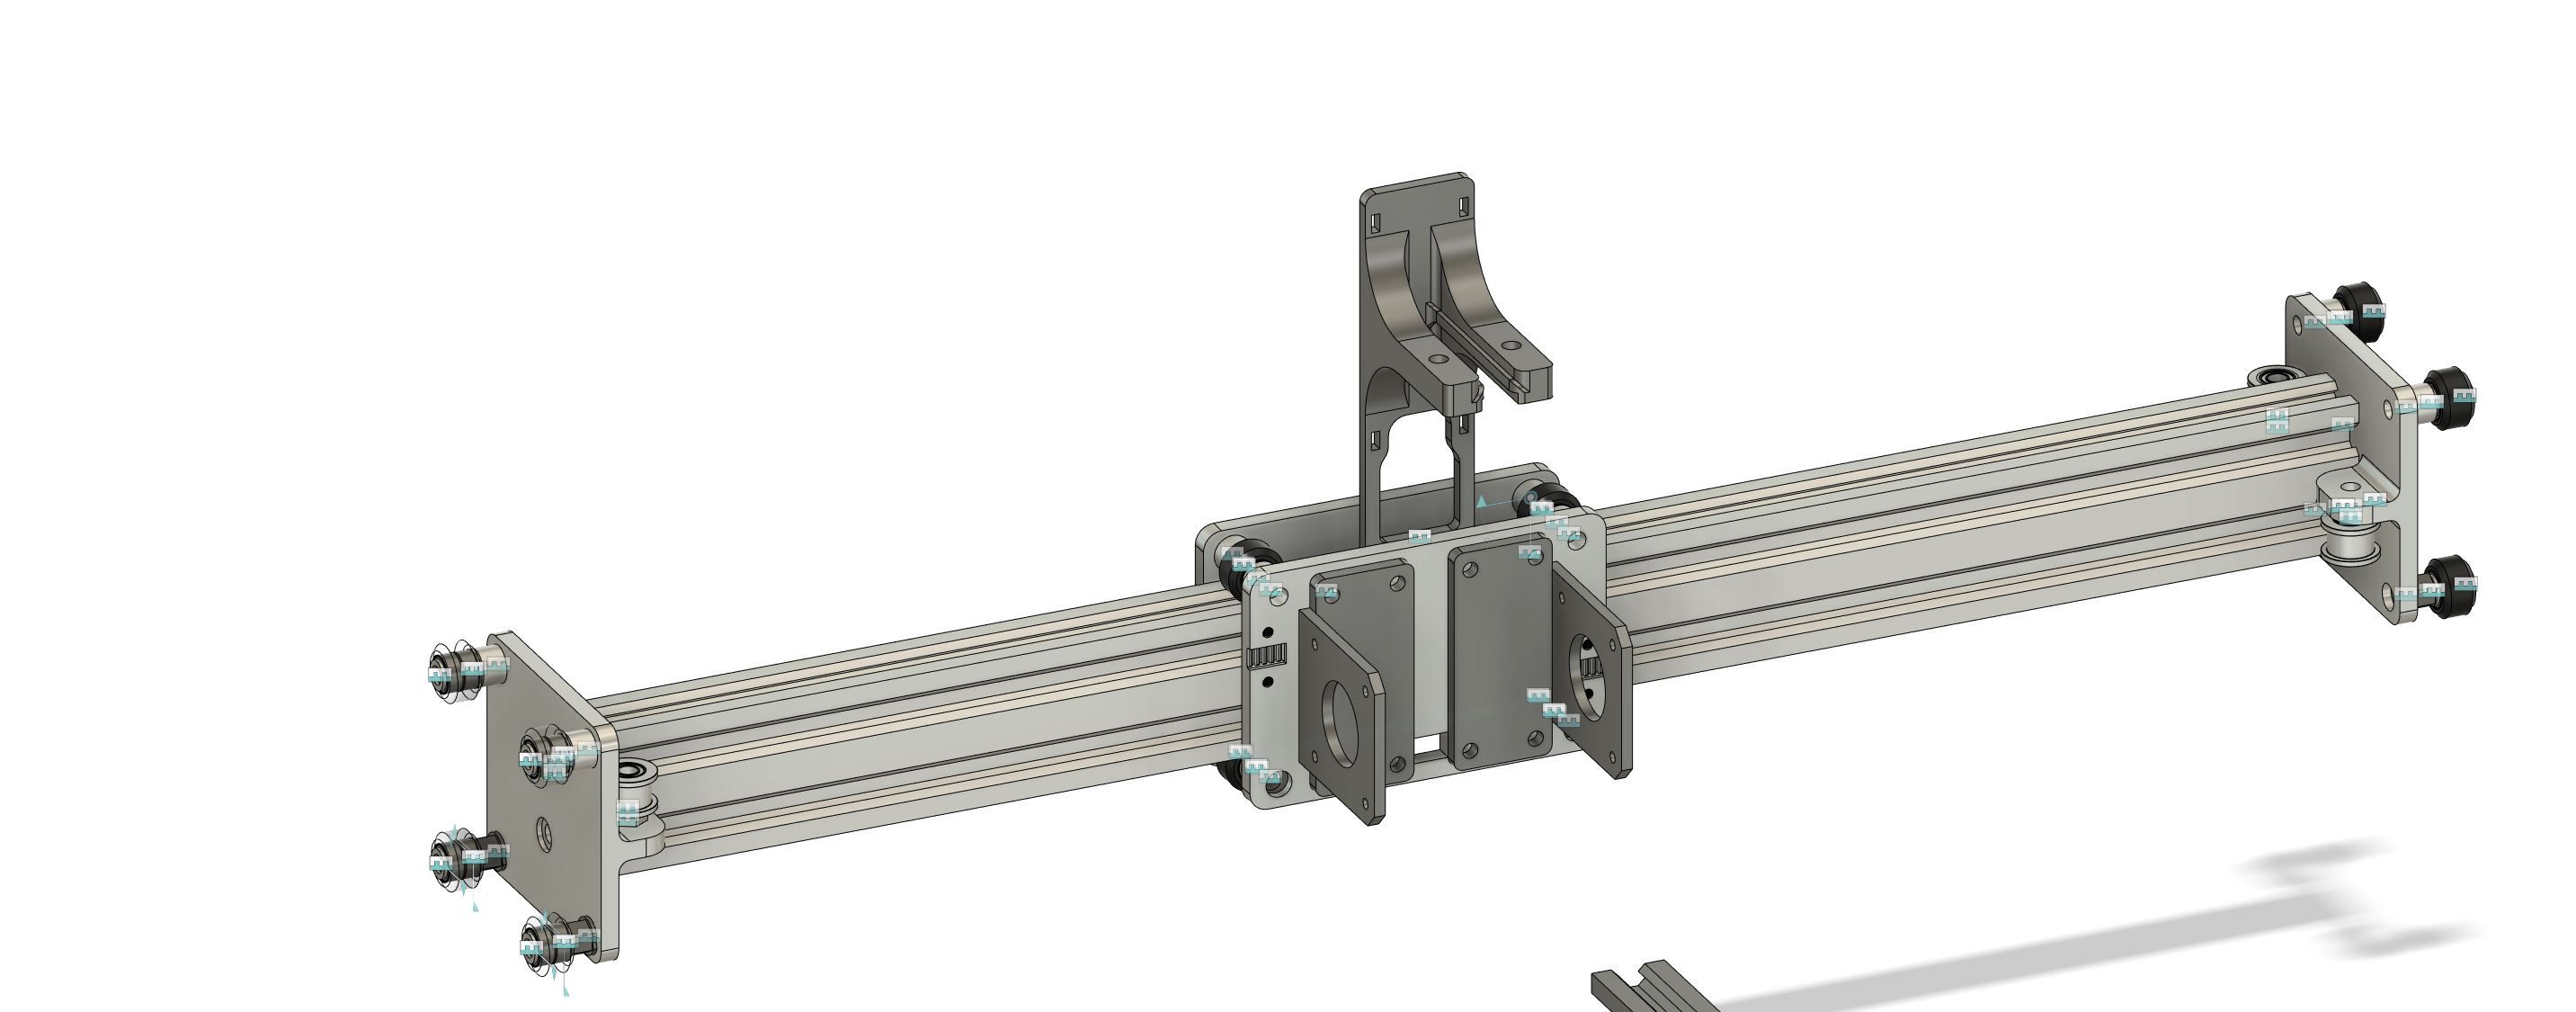
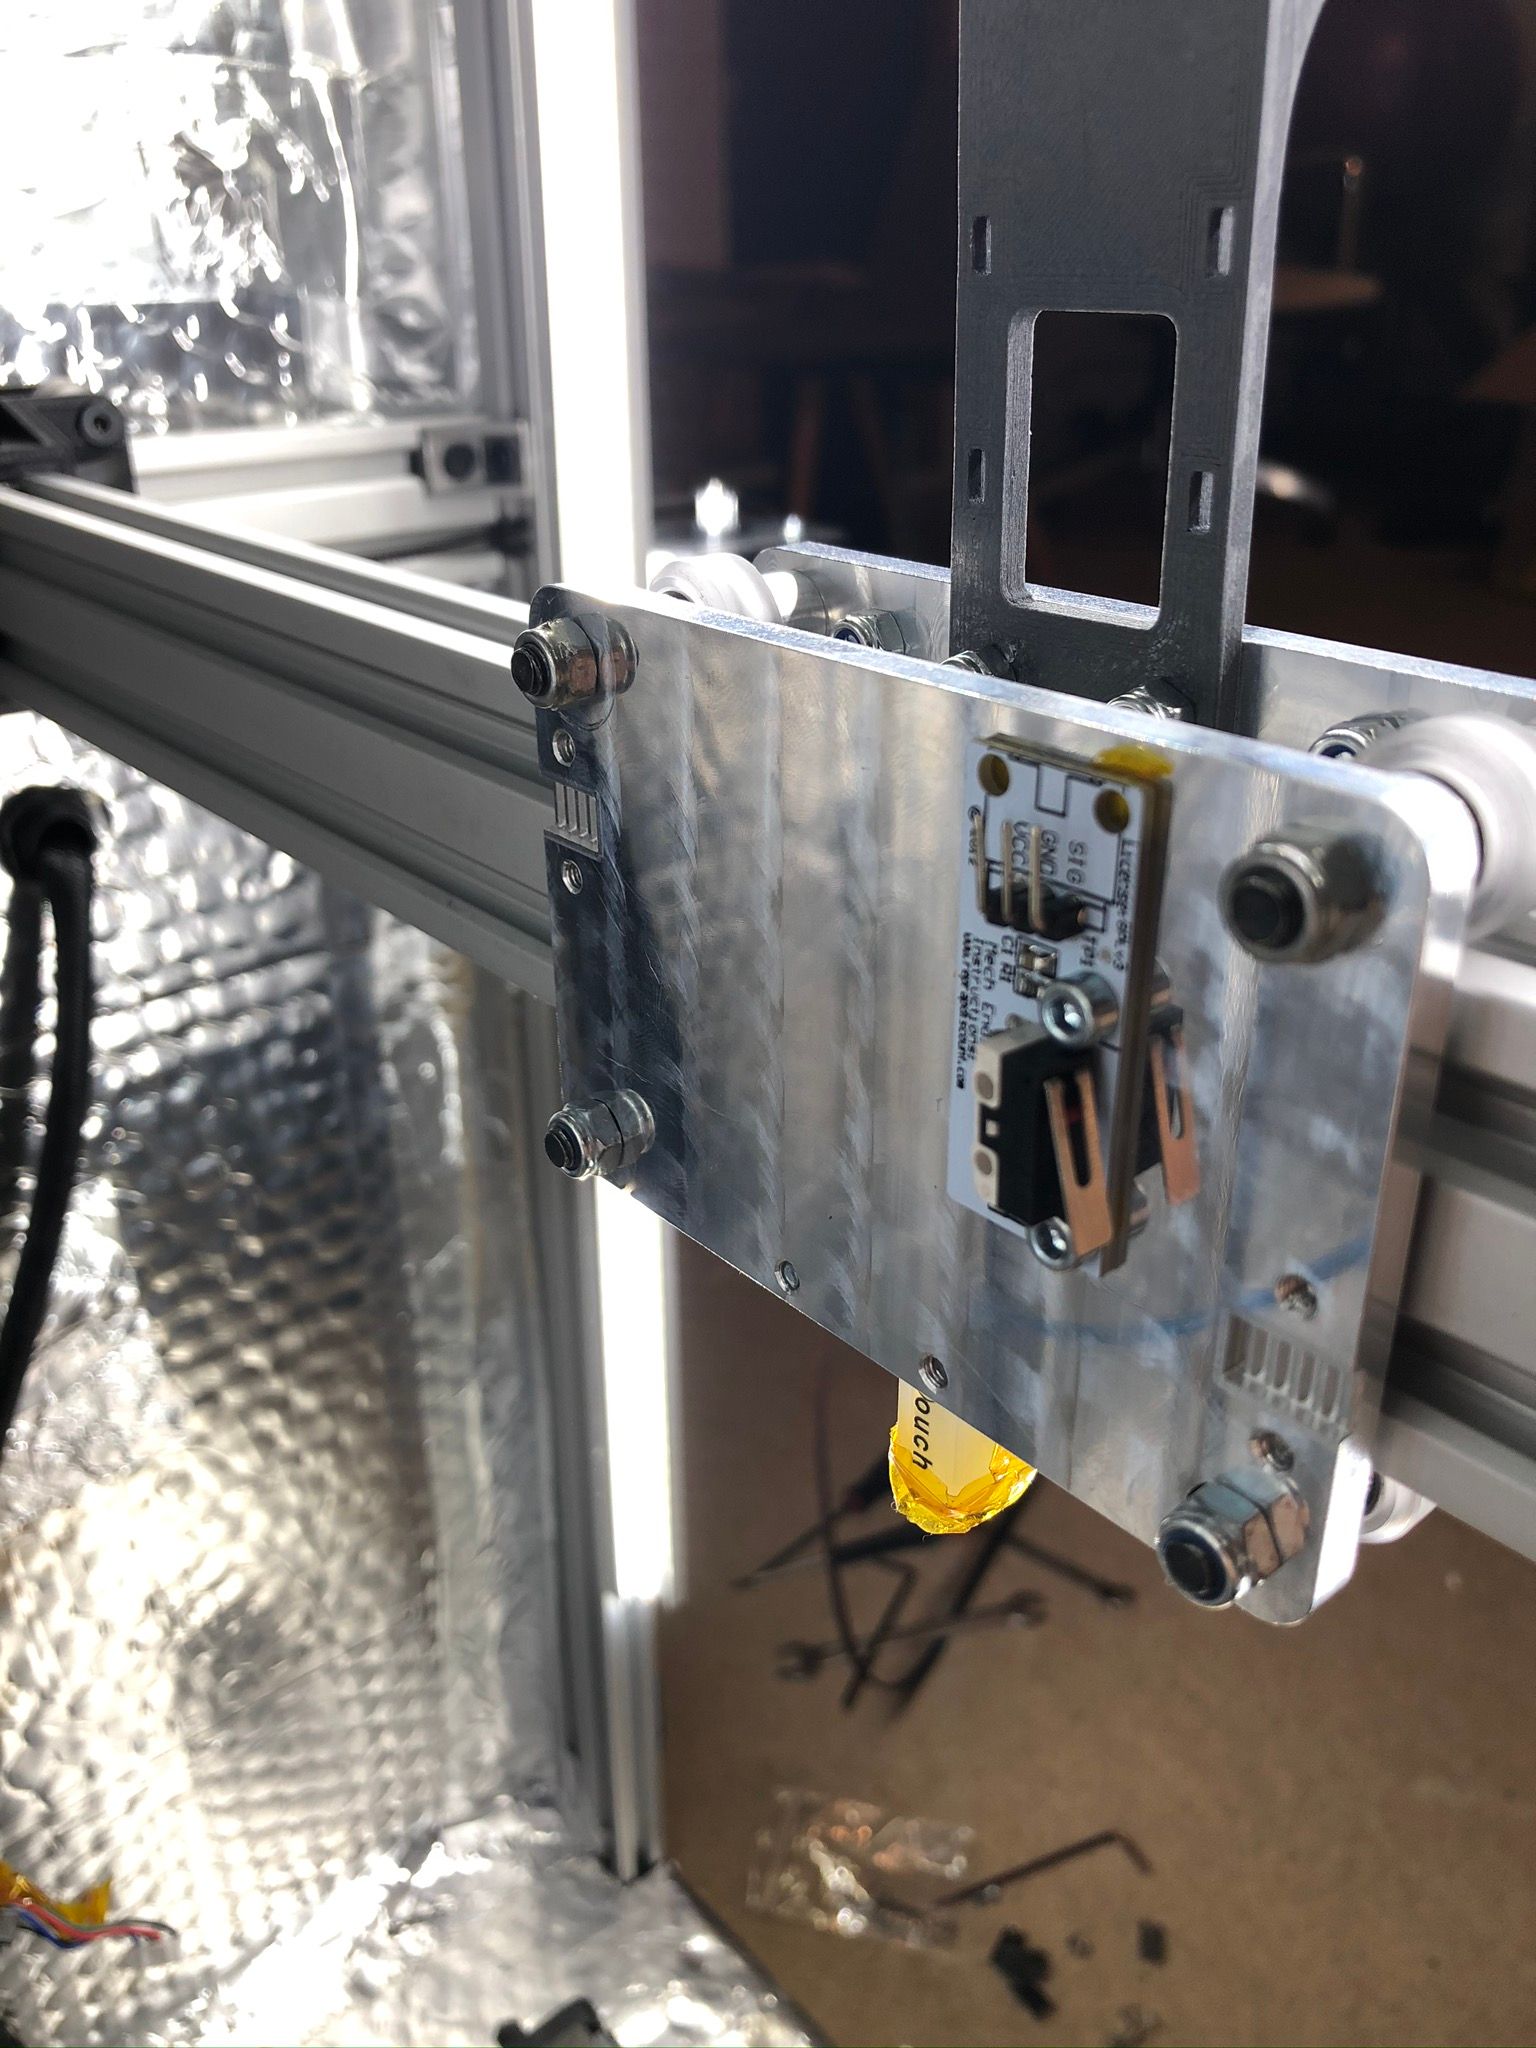
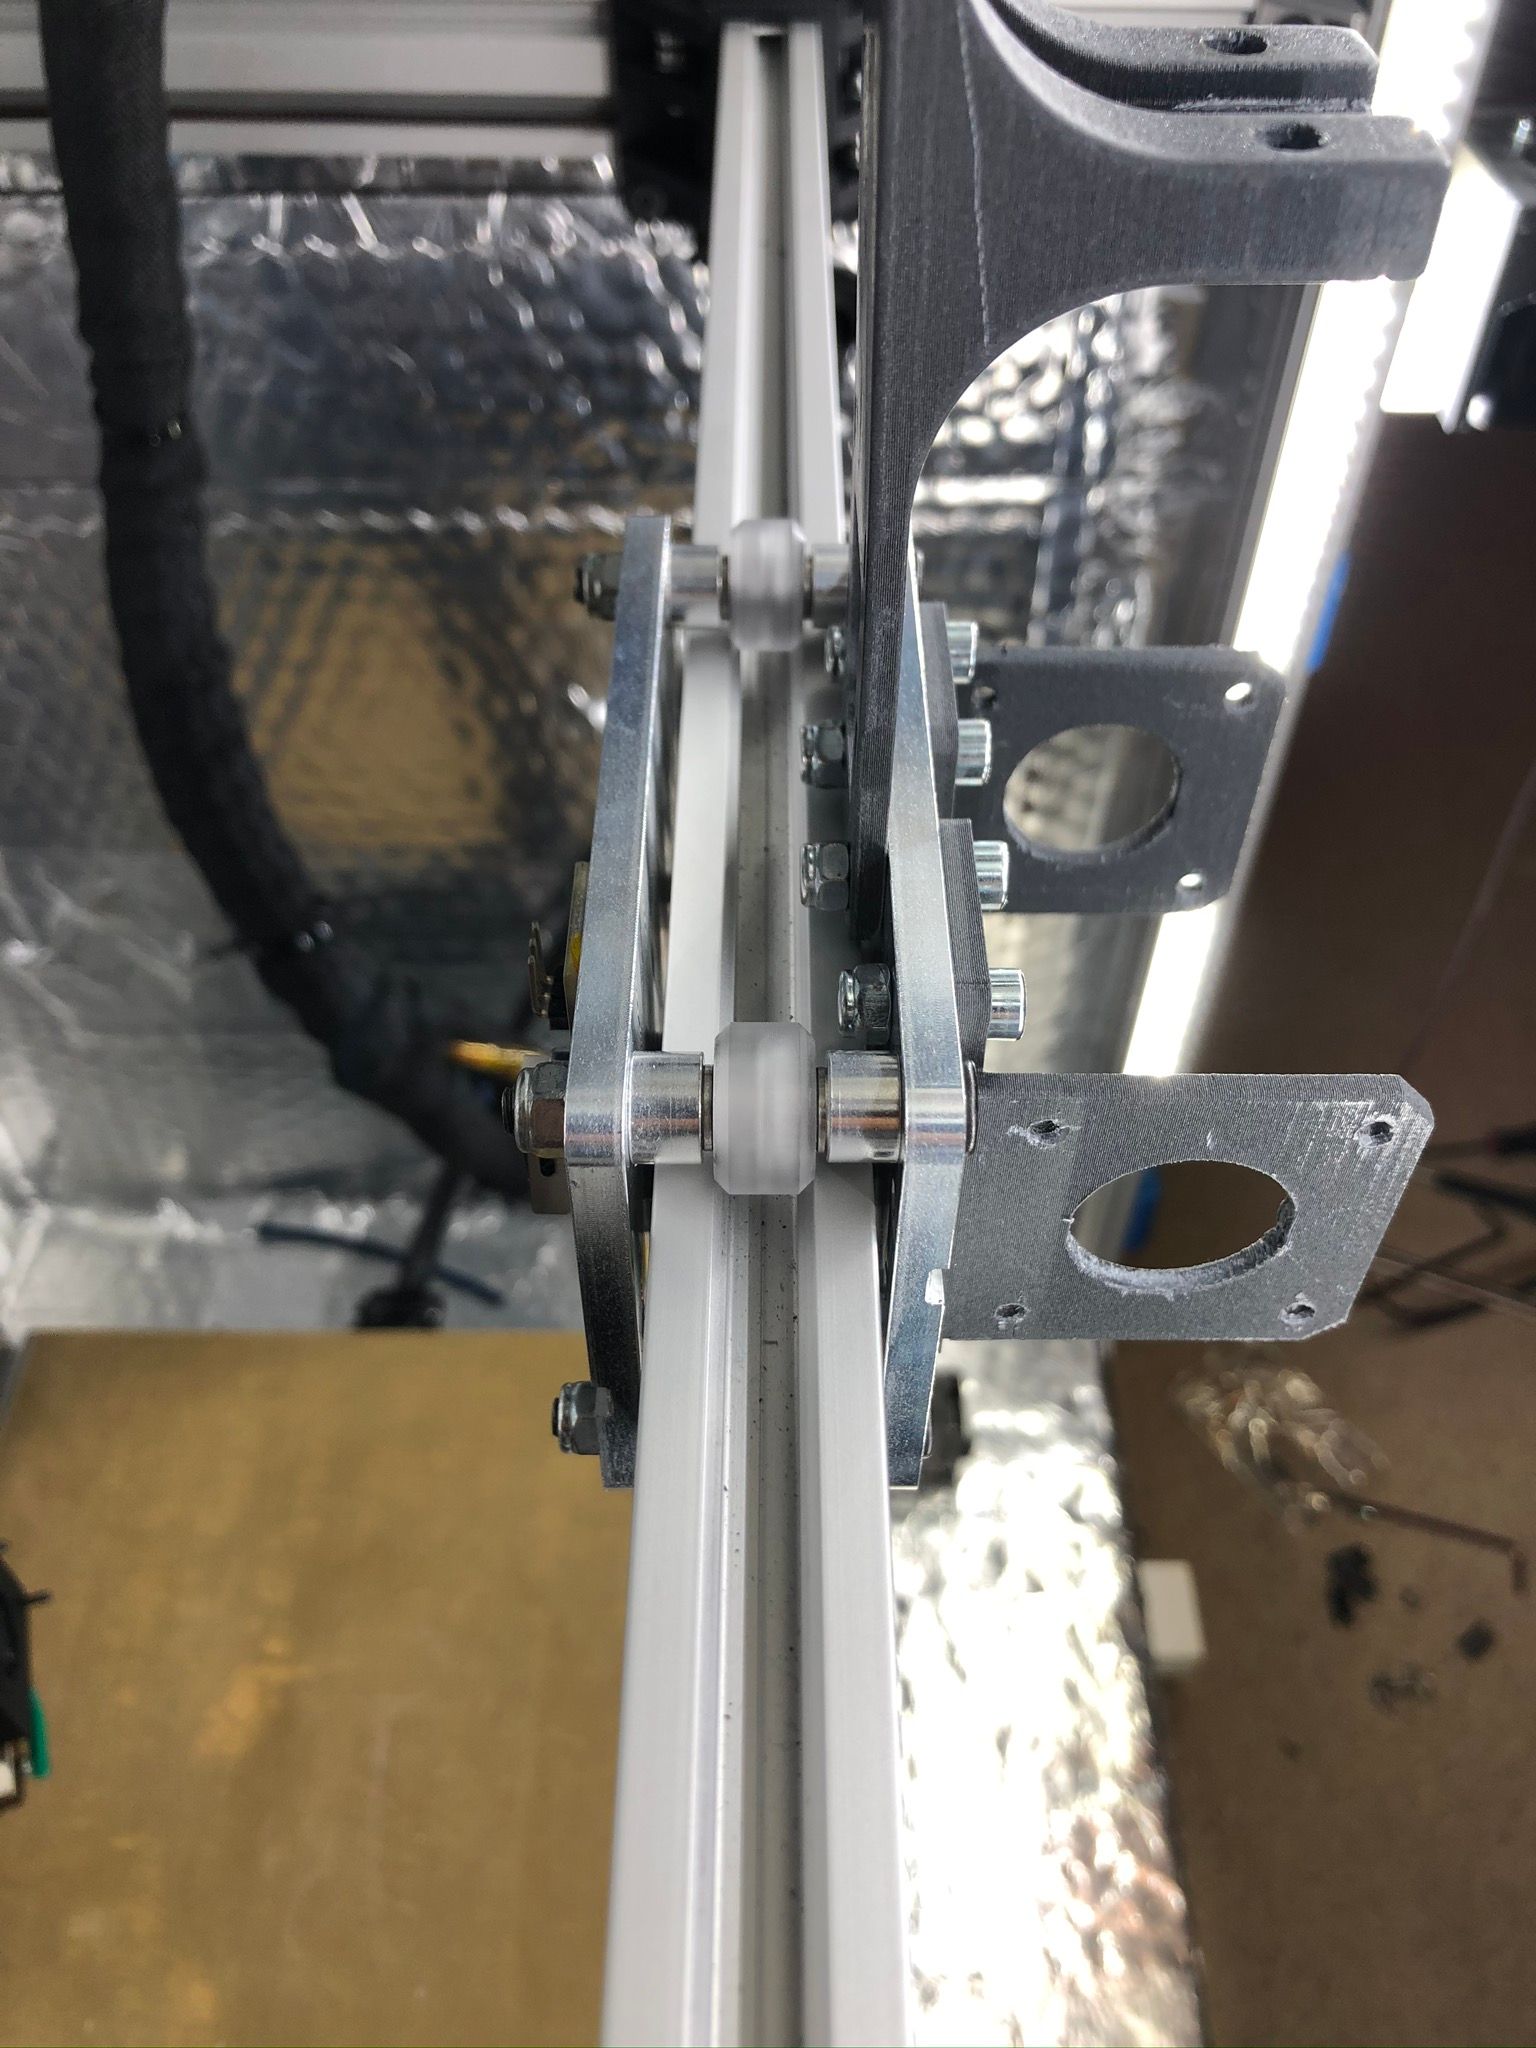
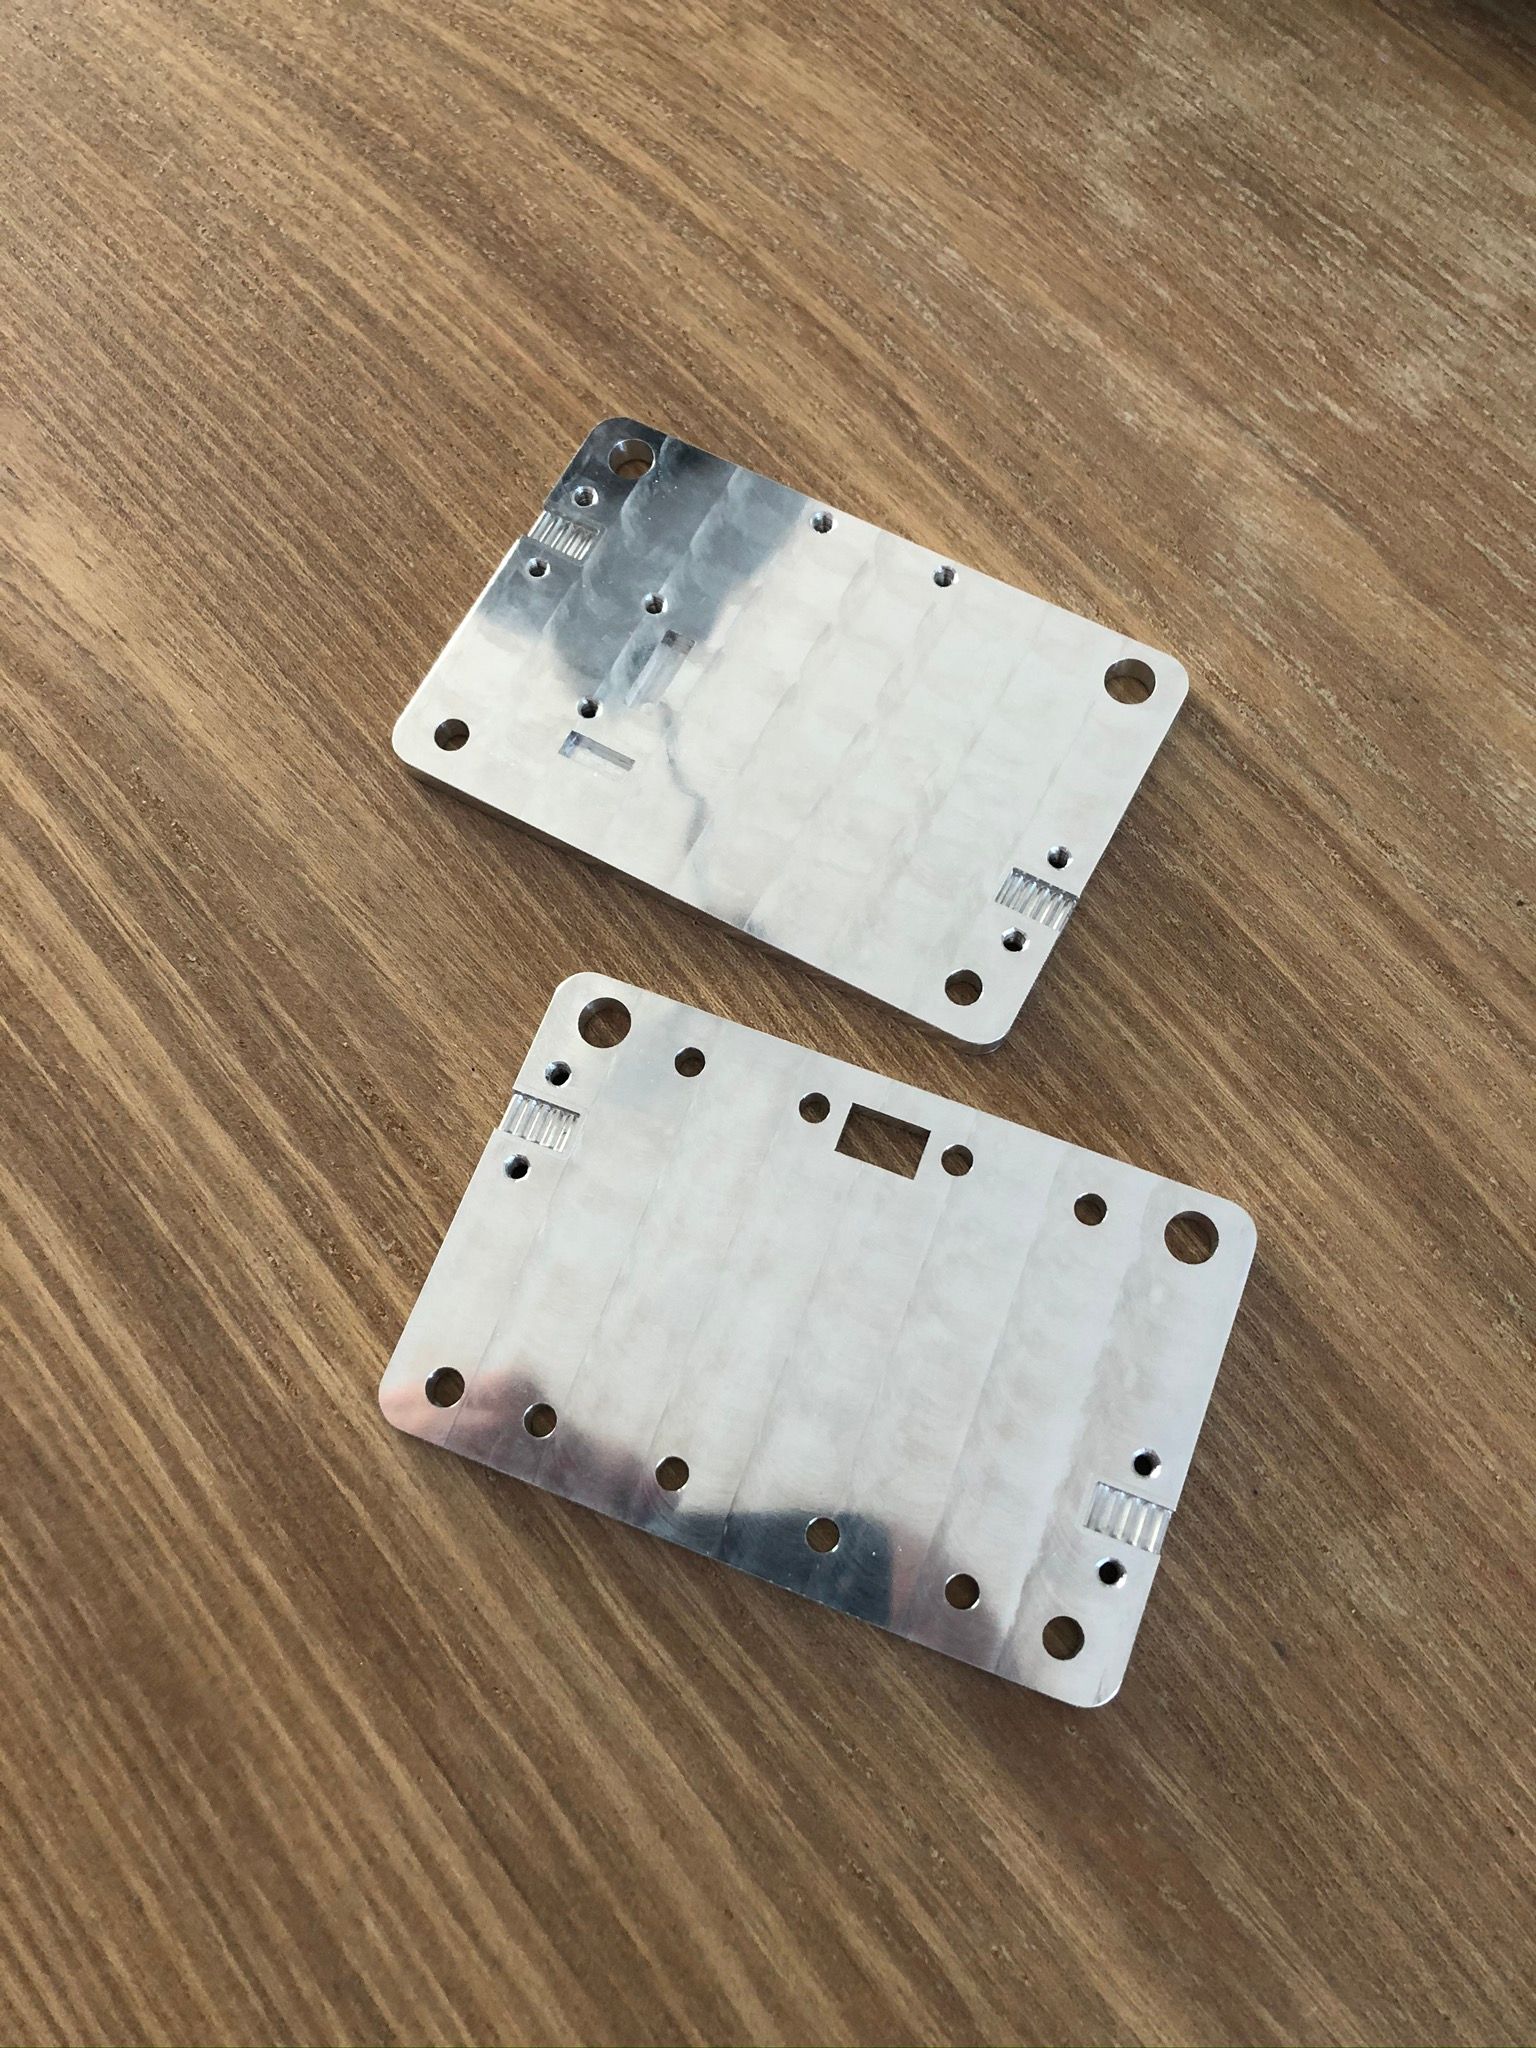
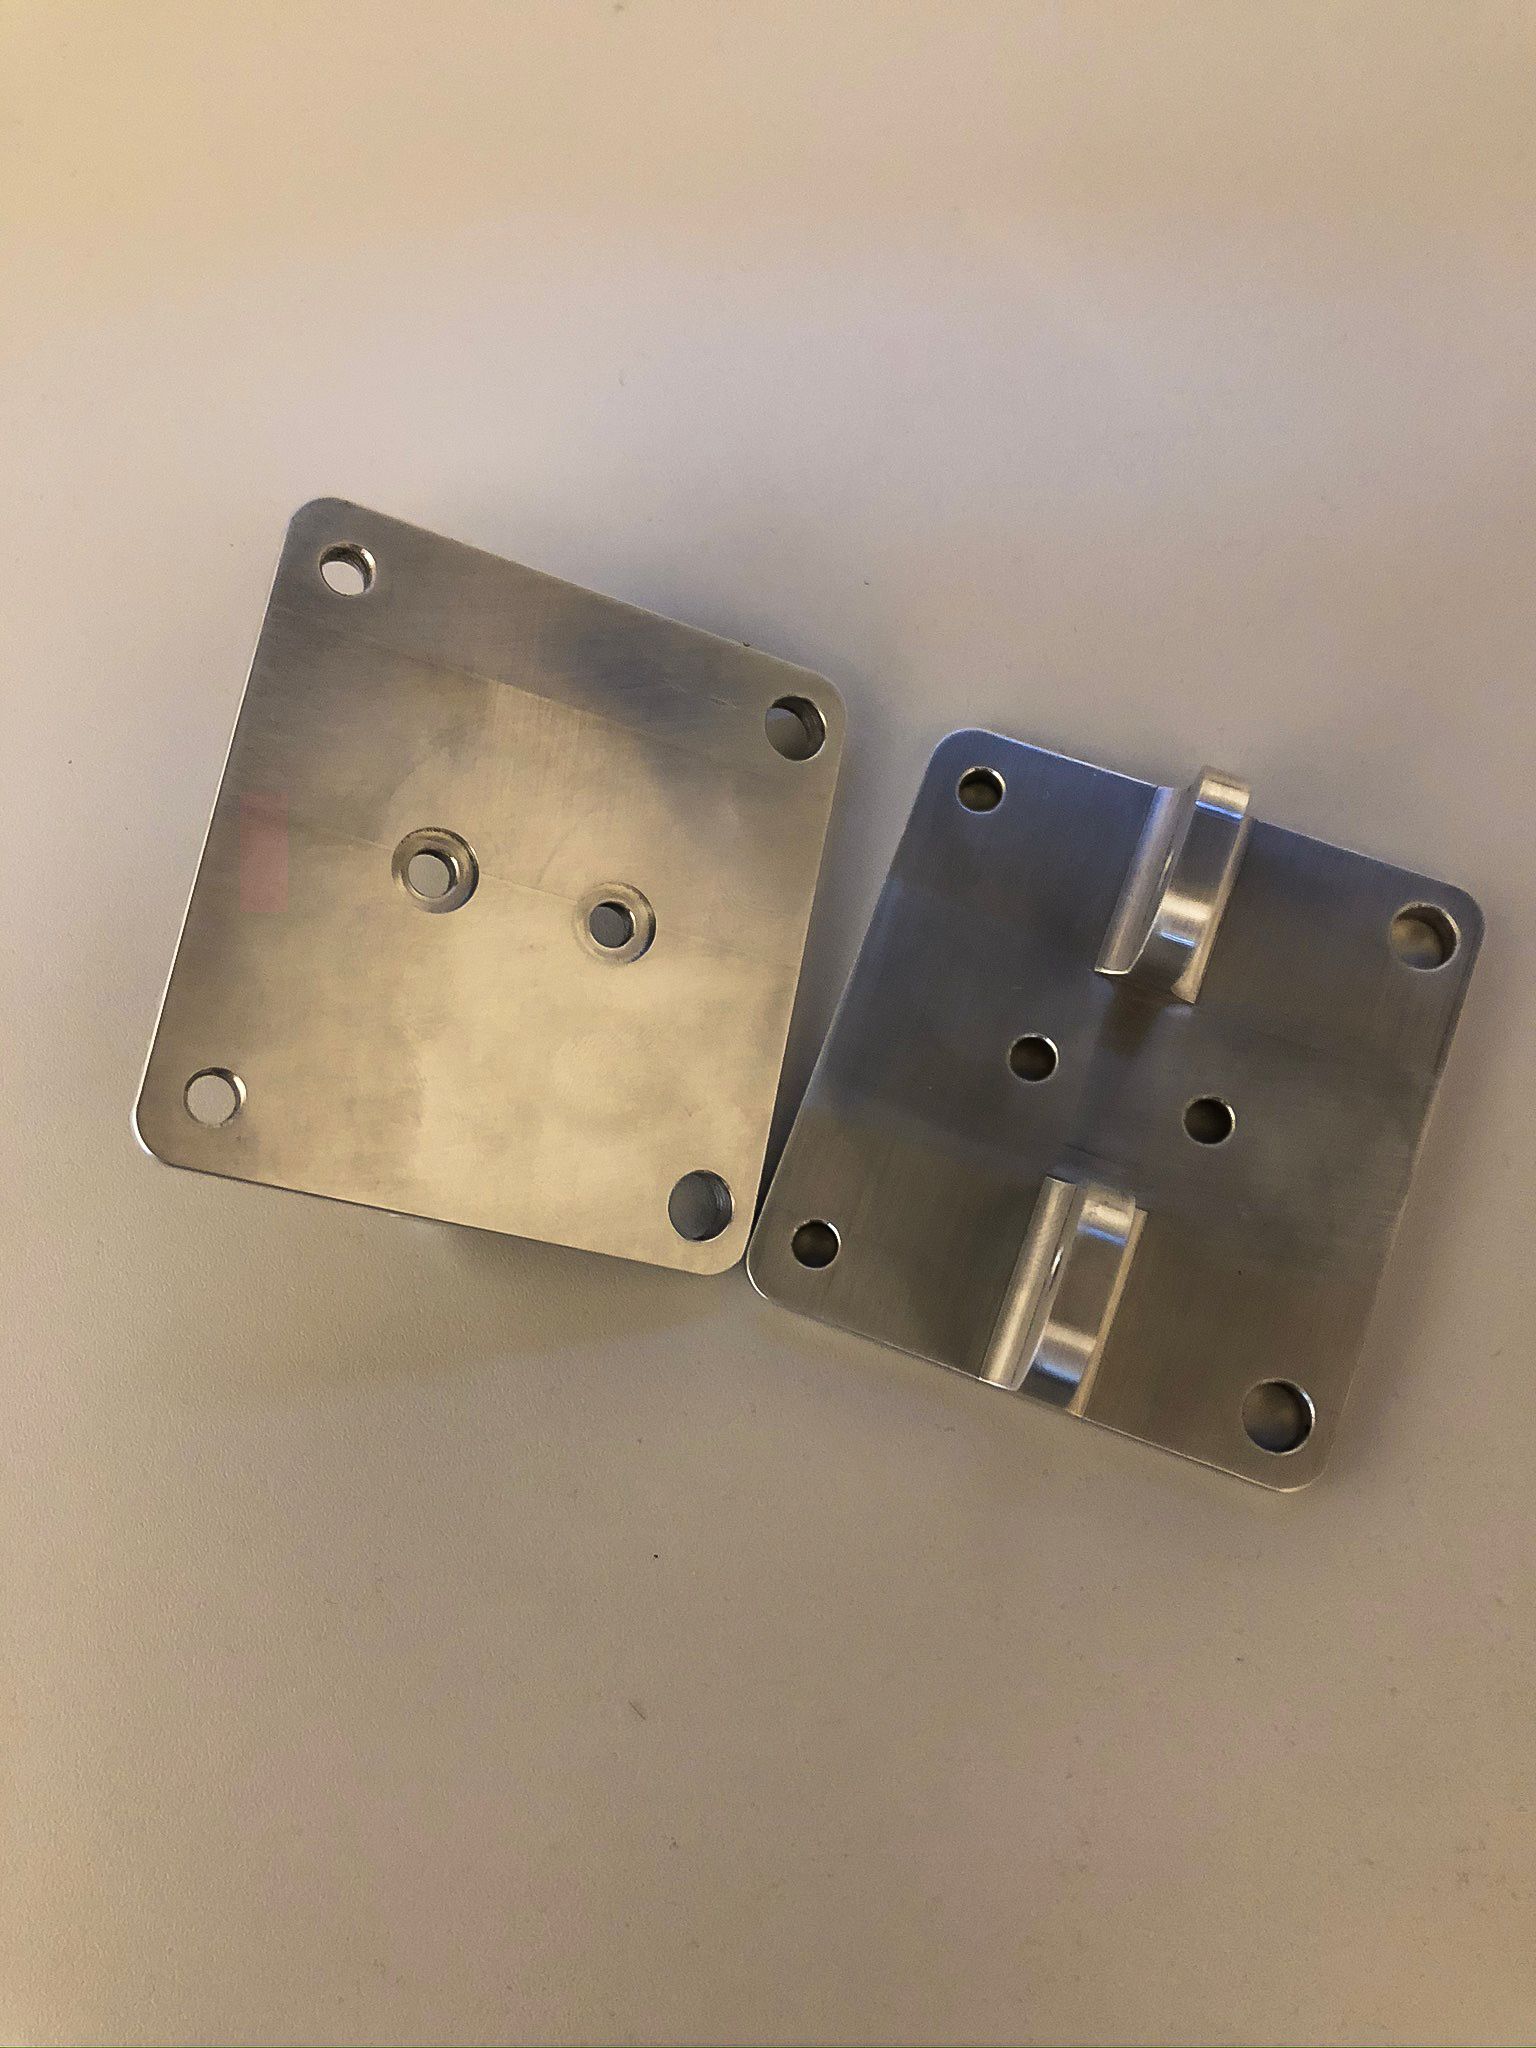
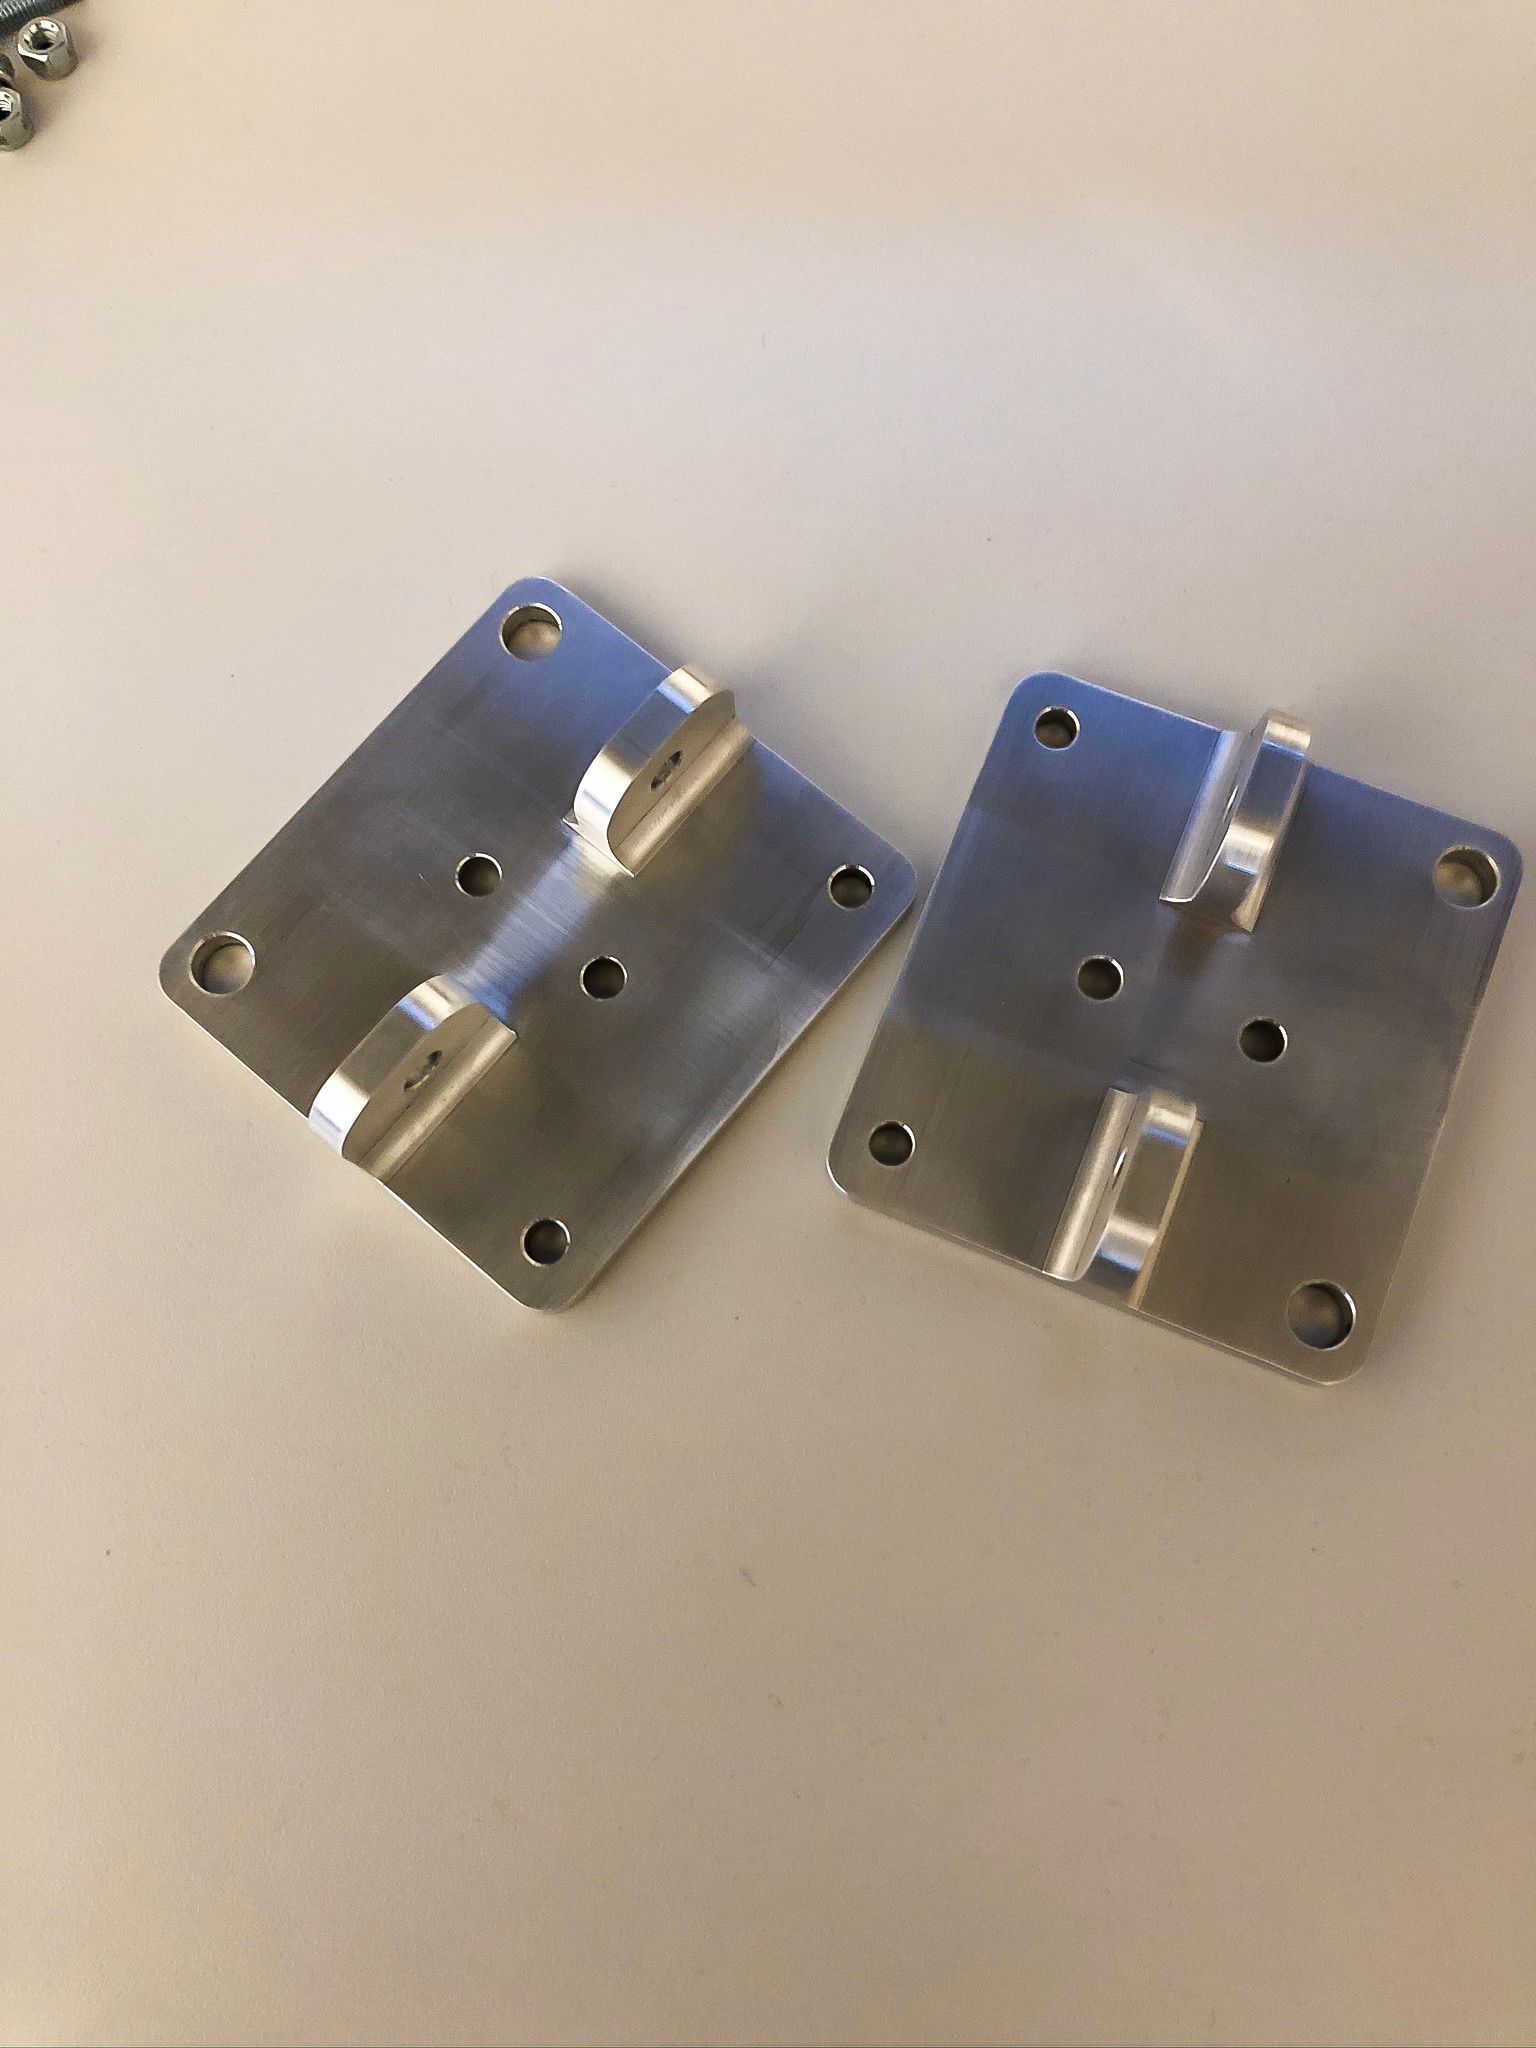
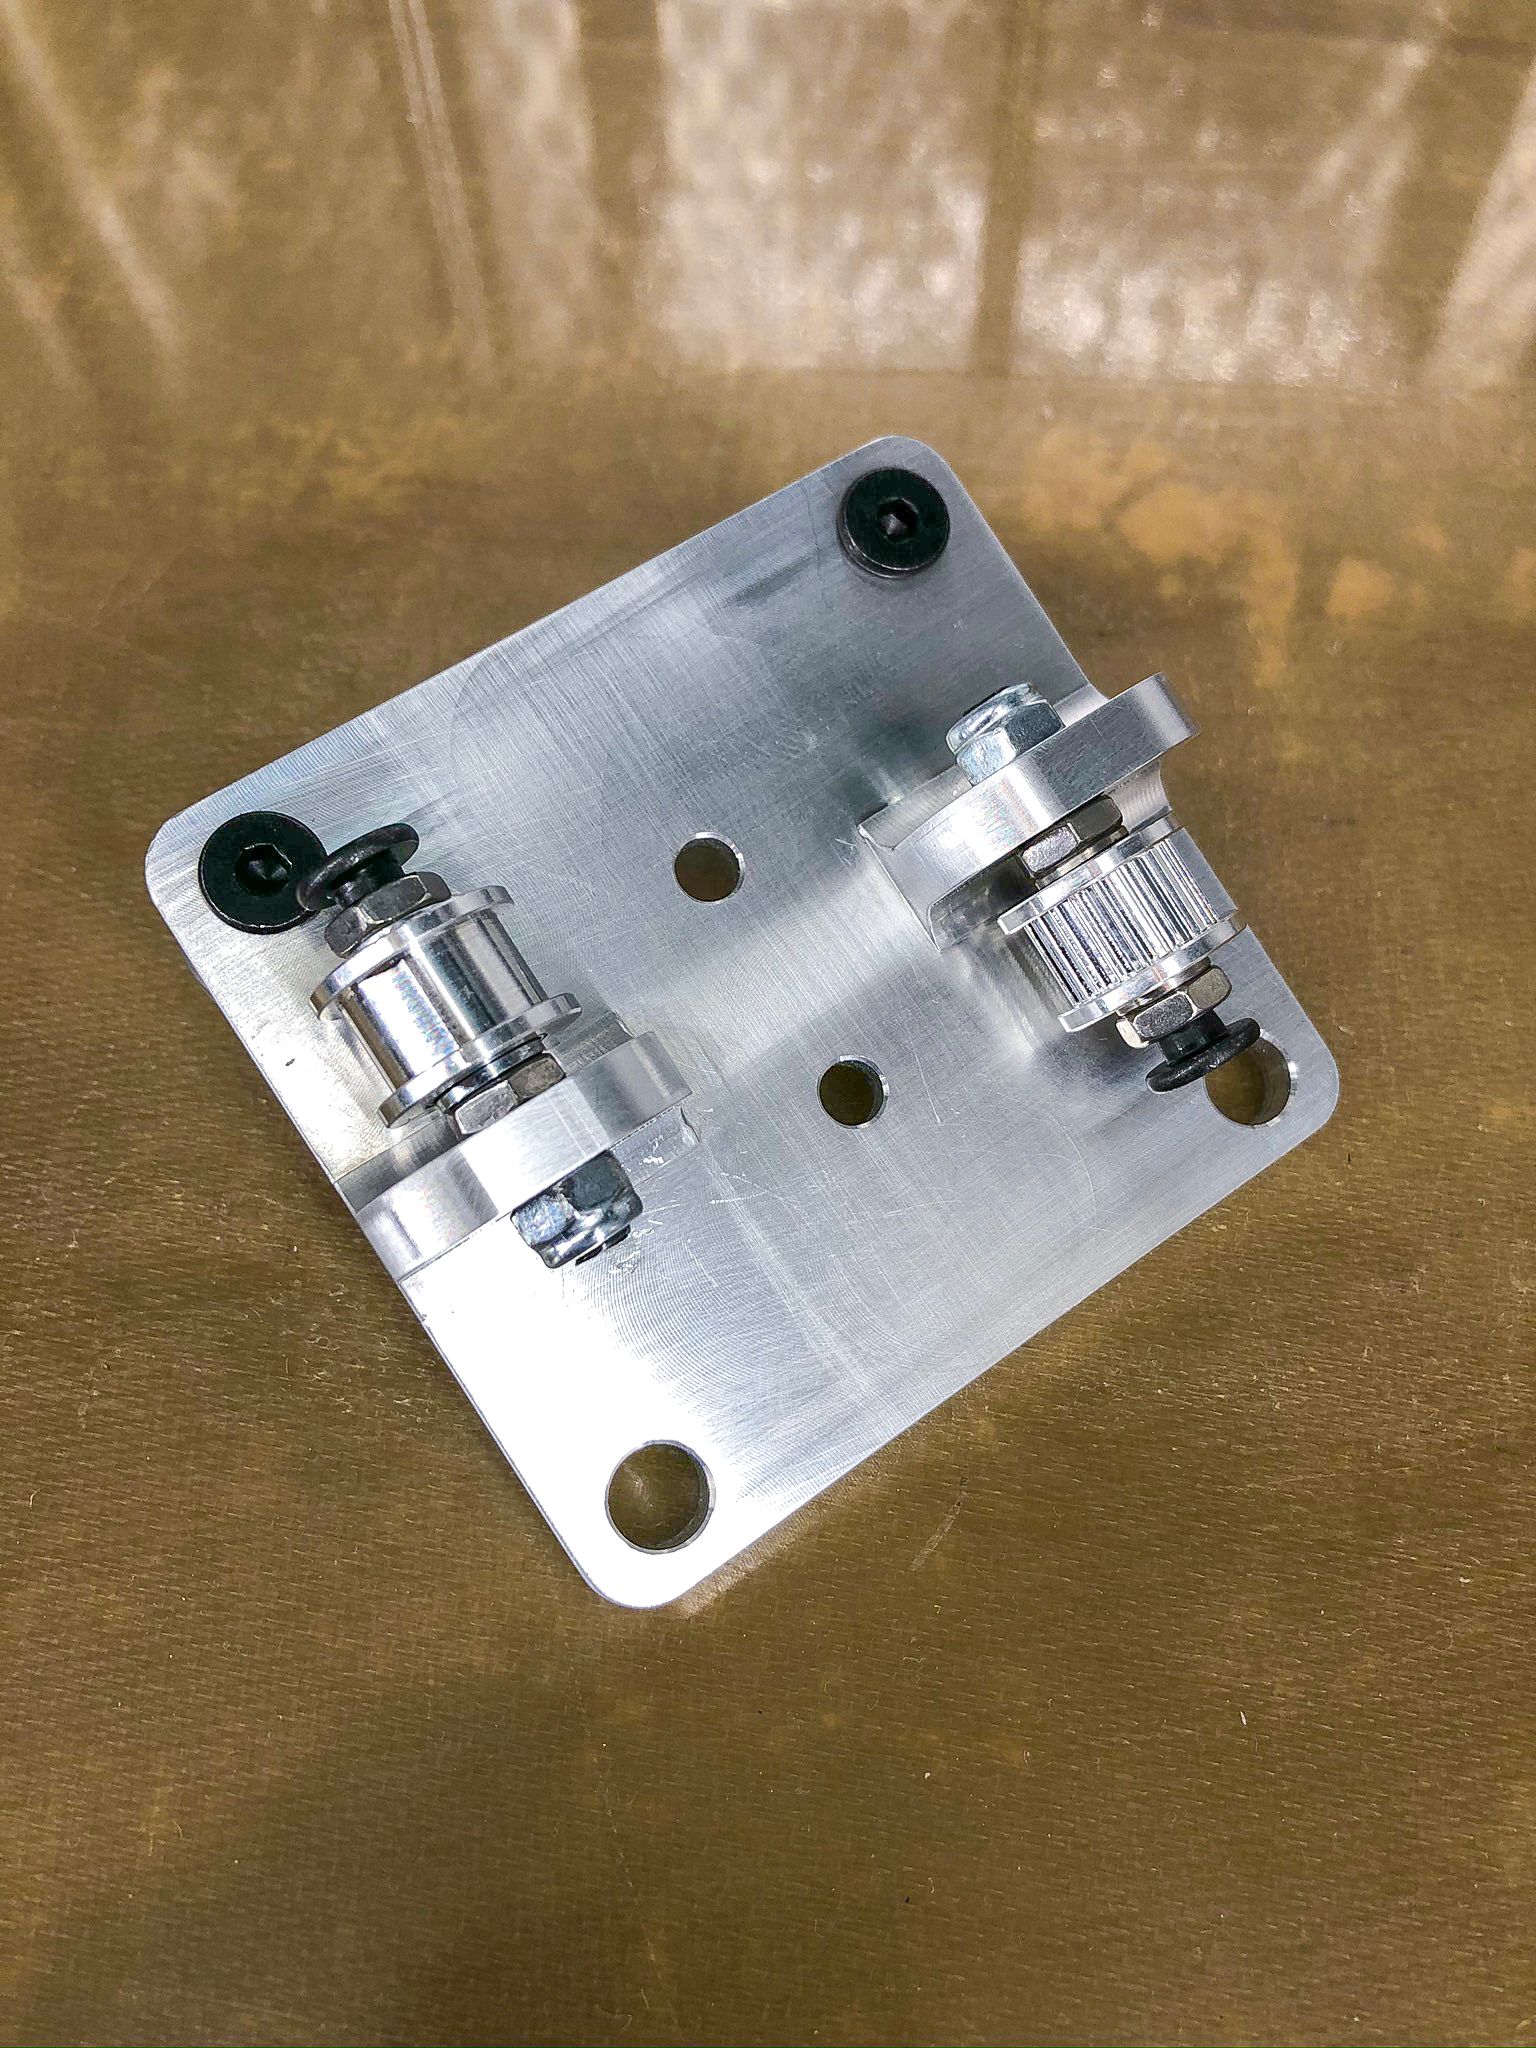
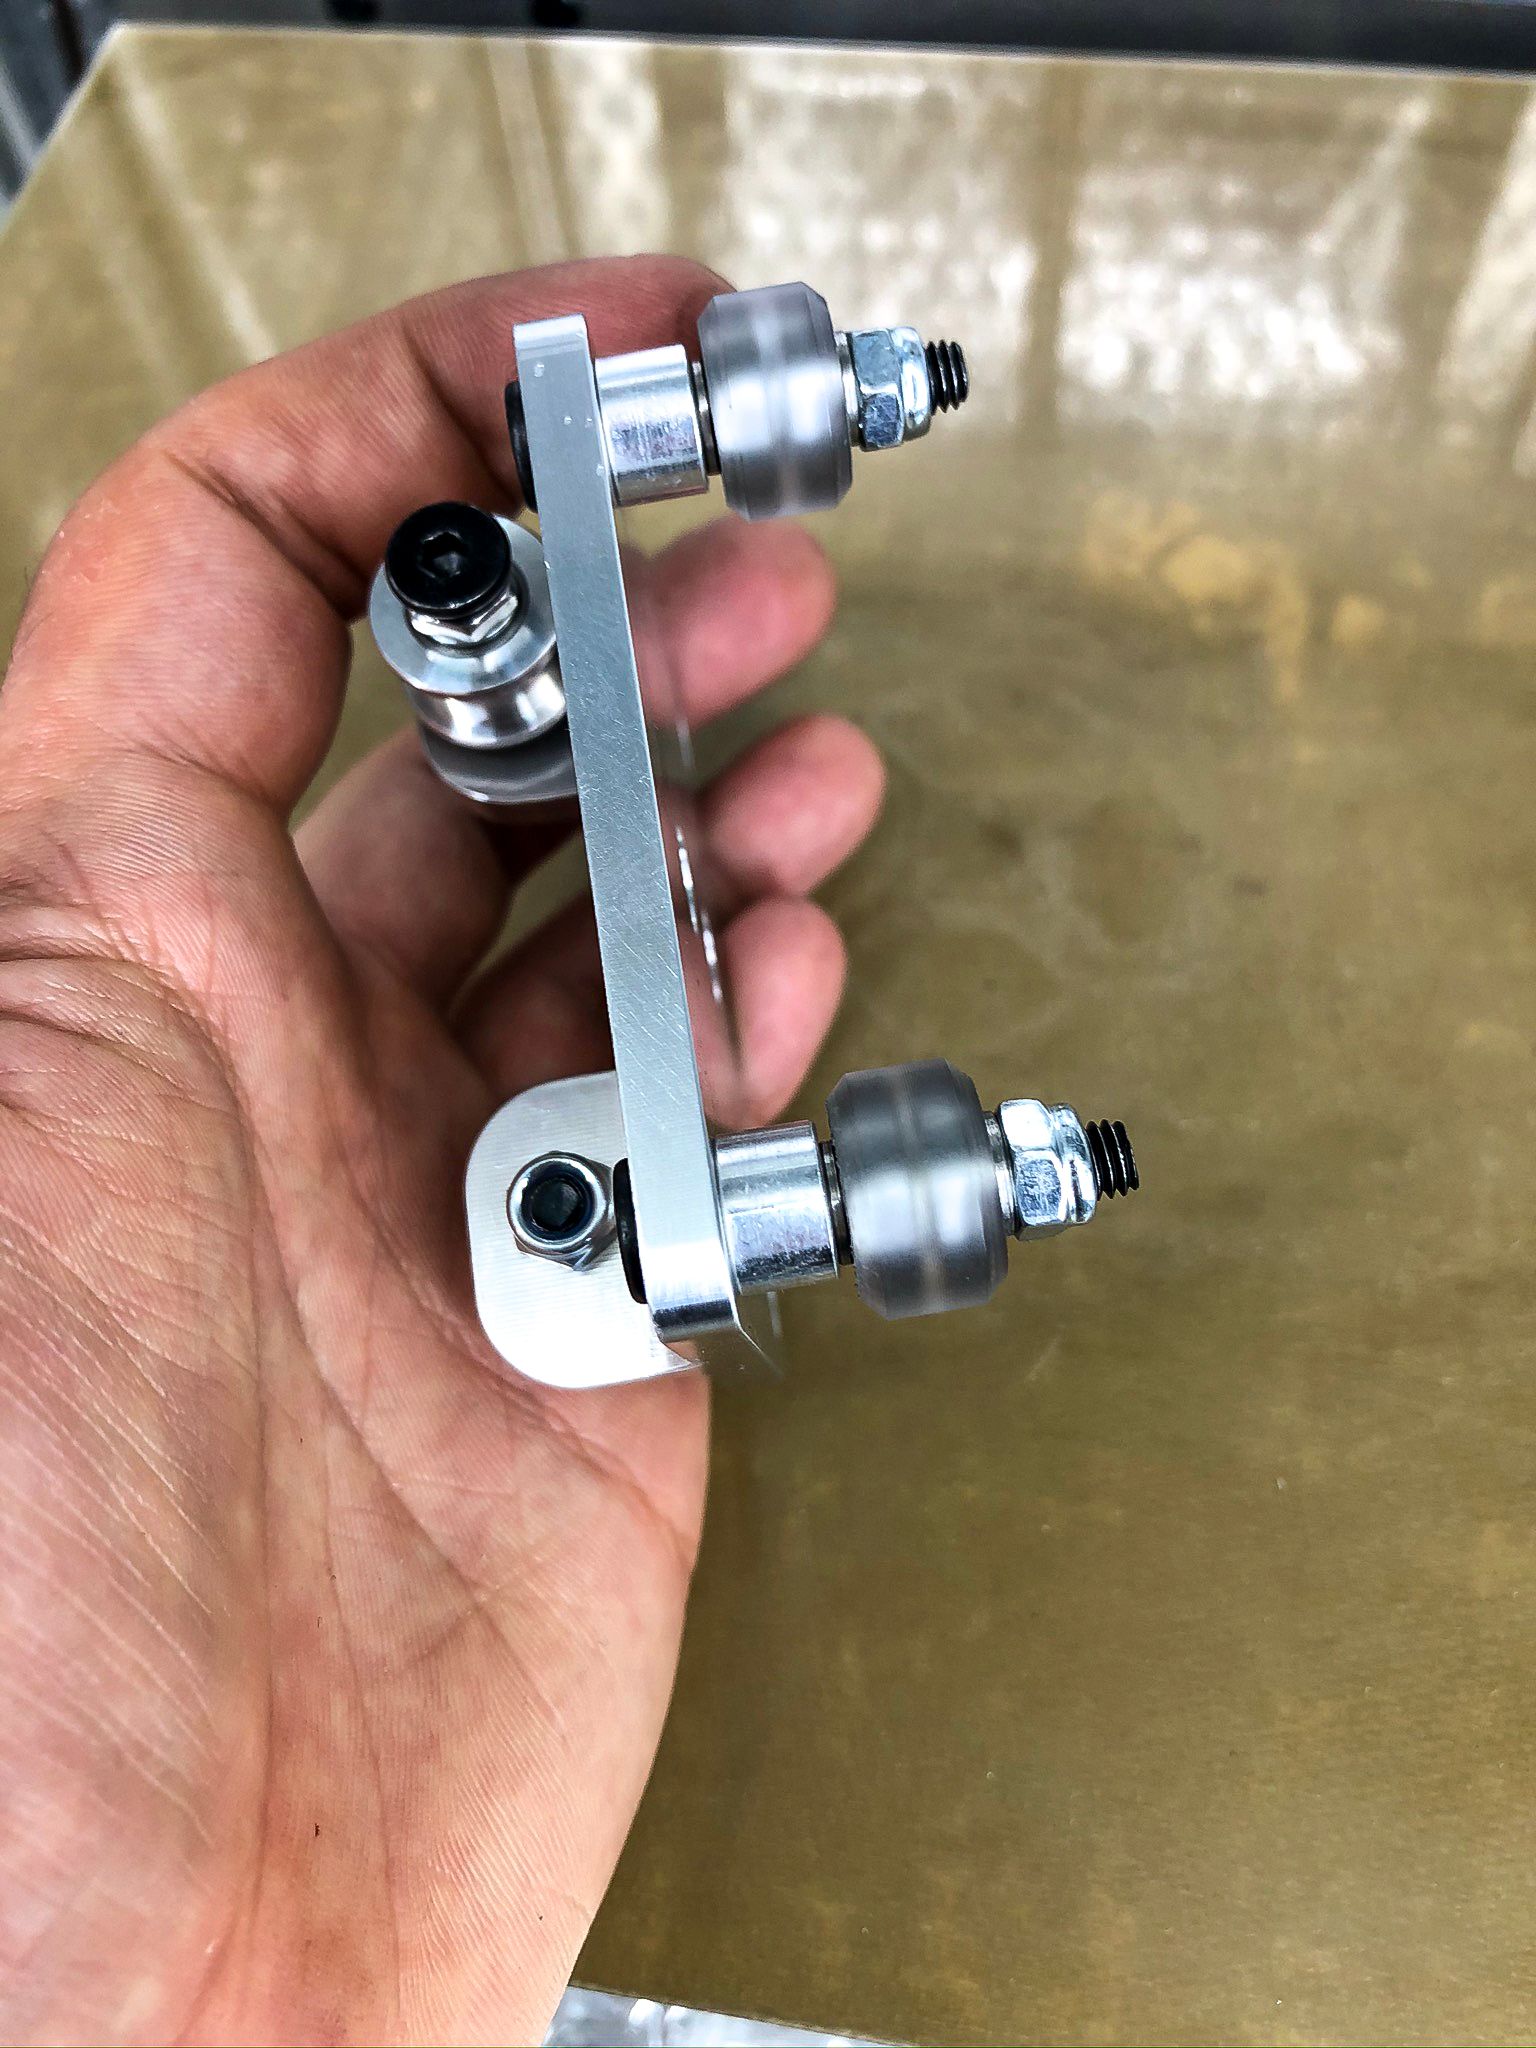
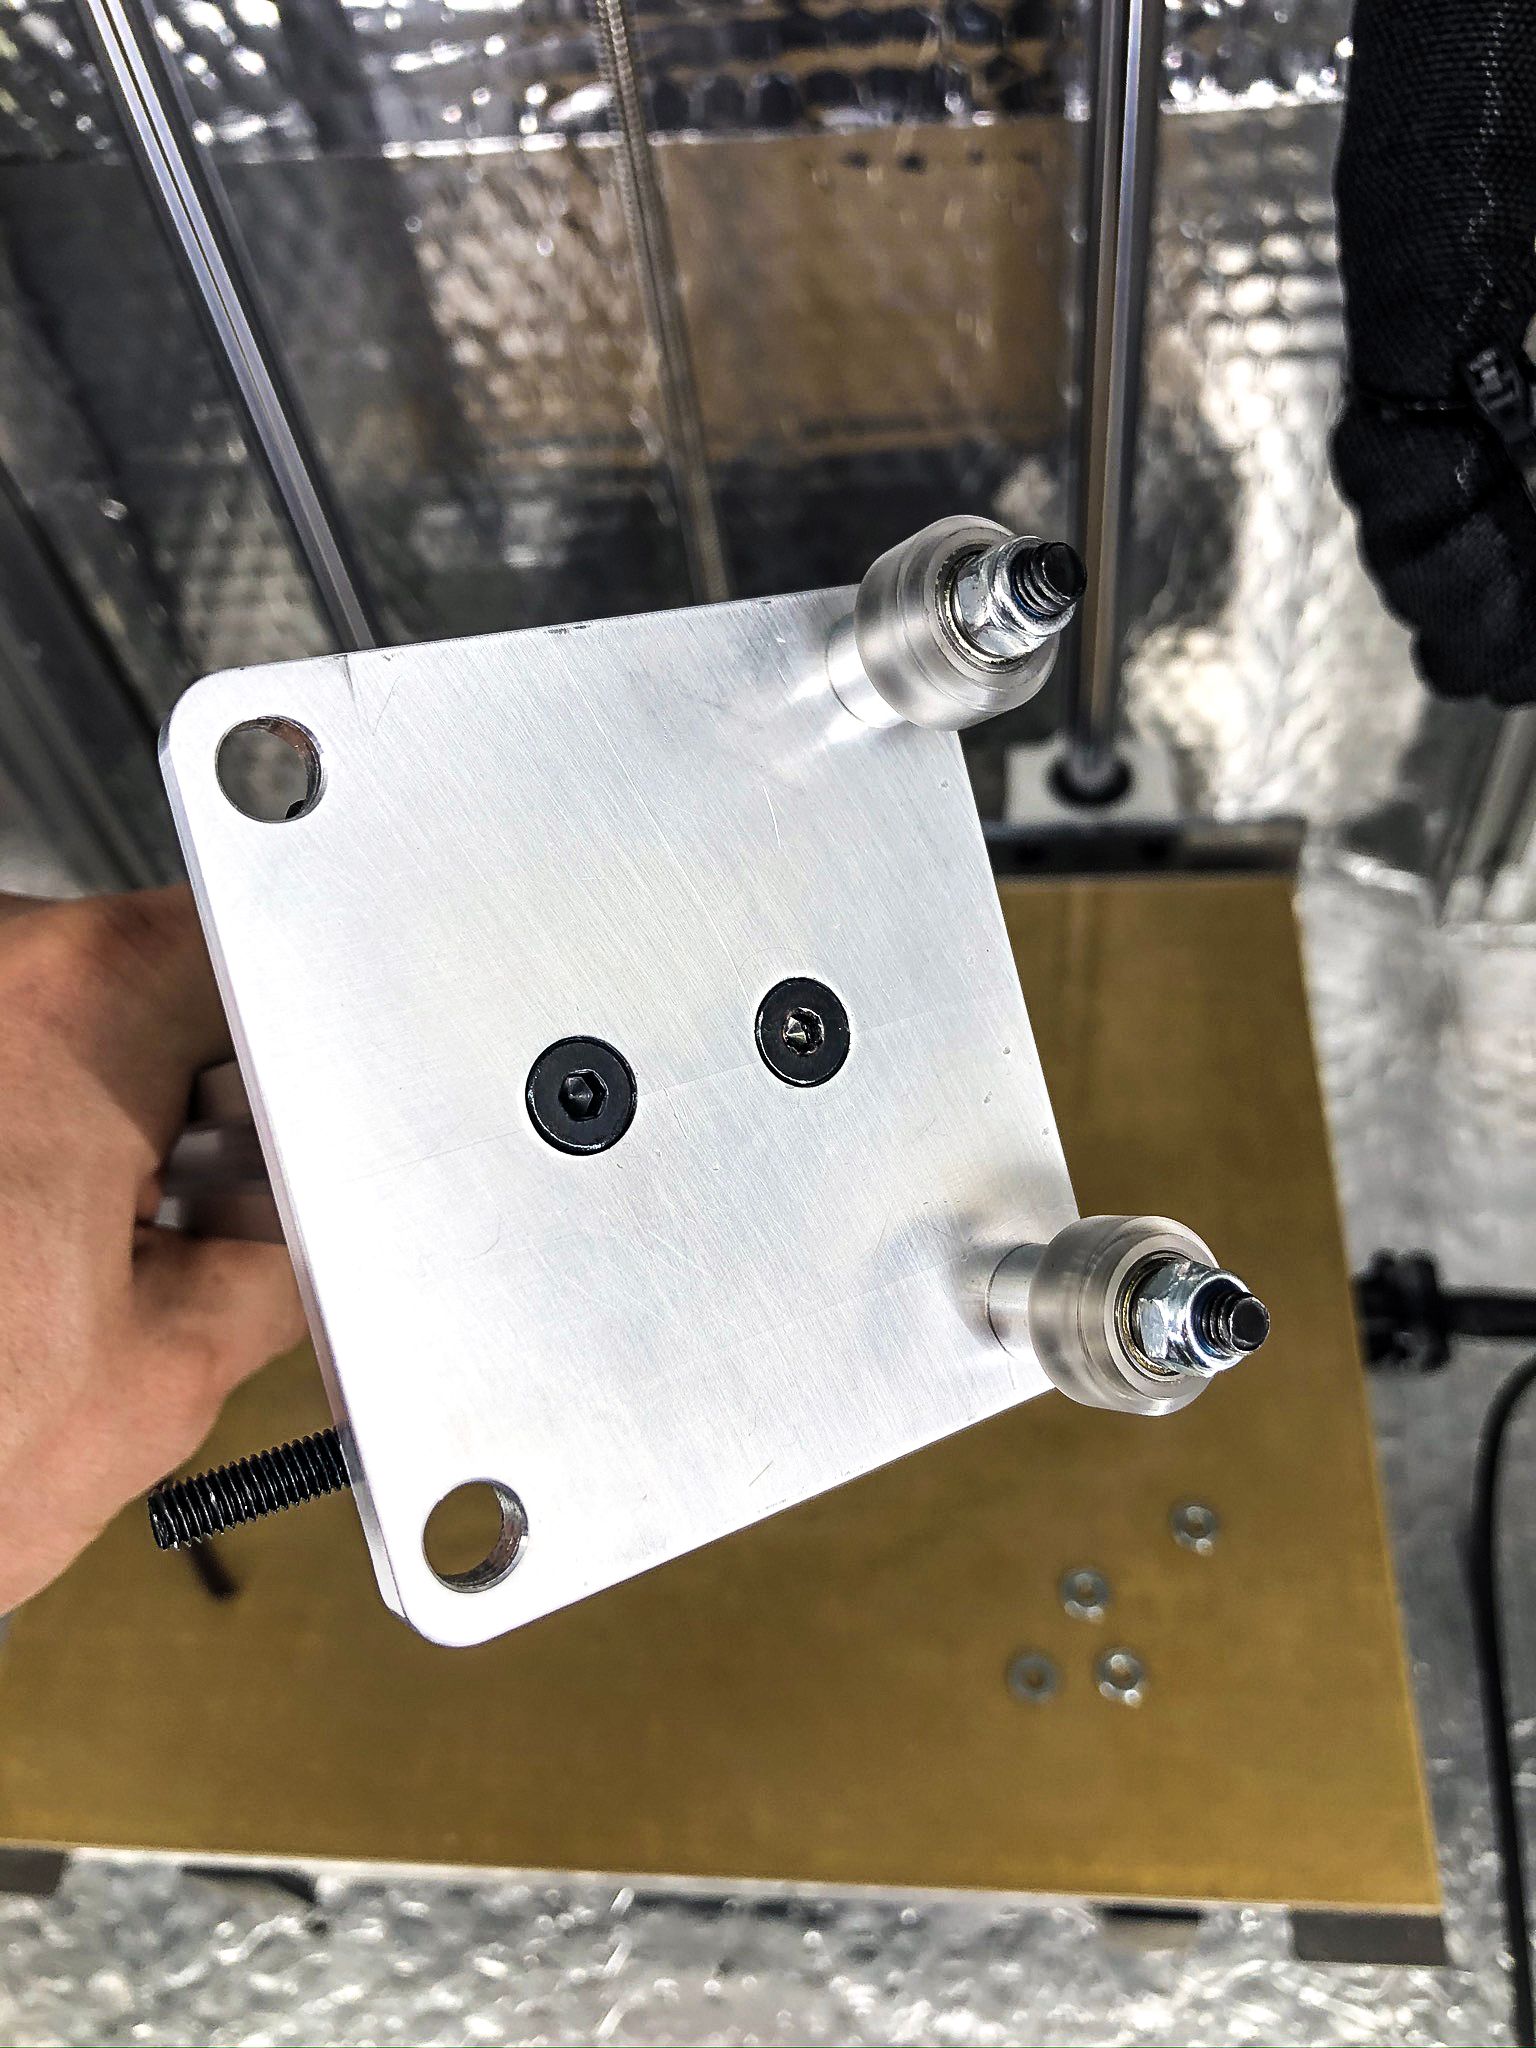
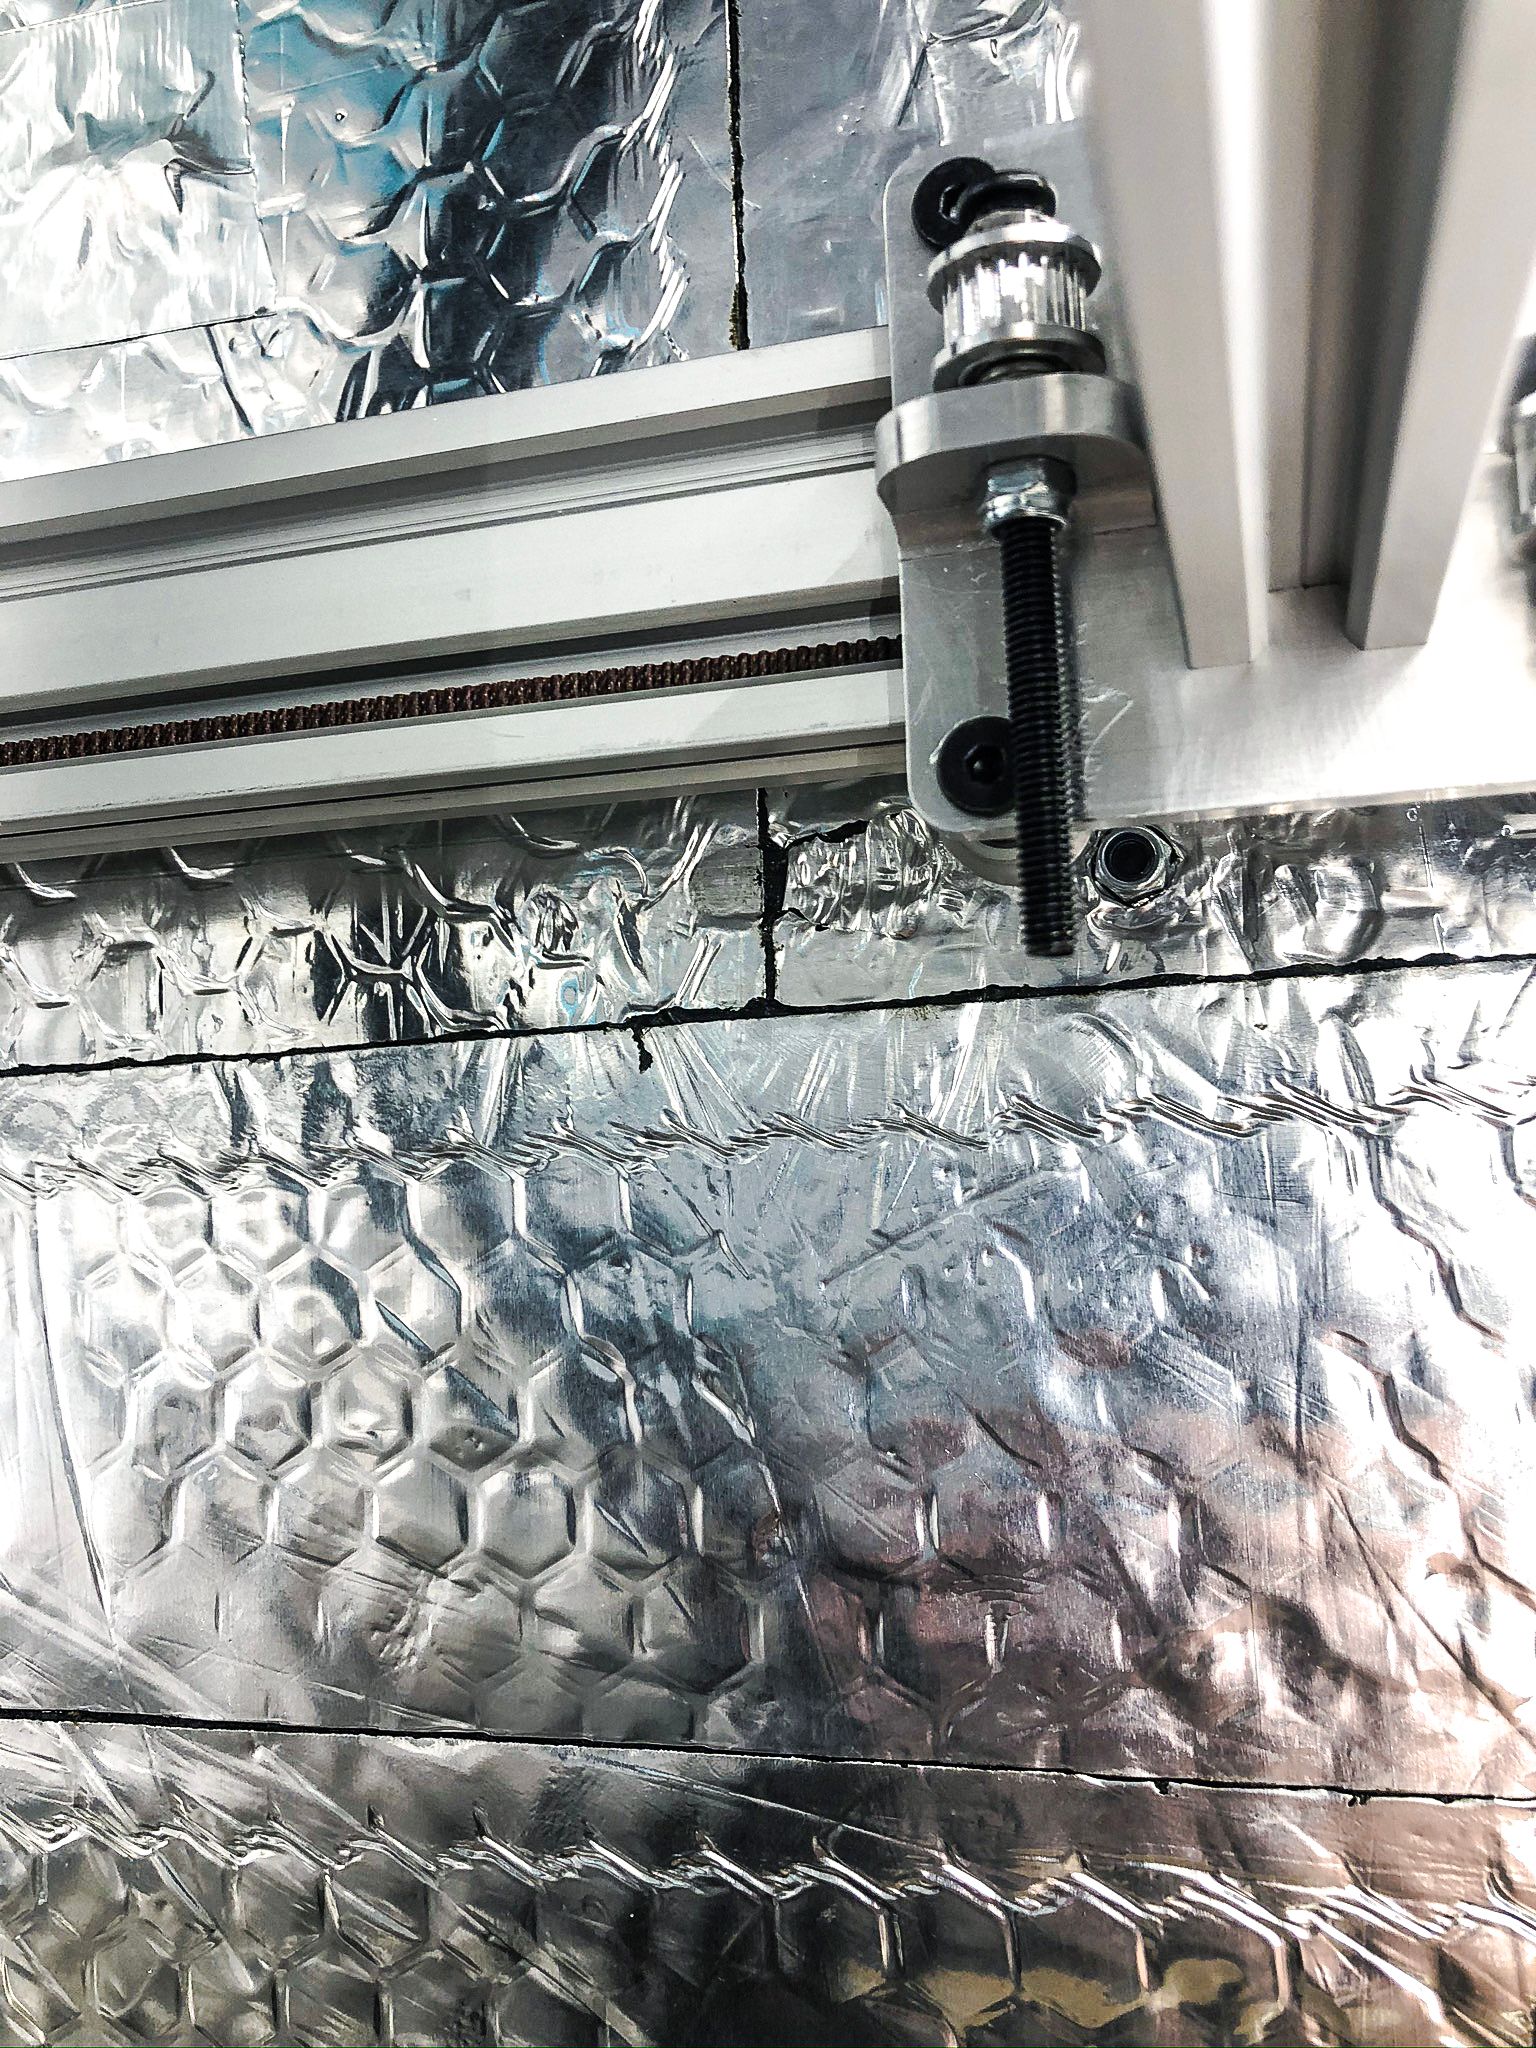
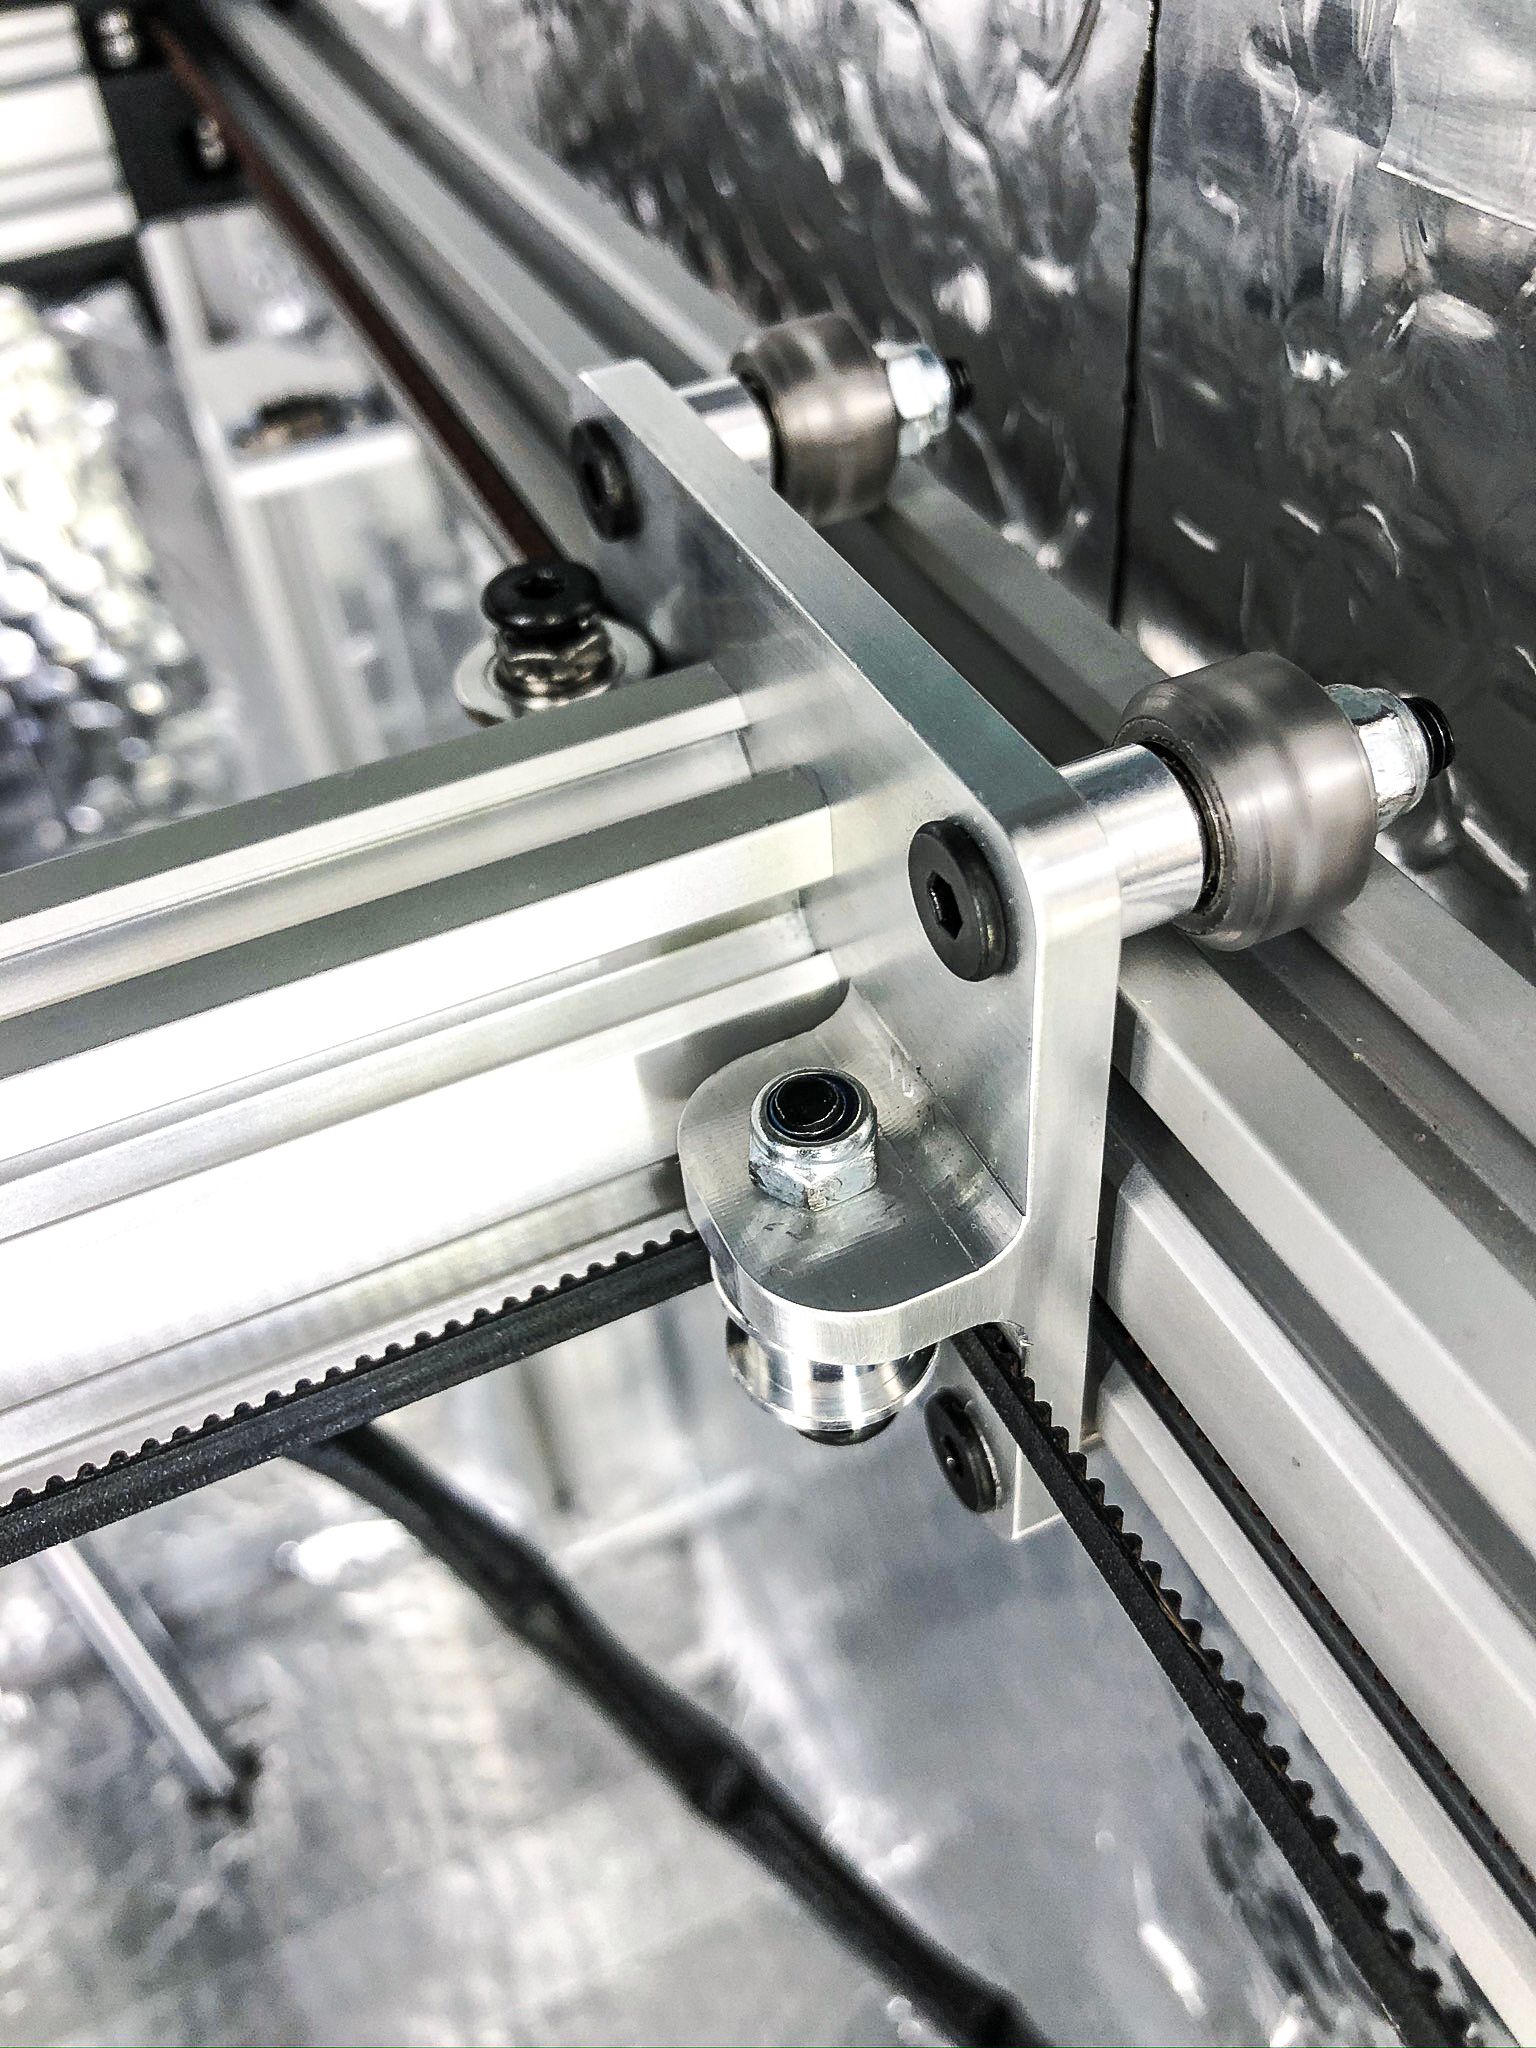
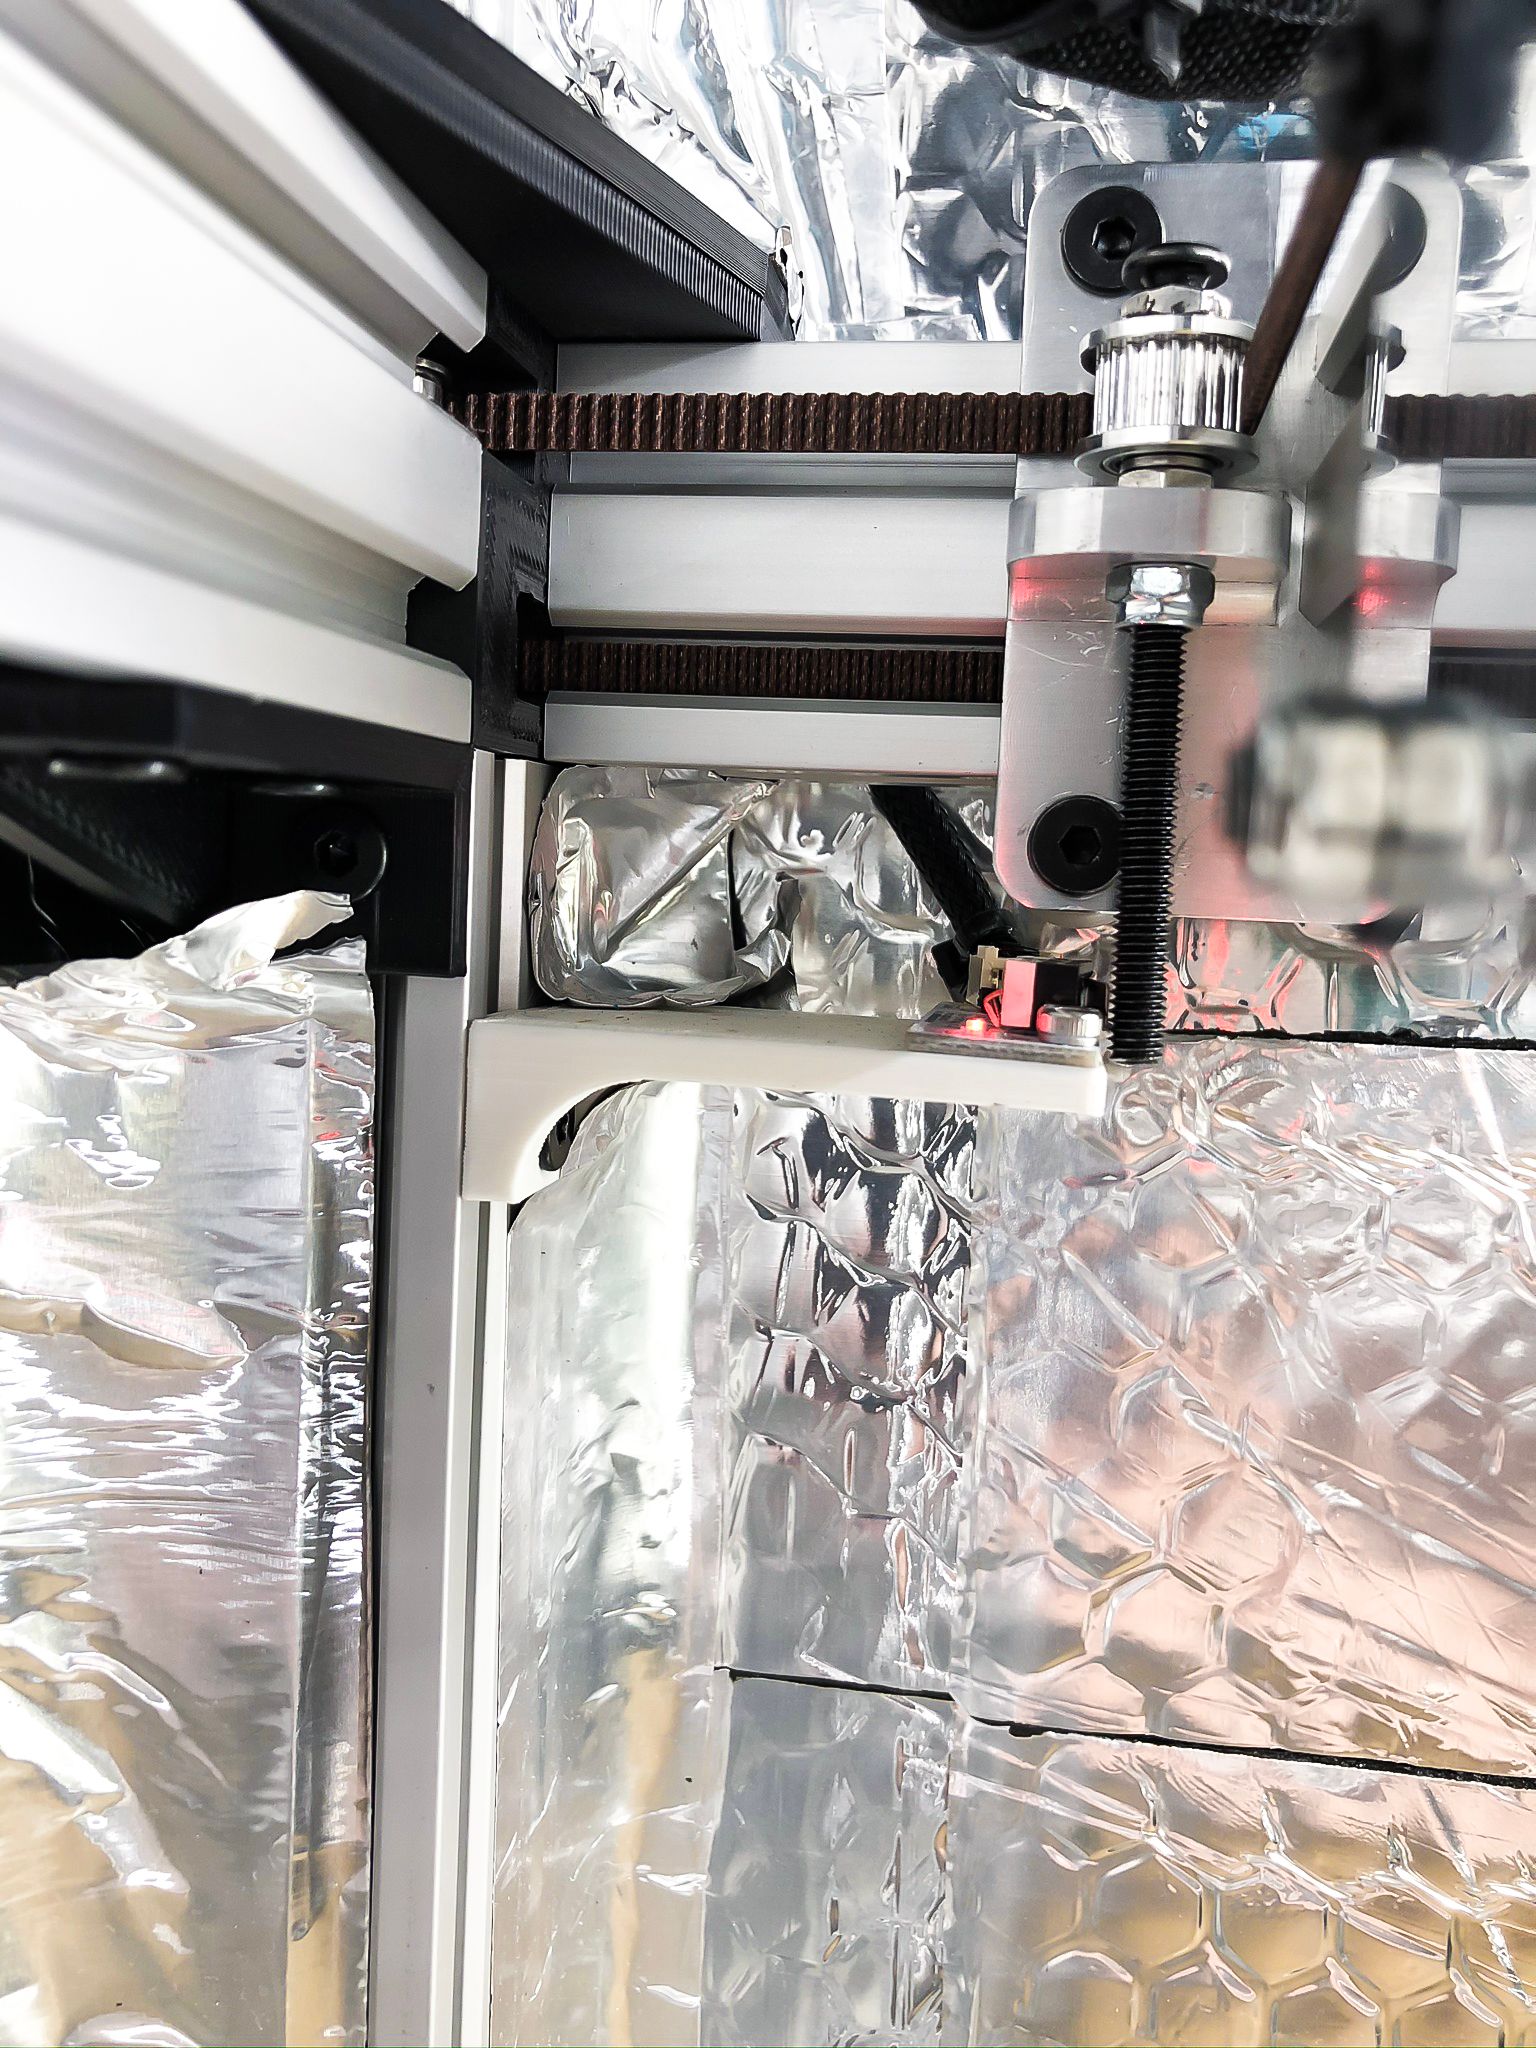
So I decided to CNC out some parts as I am being very happy with the printing big ABS parts already for real customers without warping and strong layer bonding. The passive heating is reaching 55 degrees and it was possible to print 22 hours object. But I always needed to adjust wheels a bit after the print is finished, as ABS printed parts are not good enough. For now, I have an X carriage made completely from aluminum and did a test with a fan blower reaching 70 degrees inside, cable holder, and bond tech extruder mount printed from Nylon + CF. It did survive without problems printing a 13-hour object. But the Y-axis mounts got a bit of flex after all as they are still from ABS, so I redesign them and ordered a CNC one, which should be done end of this week! Then testing and setting up an active heater.
Updated link for some new photos:
https://www.icloud.com/photos/#0xNaIFtCVxhc7LV4lLBvnyL5A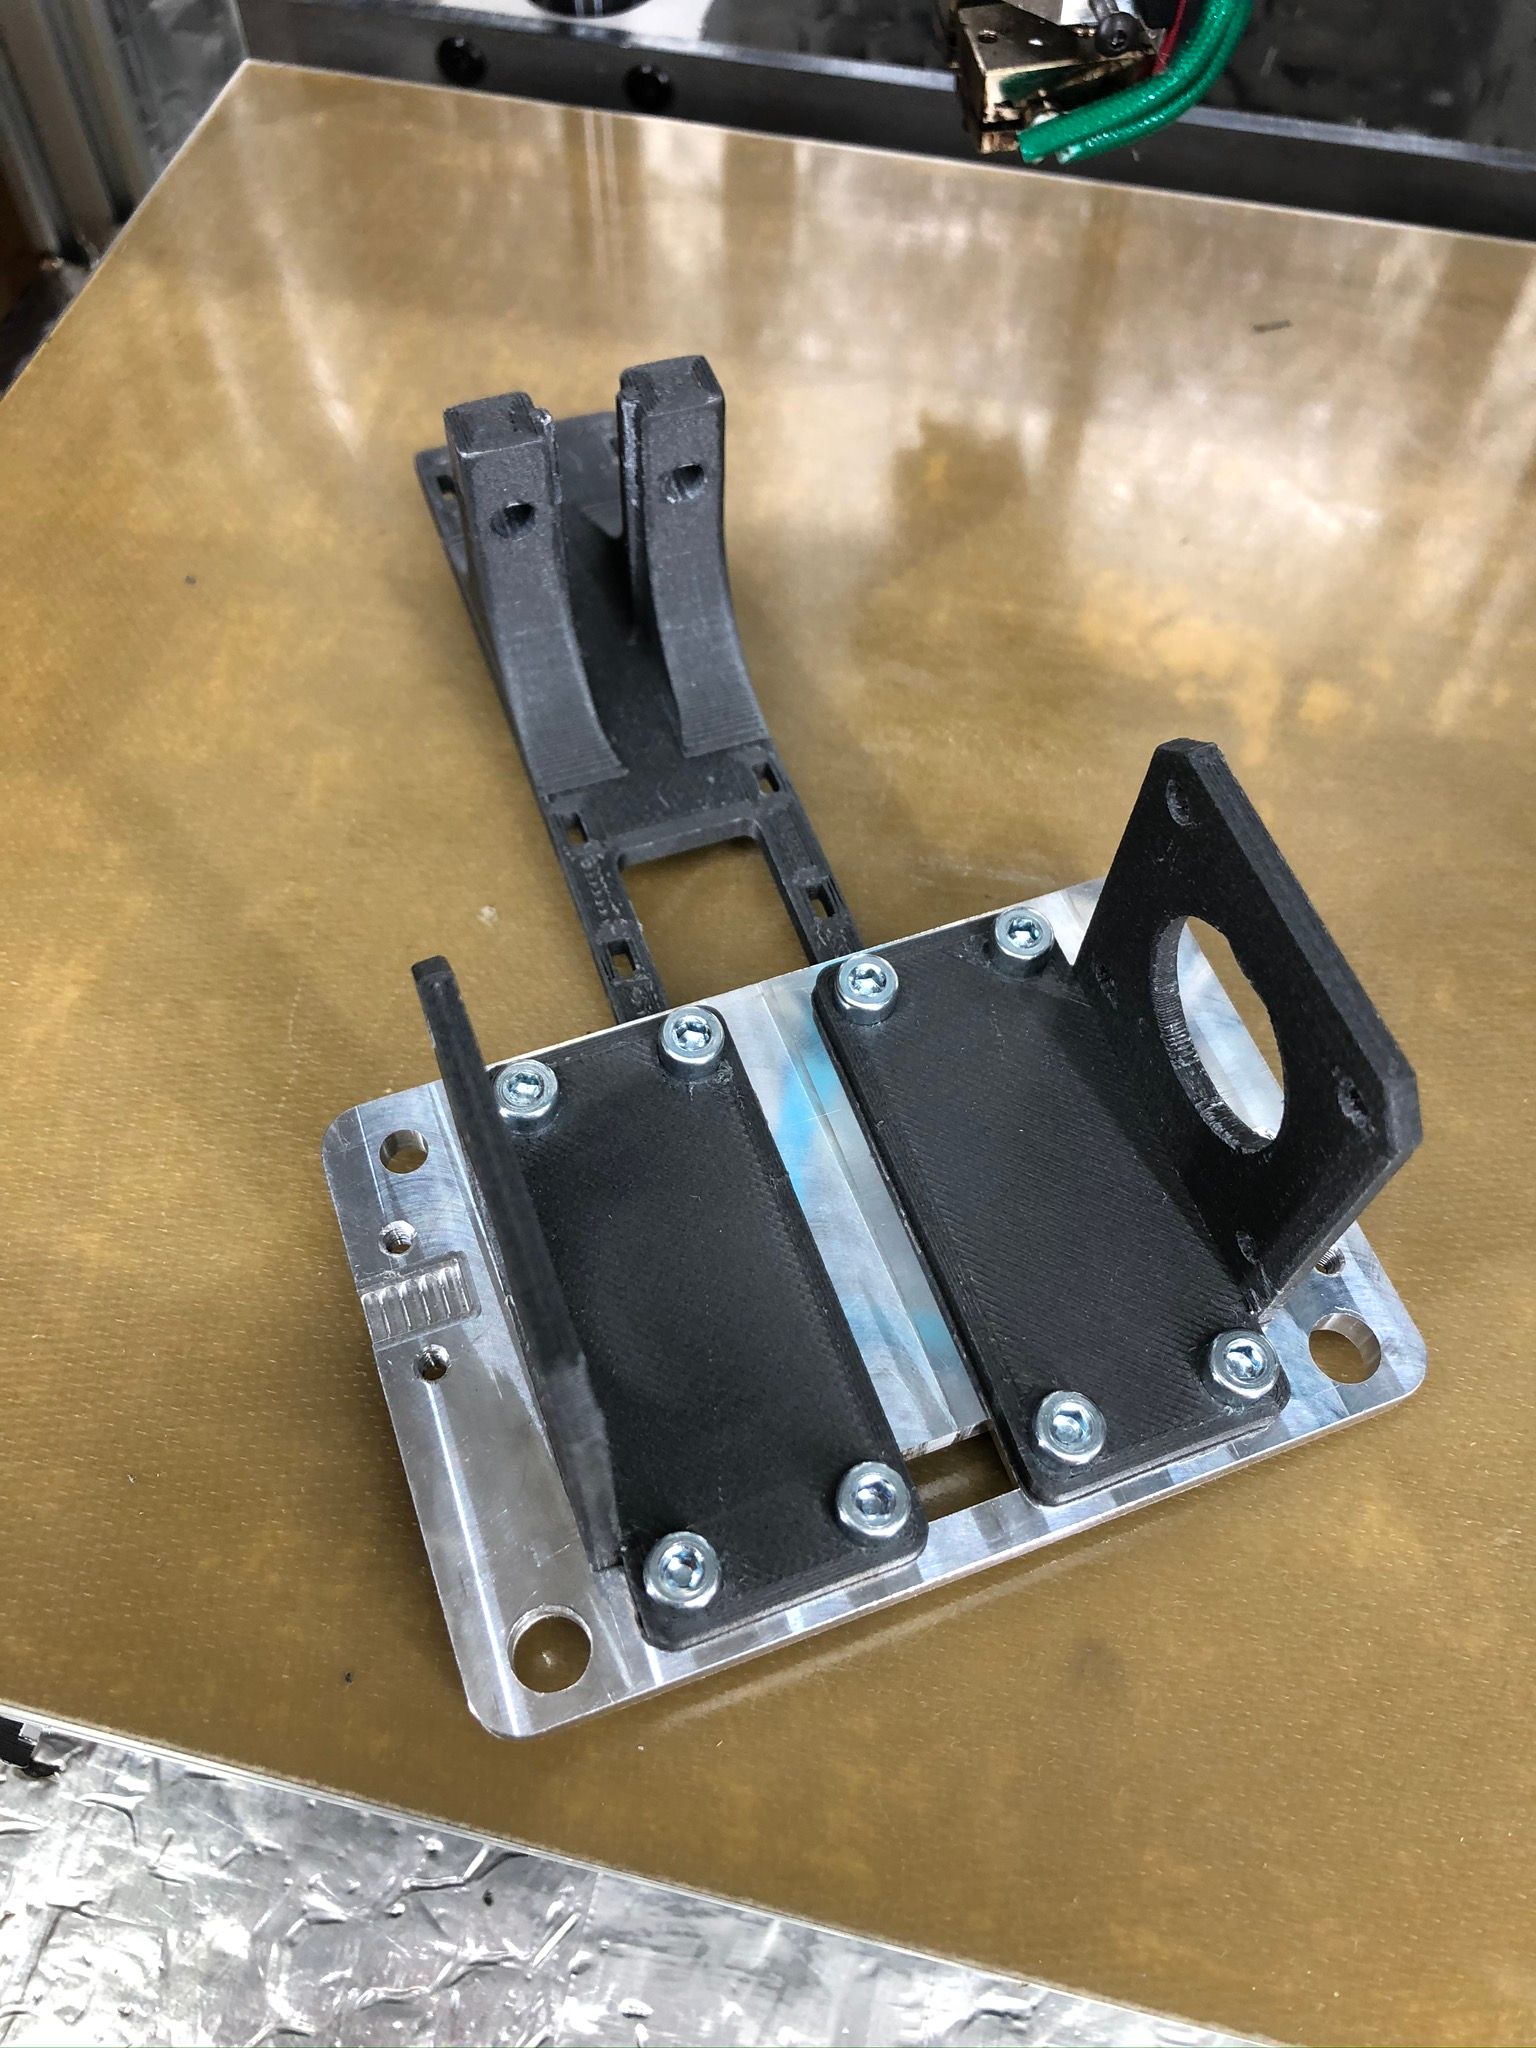
Industrial 3D printing service in the Netherlands - gagatstudio.com
-
@felt342 : nice printer you have there!
Question, where are you getting the CNC parts from? -
@whosrdaddy Thank you!
This is from 3D hubs, first time used their service.
-
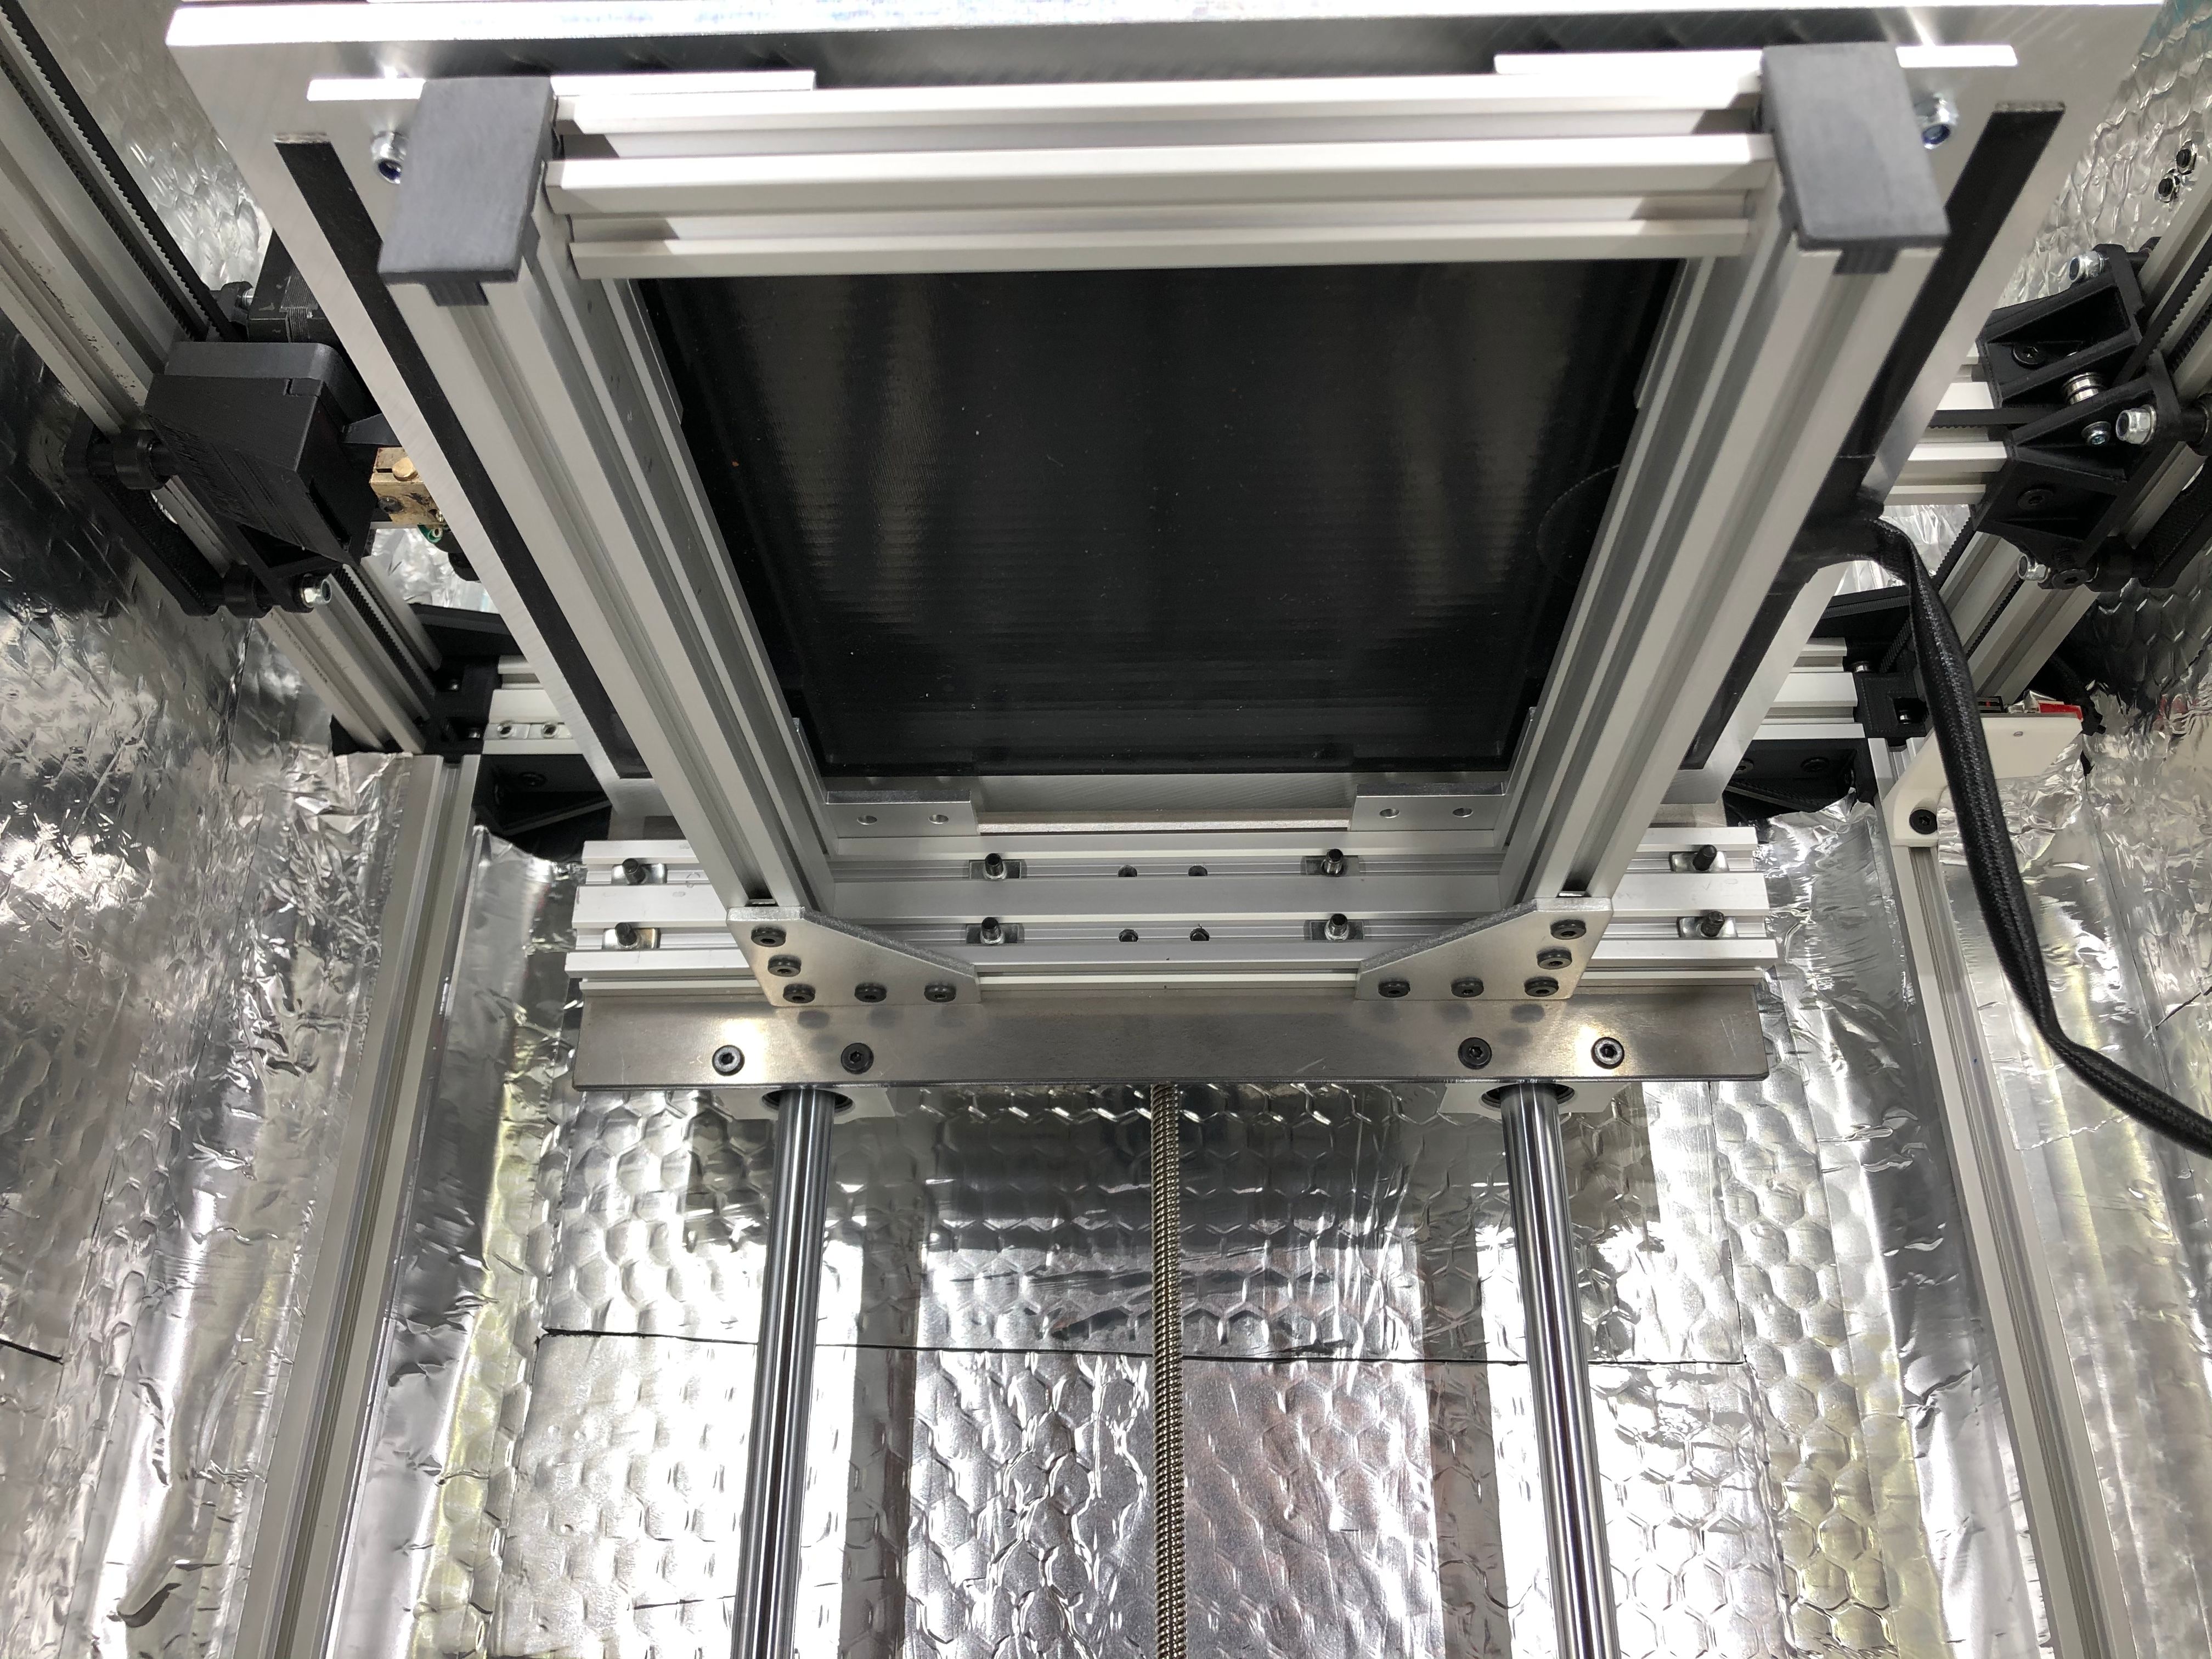
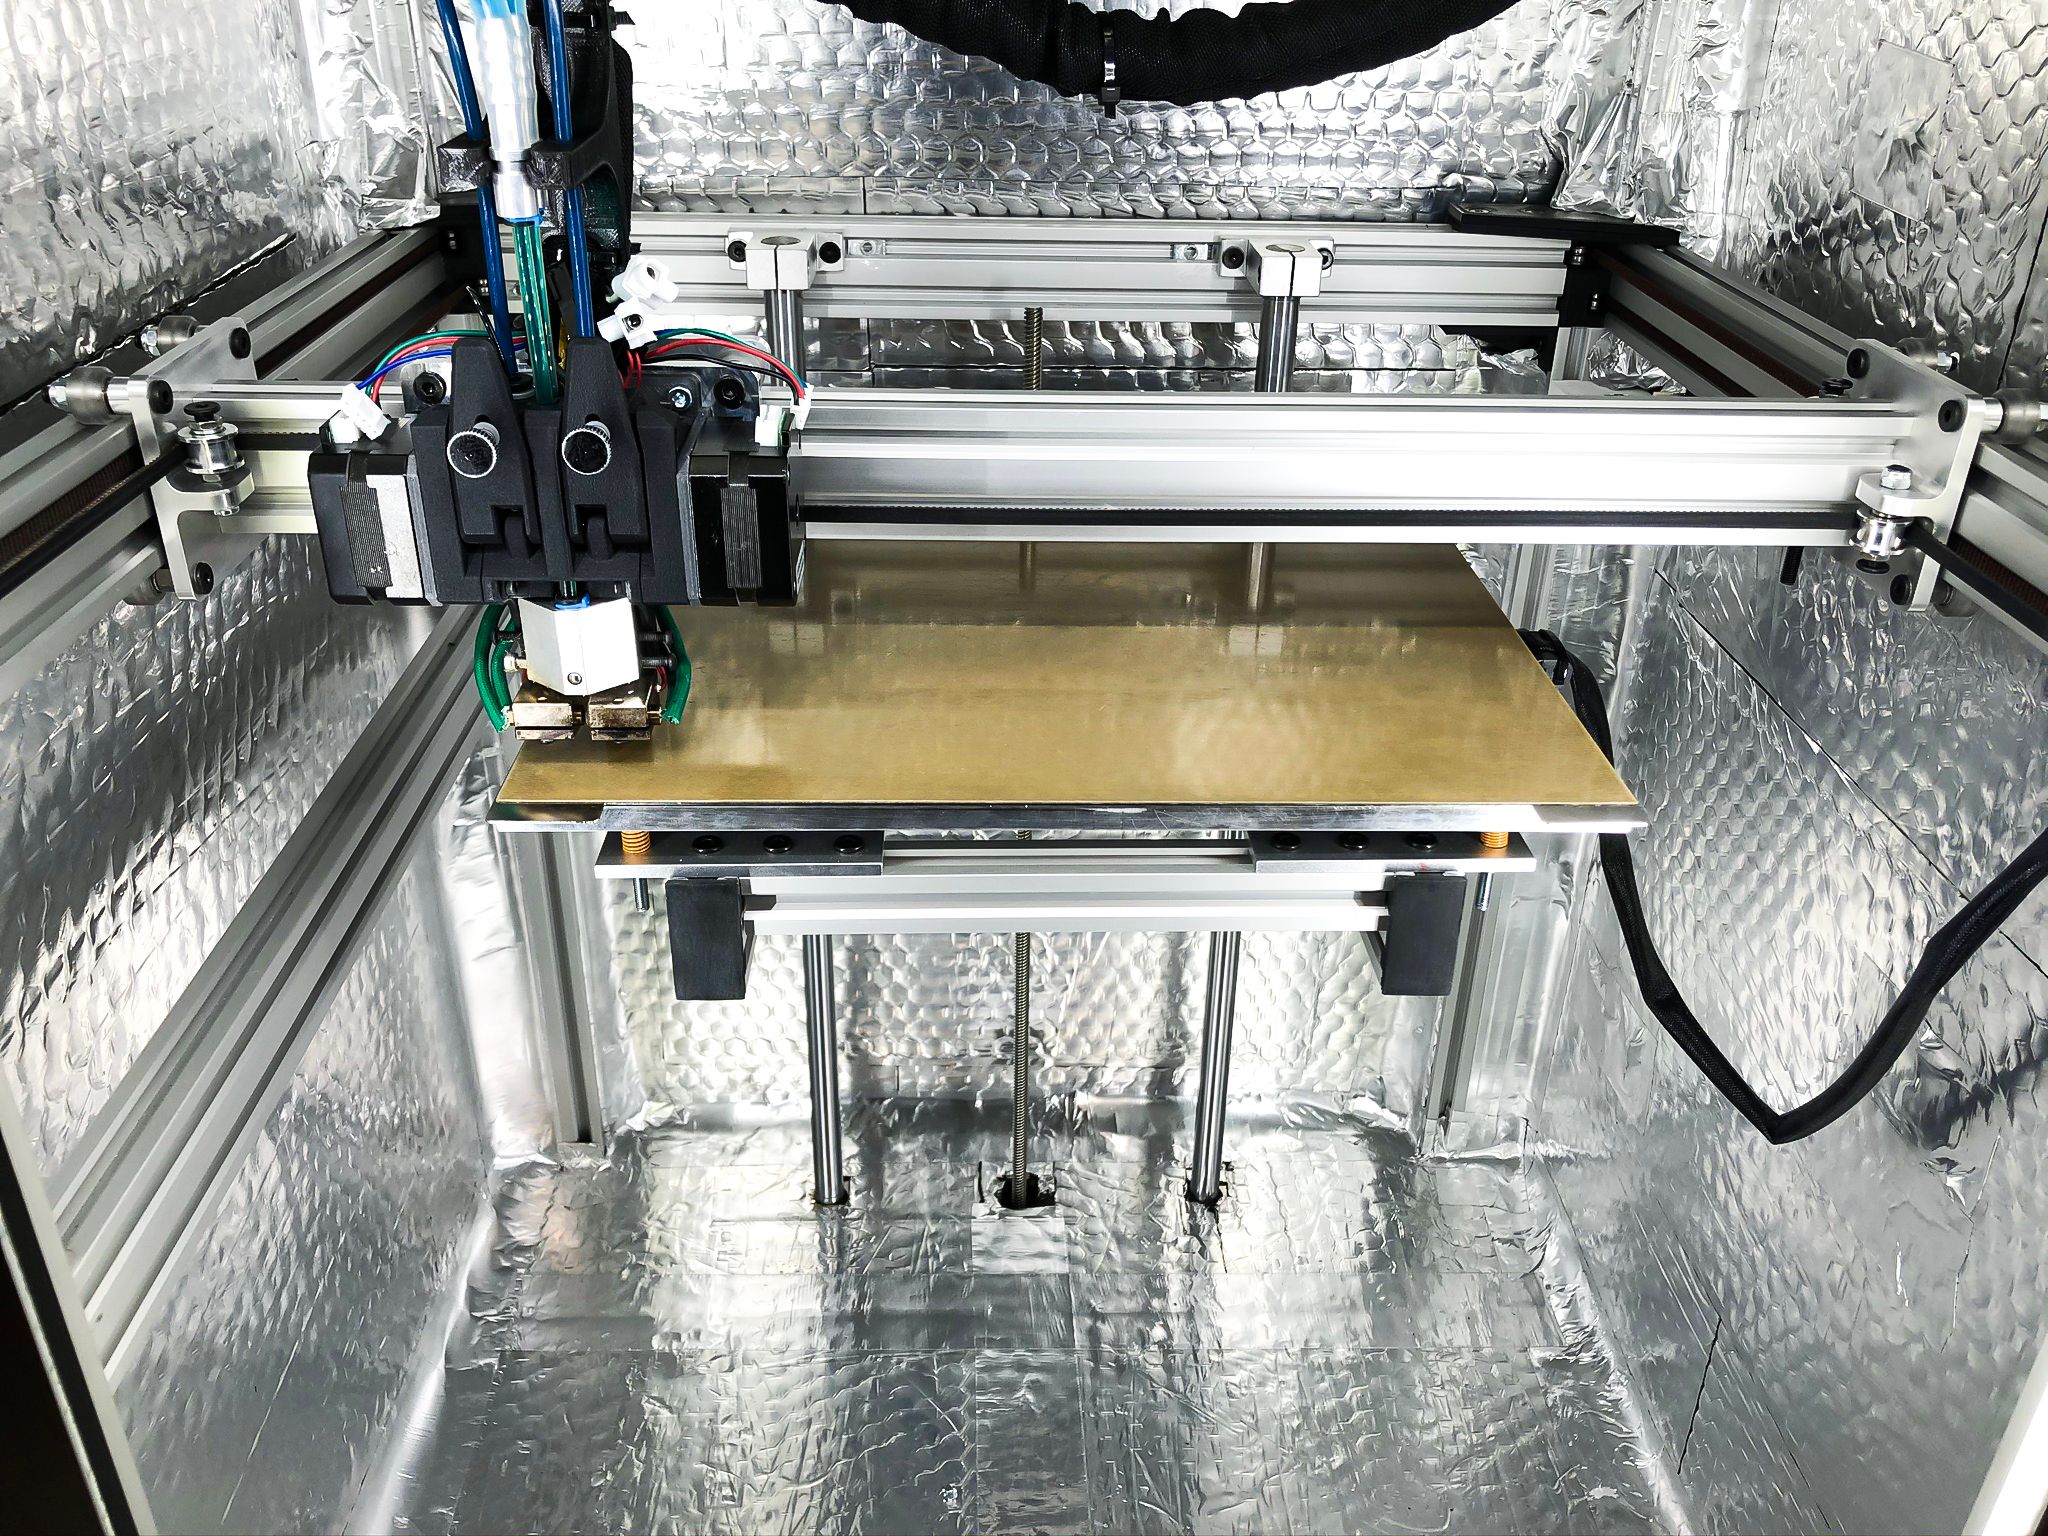
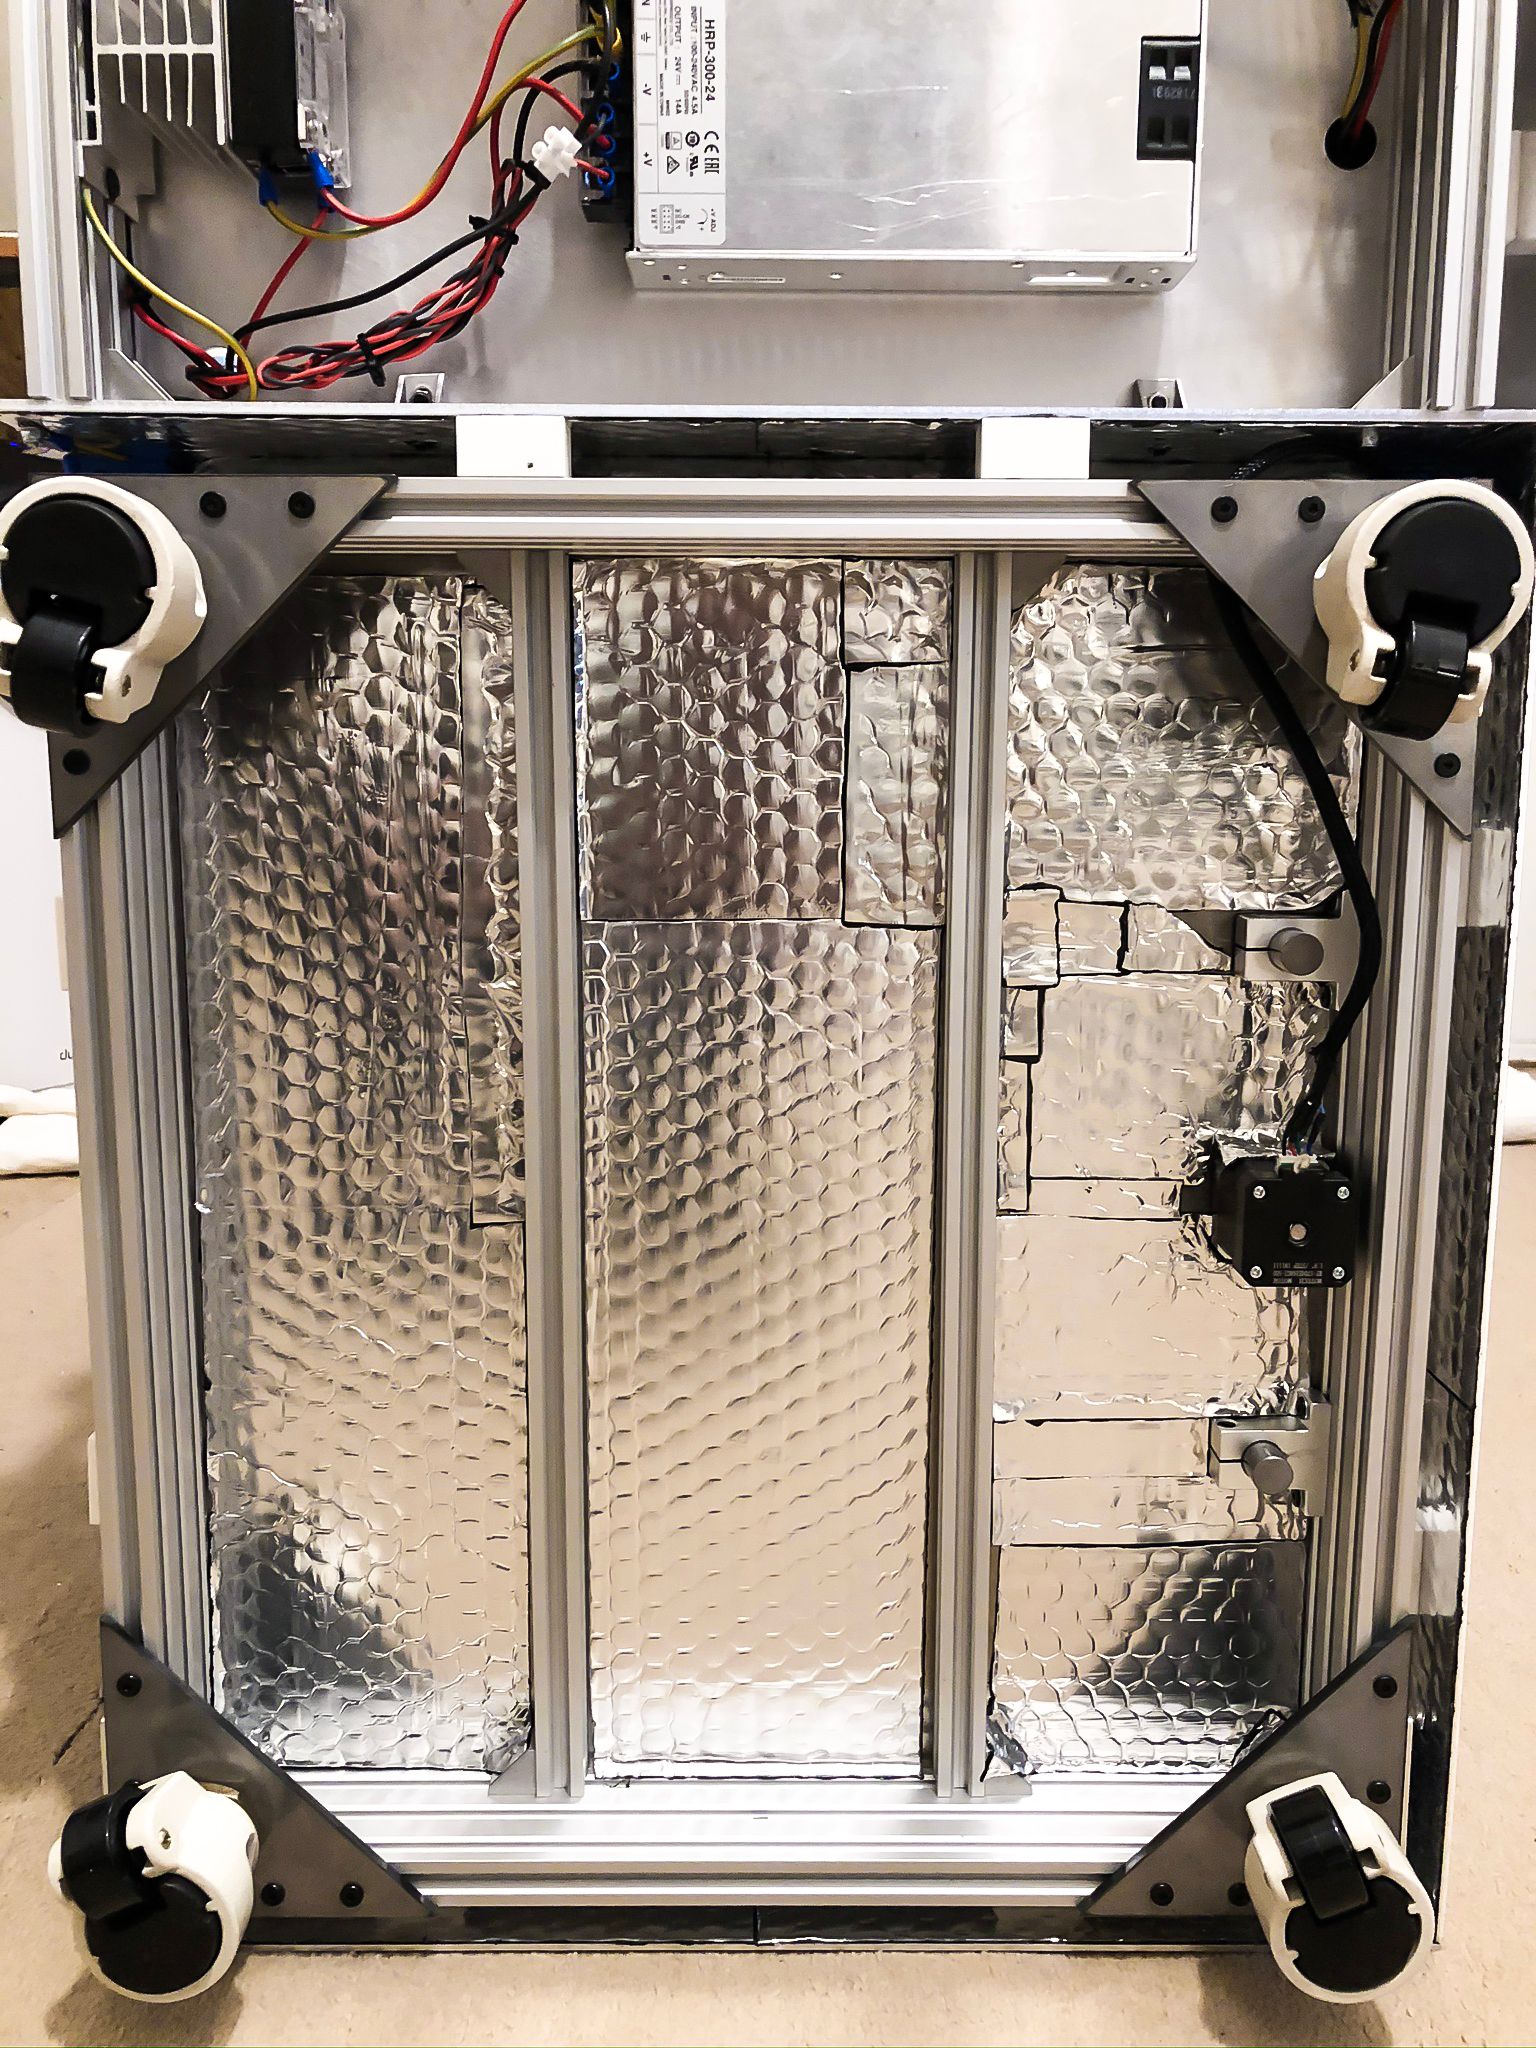
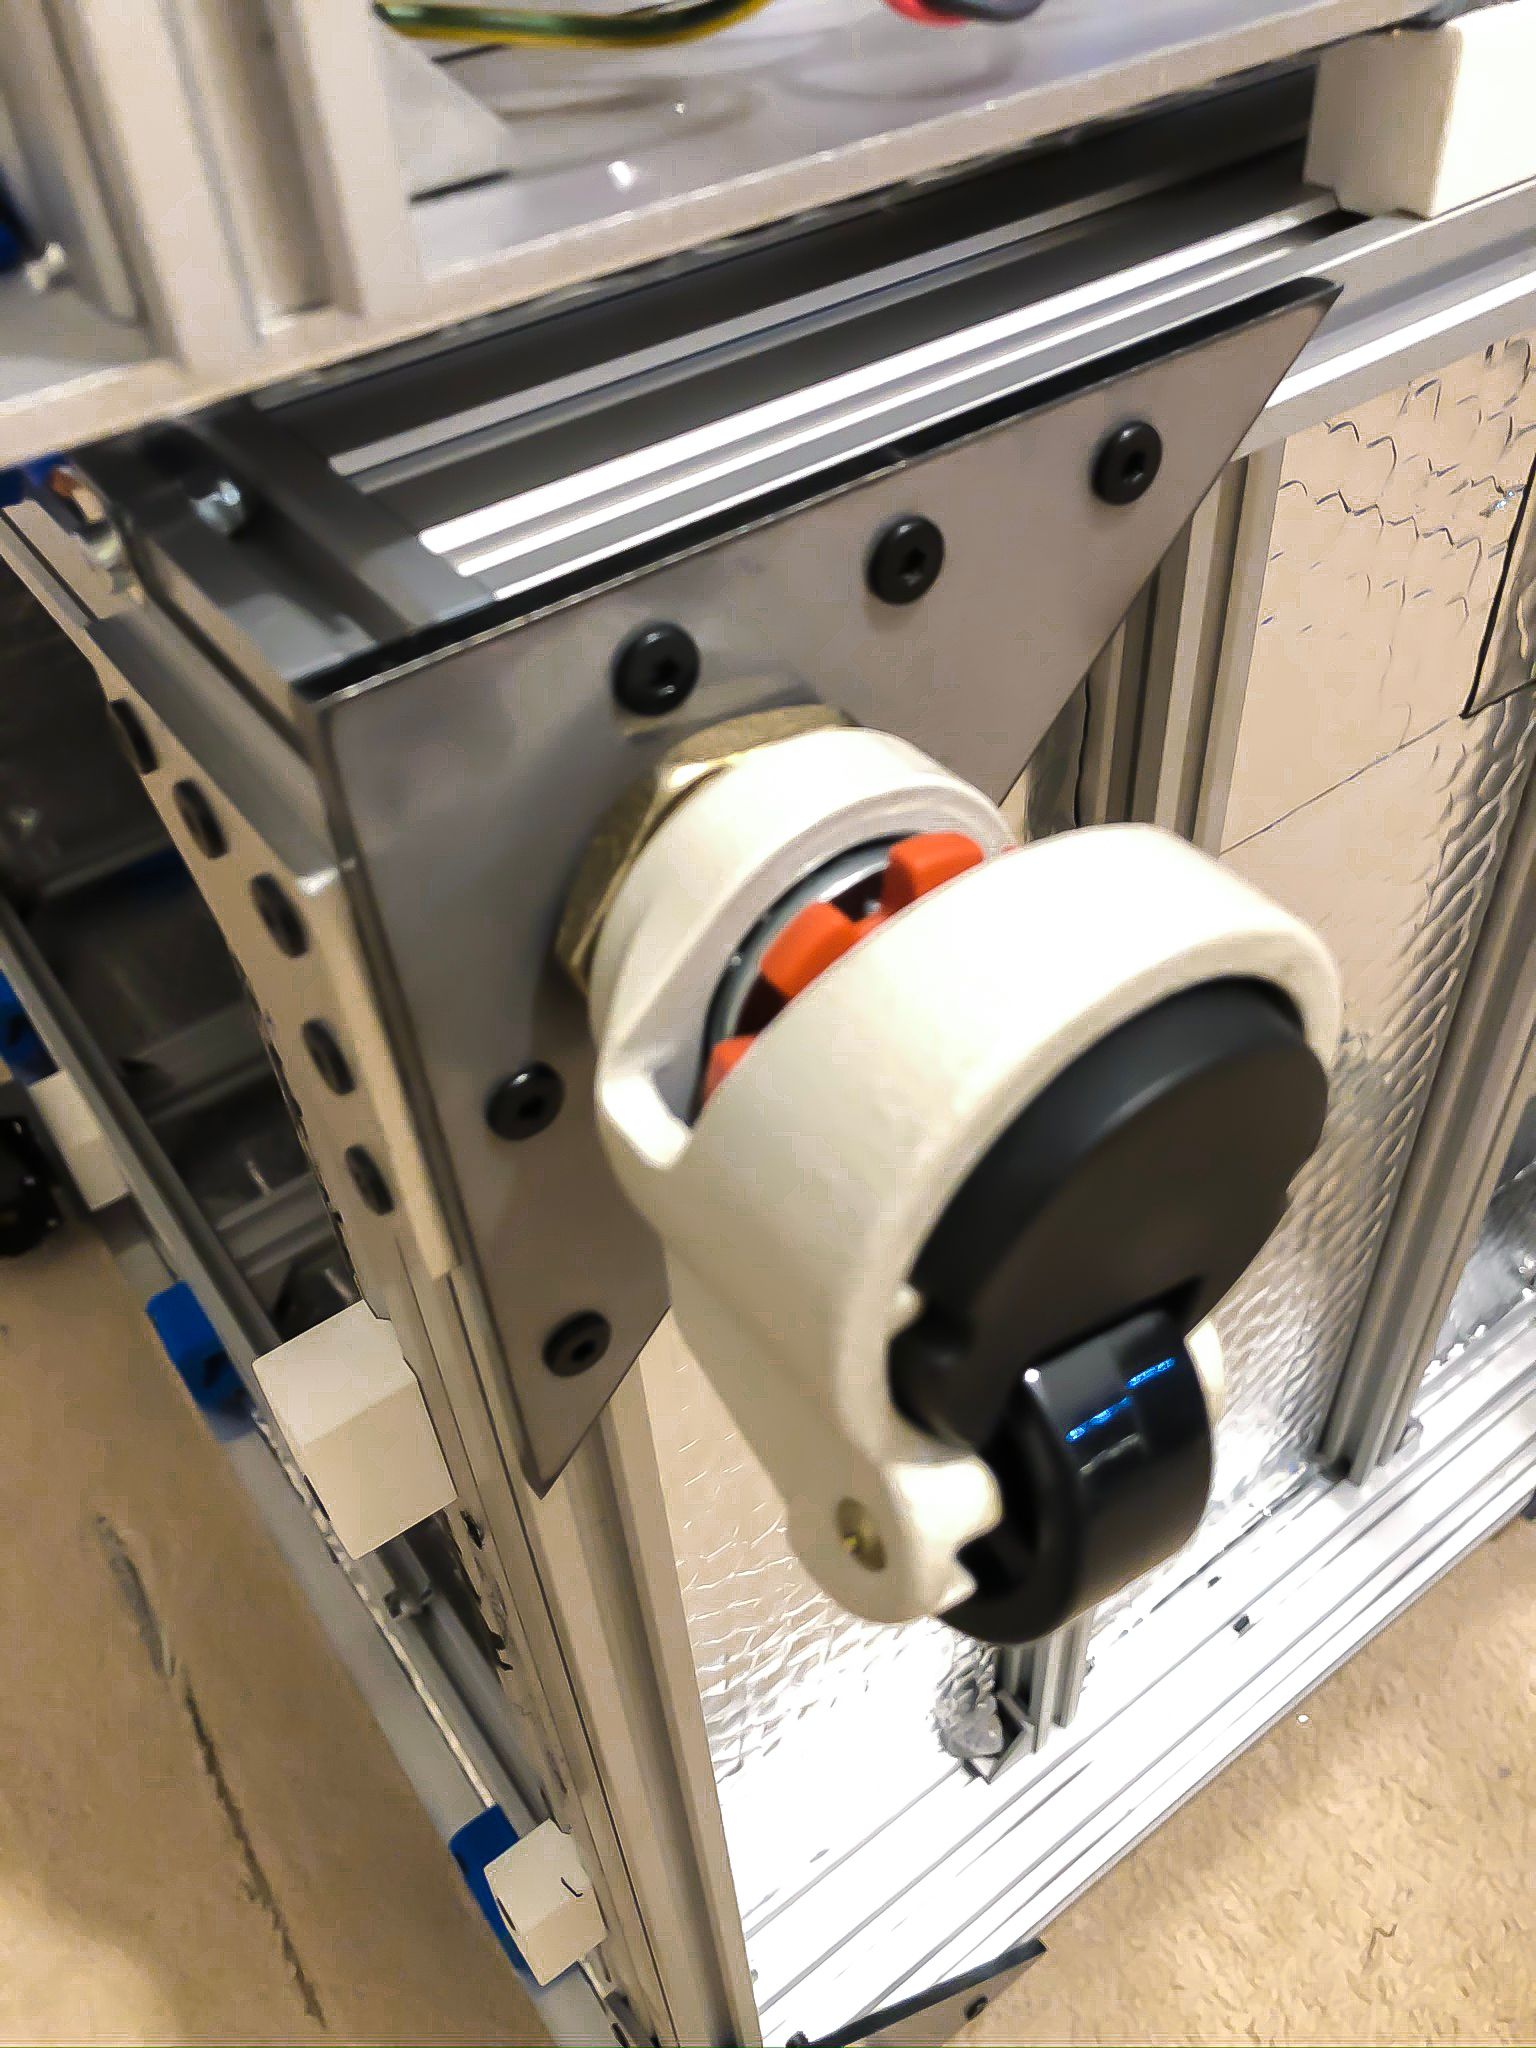
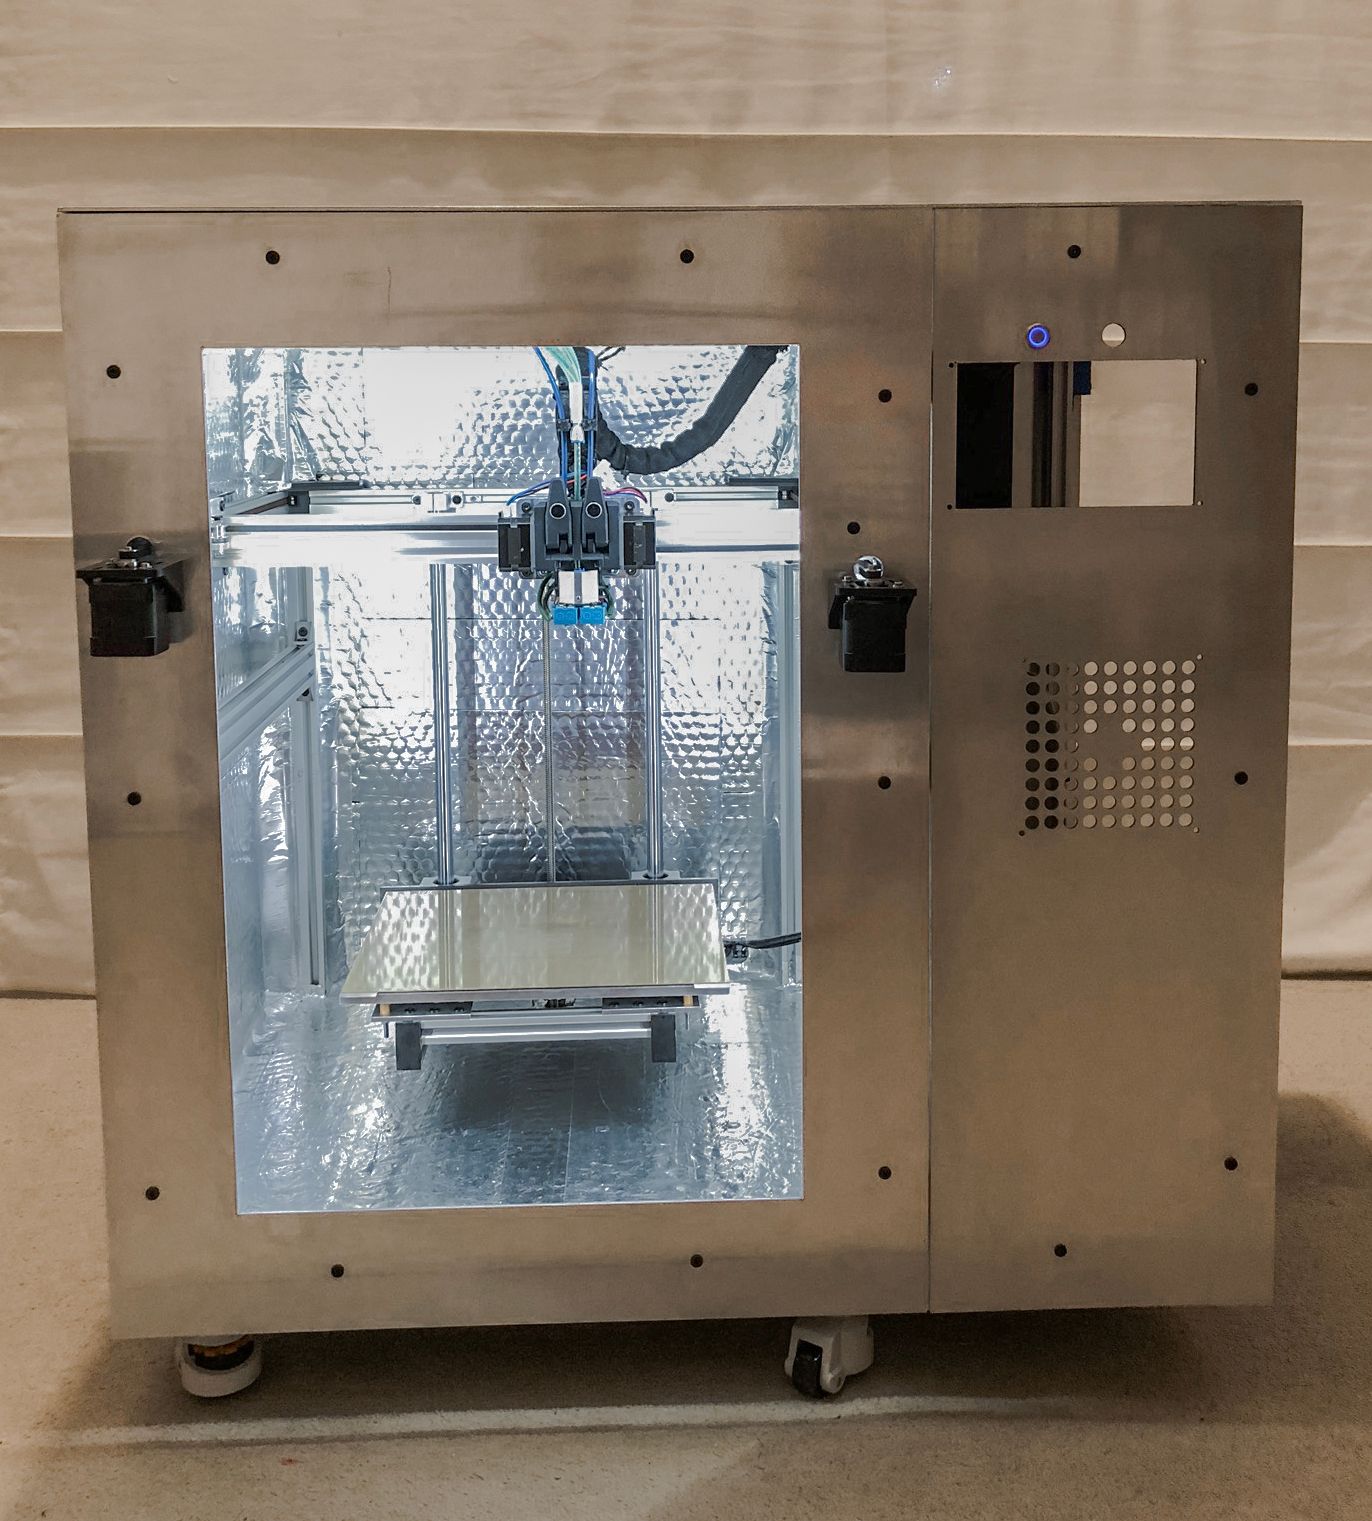
Hi all, things moving but very slow, this is progress so far by today. I got all-aluminum machined parts for the motion system, very happy with them, and moving very smoothly. I can tighten them very hard without worry what plastic will crack, or they will start wobble then the chamber is getting 45 degrees C. Besides this I also installed front panel and wheel to be able moving printer around as its getting quite heavy. Working on the door now and decided what it will be not hinged, but removable on the channel magnets, with transparent polycarbonate sheet.
Some images:


-
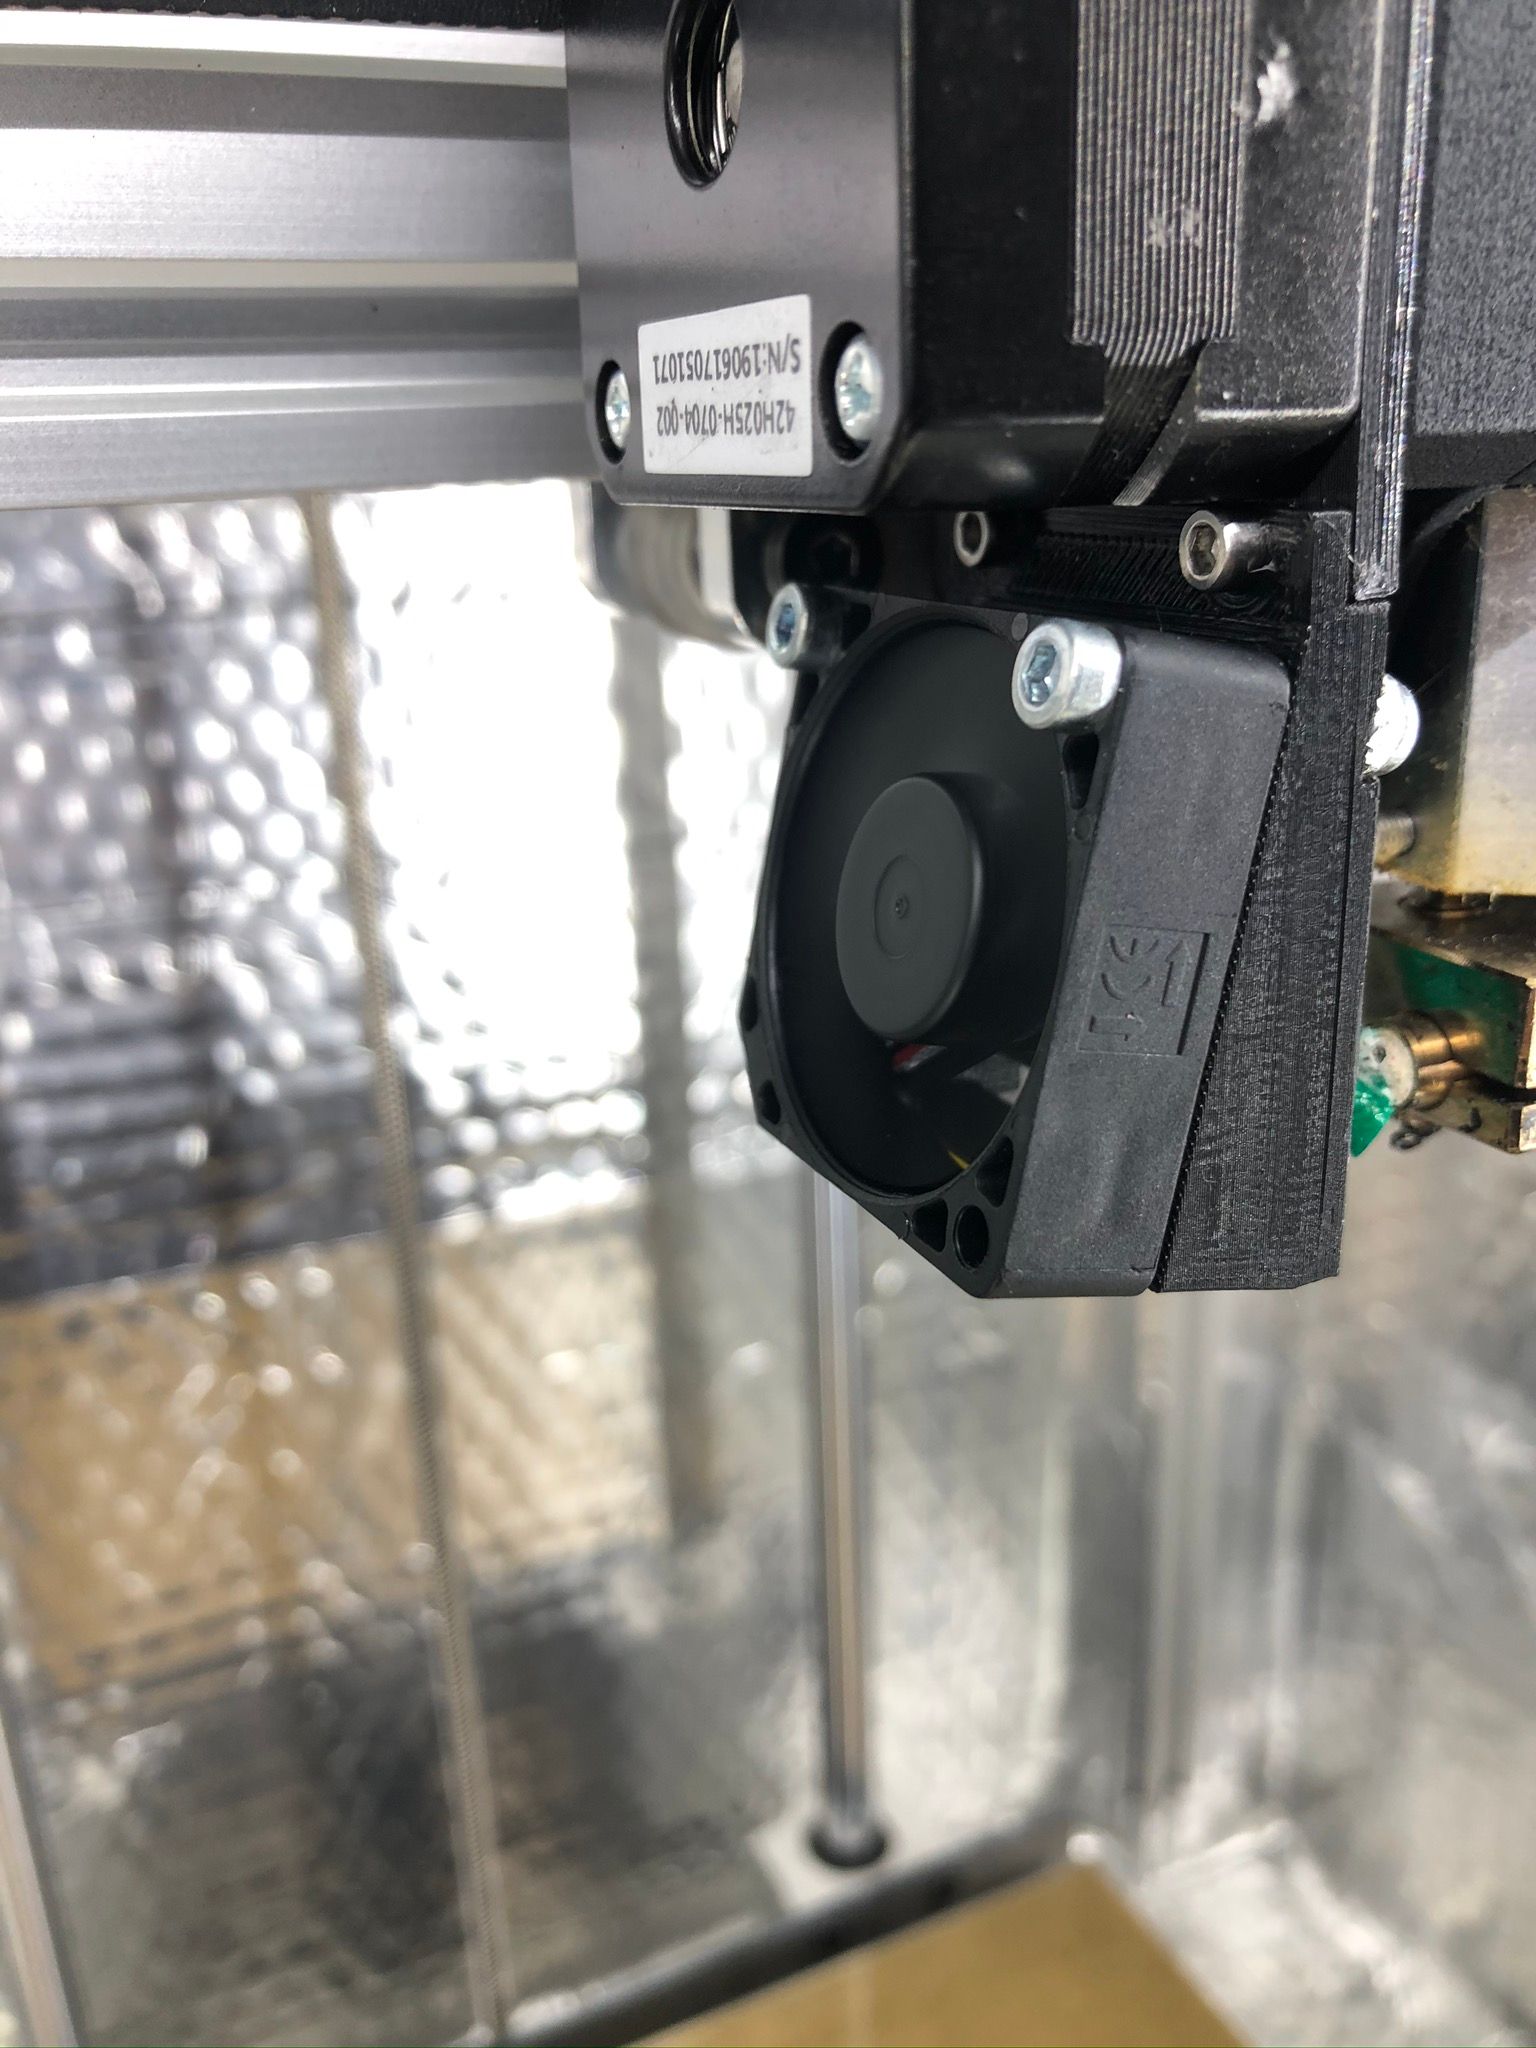
Update - part cooling fan added. Mount and fan shroud printed from PA6.6. I used those fans - https://nl.rs-online.com/web/p/axial-fans/1356898/
They are rated to work at 70C and has a small form factor of 35x35x10mm with good pressure.

-
I read your project very carefully! Really really cool!
I have published a fan duct for the BMG X2 ... maybe it will help you a little
https://www.thingiverse.com/thing:4462527
Regards Christian (CR-3D)