Duet3D Logo Duet3D
    • Tags
    • Documentation
    • Order
    • Register
    • Login

    Splitting Z-axis steppers

    Scheduled Pinned Locked Moved
    Tuning and tweaking
    7
    19
    884
    Loading More Posts
    • Oldest to Newest
    • Newest to Oldest
    • Most Votes
    Reply
    • Reply as topic
    Log in to reply
    This topic has been deleted. Only users with topic management privileges can see it.
    • StevePS3undefined
      StevePS3
      last edited by

      I've seen a couple of videos where people have 2 independent stepper drivers. I have a D-bot with two lead screws. I also have a BL touch. I would have thought that there must be a way of using these two components to facilitate a better way of levelling the build plate. I've tried a couple of times following posts that I've found but I've not managed to split the Z axis motors, let alone actually use them to level the bed.

      Can someone either direct me at a good RRF3 reference or explain how I would go about achieving this? Or even just saying that it is not possible so that I can stop searching for a solution.

      JoergS5undefined 1 Reply Last reply Reply Quote 0
      • JoergS5undefined
        JoergS5 @StevePS3
        last edited by JoergS5

        @StevePS3 this is a good start:
        https://duet3d.dozuki.com/Wiki/Bed_levelling_using_multiple_independent_Z_motors
        with a section about RRF3 at the end. RRF3 made the procedure easier.

        1 Reply Last reply Reply Quote 0
        • StevePS3undefined
          StevePS3
          last edited by

          That is the one that I followed. It seem to be written by someone who assumed that I knew what they were talking about. There appears to be a whole load of detail missing. I am pretty sure that firmware can't get around the problem that the two Z connectors are linked to each other. So I am sure that you do need to split the Z axis.

          A Former User? 1 Reply Last reply Reply Quote 0
          • StevePS3undefined
            StevePS3
            last edited by

            I tried just doing this to start with

            ...
            M584 X0 Y1 Z2:4 E3; two Z motors connected to driver outputs Z and E1
            M671 X-20:220 Y0:0 S0.5 ; leadscrews at left (connected to Z) and right (connected to E1) of X axis
            M208 X-5:205 Y0:200 ; X carriage moves from -5 to 205, Y bed goes from 0 to 200
            ...

            But all I ended up with was only 1 stepper being powered.

            engikeneerundefined 1 Reply Last reply Reply Quote 0
            • hlwerschnerundefined
              hlwerschner
              last edited by

              @StevePS3 said in Splitting Z-axis steppers:

              D-bot

              As far as I can find that D-Bot seems to be a cartesian printer, I am wondering why you want to have 2 "independent" Z axes?

              I have built my machine as a "portal" style one (Y movement is done by moving the bed/table and the protal has 2 leadscrew drives (each with stepper motor) and the X-axes leadscrew moved up/down by these two synchroneously working steppers. With the DUET 2 this is quite simple as it directly supports this solution. With the two leadscrews + each stepper, I am quite sure to be able to move even drilling motors instead of a printing head.

              As far as I did understand the different kinds of printer axes modes, you need independently working steppers for the non-cartesian modes?

              StevePS3undefined 1 Reply Last reply Reply Quote 0
              • engikeneerundefined
                engikeneer @StevePS3
                last edited by

                @StevePS3 post your full config.g file so we can see what is going on. It could be one of the other settings isn't right (have you got the steps per mm set up right for both Z motors etc)

                Also, have you checked your wiring? Simple test would be to swap the cables over at the Duet, just in case there is an issue there.

                How are you trying to move your Z axis? Does the motor that is moving move as you would expect?

                E3D TC with D3Mini and Toolboards.
                Home-built CoreXY, Duet Wifi, Chimera direct drive, 2x BMG, 300x300x300 build volume
                i3 clone with a bunch of mods

                StevePS3undefined 1 Reply Last reply Reply Quote 0
                • StevePS3undefined
                  StevePS3 @hlwerschner
                  last edited by

                  @hlwerschner
                  No, the D-bot is a CoreXY

                  1 Reply Last reply Reply Quote 0
                  • StevePS3undefined
                    StevePS3 @engikeneer
                    last edited by

                    @engikeneer
                    At the moment my config.g is just a standard setup. I've not made any changes. Or at least I've not kept any changes. I rolled them back until I could find something that worked.

                    1 Reply Last reply Reply Quote 0
                    • fcwiltundefined
                      fcwilt
                      last edited by

                      Hi,

                      If at one point you had both Z steppers connected to the two Z connectors did you restore the jumpers when you disconnected the stepper that is now connected to E1?

                      Frederick

                      Printers: a small Utilmaker style, a small CoreXY and a E3D MS/TC setup. Various hotends. Using Duet 3 hardware running 3.4.6

                      1 Reply Last reply Reply Quote 1
                      • StevePS3undefined
                        StevePS3
                        last edited by

                        Maybe this is the problem, I did not change any jumpers. I didn't think I needed to. I thought that I could just do the M584 X0 Y1 Z2:4 E3. I've not read anywhere that said I needed to change jumpers.

                        fcwiltundefined engikeneerundefined 2 Replies Last reply Reply Quote 0
                        • fcwiltundefined
                          fcwilt @StevePS3
                          last edited by fcwilt

                          @StevePS3

                          Well IF you had both Z steppers connected to the two Z connectors you had to remove the two little black jumpers on the second Z connector.

                          IF you removed a cable to a Z stepper from the second Z connector you need to restore the jumpers.

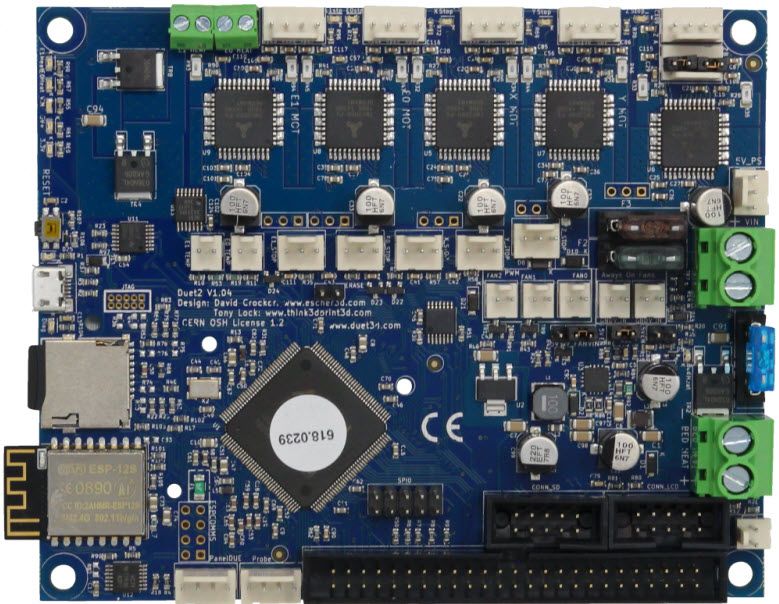
                          See the upper right corner of this screen shot of the Duet WiFi board.

                          Frederick

                          Duet WiFi Board.jpg

                          Printers: a small Utilmaker style, a small CoreXY and a E3D MS/TC setup. Various hotends. Using Duet 3 hardware running 3.4.6

                          1 Reply Last reply Reply Quote 1
                          • engikeneerundefined
                            engikeneer @StevePS3
                            last edited by

                            @StevePS3 What @fcwilt said...

                            FYI, the two Z-motor headers on the Duet are wired in series, hence the need for the jumpers to complete the circuit. There's a note about this on the Duet wiring diagrams:
                            https://duet3d.dozuki.com/Wiki/Duet_Wiring_Diagrams

                            @Phaedrux (/someone with the power) - Might be worth putting a quick reminder about this on the Independent Z motor's page to make things clearer 🙂

                            E3D TC with D3Mini and Toolboards.
                            Home-built CoreXY, Duet Wifi, Chimera direct drive, 2x BMG, 300x300x300 build volume
                            i3 clone with a bunch of mods

                            1 Reply Last reply Reply Quote 1
                            • StevePS3undefined
                              StevePS3
                              last edited by

                              Ahhhh. That makes sense. Thanks, let me try that.

                              1 Reply Last reply Reply Quote 0
                              • StevePS3undefined
                                StevePS3
                                last edited by

                                OK, So I have put the jumpers back and I've updated the config.g

                                ; Drives
                                M569 P1 S1 ; physical drive 1 goes forwards
                                M569 P0 S1 ; physical drive 0 goes forwards
                                M569 P2 S0 ; physical drive 2 goes backwards
                                M569 P3 S0 ; physical drive 3 goes forwards
                                M584 X1 Y0 Z2:4 E3 ; set drive mapping
                                M671 X0:0 Y-20:220 S0.5 ; leadscrews at front (connected to Z) and back (connected to E1) of Y axis
                                M350 X16 Y16 Z16 E16 I1 ; configure microstepping with interpolation
                                M92 X100.00 Y100.00 Z400.00 E420.00 ; set steps per mm
                                M566 X900.00 Y900.00 Z12.00 E120.00 ; set maximum instantaneous speed changes (mm/min)
                                M203 X18000.00 Y18000.00 Z180.00 E1200.00 ; set maximum speeds (mm/min)
                                M201 X500.00 Y500.00 Z20.00 E250.00 ; set accelerations (mm/s^2)
                                M906 X900 Y900 Z1100 E800 I30 ; set motor currents (mA) and motor idle factor in per cent
                                M84 S30

                                Other than that I've done nothing so far. I though that it was best to get the leadscrews working before I worries about endstops.

                                Now the stepper plugged into the E2 is working but the stepper plugged into Z is totally passive.

                                1 Reply Last reply Reply Quote 0
                                • StevePS3undefined
                                  StevePS3
                                  last edited by

                                  OK, I saw one of the comments and I swapped it to 4:2 and that works.

                                  1 Reply Last reply Reply Quote 0
                                  • StevePS3undefined
                                    StevePS3
                                    last edited by

                                    I now have the two endstop positions working but with each enstop probe, both motors are turning. Is that correct? If so then how is this levelling the bed?

                                    1 Reply Last reply Reply Quote 0
                                    • StevePS3undefined
                                      StevePS3
                                      last edited by

                                      OK, sorted. I had to change the M574 command to use an S2 probe rather than an S1. All working now, thanks everyone.

                                      1 Reply Last reply Reply Quote 0
                                      • Phaedruxundefined
                                        Phaedrux Moderator
                                        last edited by

                                        Glad you got it sorted. I'll add a note to the page about adding the jumpers back to the second Z driver port as it certainly may not be obvious to the uninitiated.

                                        By the way, if you already have a probe you don't really need to use the dual z endstop method at all, but if it's working for you, rock on.

                                        Z-Bot CoreXY Build | Thingiverse Profile

                                        1 Reply Last reply Reply Quote 0
                                        • A Former User?
                                          A Former User @StevePS3
                                          last edited by

                                          This post is deleted!
                                          1 Reply Last reply Reply Quote 0
                                          • First post
                                            Last post
                                          Unless otherwise noted, all forum content is licensed under CC-BY-SA