BOx Large Format DIY Printer
-
@tgarr said in BOx Large Format DIY Printer:
The breakout board to HDMI looks very slick. I've wondered why something like that isn't done more often, is there a simple way to tell what the current limit would be on the HDMI and USB cables?
This depends on the internal wire gauge used. I chose to go for 24AWG because I was concened to pass about 40W to the heated cartridge, but I think this might be overkill since I'm running the duet at 24V so that's only 1.5 amps, plus that's only full power for a few minutes during the initial heating anyways. But my cable is very long, it measures 5 metersso I had to lower its resistance by having a bigger section.
The lower the gauge, the less flexible the cable will be, which might be an issue on smaller printers. In my case it was already an issue, so I decided to remove the external PVC insulation of the HDMI cable and replaced it by a nylon sleeve so it would be easier for the cable chains to bend.The HDMI cable has around 20 indivudual wires, so you can also parallel some of them if you're concerned about power delivery. I didn't want to do that since I wanted the possibility to add a few accessories later, so I prefered to keep as much wires available as possible. Right now I've still got 3 or 5 wires still unused, that's after having wired the extruder cartridge, the temp sensor, the part fan, the LED, the Extruder motor and the BLtouch.
-
@MrDui said in BOx Large Format DIY Printer:
The higher the gauge, the less flexible the cable will be, which might be an issue on smaller printers.
Minor correction for anybody not aware: The higher the gauge, the THINNER the cable will be. A 32 gauge wire will be thinner than a 24 gauge wire and all else being equal will be MORE flexible.
I do like the idea of using HDMI cables though. It can really clean up the wire mess that seems to be unavoidable under most circumstances. Too bad I didn't think of that in my last printer build. -
@jens55 said in BOx Large Format DIY Printer:
@MrDui said in BOx Large Format DIY Printer:
The higher the gauge, the less flexible the cable will be, which might be an issue on smaller printers.
Minor correction for anybody not aware: The higher the gauge, the THINNER the cable will be. A 32 gauge wire will be thinner than a 24 gauge wire and all else being equal will be MORE flexible.
Oh yeah you're absolutely right, I made a mistake in writing my post. It's corrected now, sorry for the confusion!
-
@MrDui said in BOx Large Format DIY Printer:
the less flexible the cable will be, which might be an issue on smaller printers. In my case it was already an issue, so I decided to remove the external PVC insulation of the HDMI cable and replaced it by a nylon sleeve so it would be easier for the cable chains to bend.
HDMI cables are potentially not designed for continual flexing so it will be very interesting to see how these hold up pver long periods of use. I am using one to the toolhead on my toolchanger (for an Raspberry Pi Camera) and so far that has worked well but i am half expecting it to fail at some point.
-
@MrDui thanks for the close up. That clarifies quite a bit for me.
May I ask what drove the decision to package the belts and motors this way? It looks like you essentially made a rack and pinion setup from a belt. Seems pretty cool. And comments on how it performs relative to stationary motors or a metal rack and pinion?
-
@tgarr said in BOx Large Format DIY Printer:
@MrDui thanks for the close up. That clarifies quite a bit for me.
May I ask what drove the decision to package the belts and motors this way? It looks like you essentially made a rack and pinion setup from a belt. Seems pretty cool. And comments on how it performs relative to stationary motors or a metal rack and pinion?
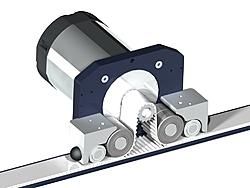
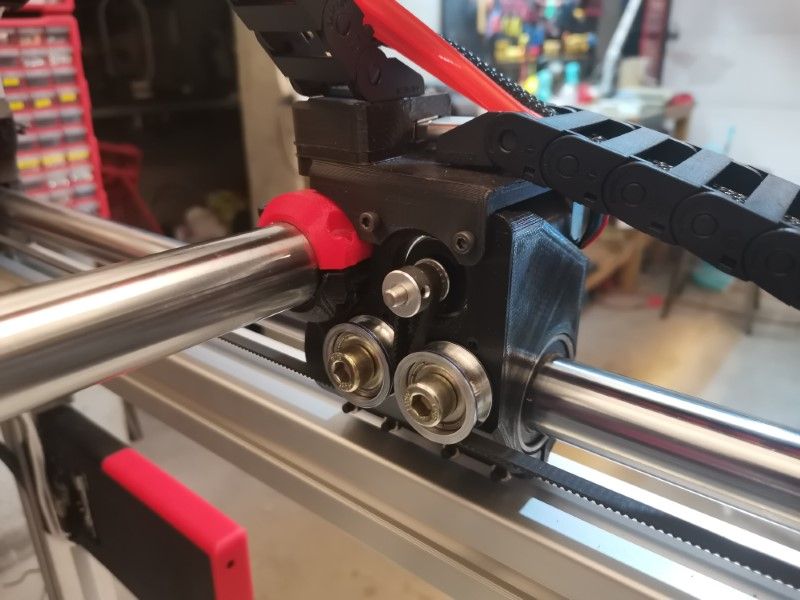
Well a few years ago I built a MPCNC, which works this way. So I knew it was working just fine. I chose to keep this solution for this printer because I wanted to avoid using giganticly long belts, and I wanted to have everything contained within the limits of the chassis while keeping the smallest non printable/useless footprint.
Other solutions like leadscrew or rack and pinion were either slower, less precise, more expensive, bulkier and/or more complicated. This was, in my opinion, the best compromize.It works great actually, Only downside would be that you get a bit more inertia since you have more moving weight, but you also have two motors on each axis instead of just one so that's more power available too. I think it is better than a rack and pinion because this has virtually no backlash (but in practice belts can stretch very, very slightly). To give you an idea of how good a belt setup can be, the MPCNC which uses a similar belt system, is capable of milling aluminum and even steel... So yeah, works just fine!
Anyway, I made a few test prints this weekend:
The Red one has been made with my old machine, and I just printed the orange one withthe printer I just built:
The orange one was printed with a 0.8mm nozzle at 0.4mm height per layer.
Really satisfied with how my printer works so far, and the Duet board works very well.
I'll need to experiment a little with the linear advance to get better corners and path starts, but aside from this both prints were almost flawless. -
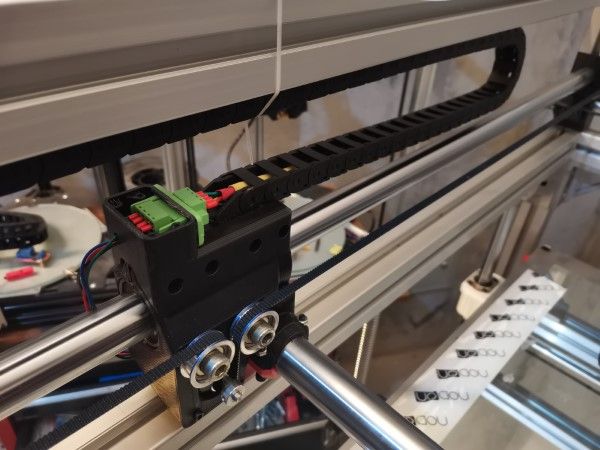
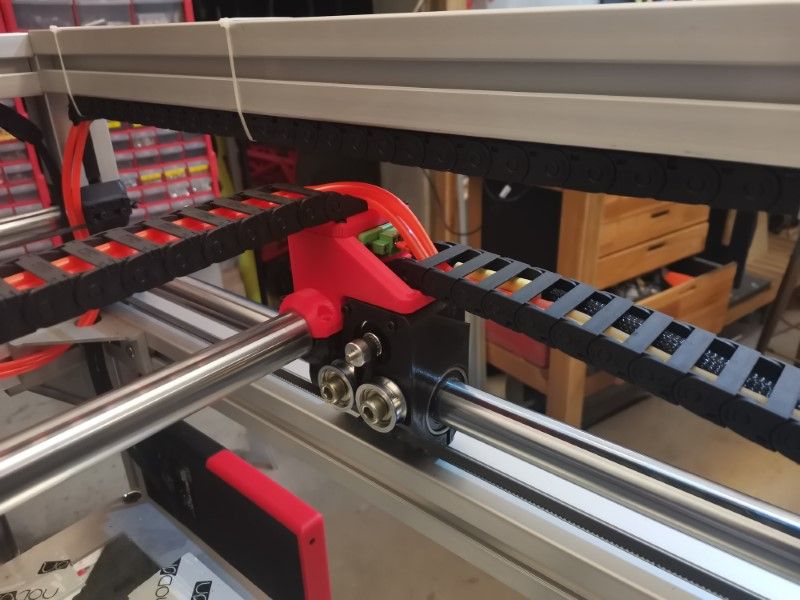
@MrDui nice machine, sort of a super large Ultimaker! Are the X and Y linear rails tubing ( like MPCNC), or solid linear rod? Also, what size belt (looks a bit narrow for all that weight)?
If you’re concerned about belt stretch as you increase speed and acceleration, particularly as you are moving 2 motors per axis, it would be quite simple to convert your belts to ‘Everman belt drive’ eg
See https://www.cnczone.com/forums/linear-and-rotary-motion/59570-forum.html or for a quicker intro see https://openbuilds.com/threads/longest-x-axis.868/#post-13415Basically, attach another length of belt (using double sided tape is recommended) under the existing belt, teeth upward. The existing belt teeth will mesh the lower belt, and there will be very little belt to stretch. There are a few other things to note, see previous links. I’m planning on doing this on my CNC machine, if I ever get around to finishing it!
Ian
Bed-slinger - Mini5+ WiFi/1LC | RRP Fisher v1 - D2 WiFi | Polargraph - D2 WiFi | TronXY X5S - 6HC/Roto | CNC router - 6HC | Tractus3D T1250 - D2 Eth
-
@droftarts said in BOx Large Format DIY Printer:
@MrDui nice machine, sort of a super large Ultimaker! Are the X and Y linear rails tubing ( like MPCNC), or solid linear rod? Also, what size belt (looks a bit narrow for all that weight)?
Thanks!
The tubes are industrial linear rails, they are hollow but if you take a close look at the first picture of the machine in my first post, you can see that they are really thick.If you’re concerned about belt stretch as you increase speed and acceleration, particularly as you are moving 2 motors per axis, it would be quite simple to convert your belts to ‘Everman belt drive’ eg
Ian
I've seen this done on some machines, it works well. To be honest, I'm not concerned at all by the belts. I used them on my previous machine and they worked just fine. Plus, the results I got yesterday seem really good to me, especially considering the fact that my belts weren't even tightened (I just saw that today)...
If it comes to that, I can always change for some steel reinforced ones or just go for 10mm wide. But, at least in my experience, it's not necessary and it won't make any noticeable difference. Only case I see it might make a difference would be if I went for really insane accelerations, but my guess would be that the motors will start skipping steps way before belts will become an issue.
-
@MrDui said in BOx Large Format DIY Printer:
steel reinforced ones
generally a bad idea for 3d printers using small pulleys/idlers the bend radius are small enough that the steel work hardens over time and snaps.
-
@T3P3Tony said in BOx Large Format DIY Printer:
@MrDui said in BOx Large Format DIY Printer:
steel reinforced ones
generally a bad idea for 3d printers using small pulleys/idlers the bend radius are small enough that the steel work hardens over time and snaps.
Yeah I heard about that but I never actually tried myself. I do have a few meters so maybe I should give it a shot just to see how long they'd last.
Let's say that they are good for 1000 hours, then it just becomes a regular maintenance thing, just like replacing nozzles.
It's not like they'd snap anyway, they'd just lose a tiny bit of accuracy, so there's not a big risk of trying it.")
-
Ok guys so a quick update. I've stopped using the HDMI and USB cables. I really loved the idea and it was so easy to build, but it just wasn't reliable enough. I had lots of issue with the HDMI disconnecting and also sometimes some layers skipped, which led me to doubt about the reliability of the USB, though I had no proof they were the culprit.
I'm still using the USB for the endstops and filament sensor since those seemed to work just fine.So, anyway, I've redesigned many, many parts in order to fit the new wiring harness system:
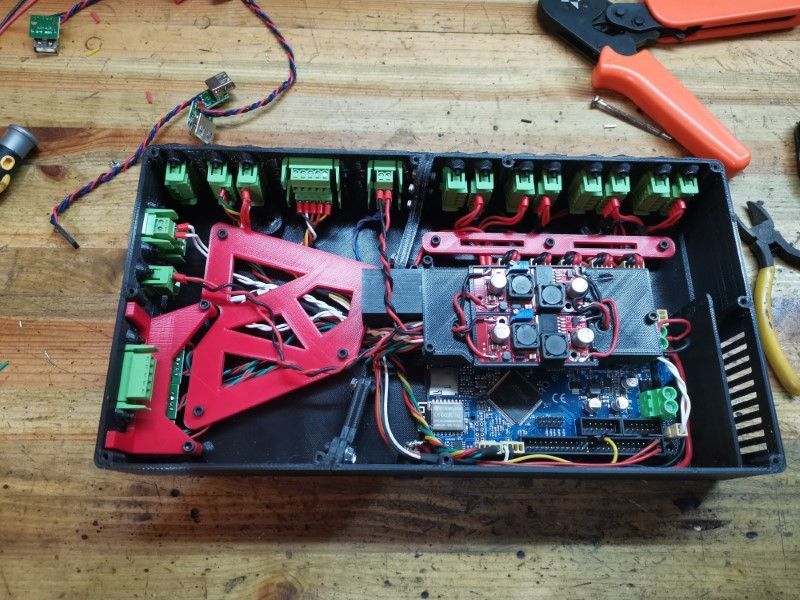
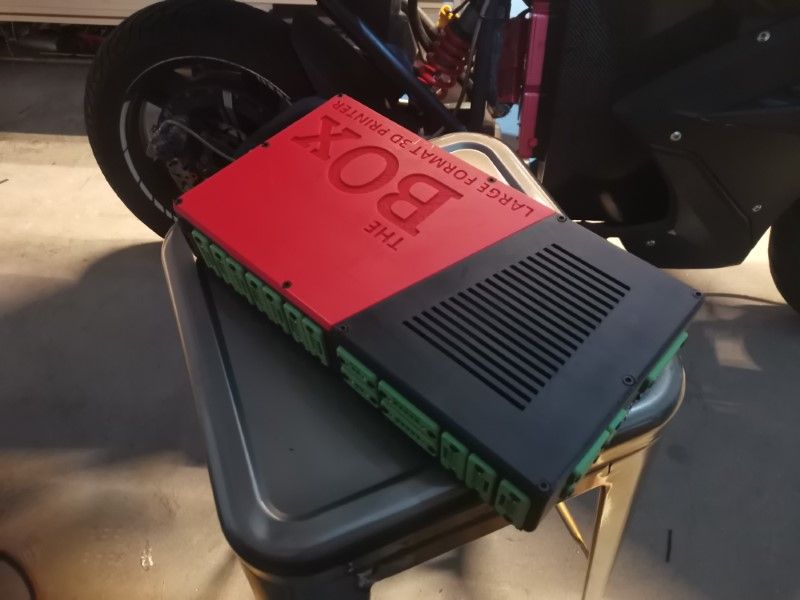
First, the electronic enclosure, featuring the new plugs, two power converters (one for the watercooling pump, one other for the LED light on the print head), and also an air duct to directly cool the drivers using a blower fan :
I used my lathe to machine some belt guides out of aluminum, because the belts were sometimes rubbing against the plastic:
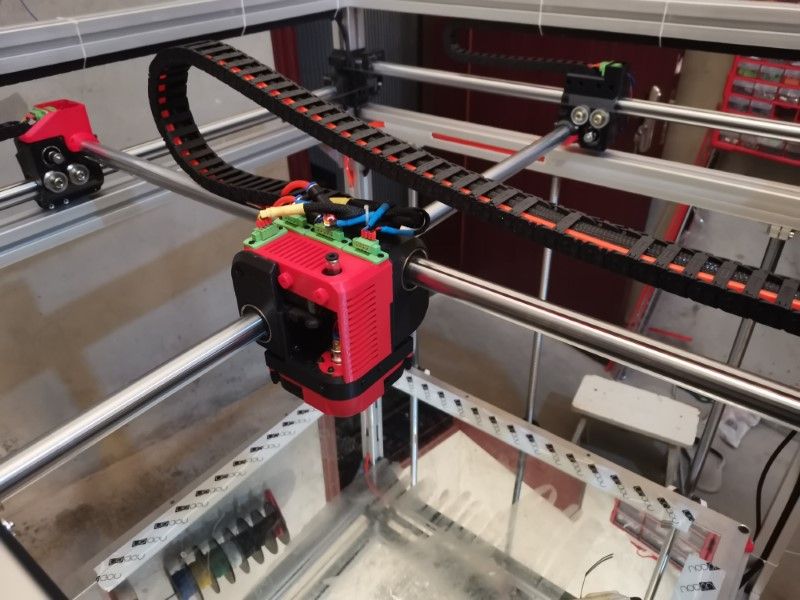
The drag chain anchor points have been redesigned for something sturdier integrating the plugs for the stepper motors, which are now wired in series instead of parallel, to get more torque. All the harness is made of silicone insulated wire, so that they are extremely flexible, thus lowering the tension on the drag chains :
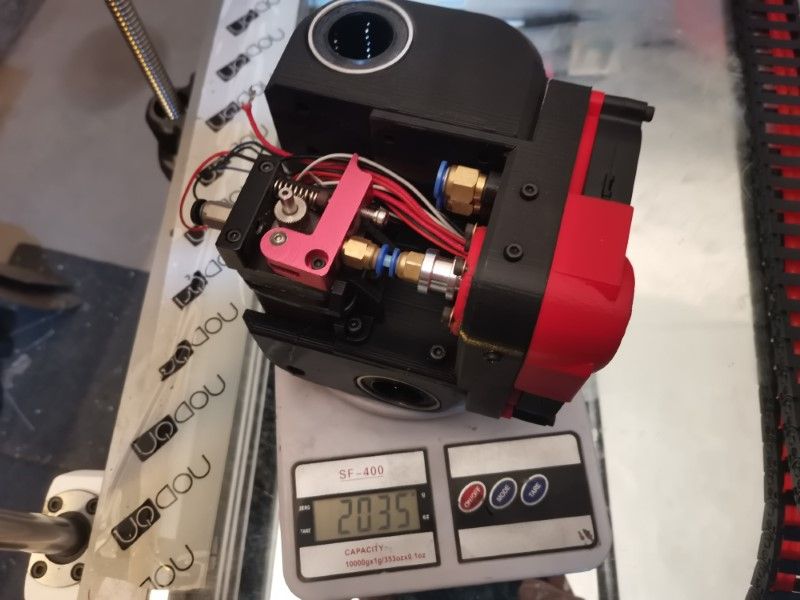
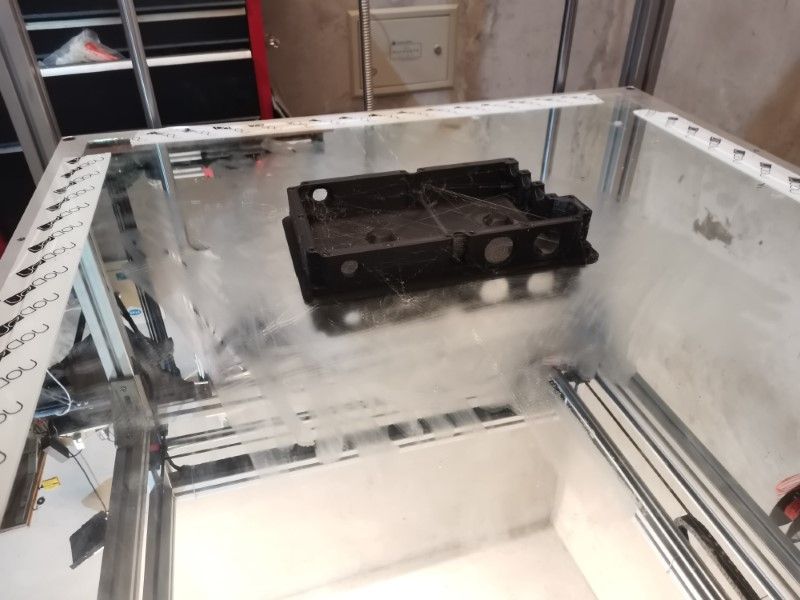
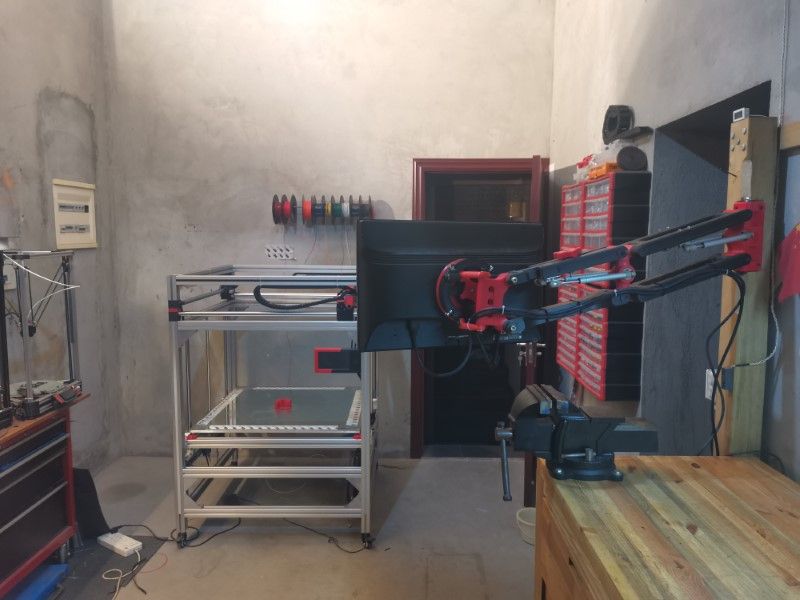
Last but not least: the print head and the carriage. Now everything fits within the carriage so that's a lot cleaner. The print tool can be dropped in the carriage in less than 2 minutes, so I can change for another tool quickly if necessary:
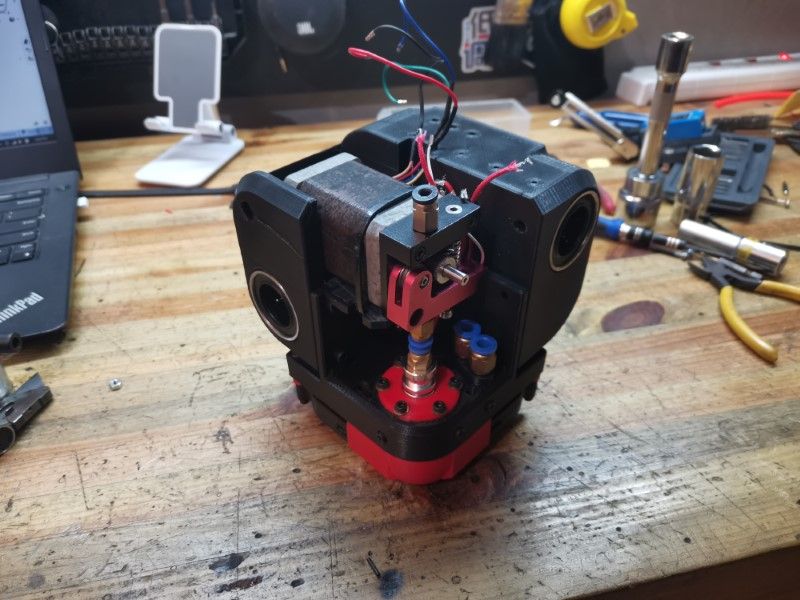
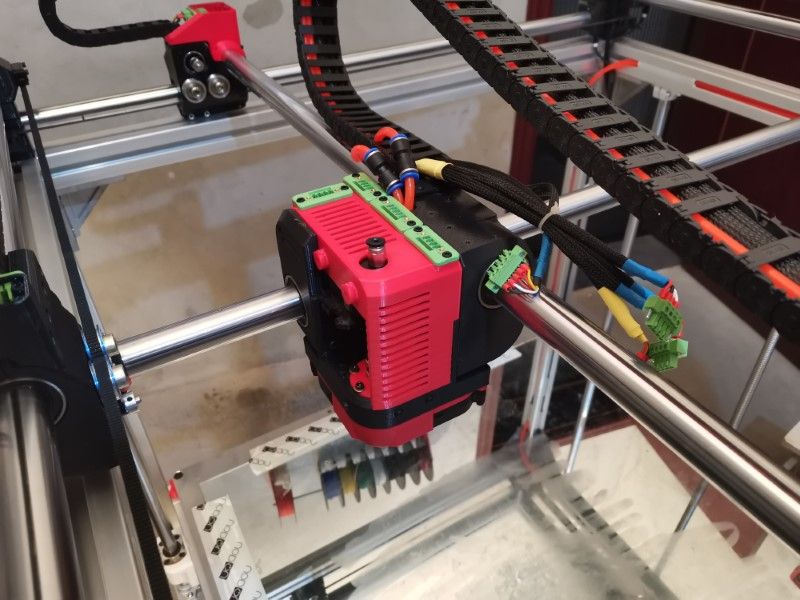
It's quite heavy, the print head weights more than 2Kg. Also the X and Y tubes are very heavy too and weight approximately 3-4 kilo each.
Despite all that weight, the printer is incredibly fast and responsive, I've made some tests running it at 300mm/sec and 3000mm/s2 of acceleration and it was working perfectly well with no skipped steps!
The Duet board does an amazing job, that's insane to see.
Right now I'm missing a part for the extruder so I was not able to extrude plastic, but just look at the kind of speeds I'm talking about on the following video... remember that this print head weights more than 2 kilos, the motors move it around like it weights nothing!!I'm super impressed by the Duet so far. I think I'll give a try to the Duex5 Expansion board to add at least one other Z axis, maybe two. And then later some more extruders (but I'll wait for the machine to be really stable and finished before I'll try). This board has surpassed my expectations by quite a lot, I was not expecting it to be that great.
Kudos to the team who designed it!
-
Such a nice printhead! But please get rid of that Extruder!!!!
-
@PCR said in BOx Large Format DIY Printer:
Such a nice printhead! But please get rid of that Extruder!!!!
Why?
-
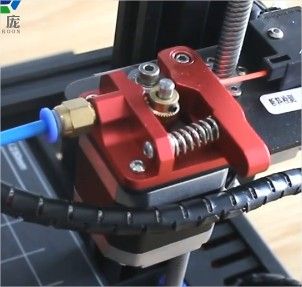
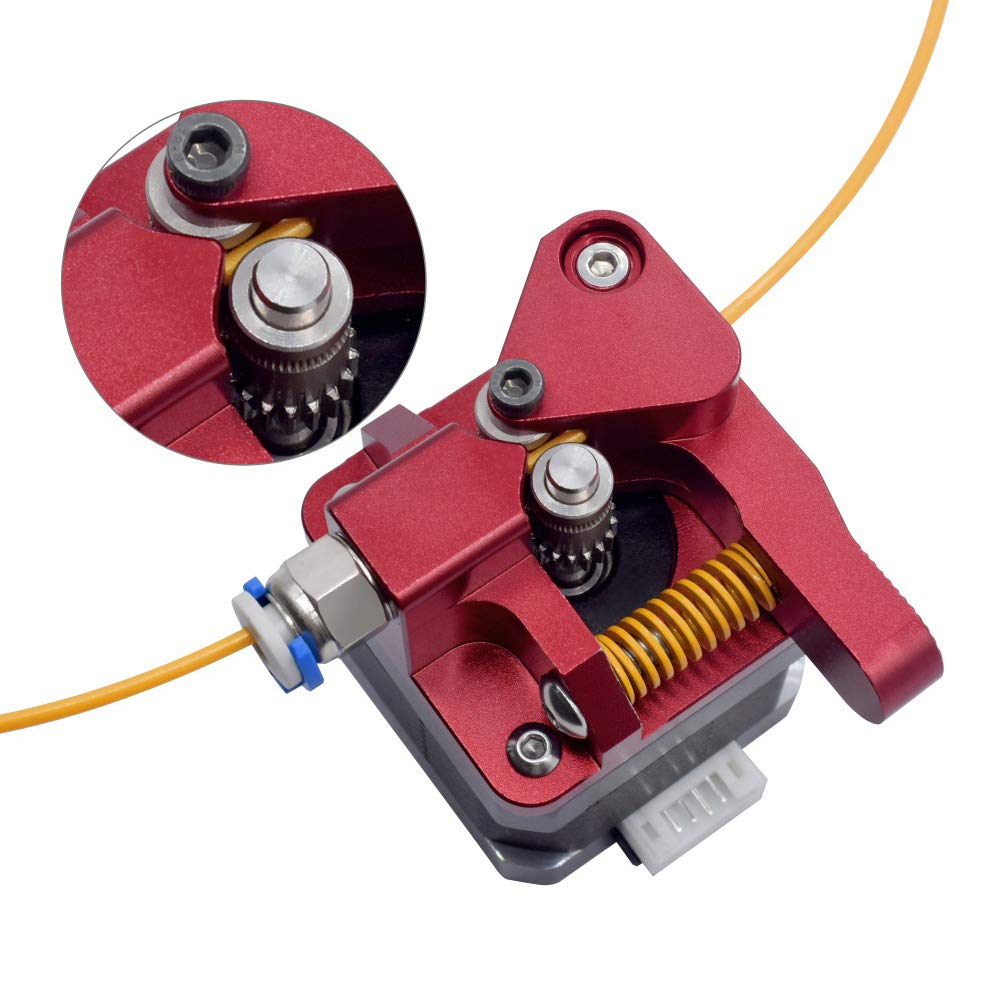
Because with such a nice printer you want a good Extruder. Look for the bondtech BMG or Clone. A Titan or clone. This "normal" Extruder is ok. But its only gripping from one Side. If you going to run preassure advance or anything like that it slips more easily.
-
Ok I see. I actually tried to find something like the ones you mentionned, but they ere either too big to fit or oriented the wrong way.
Actually I never had any problem with this style of extruder. I'm using some really good gripping wheels and I tend to tighten the spring hard, so I don't recall it ever slipping except in case of nozzle clog.
Generally it ends up skipping steps but when it starts pushing that hard you know that you've reached the speed limits and it's time to crank up the temperature anyway. You can only push so much plastic through a nozzle at a given temperature, at some point increasing the pressure doesn't make any difference.I've already bought a slightly different extruder that should hopefully come in the mail tomorrow. Still similar style but it has a feature to hopefully better guide the filament after the wheel:
But thanks for the suggestion, much appreciated. If by chance there is a geared system that can fit the tiny space available in the print head then I'll use it for sure!
-
You can actually get a creality dual gear extruder that's very similar to the one your using but with bondtech gears.
-
Aw crap I almost bought this one yesterday but decided it was a bit too long.
Meh, I'll try the one I bought and if it's not convincing then I'll give this one a tryThanks!
-
Or look at the orbiter extruder!
-
OK so new extruder installed and after fixing a few small issues I installed the heat bed:
it's made of 9 heating pads of 300W each, so that's 2700W in total.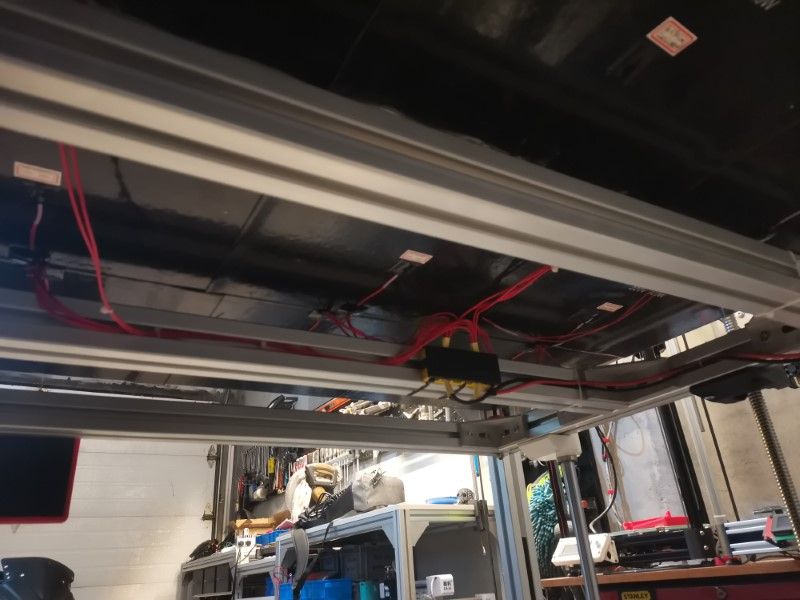
It works really well, the bed is able to hit 60 degree in less than 5 minutes. And since then, no warping anymore.
I've already printed lots of stuff with the printer and so far it works really well. It's getting to the point where it starts being really reliable.
Some parts for my screen articulated arm:


An enclosure for my motorbike's battery monitoring system:
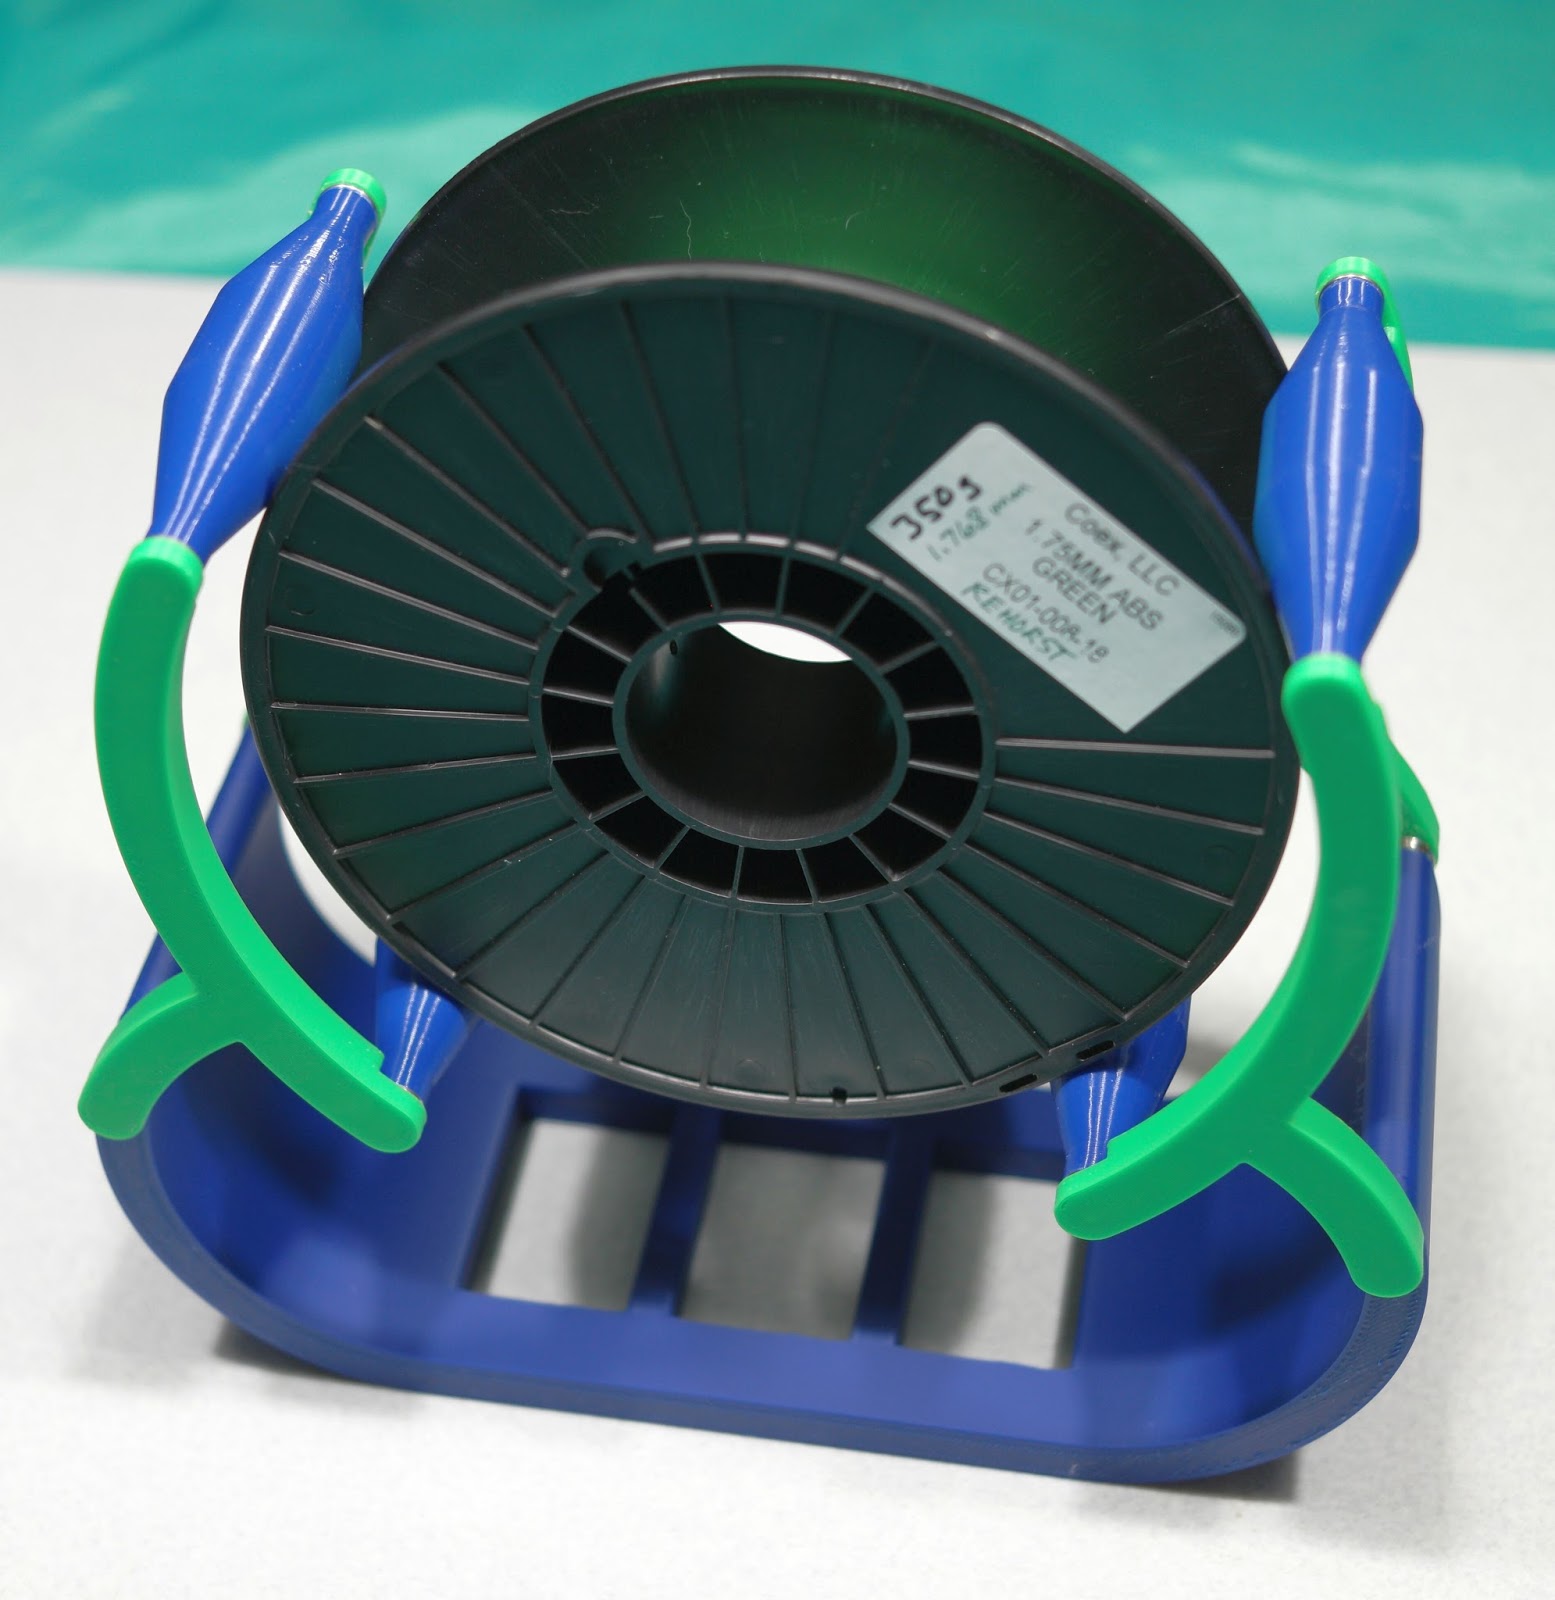
A spool holder system for the printer:

Most of the work on this printer is done, now I'll try making it as reliable as possible.
Also, I received a DueX5 board, so I'll add lots of new functions in the next months, I plan to start ith a 3rd Z axis and then add multi color/multi material capabilities.
-
Looks like a great build! Since the printer has an open frame I'm guessing you'll be printing a lot of PLA. PLA likes to spring off the spool, especially when it's a new spool that's wound almost to the edges of the flanges. When the filament springs off the spool it tends to get tangled and that can end a print prematurely. I use two different design spool holders, both of which prevent such problems.
This one uses bearings from hard disc drives (12 of them!). The rollers were printed as single wall vases. The weight of the spool keeps the rollers pressed against the flanges of the spool. The filament can't jump off.
This is the other one. The rollers have F608 bearings and 5/16" bolts with nylock nuts as shafts. The base was printed as a single piece without support material. Another copy of this one has a steel roller on top so the rubber bands aren't needed:
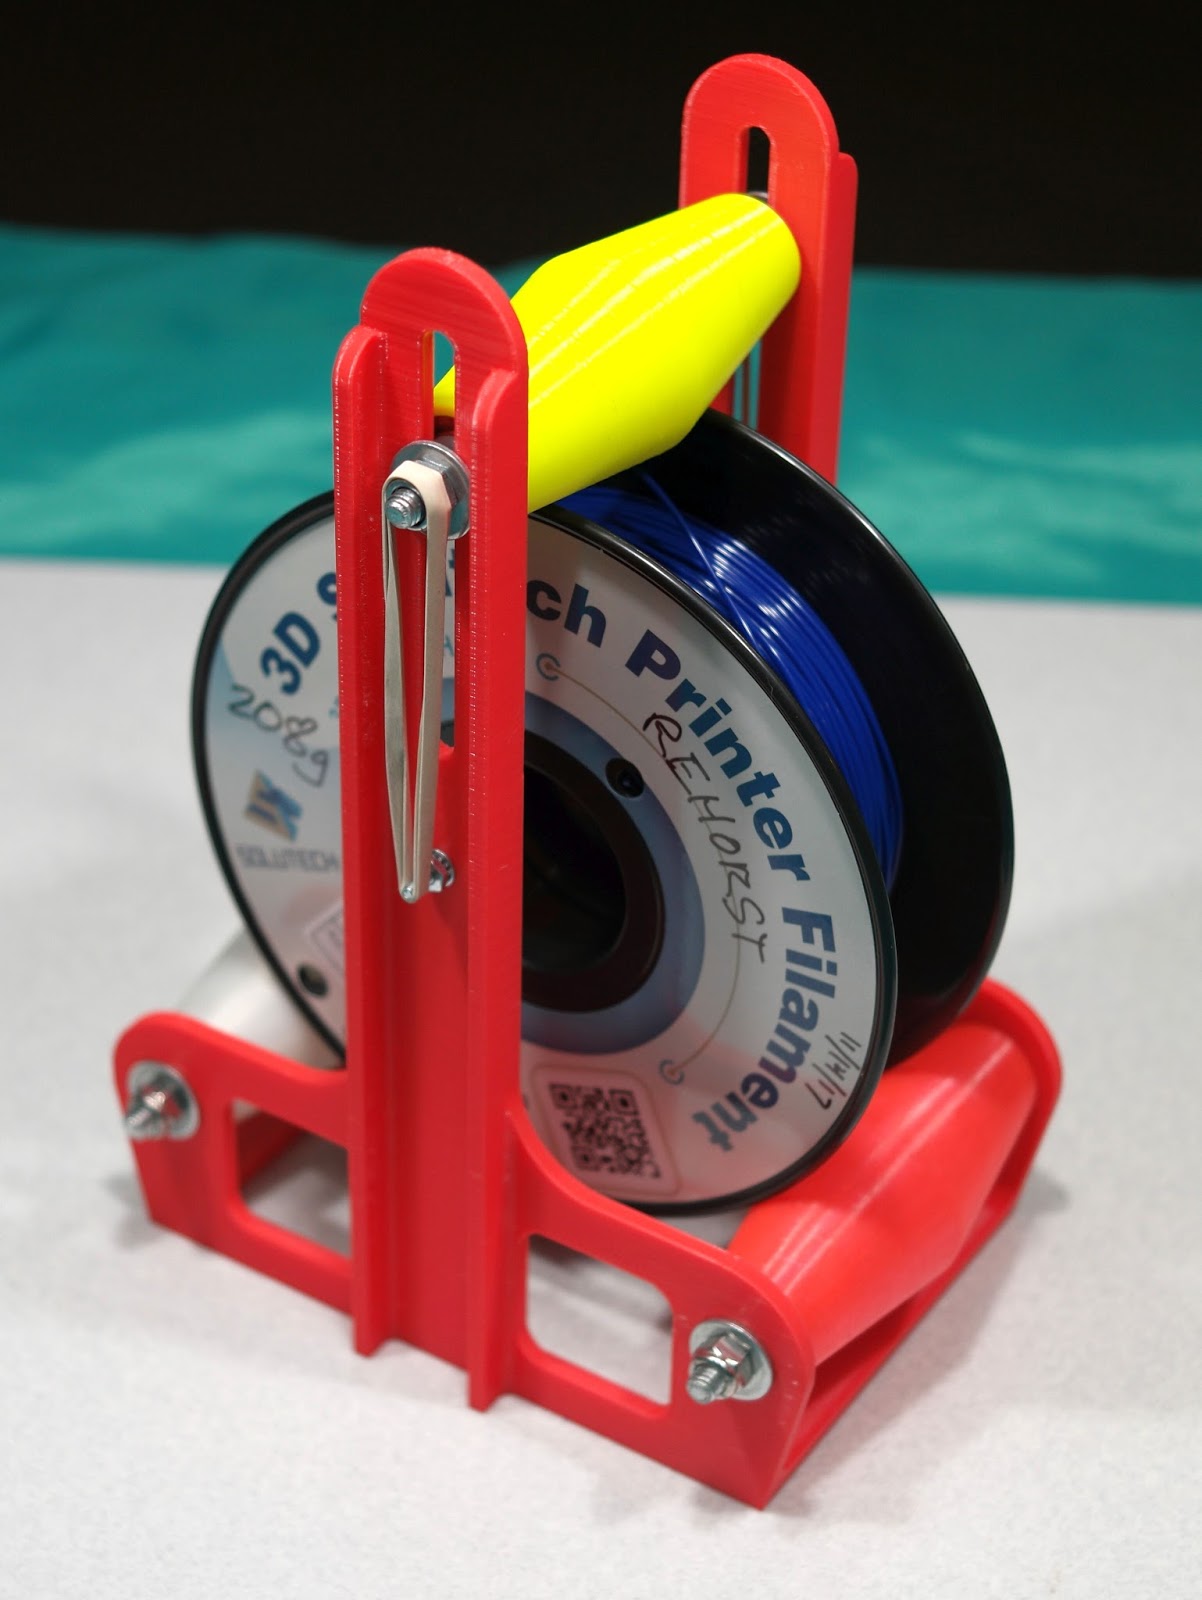
I have found the second one can be used for 5 lb spools if I remove the upper roller- It needs a taller base to be used with all 3 rollers.