The nozzle scratches the part
-
@engikeneer Hi, I will check each proposition.
-
It doesn’t seem to be the Z calibration (second motor to be checked to remove a problem on one of both motors.
-
I have already calibrated the extrusion by measuring the effective length processed
-
The thermistors settings could be also checked again. As I remember, I followed a procedure to set each thermistor PID, I could do it again.
-
I will check on my slicer the extruding type. I don’t remember to change something…
Anyway, thank you for your suggestions !
-
-
@engikeneer Sorry for this newbie question… do you know where to change volumetric settings in Cura? Regards
-
@redax27 I'm not sure about volumetric settings in Cura, but it could be that the filament diameter is set incorrectly. If you use 1.75mm filament, but Cura is set to 3mm filament, you will get massive over-extrusion.
Ian
Bed-slinger - Mini5+ WiFi/1LC | RRP Fisher v1 - D2 WiFi | Polargraph - D2 WiFi | TronXY X5S - 6HC/Roto | CNC router - 6HC | Tractus3D T1250 - D2 Eth
-
@droftarts said in The nozzle scratches the part:
If you use 1.75mm filament, but Cura is set to 3mm filament, you will get massive over-extrusion.
I think it will be the other way around... in this case, you will have massive under-extrusion.
-
@cosmowave Yes, you're right, thanks!
Ian
-
@redax27 Can you post a picture of your first print? That might help us see if the problem is over-extrusion. If you can also post the gcode file, it may show if the gcode is sending commands it shouldn't.
Ian
Bed-slinger - Mini5+ WiFi/1LC | RRP Fisher v1 - D2 WiFi | Polargraph - D2 WiFi | TronXY X5S - 6HC/Roto | CNC router - 6HC | Tractus3D T1250 - D2 Eth
-
@droftarts First of all, thank you to participate to solve my problem!
See below a picture of a part aborted; We can see strange traces like that from the first layer. I attach also the G-code but it is too big; I post only the beginning of the file.
I note also frequently strange over-speeds...
-
@droftarts:
Hi,
Did you have a little moment to see my file?
This evening, I try another print coming from another version of Cura on another computer.
It's worse and stops earlier after the first layer
-
@redax27 Nothing obvious sticks out to me with your print file.
When you start a print, do you start the file with the build plate cold? In your print file it appears as if you home the printer first, and then preheat your bed. I recommend changing your Cura profile to either preheat the bed and nozzle before homing, or re-home after the build plate and nozzle temperatures are reached.
I ask because of this area (same as bottom right):

It looks as if the nozzle and build plate are coming closer together (or even the bed is not level/bent). This COULD happen if your bed, nozzle, frame, etc, are expanding as they increase in temperature. Although, 60°C isn't TOO hot. Could also be that your bed is not flat.
-
@sebkritikel Hi,
Thank you for your answer; the reason why I do it like that is an accuracy measurement problem.
As I let the bed heat during the bl-touch measurement causes a big error (more than 0.5/0.6mm).
If I have no heating and no fans, in this case I have a good measurement and always the same.
I can maybe begin to heat and stop the heating only during the short measurement.
Do you think it's a good idea? The best way is to solve the measurement mistake, but I have no idea how to solve that.
Regards -
@redax27 The accuracy problem - do you mean you see a big difference in the height map when the bed is cool vs. when the bed is hot (for example, you measure when cold, then later measure when hot)? Or do you mean that the BL touch homing may vary/error by .5 / .6mm?
Do you do a height map? If so, can you upload one?
-
@sebkritikel As you say, I think it's an interference when heating. If I do G30-S-1 alone or G30 S-1 with the heating, I have a big measurement difference (around 0,5/0,6). I will add B term as proposed to M558 . For information, see enclosed my map. I have done it by heating the bed @60°C and cut it during the process. It's not perfect because the bed cools down but better than nothing.
heightmap.csv -
@sebkritikel Hi, after some week-end tests, I go ahead but not completely cancelled my problem.
Adding B1 to M558 during measurement cycle is appropriate and cut the heating during measures.
After applying this new feature, G29 seems correct and the printing of the first layer is better. But after several layers the extruder forces again and stops the material feeding.
I begin to be really disappointed because it’s difficult to print something simple.
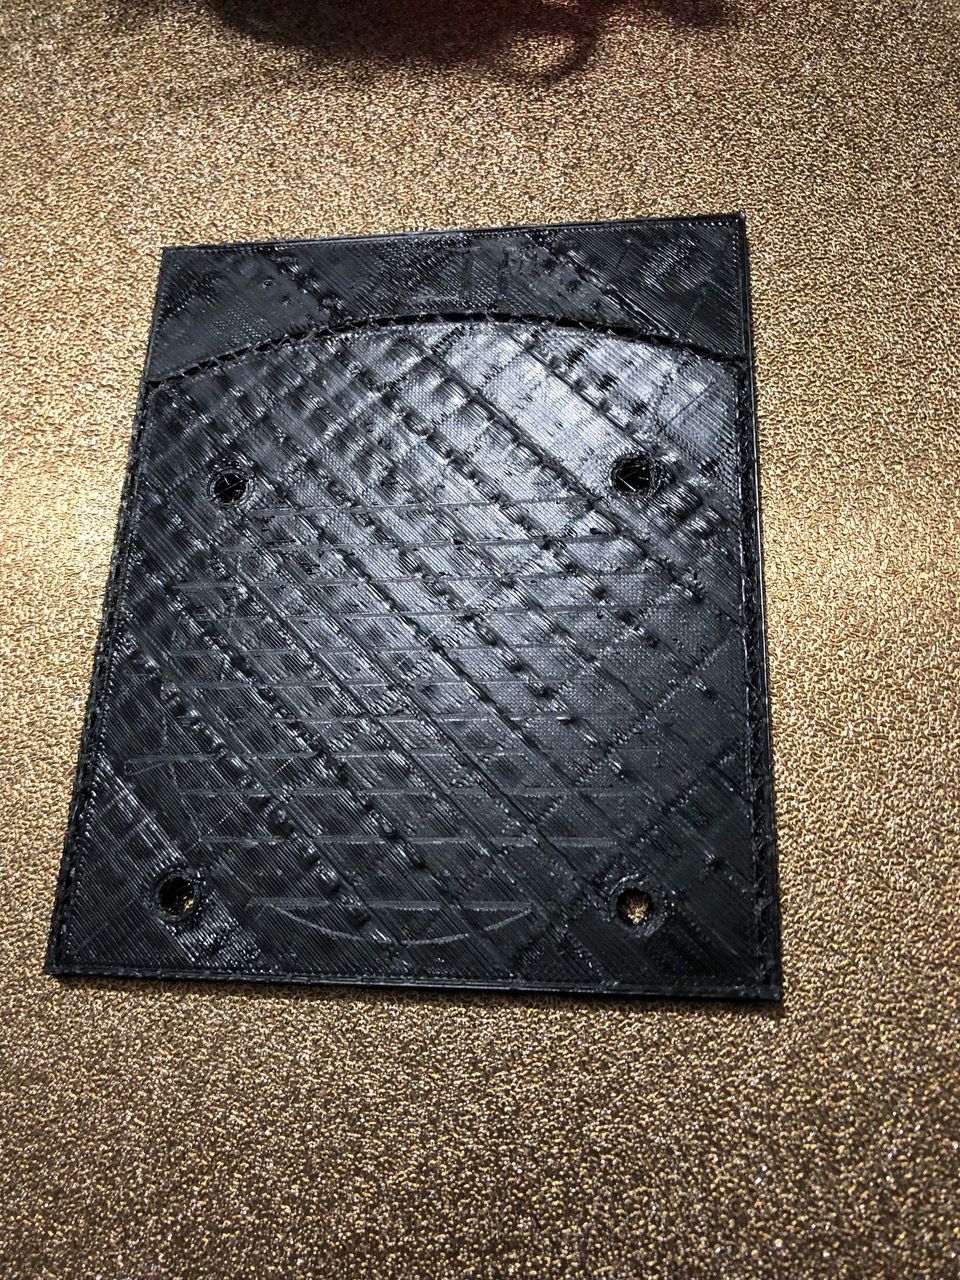
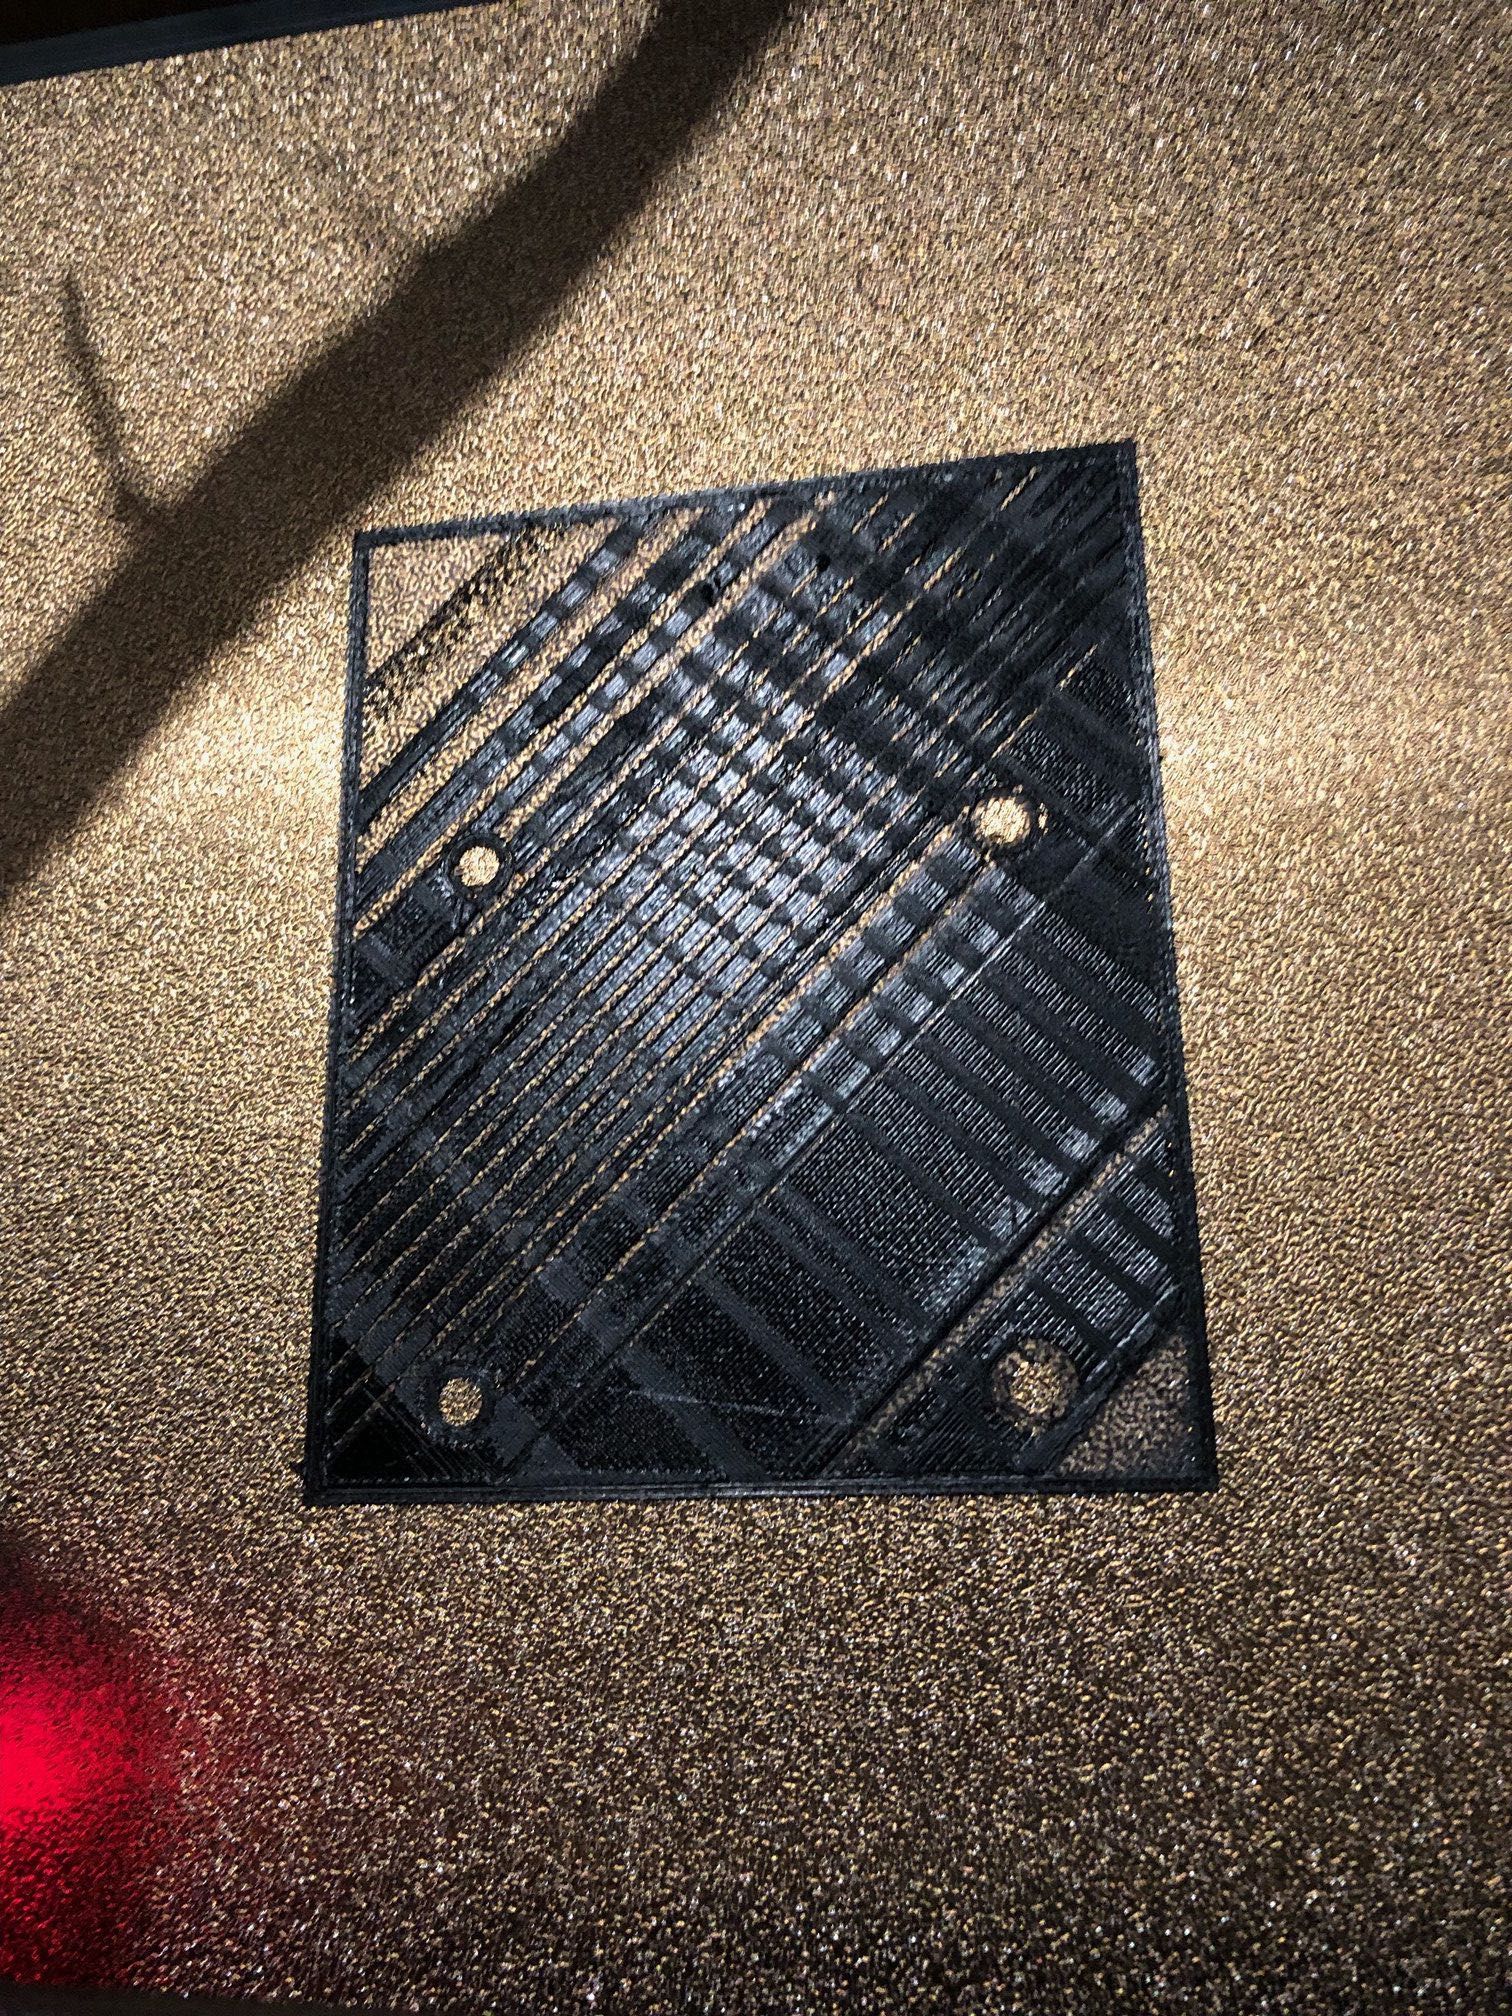
Below my last test. Could it be the atmosphere moisture?
-
Below my last test.
Don’t know much about your printer, the filament you use and the parameters you apply to a print, but your "cabriolet" benchy reminds me of what I get from a (partially) clogged nozzle.
The potential reasons are manyfold and difficult to spot, maybe you can give us some hints:
- filament type (I assume: PLA?)
- wattage of the heater
- heater temperature
- nozzle diameter
- print speed
- retraction settings
- setup of your customised print head
The last item from my list is aimed at a possible heat-creep which may block the filament flow over time. That depends largely on the cooling of your hotend (fan1) and the retraction settings.
-
@infiniteloop, Hi, thank you for your interest.
My last post follows the beginning of the post; at a moment, the nozzle finishes by scratching the part and blocks the material feeding. Below some additional requested information :- filament type: PLA+
- wattage of the heater: 40W
- heater temperature: 210 °C
- nozzle diameter: 0,4
- print speed: 100mm/s
- retraction settings 3mm - no Z hop - no combing mode - 40mm/s
- setup of the customised print head: Bowden head designated to be twice. Running at the moment with a single head (as it’s difficult to make it run, I prefer to begin with a single head). The fan 0 pipe is a weak point, I know it and I have to print a new part. It could be an explanation but I have also the same problem with long time layers (on other parts) where the cooling is less important. But, not 100% sure that it’s not the reason of the problem…
-
@redax27 Thx for the data points. Most of them are quite plausible and unsuspicious to cause nozzle clogging due to heat creeping up to the cold part of the hotend. So, everything looks fine, but …
I don’t wanna adress the part cooling fan (that’s fan 0?) at this stage, although stringing deserves a second thought. To avoid said heat-creep, it is essential to effectively cool the upper part of your hotend - in my understanding of your config.g, that’s the task of fan 1?
Well, whatever fan takes this task - try to verify its operation. In your config, the F parameter in all of your
M106GCodes puzzles me: it should no longer be valid with RRF 3.x. Better to remove that.A second thing to try: halve print speed. I don’t want to doubt the capabilities of your printer, it’s just better to start low.
Then, print a benchy. If you still encounter the same problem, reduce retracts to <0.8 mm: if that works, you have a strong indicator of insufficient hotend cooling. Else, I’m on the wrong path.
-
@infiniteloop first of all, thanks for your last message, it was a good basis for me to investigate and debug my config. I found mistakes, wrong fan numbers, inverting printing fan and nozzle fan. I finally also exchange the mounting of the nozzle fan direction which blowed out and not in.
I had long time ago calibrated the bed heating but not the nozzle heater. It’s now done and, and… I have always the same problem. The last thing not done (as I don’t know how to do it) is the thermistor calibration but really not sure it’s the reason of my problem.
Which method to choose to calibrate my thermistor? And do you have other idea?
I will post later my updated config and the last benchy G-code used at the end.Regards
-
…inverting printing fan and nozzle fan.
Hm, which is what? Commonly, the fan to cool the upper part of the heater is called the "hot end fan", the one which cools the filament after it has left the nozzle is called "print (or part) cooling fan".
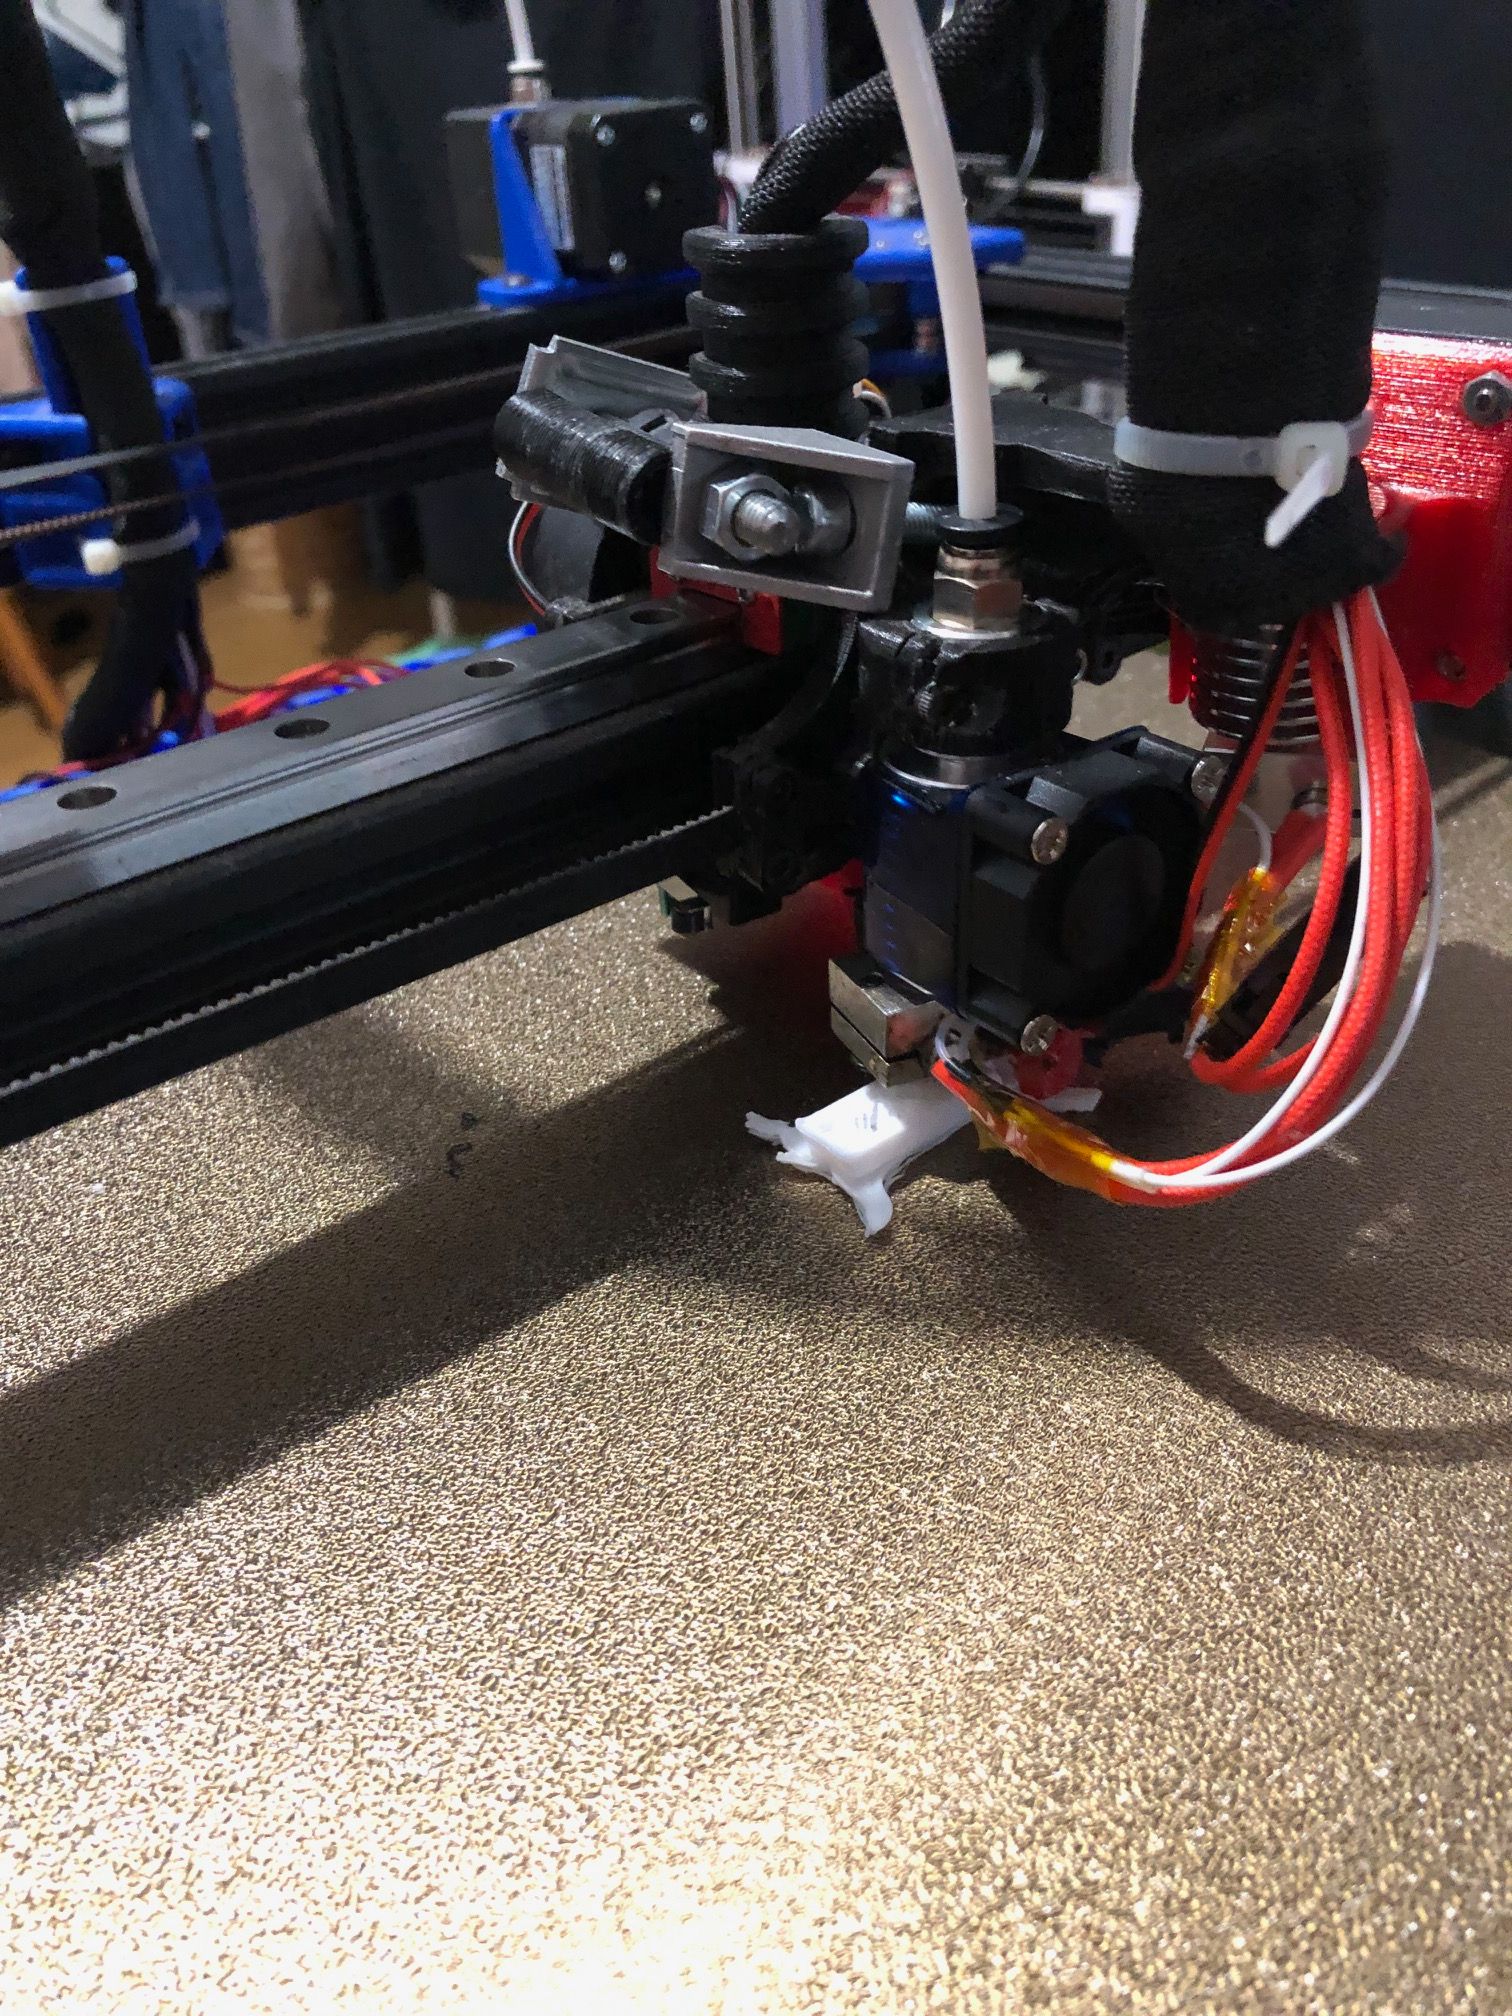
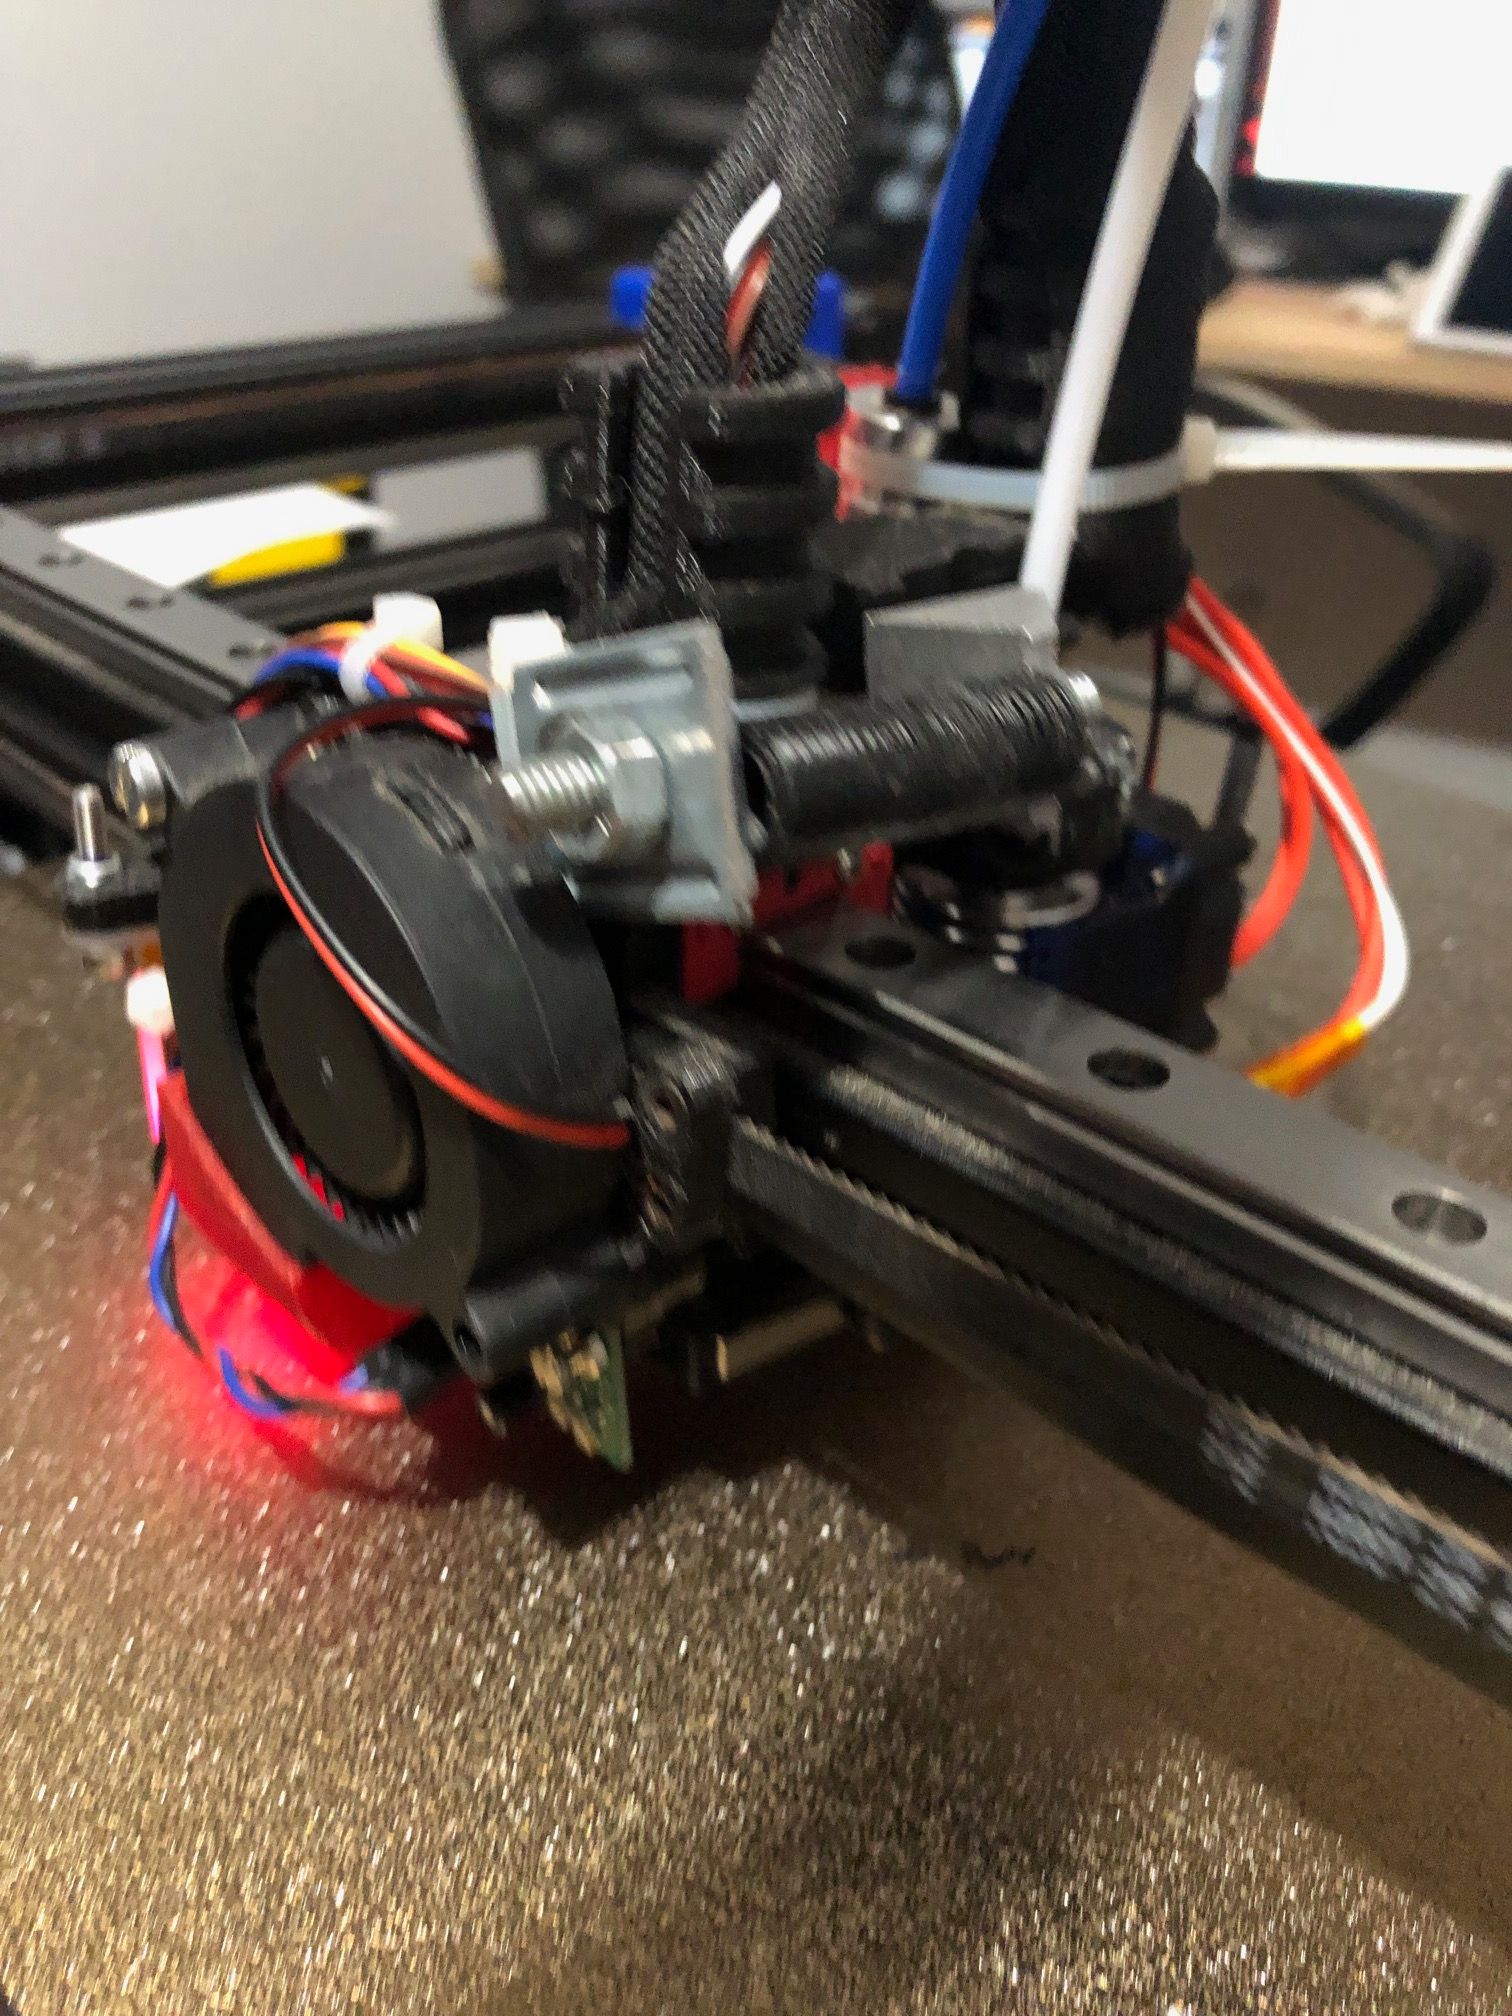
In your OP you told us that the print head is completely customised - it might be helpful to post a snapshot so that I can better imagine that thing.
Which method to choose to calibrate my thermistor?
None? TBH, I just checked if my thermistor’s values looked somehow plausible at room temperature

You can find an in-depth tutorial here: Temperature calibration and ADC tuning.
And do you have other idea?
A lot: with 3D printers, there is barely anything that can’t get wrong

Currently, the contributors to this thread stare at the prints you posted. I’ve put my focus on the filament flow and a potential blocking - if you confirm that a nozzle clogging can be ruled-out, I’d propose, as a next step, to print a temperature calibration tower.
-
@infiniteloop Hi, thanks for your last comments, it's really interesting.
Sorry to answer after a so big time; unfortunately, I haven't always enough time to proceed on my tests and try solving this problem.
Enclosed some pictures; the head is really not finished and I would like to print new parts with this new printer because the old one is also difficult to run correctly. But my problem is close to the story of the egg and the hen.
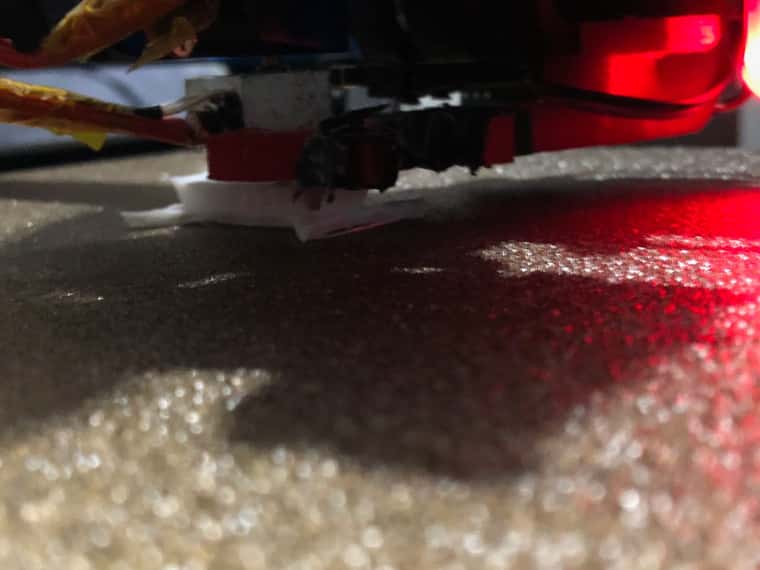
I make a little test tonight, completely stop the part cooling fan and what a surprise, the part continue to grow up. It hasn't been finished because of a first layer badly fixed on the bed but nothing I can't solve. I will continue my tests in this direction but I think the main problem is the part cooling fan blowing out on the hot end and not on the part.
I come back asap with news. I hope at the end close this thread!!
-
Thank you for the imagery.
I think the main problem is the part cooling fan blowing out on the hot end and not on the part.
That's a damn good explanation for the clogging. Great you've spotted it. +1 for this.
However, I'm not sure if the part cooling fan is to blame for the irregular extrusion in this print:
As @sebkritikel commented above, there might be a problem with nozzle height and/or bed levelling. You can find some related links under the topic Z Probe, maybe Using the Manual Bed Levelling Assistant is worth a first look?
At this stage of commissioning, I would recommend not to use mesh bed compensation, as it might obfuscate mechanical inconsistencies (e.g. some non-rectangular geometry). To start with, simply probe the nozzle height in the center and at all corners of the bed with a sheet of paper. This should result in a decent first layer - not perfect, but of reasonable quality.
Whatever you get, feel free to post the results so that we can have a look
