Duet3D Logo Duet3D
    • Tags
    • Documentation
    • Order
    • Register
    • Login
    1. Home
    2. flobler
    • Profile
    • Following 0
    • Followers 0
    • Topics 20
    • Posts 126
    • Best 11
    • Controversial 1
    • Groups 0

    flobler

    @flobler

    17
    Reputation
    24
    Profile views
    126
    Posts
    0
    Followers
    0
    Following
    Joined Last Online

    flobler Unfollow Follow

    Best posts made by flobler

    • RE: Duet 3 Mini 5+ sensorless homing configuration

      I thought Iยดd post a quick update for anyone reading this later:

      I now realized that the bug described here was also contributing to my issues:
      https://forum.duet3d.com/topic/21108/stall-detection-on-duet-3-mini

      Taking this into account, it was a breeze finding a good value for sensitivity and getting sensorless homing to work smoothly.

      posted in Tuning and tweaking
      floblerundefined
      flobler
    • RE: Duet 3 Mini 5+ sensorless homing configuration

      @phaedrux Sure! Sorry I must have missed your message.

      I have "outsourced" the changes that need applying for homing (motor current, driver tuning, V parameter etc.) from the actual homing moves into a separate macro, so I can tweak this centrally.

      Here is how I home all axes:

      ; homeall.g
      ; called to home all axes
      
      M98 P"homing_modifications.g" ; applies necessary modifications for the homing moves
      
      ; get Z out of the way
      G91                    ; relative positioning
      G1 H2 Z5 F1200         ; lift Z	
      M400                   ; wait for current moves to finish
      
      ; home X
      G1 H1 X5 F1200    ; move slowly away
      G1 H1 X-255 F3600 ; move to X axis endstop and stop there (first pass)
      G1 X5 F1200       ; go back a few mm
      G1 H1 X-10 F3000  ; move to X axis endstop once more (second pass)
      G1 X10 F1200      ; go back a few mm
      M400              ; wait for current moves to finish
      
      ; home Y
      G1 H1 Y5 F1200    ; move slowly away
      G1 H1 Y-220 F3600 ; move to Y axis endstop and stop there (first pass)
      G1 Y5 F1200       ; go back a few mm
      G1 H1 Y-10 F3000  ; move to Y axis endstop once more (second pass)
      G1 Y10 F1200      ; go back a few mm
      M400              ; wait for current moves to finish
      
      ; home Z
      G90                 ; absolute positioning
      G1 X11.5 Y4.5 F6000 ; go to first probe point
      G30                 ; home Z by probing the bed
      G1 Z0.6 F500        ; move Z to origin
      G91                 ; relative positioning
      G1 Z1 F500          ; lift Z relative to current position
      M400	     	    ; Wait for current moves to finish
      
      M98 P"homing_modifications_reset.g" ; resets all modifications applied for the homing move
      
      ; homing_modifications.g
      ; tune motor drivers, set motor current and V parameter for homing moves
      
      ; apply modifications
      M569 P0.1 V10          ; reduce V to ensure stealthChop is enabled for X
      M569 P0.2 V10          ; reduce V to ensure stealthChop is enabled for Y
      M913 X70 Y70           ; drop motor current to 50%
      G4 P100                ; wait 100ms
      
      ; tune drivers
      G91                      ; relative positioning
      G1 H2 X0.2 Y0.2 F3000    ; power up motors to ensure they are not stalled
      G4 P100                  ; wait 100ms
      M400                     ; wait for current moves to finish
      
      ; homing_modifications_reset.g
      ; reset all homing modifications applied in homing_modifications.g
      ;
      M913 X100 Y100          ; return current to 100% for X and Y
      M569 P0.1 V2000         ; restore default V for X
      M569 P0.2 V2000         ; restore default V for Y
      G90                     ; absolute positioning
      

      Here is the configuration of the endstops/stallguard sensitivity:

      ; Endstops
      M574 X1 S3                                            ; configure sensorless endstop for low end on X
      M574 Y1 S3                                            ; configure sensorless endstop for low end on Y
      M915 X S3 F0 H200 R0                                  ; set the X axis sensitivity
      M915 Y S3 F0 H200 R0                                  ; set the Y axis sensitivity
      

      This works very well for me. I might still tweak it here and there but everything will then be released on the Bear Project GitHub repo.

      Hope that helps someone looking into this thread later down the line ๐Ÿ™‚

      posted in Tuning and tweaking
      floblerundefined
      flobler
    • RE: Saving Baby stepping value

      @com3 here is how I have implemented it for the Bear Project. I am using Prusaslicer for this:

      Everytime after a first layer finishes I am calling the system file "layer_change.g". This happens through the Before layer change G-code in Prusaslicer:

      ; Before layer change G-code
      ; called before the print advances to the next layer
      
      G92 E0.0                                                                    ; reset extruder position to 0
      {if layer_z == layer_height+first_layer_height}M98 P"layer_change.g"{endif} ; execute layer_change.g
      ;[layer_z]
      

      So whenever a print switches from 1st to 2nd layer "layer_change.g" is being called:

      ; layer_change.g
      ; system file, called on first layer change during a print from Prusaslicer to save applied babysteps to config-override.g
      ; requires modifications to layer change G-Code in Prusaslicer
      
      if move.axes[2].babystep !=0                                                                                                    ; if no babysteps are currently adjusted - exit routine
         echo {"OLD: " ^ sensors.probes[0].triggerHeight ^ " NEW: " ^ sensors.probes[0].triggerHeight + (move.axes[2].babystep * -1)} ; displays old and new Z probe trigger height
         G31 Z{sensors.probes[0].triggerHeight - move.axes[2].babystep}                                                               ; measures and applies new Z probe trigger height
         M500 P31                                                                                                                     ; saves new Z probe trigger height to config-overide.g
      

      This will add or substract any baby stepping adjustment to your current Z-Offset value and then stores it in "config-override.g" via M500 P31

      Additionally I inlcuded the following in "cancel.g" and "stop.g":

      M290 R0 S0                            ; reset babystepping to 0
      M501                                  ; load saved parameters from non-volatile memory (config-override.g)
      

      This assures that if a print is cancelled or finished, babystepping is reset to 0 and the new value from "config-override.g" is being called.

      Now I know this is a workaround more than anything and I would love for this to be implemented in the firmware itself. Our goal is to make 3D printing as easy as possible for everyone and in our opinion this means keeping users away from system, config and macro files for printers where a "out of the box" configuration is published. Ideally users should only have to interact with either the printer display or the webUI. Prusa does a great job with that and this is why so many people can just get started with their printers even though they have no experience at all.

      I hope this helps to find your own workaround.

      posted in Firmware wishlist
      floblerundefined
      flobler
    • RE: Using reported Z trigger height as input for G31

      For anyone reading this later, this is a working macro to calibrate the Z trigger height for the Pinda/Superpinda: z_offset_calibration.txt

      EDIT: one might want to heat the bed to the bed temperature that will be used for printing to get an accurate result throughout the procedure. In my case with the MK3 bed and a temperature of 85C for printing PETG the value was about 0.15mm off compared to running the macro with a cold bed.

      posted in Tuning and tweaking
      floblerundefined
      flobler
    • RE: Duet 3 Mini 5+ Superpinda output not being recognized

      Thank you both!

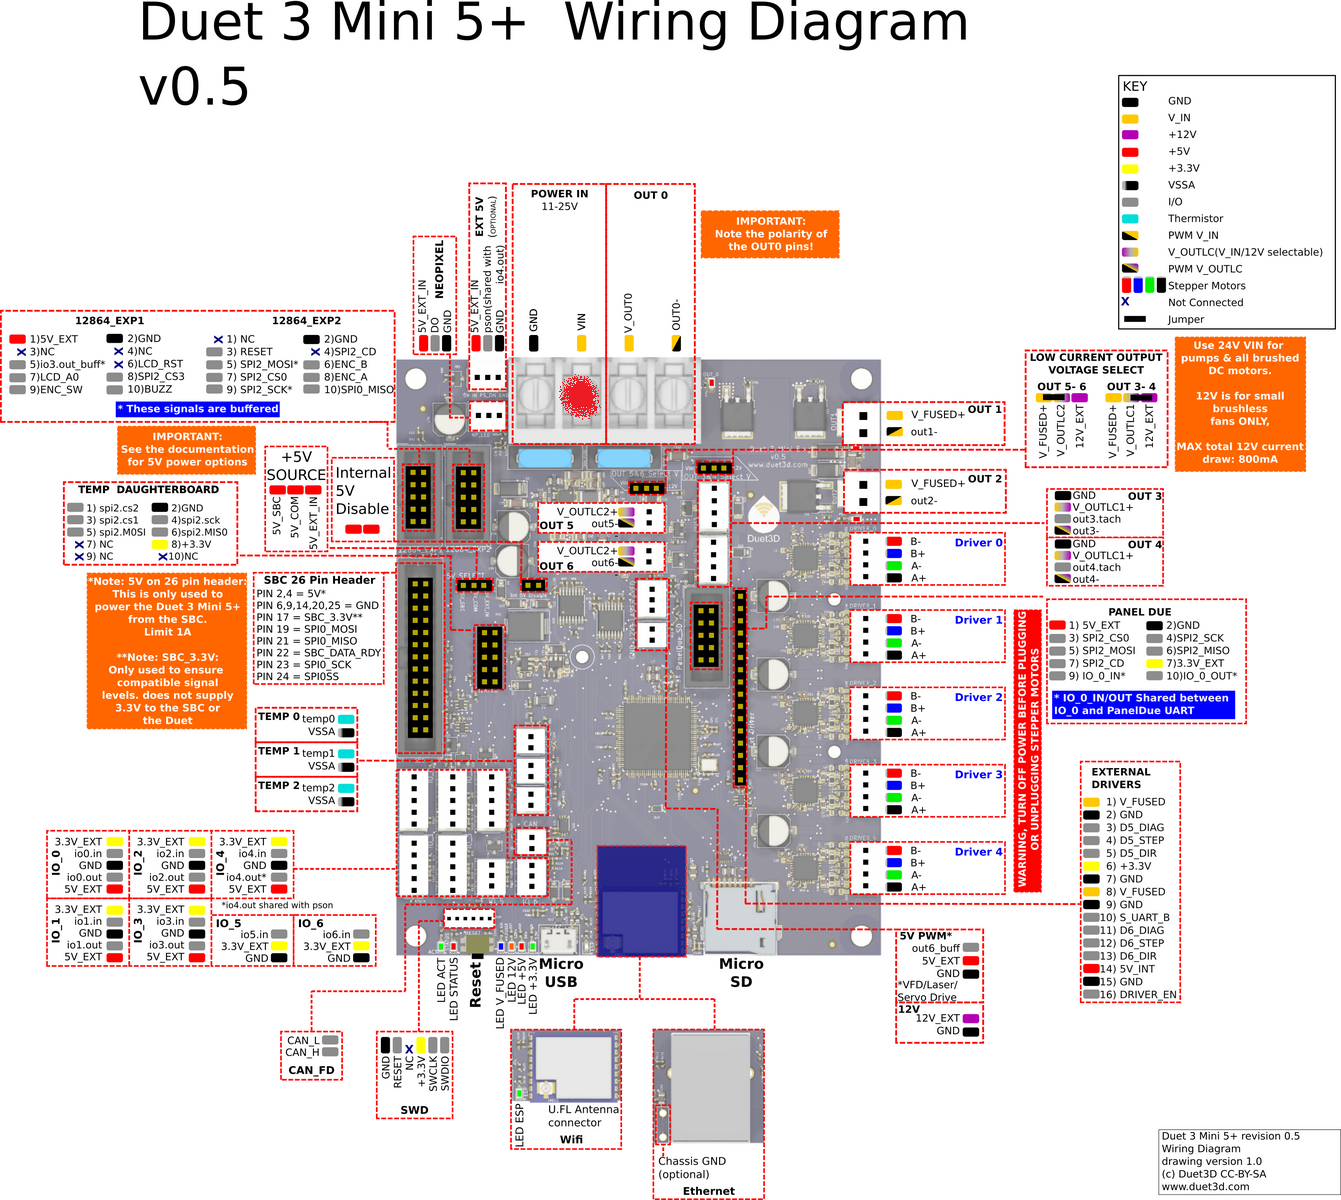
      After reading you comments, I realized I had an outdated wiring diagram and the "in" and "out" as well as "5V" and "3.3V" are actually the other way around. This is what I had:

      duet3_mini5_wiring.png

      I wired it correctly according to https://duet3d.dozuki.com/Wiki/Duet_3_Mini_5plus_Wiring and now everything works fine.

      posted in Duet Hardware and wiring
      floblerundefined
      flobler
    • RE: M291 messages ignored by PanelDue

      @mfs12 @wilriker I am still seeing very inconsistent behaviour when using M291, especially with messages not being displayed on the PanelDue. Often for information type messages via S0 or S1, that indicate the printer is currently heating or loading or similar.

      I upgraded to PanelDue Firmware 3.3 before I did the following tests (I am on 3.3 for both RRF and DWC on my Duet 3 Mini 5+ in standalone mode):

      Note: All macros are initiated from the PanelDue

      1. M291 S3, followed by M291 S0

      M291 P"BED and EXTRUDER will be heated before the procedure starts! Press OK to start or CANCEL to abort!" S3 R"Z OFFSET CALIBRATION"
      M291 P"Heating..." S0 R"Z OFFSET CALIBRATION"
      

      Both messages show on DWC and PanelDue.

      2. M291 S3, followed by M291 S1

      M291 P"BED and EXTRUDER will be heated before the procedure starts! Press OK to start or CANCEL to abort!"
      M291 P"Heating..." S1 R"Z OFFSET CALIBRATION"
      

      Only the second message shows on both PanelDue and DWC, the first message is completely ignored.

      3. M291 S3, followed by M291 S2

      M291 P"BED and EXTRUDER will be heated before the procedure starts! Press OK to start or CANCEL to abort!"
      M291 P"Heating..." S2 R"Z OFFSET CALIBRATION"
      

      Only the second message shows on both PanelDue and DWC, the first message is completely ignored.

      4. M291 S3, followed by some additional steps, followed by M291 S0

      M291 P"BED and EXTRUDER will be heated before the procedure starts! Press OK to start or CANCEL to abort!" S3 R"Z OFFSET CALIBRATION" ; requires user input to continue
      
      ; preparation
      M104 S230                                                                                ; set extruder temperature to 230C
      M140 S70                                                                                 ; set bed temperature to 70C
      
      if !move.axes[0].homed || !move.axes[1].homed || !move.axes[2].homed                     ; if not all axes are homed
        G28                                                                                    ; home all axes
      else                                                                                     ; if all axes are homed
      	G1 Z{sensors.probes[0].diveHeight} F360                                              ; move Z axis to probe dive height
      
      M561                                                                                     ; clear any bed transform
      M290 R0 S0                                                                               ; clear babystepping
      
      G90                                                                                      ; absolute positioning
      G1 X{(move.axes[0].min + move.axes[0].max)/2} Y{(move.axes[1].min + move.axes[1].max)/2} ; move X and Y axis to their center
      G1 Z5                                                                                    ; move Z axis 5mm above the bed
      
      M564 S0 H0                                                                               ; allow movement beyond axis limits defined in config.g
      
      M291 P"Heating..." S0 R"Z OFFSET CALIBRATION"                                            ; message to confirm heating
      G10 P0 S230                                                                              ; wait for extruder temperature to reach 230C
      M190 S70                                                                                 ; wait for bed temperature to reach 70C
      M400                                                                                     ; wait for current moves to finish
      

      The first message shows on both PanelDue and DWC, the second message only in DWC.

      5. M291 S3, followed by some additional steps, followed by M291 S1

      M291 P"BED and EXTRUDER will be heated before the procedure starts! Press OK to start or CANCEL to abort!" S3 R"Z OFFSET CALIBRATION" ; requires user input to continue
      
      ; preparation
      M104 S230                                                                                ; set extruder temperature to 230C
      M140 S70                                                                                 ; set bed temperature to 70C
      
      if !move.axes[0].homed || !move.axes[1].homed || !move.axes[2].homed                     ; if not all axes are homed
        G28                                                                                    ; home all axes
      else                                                                                     ; if all axes are homed
      	G1 Z{sensors.probes[0].diveHeight} F360                                              ; move Z axis to probe dive height
      
      M561                                                                                     ; clear any bed transform
      M290 R0 S0                                                                               ; clear babystepping
      
      G90                                                                                      ; absolute positioning
      G1 X{(move.axes[0].min + move.axes[0].max)/2} Y{(move.axes[1].min + move.axes[1].max)/2} ; move X and Y axis to their center
      G1 Z5                                                                                    ; move Z axis 5mm above the bed
      
      M564 S0 H0                                                                               ; allow movement beyond axis limits defined in config.g
      
      M291 P"Heating..." S1 R"Z OFFSET CALIBRATION"                                            ; message to confirm heating
      G10 P0 S230                                                                              ; wait for extruder temperature to reach 230C
      M190 S70                                                                                 ; wait for bed temperature to reach 70C
      M400                                                                                     ; wait for current moves to finish
      

      The first message shows on both PanelDue and DWC, the second message only in DWC.

      6. M291 S3, followed by some additional steps, followed by M291 S2

      M291 P"BED and EXTRUDER will be heated before the procedure starts! Press OK to start or CANCEL to abort!" S3 R"Z OFFSET CALIBRATION" ; requires user input to continue
      
      ; preparation
      M104 S230                                                                                ; set extruder temperature to 230C
      M140 S70                                                                                 ; set bed temperature to 70C
      
      if !move.axes[0].homed || !move.axes[1].homed || !move.axes[2].homed                     ; if not all axes are homed
        G28                                                                                    ; home all axes
      else                                                                                     ; if all axes are homed
      	G1 Z{sensors.probes[0].diveHeight} F360                                              ; move Z axis to probe dive height
      
      M561                                                                                     ; clear any bed transform
      M290 R0 S0                                                                               ; clear babystepping
      
      G90                                                                                      ; absolute positioning
      G1 X{(move.axes[0].min + move.axes[0].max)/2} Y{(move.axes[1].min + move.axes[1].max)/2} ; move X and Y axis to their center
      G1 Z5                                                                                    ; move Z axis 5mm above the bed
      
      M564 S0 H0                                                                               ; allow movement beyond axis limits defined in config.g
      
      M291 P"Heating..." S2 R"Z OFFSET CALIBRATION"                                            ; message to confirm heating
      G10 P0 S230                                                                              ; wait for extruder temperature to reach 230C
      M190 S70                                                                                 ; wait for bed temperature to reach 70C
      M400                                                                                     ; wait for current moves to finish
      

      The first message only shows in DWC, the second message shows on PanelDue and DWC.

      This makes it really difficult to create self-explanatory macros for our users as we aim for them to be able to navigate the printer completely from the display on the printer. Without consistent messages I am not sure how to do that though.

      Am I still missing an aspect of M291?

      posted in PanelDue
      floblerundefined
      flobler
    • RE: Prusa mk3s+ with duet

      @jakob Thank you! We'll also need your homing files ๐Ÿ˜‰

      You can just copy the text from each file in here, mark it with your mouse and then select the </> symbol. The text will then be displayed in a box. Like this:

      ;----------------------------------------------------------------------------
      ; homex.g
      ;
      ; Description:
      ; 	- system file
      ; 	- called to home the X axis
      ;----------------------------------------------------------------------------
      
      
      ;----------------------------------------------------------------------------
      ; Preparation
      ;----------------------------------------------------------------------------
      
      M98 P"homing-modifications.g" ; calls homing-modifications.g
      
      ; Lift Z Axis
      G91                           ; relative positioning
      G1 H2 Z5 F1200                ; lift Z axis by 5mm
      M400                          ; wait for current moves to finish
      
      
      ;----------------------------------------------------------------------------
      ; Home X Axis
      ;----------------------------------------------------------------------------
      
      G1 H2 X0.5 F10000             ; energise motor to ensure it's not stalled
      M400                          ; wait for current moves to finish
      G4 P200                       ; wait 200ms
      
      G1 H1 X5 F1200                ; move X axis away from homing position by 5mm
      G1 H1 X-255 F3000             ; move to X axis endstop and stop there
      G1 X5 F1200                   ; move back by 5mm
      G1 H1 X-10 F3000              ; move to X axis endstop again
      G1 X10 F1200                  ; move back by 10mm
      G1 H2 Z-5 F1200               ; lower Z axis by 5mm
      M400                          ; wait for current moves to finish
      
      posted in General Discussion
      floblerundefined
      flobler
    • RE: Duet 3 Mini 5+ sensorless homing configuration

      In-cooperating all the above tips with some trial and error got it running. I simply had my current reduced way too much for it to work consistently, which was the last bit that needed adjusting.

      This is configuration gives good results now homex.g

      Thanks everyone for your help!

      posted in Tuning and tweaking
      floblerundefined
      flobler
    • RE: M291 messages ignored by PanelDue

      @mfs12 it looks like upgrading everything to 3.4.0 fixed this for me and all messages are now displayed as they should ๐Ÿ™‚ thank you very much for your help along the way!!!

      posted in PanelDue
      floblerundefined
      flobler
    • RE: Prusa mk3s+ with duet

      ok, for everyone reading this later, we troubleshooted a few issues:

      1. A config for 0.9 motors was used (while @Jakob is using 1.8 degree motors with lower current rating), so the motor current for all axes needed to be reduced
      2. The adjustments for the homing moves (stallguard sensitivity, full_steps_per_rev and motor current reductions) were also tuned for the 0.9 motors and needed adjusting.

      Once we changed these things, the motors homed successfully.

      posted in General Discussion
      floblerundefined
      flobler

    Latest posts made by flobler

    • RE: Printer ignores Gcode pre-print

      @flobler OK, I figured it out already ๐Ÿ˜„

      This was a stupid typo that I then carried from bed-temperature.g to hotend-temperature.g via copy paste. I tried all these files with PLA previously which worked fine. This time I had PETG loaded but unfortunately looked for PTEG in the object model and not PETG.

      Therefore the loaded filament and my bed-temperature.g and hotend-temperature.g system files did not match and therefore not use PETG temperatures before trying to start the print.

      Sorry for the noise ๐Ÿ˜‰

      posted in Tuning and tweaking
      floblerundefined
      flobler
    • Printer ignores Gcode pre-print

      Hi there!

      I created a system file that can be executed as print from different macros (i.e. printer calibration macro or first layer calibration macro), called first-layer.g. This system file contains instructions to print a square that will allow to use babystepping for first layer calibration and then stores the resulting value in config-override.g. The gcode itself has been generated via Prusaslicer and I added the start and end bits.

      I'm using a Duet Mini and I'm currently on RRF 3.4.0 and DWC 3.4.0

      This is how first-layer.g is being called via the macro "First Layer Calibration":

      ;------------------------------------------------------------------------------------------------------------------------------
      ; First Layer Calibration
      ;
      ; Description:
      ; 	- macro file
      ; 	- calibrates the first layer distance between nozzle and bed
      ; 	- stores result in config-override.g after print completes
      ;------------------------------------------------------------------------------------------------------------------------------
      
      M291 P"Do you want to start calibrating the FIRST LAYER?" S3 R"FIRST LAYER CALIBRATION" ; requires user input
      M32 "0:/sys/first-layer.g"                                                              ; executes "first-layer.g" from SD card
      

      This is first-layer.g (removed most of the Prusaslicer generated gcode as I do not think it is relevant for my problem):

      ;----------------------------------------------------------------------------------------------
      ; First Layer Calibration
      ;
      ; Description:
      ; 	- gcode file
      ; 	- print to calibrate the distance between nozzle and bed for the first layer
      ; 	- required user input to dial in first layer
      ;   - called via the first layer calibration macro
      ;   - needs to be stored in the gcodes folder
      ;----------------------------------------------------------------------------------------------
      
      
      ;----------------------------------------------------------------------------------------------
      ; Preparation
      ;----------------------------------------------------------------------------------------------
      
      M98 P"0:/sys/bed-temperature.g"            ; calls bed-temperature.g to set bed temperature                                     
      
      M568 S160	                        ; set hotend temperature to 160ยฐC
      M561                                ; clear any bed transform
      M290 R0 S0                          ; clear babystepping
      G31 P1000 Z0                        ; set Z probe offset to 0
      
      
      ;----------------------------------------------------------------------------------------------
      ; First Layer Calibration
      ;----------------------------------------------------------------------------------------------
      
      M116                                ; wait for bed and hotend temperature
      G32                                 ; true bed leveling with mesh bed leveling
      
      M98 P"0:/sys/hotend-temperature.g"         ; calls hotend-temperature.g to set hotend temperature
      M116                                ; wait for bed and hotend temperature
      
      G92 E0.0                            ; reset extruder position to 0
      G1 X60.0 E9.0 F1000.0               ; intro line thin part
      G1 X100.0 E12.5 F1000.0             ; intro line thick part
      G92 E0.0                            ; reset extruder position to 0
      
      M564 S0                             ; allow movement beyond axis limits defined in config.g
      G21                                 ; set units to millimeters
      G90                                 ; use absolute coordinates
      M83                                 ; use relative distances for extrusion
      
      ;LAYER_CHANGE
      ;Z:0.2
      ;HEIGHT:0.2
      G92 E0.0                            ; reset extruder position to 0
      
      ;0.2
      G1 E-1 F3000
      G1 Z.4 F7200
      G1 X61.617 Y47.564
      G1 Z.2
      G1 E1 F3000
      M204 P1000
      
      ;TYPE:Skirt/Brim
      ;WIDTH:0.42
      G1 F1200
      G1 X64.531 Y44.274 E.13705
      G1 X67.556 Y41.623 E.12546
      G1 X70.821 Y39.39 E.12338
      G1 X74.068 Y37.676 E.11451
      
      ....
      ....
      ....
      
      ;WIPE_START
      G1 F5760;_WIPE
      G1 X87.249 Y143.176 E-.41629
      G1 F5760;_WIPE
      G1 X87.784 Y143.176 E-.26456
      G1 F5760;_WIPE
      G1 X87.467 Y142.859 E-.22165
      
      ;WIPE_END
      G1 E-.0475 F3000
      G1 Z.6 F7200
      
      
      ;----------------------------------------------------------------------------------------------
      ; Saving First Layer Height
      ;----------------------------------------------------------------------------------------------
      
      M98 P"layer-change.g" ; execute layer-change.g to save adjusted babysteps to config-override.g
      M564 S1               ; forbid movement beyond axis limits defined in config.g
      
      M291 P"First Layer Calibration completed! Z Offset saved!" S1 R"FIRST LAYER CALIBRATION"
      
      M0                    ; calls stop.g
      

      Here are bed-temperature.g and hotend-temperature.g:

      ;-----------------------------------------------------------------------------------------------------
      ; bed-temperature.g
      ;
      ; Description:
      ; 	- system file
      ; 	- called to auto-select the bed temperature according to the loaded filament
      ;-----------------------------------------------------------------------------------------------------
      
      
      if move.extruders[state.currentTool].filament == "ABS"          ; if ABS is loaded
      	M140 S{global.abs_bed_temp}                                 ; set bed to ABS temperature
      	
      if move.extruders[state.currentTool].filament == "GreenTec Pro" ; if GreenTec Pro is loaded
      	M140 S{global.greentecpro_bed_temp}                         ; set bed to GreenTec Pro temperature
      	
      if move.extruders[state.currentTool].filament == "PC"           ; if PC is loaded
      	M140 S{global.pc_bed_temp}                                  ; set bed to PC temperature
      	
      if move.extruders[state.currentTool].filament == "PTEG"         ; if PETG is loaded
      	M140 S{global.petg_bed_temp}                                ; set bed to PETG temperature
      	
      if move.extruders[state.currentTool].filament == "PLA"          ; if PLA is loaded
      	M140 S{global.pla_bed_temp}                                 ; set bed to PLA temperature
      	
      if move.extruders[state.currentTool].filament == "TPU"          ; if TPU is loaded
      	M140 S{global.tpu_bed_temp}                                 ; set bed to TPU temperature
      
      ;--------------------------------------------------------------------------------------------------------
      ; hotend-temperature.g
      ;
      ; Description:
      ; 	- system file
      ; 	- called to auto-select the hotend temperature according to the loaded filament
      ;--------------------------------------------------------------------------------------------------------
      
      
      if move.extruders[state.currentTool].filament == "ABS"          ; if ABS is loaded
      	M568 S{global.abs_hotend_temp}                              ; set hotend to ABS temperature
      	
      if move.extruders[state.currentTool].filament == "GreenTec Pro" ; if GreenTec Pro is loaded
      	M568 S{global.greentecpro_hotend_temp}                      ; set hotend to GreenTec Pro temperature
      	
      if move.extruders[state.currentTool].filament == "PC"           ; if PC is loaded
      	M568 S{global.pc_hotend_temp}                               ; set hotend to PC temperature
      	
      if move.extruders[state.currentTool].filament == "PTEG"         ; if PETG is loaded
      	M568 S{global.petg_hotend_temp}                             ; set hotend to PETG temperature
      	
      if move.extruders[state.currentTool].filament == "PLA"          ; if PLA is loaded
      	M568 S{global.pla_hotend_temp}                              ; set hotend to PLA temperature
      	
      if move.extruders[state.currentTool].filament == "TPU"          ; if TPU is loaded
      	M568 S{global.tpu_hotend_temp}                              ; set hotend to TPU temperature
      

      This is how the variables are defined in config.g:

      ;----------------------------------------------------------------------------------------------------------------------------------------------
      ; Global Variables
      ;----------------------------------------------------------------------------------------------------------------------------------------------
      
      ; Filament Temperatures
      global abs_hotend_temp = 240               ; global ABS hotend temperature variable
      global abs_bed_temp = 110                  ; global ABS bed temperature variable
      
      global greentecpro_hotend_temp = 230       ; global GreenTec Pro hotend temperature variable
      global greentecpro_bed_temp = 60           ; GreenTec Pro bed temperature
      
      global pc_hotend_temp = 270                ; global GreenTec Pro hotend temperature variable
      global pc_bed_temp = 110                   ; global GreenTec Pro bed temperature variable
      
      global petg_hotend_temp = 235              ; global PETG hotend temperature variable
      global petg_bed_temp = 80                  ; global PETG bed temperature variable
      
      global pla_hotend_temp = 210               ; global PLA hotend temperature variable
      global pla_bed_temp = 60                   ; global PLA bed temperature variable
      
      global tpu_hotend_temp = 230               ; global TPU hotend temperature variable
      global tpu_bed_temp = 60                   ; global TPU bed temperature variable
      

      The problem I am currently facing is that both M98 commands who are supposed to call bed-temperature.g and hotend-temperature.g before the print are being ignored and the printer tries to start printing without the hotend or bed being heated, resulting in an error.

      Can someone help me understand what I am doing wrong?

      Thanks a lot!

      posted in Tuning and tweaking
      floblerundefined
      flobler
    • RE: RRF 3.4.0 Sensorless Homing Issues after Power Cycle

      @dc42 my bad, as you can see above I failed to remove the G1 H1 X5 F1200

      I re-tested without and this works now. Thank you very much!

      posted in Beta Firmware
      floblerundefined
      flobler
    • RE: RRF 3.4.0 Sensorless Homing Issues after Power Cycle

      @dc42 Yes, they do and as soon as the axes move towards the endstop, they stall. If it helps I can send you a video of the behavior?

      posted in Beta Firmware
      floblerundefined
      flobler
    • RE: RRF 3.4.0 Sensorless Homing Issues after Power Cycle

      For reference, this is what I just tried:

      homeall.g

      ;----------------------------------------------------------------------------
      ; homeall.g
      ;
      ; Description:
      ; 	- system file
      ; 	- called to home all axes
      ; 	- used in homez.g
      ;----------------------------------------------------------------------------
      
      
      ;----------------------------------------------------------------------------
      ; Preparation
      ;----------------------------------------------------------------------------
      
      M98 P"homing-modifications.g" ; calls homing-modifications.g
      
      ; Lift Z Axis
      G91                           ; relative positioning
      G1 H2 Z5 F1200                ; lift Z axis by 5mm	
      M400                          ; wait for current moves to finish
      
      
      ;----------------------------------------------------------------------------
      ; Home X Axis
      ;----------------------------------------------------------------------------
      
      M17 X
      G4 P140
      G1 H2 X5 F1200
      
      G1 H1 X5 F1200                ; move X axis away from homing position by 5mm
      G1 H1 X-255 F3000             ; move to X axis endstop and stop there
      G1 X5 F1200                   ; move back by 5mm
      G1 H1 X-10 F3000              ; move to X axis endstop again
      G1 X10 F1200                  ; move back by 10mm
      M400                          ; wait for current moves to finish
      
      ;----------------------------------------------------------------------------
      ; Home Y Axis
      ;----------------------------------------------------------------------------
      
      M17 Y
      G4 P140
      G1 H2 Y5 F1200
      
      G1 H1 Y5 F1200                ; move Y axis away from homing position by 5mm
      G1 H1 Y-220 F3000             ; move to Y axis endstop and stop there
      G1 Y5 F1200                   ; move back by 5mm
      G1 H1 Y-10 F3000              ; move to Y axis endstop again
      G1 Y10 F1200                  ; move back by 10 mm
      M400                          ; wait for current moves to finish
      
      ;----------------------------------------------------------------------------
      ; Home Z Axis
      ;----------------------------------------------------------------------------
      
      G90                           ; absolute positioning
      G1 X11.5 Y4.5 F6000           ; go to first probe point
      G30                           ; home Z axis by probing the bed
      G1 Z0.6 F500                  ; move Z axis to 0.6mm
      G91                           ; relative positioning
      G1 Z1 F500                    ; lift Z axis by 1mm
      M400	     	              ; wait for current moves to finish
      
      
      ;----------------------------------------------------------------------------
      ; Restore Defaults
      ;----------------------------------------------------------------------------
      
      M98 P"homing-modifications-reset.g" ; calls homing-modifications-reset.g
      

      homing-modifications.g

      ;---------------------------------------------------------------------------------
      ; homing-modifications.g
      ;
      ; Description:
      ; 	- system file
      ; 	- sets motor current and V parameter for homing moves
      ; 	- tunes motor drivers
      ; 	- used in all homing system files
      ;---------------------------------------------------------------------------------
      
      
      ;---------------------------------------------------------------------------------
      ; Modifications
      ;---------------------------------------------------------------------------------
      
      M569 P0.3 V10           ; reduce V parameter to ensure stealthChop is enabled for X
      M569 P0.2 V10           ; reduce V parameter to ensure stealthChop is enabled for Y
      M913 X60 Y60            ; drop X and Y motor current to 60%
      G4 P150                 ; wait 150ms


      homing-modifications-reset.g

      ;-----------------------------------------------------------------------
      ; homing-modifications-reset.g
      ;
      ; Description:
      ; 	- system file
      ; 	- resets all homing modifications applied in homing_modifications.g
      ; 	- used in all homing system files
      ;-----------------------------------------------------------------------
      
      
      M913 X100 Y100  ; reset X and Y motor current to 100%
      M569 P0.3 V2000 ; restore default V parameter for X
      M569 P0.2 V2000 ; restore default V parameter for Y
      G90             ; absolute positioning
      
      posted in Beta Firmware
      floblerundefined
      flobler
    • RE: RRF 3.4.0 Sensorless Homing Issues after Power Cycle

      @dc42 Thank you! I just tried that but the behavior did not change. X and Y are still stalling immediately when trying to home after a power cycle and home fine after that initial false stall until I power cycle the printer again.

      I had a tuning move included in homing-modifications.g (which I removed to test what you suggested).

      posted in Beta Firmware
      floblerundefined
      flobler
    • RE: M291 messages ignored by PanelDue

      @mfs12 it looks like upgrading everything to 3.4.0 fixed this for me and all messages are now displayed as they should ๐Ÿ™‚ thank you very much for your help along the way!!!

      posted in PanelDue
      floblerundefined
      flobler
    • RE: Filament Sensor Error reported while not printing from SD

      This fixed my issue, thank you for your help @Stephen6309!

      posted in Using Duet Controllers
      floblerundefined
      flobler
    • RE: RRF 3.4.0 Sensorless Homing Issues after Power Cycle

      @oliof yes, that makes sense. I assume before you upgraded to RRF 3.4.0 you did not specifically configure your drivers as D3 (because they did that by default). Now they default to D2, hence you need to tell them specifically to operate in stealthChop2 before homing (via D3).

      If you just configure your drivers as D3 now in config.g you should also be able to home just fine without switching between D2 and D3.

      May I ask how your homing files look like? I'd like to see if you are doing something different to tune your drivers. Thank you!

      posted in Beta Firmware
      floblerundefined
      flobler
    • RE: RRF 3.4.0 Sensorless Homing Issues after Power Cycle

      @oliof this did not help in my case. I think in your case you utilized that the drivers were defaulting to stealthChop before going to RRF 3.4.0 and therefore you needed to give them instructions to use stealthChop2 after the upgrade (as with RRF 3.4.0 the default now is spreadCycle).

      My problem is not really that homing is not working generally. Homing works totally fine and smooth just not right after I power-cycle my printer when trying to home for the first time.

      Thank you for the suggestion though!

      posted in Beta Firmware
      floblerundefined
      flobler