@Phaedrux Ok now I get it. That makes sense. Thanks!
Posts made by jdjeff58
-
RE: PWM Fansposted in Duet Web Control
@Phaedrux Right....but right now Vin is 24V and the fan jumper is installed for Vin. What changes (if any) do I have to make to the present jumper for this mod? I don't want to let any smoke out.
-
RE: PWM Fansposted in Duet Web Control
@Phaedrux Duet Wifi yes. The only thing I'm not clear on is how to connect this buck converter. I've read the Duet tutorial on this and it points you to a link to show how to connect to a maestro and only connecting the positive output? What about the fan jumper? I've ordered the stuff to do this but could only find the typical vague duet tutorial.
-
RE: PWM Fansposted in Duet Web Control
@Phaedrux Ok..I see that the buck converter gets connected to the board inputting 12V to the fans. I just need to convert my other fan to 12V too I suppose.
-
RE: PWM Fansposted in Duet Web Control
@Phaedrux Yeah I just found one thread about it. Seems like the solution was to get a 12V fan and a buck converter but the fan will still run at full speed? I played around with frequencies/speeds and blip time. The best I could do was erratic cycling with S.6 F10000
-
RE: PWM Fansposted in Duet Web Control
@dc42 Can a thermostatically controlled fan be turned on at 70% instead of 100%. I'm trying to change the "S" value but it only seems to work when set to 1. This fan is too loud and on a mosquito hotend so I don't think I need all that speed/noise
-
RE: PWM Fansposted in Duet Web Control
BTW you appear to have the thermostatic control on the wrong fan, or else you have the fan names swapped.
You're right....thanks for pointing that out.
-
PWM Fansposted in Duet Web Control
I have 2 PWM fans and can only see Fan 0 in DWC. This is a new build so will the fan eventually appear when I load a job? Here are the lines from config.g
; Fans
M106 P0 S0 I0 C"Heatsink" F500 H-1 ; Set fan 0 value, PWM signal inversion and frequency. Thermostatic control is turned off
M106 P1 S1 I0 C"Nozzle" F500 H1 T45 ; Set fan 1 value, PWM signal inversion and frequency. Thermostatic control is turned on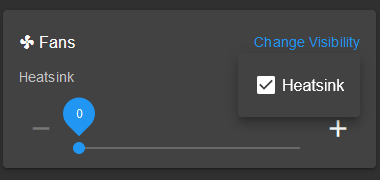
-
RE: DWC Local cacheposted in Duet Web Control
@droftarts said in DWC Local cache:
What firmware version? The config.g says 2.03, but send M115 and post response.
Ian
Another Duet curveball. The RRF config tool (https://configtool.reprapfirmware.org/General) does NOT have 2.04 as a choice in the drop down. I showed my FW version in the first line of my post 2.04
M115
FIRMWARE_NAME: RepRapFirmware for Duet 2 WiFi/Ethernet FIRMWARE_VERSION: 2.04 ELECTRONICS: Duet WiFi 1.02 or later FIRMWARE_DATE: 2019-11-01b1
-
RE: DWC Local cacheposted in Duet Web Control
@droftarts said in DWC Local cache:
I'm not sure why you are getting different values in the console and dashboard. Have you applied a Z offset to the probe? Can you post your config.g?
I'm not sure either. The whole purpose of what I'm doing here is to record the Zoffset in the config.g file. Before this glitch or bug or whatever, the numbers on the dashboard and the popup numbers were identical other than the resolution. (i.e 4.25 on the Dashboard vs. 4.249 on the pop up). Now the numbers are off by way more than that. The only thing my config will show you is that I recorded the latest value. I'm using the higher resolution value that comes up in the console but I'm left wondering which one is accurate.
; Configuration file for Duet WiFi (firmware version 2.03)
; executed by the firmware on start-up
;
; generated by RepRapFirmware Configuration Tool v2.1.2 on Sat Nov 09 2019 21:10:45 GMT-0500 (Eastern Standard Time); General preferences
G90 ; send absolute coordinates...
M83 ; ...but relative extruder moves
M550 P"My Printer" ; set printer nameM669 K1 ; select CoreXY mode
; Network
M552 S1 ; enable network
M586 P0 S1 ; enable HTTP
M586 P1 S0 ; disable FTP
M586 P2 S0 ; disable Telnet; Drives
M569 P0 S0 D3 ; Drive 0 goes forwards, CoreXY_1
M569 P1 S1 D3 ; Drive 1 goes forwards, CoreXY_2
M569 P2 S1 D3 ; Drive 2 goes forwards, Z Motor
M569 P3 S0 D3 ; Drive 3 goes forwards, Extruder
M584 X0 Y1 Z2 E3 ; set drive mapping
M350 X16 Y16 Z16 E16 I1 ; configure microstepping with interpolation
M92 X79.80 Y79.80 Z282.70 E830.00 ; set steps per mm (.9 deg extruder motor)
M566 X420.00 Y420.00 Z39.60 E120.00 ; set maximum instantaneous speed changes (mm/min)
M203 X4200.00 Y4200.00 Z2298.00 E2500.00 ; set maximum speeds (mm/min)
M201 X500.00 Y500.00 Z75.00 E250.00 ; set accelerations (mm/s^2)
M906 X800 Y800 Z800 E800 I65 ; set motor currents (mA) and motor idle factor in per cent
M84 S60 ; Set idle timeout; Axis Limits
M208 X0 Y0 Z-0.5 S1 ; set axis minima
M208 X347 Y285 Z364 S0 ; set axis maxima; Use this if you have BL Touch
M574 X2 Y2 S0
M574 Z1 S2 ; Define Z to use Probe. Home to Min (BL Touch Nozzle); Z-Probe
M307 H3 A-1 C-1 D-1 ; disable heater on PWM channel for BLTouch
M558 P9 H5 F120 T6000 ; set Z probe type to bltouch and the dive height + speeds
G31 P500 X28.9 Y0 Z4.054 ; set Z probe trigger value, offset and trigger height
M557 X0:347 Y0:285 S65 ; define mesh grid; Heaters
M307 H0 B0 S1.00 ; disable bang-bang mode for the bed heater and set PWM limit
M305 P0 T100000 B4138 C7.060000e-8 R4700 ; set thermistor + ADC parameters for heater 0
M143 H0 S120 ; set temperature limit for heater 0 to 120C
M305 P1 T100000 B4725 C7.060000e-8 R4700 ; set thermistor + ADC parameters for heater 1
M143 H1 S280 ; set temperature limit for heater 1 to 280C;Part Fan
M106 P0 S0 I0 F500 H-1 ; set fan 0 value, PWM signal inversion and frequency. Thermostatic control is turned off; Tools
M563 P0 D0 H1 F0 ; define tool 0
G10 P0 X0 Y0 Z0 ; set tool 0 axis offsets
G10 P0 R0 S0 ; set initial tool 0 active and standby temperatures to 0C; Custom settings
M572 D0 S0.05 ; Extruder Pressure Advance; Miscellaneous
M501 ; load saved parameters from non-volatile memory
M911 S10 R11 P"M913 X0 Y0 G91 M83 G1 Z3 E-5 F1000" ; set voltage thresholds and actions to run on power loss -
DWC Local cacheposted in Duet Web Control
CoreXY machine with bed moving UP TO NOZZLE on Z axis Duet Wifi FW 2.04 DWC 2.04 on Firefox
I'm having problems during BLtouch calibration and I want to try to clear local cache. There is nothing (that I can see) as in the older 1.XX.XX versions of DWC that allows me to do this. I can see a switch to enable local cache storage.
The problem I'm having may or may not be related, but I had this all working 2 days ago. I bring the bed UP TO THE NOZZLE to do G92 Z0. The Z position in DWC Dashboard shows 0.00. Then I do G1 Z10....then G30 S-1 to trigger the BL touch. The Z position showing on the pop up message (and in the console) is now different than the Z position showing on the DWC dashboard by .2 mm. This all worked before where both numbers matched every time I went through this exercise.
I tried doing it over and over and over again with same results. I tried rebooting the Duet by powering off. I remember hearing somewhere that sometimes (especially where height maps are concerned) the local cache can get corrupted and it needs to be cleared. I used to run DWC 1.66.XX and there was a "clear cache" button. I keep looking and can't see a button in DWC 2.04 Is it there and I'm missing it? Or am I getting thrown another Duet curve ball? I found the switch for "Save cache in local storage" and it was apparently enabled by default. I don't even know if this will fix my issue. But I don't know that until I can clear the LOCAL cache.
As a side note, when I first installed DWC 2.04, I saw the switch to "revert to DWC1" Out of curiosity I switched it and apparently made a permanent move to DWC1. I could not see a way to revert back to DWC2 and had to reinstall 2.04 to get it back. Is this yet another curve ball?
-
RE: Need Help Core XYposted in General Discussion
@Phaedrux said in Need Help Core XY:
Ah I see. So the X axis endstop is on the frame, not on the print head. Then yes, you will need to home Y first to get X into position.
Yeah...I'll mark this as solved since this is where I was really stuck. Thanks and I will likely be posting again as I move forward..LOL
-
RE: Need Help Core XYposted in General Discussion
@Phaedrux said in Need Help Core XY:
The Y and X axis both home at the same time because that's the way they have configured the homex and homey files. They have it so that homex actually just calls homey and then it homes both. They say in the file they do it because it's corexy, which is nonsense.
Ok...but as I just found out, I made a new sys folder like Jeti said to do. It created clean xhome yhome zhome files. I replaced the contents of the zhome with your file because it wasn't the same. But when I ran xhome, it did NOT go to the back corner where the XY switch(es) are. It slammed into the right side of the machine grinding gears and shredding belts. I stuck the crazy M3D files back in place and it homes Y first then homes X when I do a homeX. When I look at the way this machine is built, it kind of makes sense. The gantry can be anywhere on the rail assy and hit the Y switch because it's the rail assy that triggers the switch. But it's the gantry itself that triggers the X switch. So the rail assy needs to be in the back of the machine before X can home because the gantry needs to be in the back corner so it can hit it's switch. So I have it working again with your Zhome file and the M3D X/Yhome files.
And thanks for explaining how to manually check the build volume. I figured there was an easier method but at least I understodd what needed to be done. So that's good news all the way around.
-
RE: Need Help Core XYposted in General Discussion
@Veti said in Need Help Core XY:
most likely a leftover from your initial configuration to home at zmax.
What is most likely a leftover? I pasted exactly what Phaedrux gave me. There is nothing else in zhome.g
EDIT: Ok..I just tried it. I rehomed Z while the bed was raised almost all the way up and it didn't smash into anything. It just homed Z. But I hear you on getting a clean file. I will do this.
-
RE: Need Help Core XYposted in General Discussion
@Phaedrux said in Need Help Core XY:
@jdjeff58 said in Need Help Core XY:
Specifically pointing to your G30 instruction...the reason I added the extra speed line was that G30 takes FOREVER for the bed to lift to the probe from all the way at the bottom.
Here's how to add a faster probe speed for the first run to get it up to the nozzle and then a slower second probe.
After positioning the probe..
G1 X150 Y150 F3000
M558 F600 A1 ; configure the probe speed to 600mm/min for a single probe
G30 ; quickly probe the bed
M558 F120 A5 ; configure the probe for accuracy
G30 ;  reprobe the bed once again
You've come at this from an unfortunate angel trying to get a preconfigured machine to work. There will be a learning curve. No question. Don't despair though. Try and tackle things systematically. We're all here to help.
If you go through the movement section here: https://duet3d.dozuki.com/Wiki/ConfiguringRepRapFirmwareCoreXYPrinter#Section_Movement_section you will be able to test the motors individually to identify if they are moving in the right directions.
There is no step by step help you get sorted manual for this situation because you're the only one physically at the printer. All we can do is point you in a direction. You'll have to use your gray matter to figure some things out.
Here's another thing I figured out yesterday after my tantrum: As part of this "Promega reconfigure", I replaced the entire printhead/hotend with a direct drive Bondetech/E3D V6. There is a Promega specific mount that I printed out from T-verse which enabled me to completely remove the original dual junk from the gantry and install a higher quality extruder/hotend. . So I was suspicious that my print volume had changed....and now I know that it has changed alot more than I originally thought. Knowing that the left front corner is supposed to be X0, Y0, I disabled homing using M564 H0 S0 and manually stepped the gantry to the spot that I thought should be X0, Y0. (where the printhead assy is clear of the frame. When I checked the position numbers on the web interface, they were something random because nothing has been homed yet. But I could still use those numbers to determine the distance back to the max limit switches in the back right corner rather than try to measure it using a ruler. So for X and Y, I entered the "absolute" distance in axis maxima and axis minima. I did the same for Z coming off the bottom of the printer just high enough that it is off the bottom physical stops. I recorded that random number shown on the web interface. I then stepped the bed up to just touching the nozzle to get the "absolute" distance so I can enter that number into Z minima/maxima. I used -0.5 for Zmin. This is my NEW build volume.
At this point I took your Zhome code and pasted it into my current zhome.g file. (I still have the BL Touch gcode entered in config.g from the tutorial). I homed X, which automatically homes Y for some reason but without incident. I then crossed my fingers and homed Z and it worked!
So then I manually moved all the axes around to make sure it would not go beyond my minima/maxima settings and that worked too!
The only thing I haven't tried yet and have done some thinking about it. Let's say for some reason I want to home all or home Z while the Z bed is raised? Is this just one of those things you don't do on a corexy? Do I need to move the bed all the way down prior to homing Z? Or can the zhome as you wrote it be done from anywhere on the z axis without crashing into something? What I was pondering is that I know there are 2 commands that I've actually looked up and studied having to do with absolute and relative (G91 and G90). I don't see either of those in the Z home file you gave me. My new Z max is 366 and Z min -0.5. Tell me if I'm correct here, but could I say in a gcode, Go to this "absolute position" on the Z axis then "relative" from that spot, move up to trigger the probe? So even if the bed was right up against the nozzle, it would drop to the "absolute" position I defined in the zhome.g?
But I do thank you for helping getting me this far. I am going to calibrate the BL Touch today and try another mesh exercise. And also, I figured this print volume procedure out on my own. Was it overkill? Is there another way to do this? This seems to me like an important step in setting up any new board/printer. I know in most cases these numbers are provided by a manufacturer. But if you change out a printhead, those numbers invariably must change...yes?
-
RE: Need Help Core XYposted in General Discussion
@Veti said in Need Help Core XY:
@jdjeff58 said in Need Help Core XY:
I used these examples in the configurator to get started and it all started getting tangled up from there.
the connectors on the duet wifi are the otherway round from the duet maestro. so the motors will move in the opposite direction.
THANK YOU!!!
Just what I mean when I use the term Duet curveball. Now that you brought that to my attention, I was able to see WHY all my connectors had to be flipped so the previous Drive S0/S1 parameters would work. So the way my motors are hooked up, makes sense now.
-
RE: Need Help Core XYposted in General Discussion
@deckingman said in Need Help Core XY:
@jdjeff58 Well unfortunately the configurator can only get you so far. When it comes to how the motors are wired, that depends entirely on how the manufacturer of the motor decided to wire them. So you only have a 50% chance that the motor direction will be right. I suggest the next step you should take is to take a look here and follow the instructions https://duet3d.dozuki.com/Wiki/ConfiguringRepRapFirmwareCoreXYPrinter
That'll get the motors moving in the right directions, then we can move on.
Yes..LOL...that is where all this started and where one of the rabbit holes I went down when I saw this line
"The easiest way to generate these files is using the RepRapFirmware configuration tool ." It's so amazing how links on these guides don't open up a new tab...they just wisk you away to some other website and you don't know where it was that you came from. I don't know...maybe I should just accept I'm not built for this cross eyed nonsense. Even the email notifications on this forum don't work.
-
RE: Need Help Core XYposted in General Discussion
@deckingman said in Need Help Core XY:
@jdjeff58 As well as my post above, another little tip is to test your Z probe or switch by triggering it by hand, which you can do well before anything crashes. Once you get that working reliably, then you can move on to actually trying to home Z.
Yes....I know that works too....but only when the bed is at the very bottom of the machine. Seems that there is some difference between relative and absolute position. I get the basics of it but you aren't going to be able to watch me fix it so it works from anywhere on the Z axis.
I CAN'T be the only person who's ever walked in here at the "dummy" level.
So here's what I do know, this printer has the X Y point of origin (0, 0) at the front left. Here is what is in the ORIGINAL config file. But as you can see, the text that follows the command doesn't match the Snnn command so again...curve ball thrown at the idiot
M667 S1 ; Enable coreXY mode
M569 P0 S0 ; Drive 0 goes forwards, CoreXY_1
M569 P1 S1 ; Drive 1 goes forwards, CoreXY_2
M569 P2 S1 ; Drive 2 goes forwards, Z MotorThis comes from a file called machine_axisdimension.g
M208 X0 Y0 Z-0.5 S1 ; Set axis minima
M208 X383 Y372 Z374 S0 ; Set axis maximaI used these examples in the configurator to get started and it all started getting tangled up from there.
-
RE: Need Help Core XYposted in General Discussion
@Phaedrux said in Need Help Core XY:
@jdjeff58 said in Need Help Core XY:
There are no lead screws...just one motor and 4 belts to push each corner. The bed doesn't slam too bad, it's just how the whole board lights up because of the motors backfeeding into the board. I have learned that can burn out drivers chips.
My condolences.
When the X or Y homes, the Z bed attempts to move down and when it's already on the bottom, it grinds the belt gears because it thinks it has to get out of the way.
Yes, that's part of the homing macro, it tries to lift the nozzle/lower the bed out of the way before moving the X and Y axis. It's unfortunately not able to know it's at the bottom of the printer when it does this. Eventually when conditioning Gcode is implemented this may be able to be detected and mitigated, but for now the only option is to either remove the move out of the way portion, or ensure that it's never truly at the physically bottomed out position.
My own printer is a corexy and I also use a z max endstop and a probe. I rarely ever lower it the entire way down though (just power outage recovery) and the lead screws don't allow the bed to fall, so I'm able to ensure there is always enough physical movement passed the Z max optical endstop to allow it to drop slightly. Part of your end solution is going to have to figure out something for that.
Seems that when I hit Z home from anywhere other than the bottom of the machine, it's position is screwed up.
This is because of this:
; Axis Limits
M208 X28 Y100 Z-357.54 S1 ; set axis minima
M208 X375 Y365 Z-8.5 S0 ; set axis maximaLogically you should be able to tell there is something off about a minimum values of -357 and a maximum value of -8.5. You can't get to 0 from there.
Your minima Z value should be 0. Or even just slightly less than 0. Like -0.5 just to give you some wiggle room when trying to get your first layer baby stepping right. And your maximum value should be 300 or whatever the maximum travel distance you can safely do on the Z axis is.
M208 X28 Y100 Z-0.5 S1 ; set axis minima
M208 X375 Y365 Z350 S0 ; set axis maxima
Then your home z needs some changes.
; Homez.g
G1 H2 Z-350 F3000 ; lift Z relative to current position
G30 ; Do a single probe to home our Z axisSo your first move is going to rapidly move the bed towards the nozzle. Don't do that. Then your using G30 to actually probe the bed. What you actually want to do is first position the probe in X and Y and then use G30 which will deploy the pin and slowly move the bed towards the probe.
G1 X150 Y150 F3000
G30
Specifically pointing to your G30 instruction...the reason I added the extra speed line was that G30 takes FOREVER for the bed to lift to the probe from all the way at the bottom.