• Tags
  • Documentation
  • Order
  • Register
  • Login
Duet3D Logo Duet3D
  • Tags
  • Documentation
  • Order
  • Register
  • Login
  1. Home
  2. Loris
  3. Posts
  • Profile
  • Following 0
  • Followers 0
  • Topics 6
  • Posts 20
  • Best 0
  • Controversial 0
  • Groups 0

Posts made by Loris

  • RE: Toolboard 1.1 - Driver not present

    @phaedrux said in Toolboard 1.1 - Driver not present:

    Please send an email to warranty@duet3d.com and CC your reseller. Include a link to this forum thread and the details of your original purchase. You'll receive a reply with a form to fill out.

    Done. Thanks

    posted in Using Duet Controllers
    undefined
    Loris
    19 Dec 2021, 11:21
  • RE: Toolboard 1.1 - Driver not present

    Problem solved....
    Is the driver.
    I have another toolboard (never used, unboxed and installed) from the same reseller (filafarm.de).
    Same wirings, same config, and works like a charm.
    So the first Toolboard have a not working driver.
    Can a moderator allow (give ok) reseller to replace this board?

    4dd51b1e-2f35-4849-b33c-968889f7b2c2-image.png

    posted in Using Duet Controllers
    undefined
    Loris
    18 Dec 2021, 14:01
  • RE: Toolboard 1.1 - Driver not present

    @phaedrux Driver not "drive" stepper. I tried with 200°c and using M302

    posted in Using Duet Controllers
    undefined
    Loris
    18 Dec 2021, 08:51
  • RE: Toolboard 1.1 - Driver not present

    @rjenkinsgb Wirings are ok, tested with 2 different steppers that are working on other boards (duet boards)

    posted in Using Duet Controllers
    undefined
    Loris
    18 Dec 2021, 08:50
  • RE: Toolboard 1.1 - Driver not present

    Tried with 3.4.0 beta 7
    After M122 b121 the driver info is like that:
    "Driver 0: pos 6560, 656.0 steps/mm,ok, steps req 6560 done 6560"

    But the stepper is not working at all.

    posted in Using Duet Controllers
    undefined
    Loris
    17 Dec 2021, 18:37
  • RE: Toolboard 1.1 - Driver not present

    @rjenkinsgb
    Set stepper current to 100%
    Set jerk, accelerations etc.

    posted in Using Duet Controllers
    undefined
    Loris
    17 Dec 2021, 18:35
  • Toolboard 1.1 - Driver not present

    Hi,
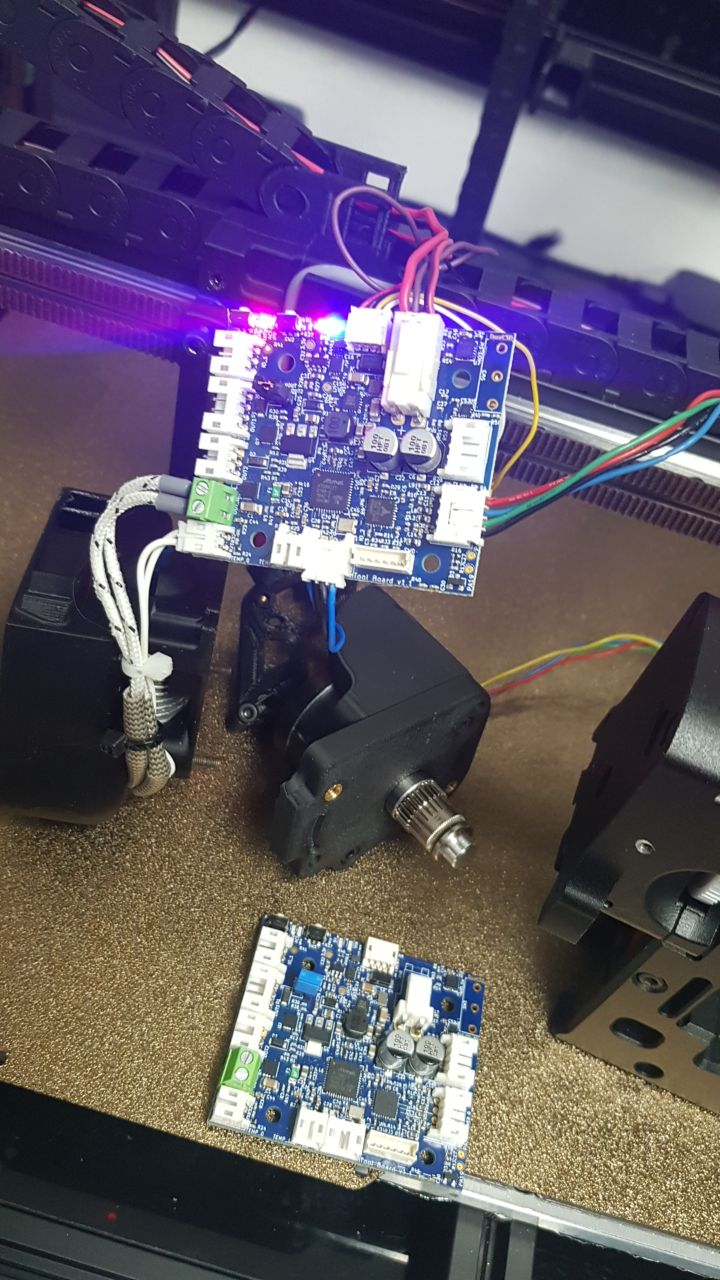
    I installed a original brand new Toolboard 1.1 in my new voron 2.4, equipped with Duet 3 mini 5.

    The toolboard is perfectly working (fans, cartdrige ecc) but the stepper extruder is not working.
    I checked with diagnostics and the is a "Not Present" about the driver 0.

    This is the diagnostic

    m122 b121
    Diagnostics for board 121:
    Duet TOOL1LC rev 1.1 or later firmware version 3.4.0beta6 (2021-11-06 11:56:11)
    Bootloader ID: SAMC21 bootloader version 2.3 (2021-01-26b1)
    Never used RAM 2576, free system stack 2788 words
    Tasks: Move(notifyWait,0.0%,153) HEAT(notifyWait,0.2%,113) CanAsync(notifyWait,0.0%,64) CanRecv(notifyWait,0.0%,77) CanClock(notifyWait,0.0%,64) ACCEL(notifyWait,0.0%,61) TMC(notifyWait,0.4%,67) MAIN(running,94.4%,350) IDLE(ready,0.0%,27) AIN(delaying,4.9%,142), total 100.0%
    Last reset 00:09:54 ago, cause: power up
    Last software reset data not available
    Driver 0: pos 0, 656.0 steps/mm,not present, steps req 0 done 0
    Moves scheduled 0, completed 0, in progress 0, hiccups 0, step errors 0, maxPrep 0, maxOverdue 0, maxInc 0, mcErrs 0, gcmErrs 0
    Peak sync jitter -4/6, peak Rx sync delay 213, resyncs 0/0, no step interrupt scheduled
    VIN voltage: min 24.2, current 24.2, max 24.2
    MCU temperature: min 30.3C, current 30.6C, max 35.0C
    Last sensors broadcast 0x00000002 found 1 135 ticks ago, 0 ordering errs, loop time 0
    CAN messages queued 10672, send timeouts 0, received 4800, lost 0, free buffers 37, min 37, error reg 0
    dup 0, oos 0/0/0/0, bm 0, wbm 0, rxMotionDelay 0
    Accelerometer detected: yes, status: 00
    I2C bus errors 0, naks 0, other errors 0
    

    This is my config

    ; Configuration file for Duet3 Mini5+ with Mini2+ expansion (firmware version 3.3 or newer)
    ; executed by the firmware on start-up
    
    ; General preferences
    M80 C"pson"			               ; Turns on the ATX power supply
    M111 S0                     ; Debugging off
    G21                         ; Work in millimetres
    G90                         ; Send absolute coordinates...
    M83                         ; ...but relative extruder moves
    
    M669 K1                     ; Select CoreXY mode
    M564 S1 H1                  ; Forbid axis movements when not homed
    ;M918 P2 E4 F2000000 C30 R6  ; Fysetc 12864 display
    
    ; Wait a moment for the CAN expansion boards to start
    G4 S2
    
    ; M575 P1 S1 B57600           ; enable support for PanelDue
    
    ; Network
    M550 P"Voron V2.4"            ; Set machine name
    M552 S1                                                 ; enable network
    M587 S"xxxxx" P"xxxxxx"	                ; Configure access point. You can delete this line once connected
    M586 P0 S1                                              ; enable HTTP
    M586 P1 S1                                              ; disable FTP
    M586 P2 S0  						; disable Telnet
    
    ; --- Z Drive map ---
    ;     _______
    ;    | 1 | 2 |
    ;    | ----- |
    ;    | 0 | 3 |
    ;     -------
    ;      front
    ;
    ; (looking at the printer from the top)
    
    ; Drive directions
    M569 P0 S1 D2     ; Z0
    M569 P1 S0 D2     ; Z1
    M569 P2 S1 D2     ; Z2
    M569 P3 S0 D2     ; Z3
    M569 P121.0 S0 ; Extruder
    M569 P5 S1 D2     ; A
    M569 P6 S1 D2     ; B    
    
    ; Motor mapping and steps per mm
    M584 X5 Y6 Z0:1:2:3 E121.0
    M350 X16 Y16 Z16 E16 I1         ; Use 1/16 microstepping with interpolation everywhere
    M92 X160 Y160 Z413              ; Set XY(0.9 deg motors)and Z(1.8deg motors)steps per mm
    ;M92 E432                       ; BMG Extruder steps per mm
    M92 E656                        ; GALILEO Extruder steps per mm
    
    ; Drive currents
    M906 X1250 Y1250 Z1400 E600     ; XYZ and E current
    M906 I30                        ; Idle current percentage
    M84 S120                        ; Idle timeout
    
    ; Accelerations and speed
    M98 P"/macros/print_scripts/setup_printing.g"
    
    ; Axis travel limits
    M208 X0 Y0 Z-8 S1               ; Set axis minima
    M208 X300 Y306 Z275 S0          ; Set axis maxima
    
    ; Endstops
    M574 X2 S1 P"io3.in"            ; Xmax endstop on hall effect board
    M574 Y2 S1 P"io1.in"            ; Ymax endstop on hall effect board
    M574 Z0 P"nil"                  ; No Z endstop
    
    ; Bed leveling
    M671 X-65:-65:365:365 Y0:395:395:0 S20      ; Define Z belts locations (Front_Left, Back_Left, Back_Right, Front_Right)
    M557 X25:275 Y25:275 P8:8                  ; Define bed mesh grid (inductive probe, positions include the Y offset!)
    
    
    ;********************************************************************* Z PROBES
    ;SENSORE INDUTTIVO HOTEND
    M558 K0 P8 C"121.io2.in" T18000 F120 H5 A5 S0.01 R0.2
    G31 K0 P500 X0 Y25 Z2       ; Offset sensore
    
    ;MICROSWITCH Z
    M558 K1 P8 C"^io6.in" T18000 F240:60 H2 A10 S0.005 R0.2
    G31 K1 P500 X0 Y0 Z0.73                    ; Z switch offset (if positive, greater value = lower nozzle. if negative, more negative = higher nozzle)
    ;*******************************************************************************
    
    
    ; Heaters
    M308 S0 P"temp0" Y"thermistor" T100000 B4138                       ; configure sensor 0 as thermistor on pin temp0
    M950 H0 C"out0" T0                                                 ; create bed heater output on out0 and map it to sensor 0
    M307 H0 B0 S1.00                                                   ; disable bang-bang mode for the bed heater and set PWM limit
    M140 H0                                                            ; map heated bed to heater 0
    M143 H0 S115                                                       ; set temperature limit for heater 0 to 100C
    M308 S1 P"121.temp0" Y"thermistor" T100000 B4138                   ; configure sensor 1 as thermistor on pin 121.temp0
    M950 H1 C"121.out0" T1                                             ; create nozzle heater output on 121.out0 and map it to sensor 1
    M307 H1 B0 S1.00                                                   ; disable bang-bang mode for heater  and set PWM limit
    ;M307 H1 B0
    M143 H1 S280                                                       ; set temperature limit for heater 1 to 280C
    
    
    ; Fans
    M950 F0 C"121.out1" Q500                                           ; create fan 0 on pin 121.out1 and set its frequency
    M106 P0 S0 H-1                                                     ; set fan 0 value. Thermostatic control is turned off
    M950 F1 C"121.out2" Q500                                           ; create fan 1 on pin 121.out2 and set its frequency
    M106 P1 S1 H1 T45                                                  ; set fan 1 value. Thermostatic control is turned on
    
    
    ; Tools
    M563 P0 D0 H1 F0                                                   ; define tool 0
    G10 P0 X0 Y0 Z0                                                    ; set tool 0 axis offsets
    G10 P0 R0 S0                                                       ; set initial tool 0 active and standby temperatures to 0C
    
    ; Misc
    ; M572 D0 S0.075                       ; Pressure Advance
    ; M592 D0 A0.015 B0.0012 L0.2          ; Non-linear extrusion
    
    ; DAA tuning
    M955 P121.0 I05                      ; create accelerometer on P121.0
    
    ; M572 D0 S0.01                        ; Pressure Advance
    ; M376 H10                             ; Fade mesh out compensation over 10mm Z
    
    M575 P1 S1 B57600                                  ; enable support for PanelDue
    M501                                                               ; load config-override.g
    T0                                                                 ; select tool 0
    

    What i'm doing wrong?
    Thanks

    posted in Using Duet Controllers
    undefined
    Loris
    17 Dec 2021, 15:59
  • Duet 3 Mini + 12864 Display not working

    Hi,
    i connected my BTT 12864 Mini 1.0 to my duet 3 mini and the display seems not powered at all.
    I connected it using EXP1 and EXP2 connectors.

    A friend of mine has same behaviour with duet 3 mini and same kind of display.

    we tested and noticed that on 5v pin of EXP1 there is no voltage

    Thanks for any help

    photo_2021-09-15_10-47-32.jpg

    posted in Using Duet Controllers
    undefined
    Loris
    15 Sept 2021, 08:54
  • RE: PanelDue 3.4.0-pre1 released

    My paneldue wont show screensaver.
    To force that i have to go to setup screen, set screensaver timeout and back to status screen.

    posted in PanelDue
    undefined
    Loris
    5 Sept 2021, 09:56
  • RE: Stupid question about Z-Offset

    @engikeneer Thanks

    posted in Using Duet Controllers
    undefined
    Loris
    5 Sept 2021, 09:54
  • Stupid question about Z-Offset

    Every time i change my z-offset (bltouch) i re launch g32 and g29 to save the mesh.
    It is correct? Or i can avoid G29?

    Thanks

    posted in Using Duet Controllers
    undefined
    Loris
    4 Sept 2021, 10:45
  • RE: LIS3DH on idex printer

    @dc42 Thanks for your reply.
    The accelerometer need to stay installed on the tool permanently or is used only for the calibration process?
    Thanks in advance.

    posted in Using Duet Controllers
    undefined
    Loris
    30 Jun 2021, 17:29
  • LIS3DH on idex printer

    Maybe is a stupid question but...
    On our project (MLM - Idex) we are designing the supports for adafruit lis3dh.
    We will need one accelerometer for each tool?

    Thanks in advance

    posted in Using Duet Controllers
    undefined
    Loris
    30 Jun 2021, 15:17
  • RE: Software package 3.3beta3 released

    Hi all, i have a strange behaviour using rrf 3.3b3.
    I printed a file already in my SD (when i use 3.3b1).
    This file is a simple testing cube sliced in simplify3d having 1 perimeter only.
    Printed with 3.3b1 is perfect.
    Printed with 3.3b3 seems that first layers are smaller than normal.
    I also confirm that the probe z-offset with 3.3b3 seems different, it print al little far away from bed, 3.3b1 perfect.
    Same config.g and same configuration.
    I only changed the firmware.
    To do a test, i rollback to 3.3b1 and it prints perfectly the same file.
    Here a picture about the print with 3.3b3
    photo_2021-04-24_12-05-54.jpg

    posted in Beta Firmware
    undefined
    Loris
    24 Apr 2021, 18:07
  • Webdav implementation

    I would like to have webdav implementation in order to access Micro SD mapped as a network drive (like toshiba wifi sd cards).
    At the moment Prusaslicer can upload gcodes directly to duet, but ideamaker and s3d not.

    Is it possible?
    Thanks

    posted in Firmware wishlist
    undefined
    Loris
    2 Dec 2020, 18:04
  • RE: Duet 2 Wifi shutdown immediately after restart

    Please help me

    posted in General Discussion
    undefined
    Loris
    19 Nov 2020, 11:47
  • RE: Duet 2 Wifi shutdown immediately after restart

    This is my config

    ; Configuration file for Duet WiFi (firmware version 3)
    ; executed by the firmware on start-up
    ;
    ; generated by RepRapFirmware Configuration Tool v3.1.4 on Tue Aug 11 2020 17:42:02 GMT-0500 (Central Daylight Time)
    
    ; General preferences
    M80														; Turns on the ATX power supply
    G90                                                     ; send absolute coordinates...
    M83                                                     ; ...but relative extruder moves
    M550 P"BLV Cube"                                        ; set printer name
    M669 K1													; Select CoreXY mode
    
    ; Network
    M552 S1                                                 ; enable network
    M586 P0 S1                                              ; enable HTTP
    M586 P1 S0                                              ; disable FTP
    M586 P2 S0                                              ; disable Telnet
    
    ; Drives
    M569 P0 S1                                              ; physical drive 0 goes forwards
    M569 P1 S0                                              ; physical drive 1 goes backwards
    M569 P2 S0                                              ; physical drive 2 goes backwards
    M569 P3 S0                                              ; physical drive 3 goes backwards
    M569 P4 S0                                              ; physical drive 3 goes backwards
    
    M671 X-64.75:366.75 Y150:150 S10	   			   ; leadscrew pivot point: Left -65:150, Right 364:150
    ;Distance between leadscrews = 429.5mm
    ;Center of leadscrew 12.5mm away from outside edge of 2020 bed carriage extrusion
    ;If everything is centered correctly the center of the leadscrew is 150mm away from front and back of the bed
    
    M584 X0 Y1 Z2:4 E3                                      ; set drive mapping Z2=Left, Z4=Right
    M350 X32 Y32 Z16 E16 I1                            		; configure microstepping with interpolation
    M92 X200.00 Y200.00 Z400.00 E406.56                		; set steps per mm
    M566 X700.00 Y700.00 Z240.00 E2000.00                   ; set maximum instantaneous speed changes (mm/min)
    M203 X18000.00 Y18000.00 Z1000.00 E2000.00              ; set maximum speeds (mm/min)
    M201 X3000.00 Y3000.00 Z100.00 E4000.00                 ; set accelerations (mm/s^2)
    M906 X1600 Y1600 Z800 E1600 I30                         ; set motor currents (mA) and motor idle factor in per cent
    M84 S120                                                ; Set idle timeout
    
    ; Axis Limits
    M208 X-23 Y0 Z0 S1                                       ; set axis min
    M208 X320 Y321 Z350 S0                                  ; set axis max
    
    ; Endstops
    M574 X1 S1 P"xstop"                                     ; configure active-high endstop for low end on X via pin xstop
    M574 Y2 S1 P"ystop"                                     ; configure active-high endstop for high end on Y via pin ystop
    M574 Z1 S2                                              ; configure Z-probe endstop for low end on Z
    M591 D0 P1 C"e0stop" S1								    ; configure filament runout sensor for high end on extruder drive 0 via pin i03.in
    
    ; Z-Probe
    M950 S0 C"exp.heater3"                                  ; create servo pin 0 for BLTouch
    M558 P9 C"^zprobe.in" H5 F300 T9000                     ; set Z probe type to bltouch and the dive height + speeds
    G31 P500 X0 Y0 Z.780                                    ; set Z probe trigger value, offset and trigger height
    M557 X30:270 Y30:270 P4                                 ; define mesh grid
    
    ; Heaters
    M308 S0 P"bedtemp" Y"thermistor" A"Bed" T100000 B4725 C0.0000000706 R4700 ; configure sensor 0 as thermistor on pin bedtemp
    M950 H0 C"bedheat" T0                                   ; create bed heater output on bedheat and map it to sensor 0
    M307 H0 A284.0 C843.8 D11.0 B0							; Heatbed PID
    M140 H0                                                 ; map heated bed to heater 0
    M143 H0 S120                                            ; set temperature limit for heater 0 to 120C
    M308 S1 P"e0temp" Y"thermistor" A"Hotend" T100000 B4725 C0.0000000706 R4700  ; configure sensor 1 as thermistor on pin e0temp
    M950 H1 C"e0heat" T1                                    ; create nozzle heater output on e0heat and map it to sensor 1
    M307 H1 A284.1 C115.5 D2.6 V23.9 S0.9 B0				; Hotend PID .4mm
    M143 H1 S260											; set temperature limit for heater 0 to 260C
    M308 S2 P"mcu-temp" Y"mcu-temp" A"Duet Board" 			; Configure MCU sensor
    
    ; Fans
    M950 F0 C"fan0" Q500                                    ; create fan 0 on pin fan0 and set its frequency
    M106 P0 C"MB Fan" T35:55 H2                             ; set fan 0 value. Thermostatic control is turned on
    M950 F1 C"fan1" Q500                                    ; create fan 1 on pin fan1 and set its frequency
    M106 P1 C"Layer fan" S0 H-1                             ; set fan 1 value. Thermostatic control is turned off
    M950 F2 C"fan2" Q500                                    ; create fan 2 on pin fan2 and set its frequency
    M106 P2 C"HE Fan" S1 H1 T40                             ; set fan 2 value. Thermostatic control is turned off
    
    ; Tools
    M563 P0 D0 H1 F1                                   		; define tool 0
    G10 P0 X0 Y0 Z0                                    		; set tool 0 axis offsets
    G10 P0 R0 S0                                       		; set initial tool 0 active and standby temperatures to 0C
    
    ; Custom settings
    M564 H0                                   	            ; Let the Jog buttons work blv: added to allow jog buttons
    
    ; Miscellaneous
    M575 P1 S1 B57600                                       ; enable support for PanelDue
    

    I follow exaclty this wiring,
    photo_2020-11-09_13-43-27.jpg

    posted in General Discussion
    undefined
    Loris
    18 Nov 2020, 19:58
  • Duet 2 Wifi shutdown immediately after restart

    Hi all,
    i just end to build my printer, i'm using a regular 24v 500w psu, a ssr 25DA and a temporary 220v switch to allow auto shutdown.
    M81 is working fine, i put M80 at the start of config.g.
    Every time i chose to restart the board when config.g is saved, the board restarts but immediately the psu turns off.
    The PSU is set to 24.2v.
    Any suggestion?
    Thanks

    posted in General Discussion
    undefined
    Loris
    18 Nov 2020, 12:50
Unless otherwise noted, all forum content is licensed under CC-BY-SA