• Tags
  • Documentation
  • Order
  • Register
  • Login
Duet3D Logo Duet3D
  • Tags
  • Documentation
  • Order
  • Register
  • Login

differences between manual and automatic leveling

Scheduled Pinned Locked Moved
IR Height Sensor
10
41
2.5k
Loading More Posts
  • Oldest to Newest
  • Newest to Oldest
  • Most Votes
Reply
  • Reply as topic
Log in to reply
This topic has been deleted. Only users with topic management privileges can see it.
  • undefined
    fcwilt @Gip_86
    last edited by 18 Sept 2021, 06:56

    @gip_86

    Hmm...

    Everything seems correct.

    When are you getting this fault?

    What is the exact message your are seeing?

    Thanks.

    Frederick

    Printers: a small Utilmaker style, a small CoreXY and a E3D MS/TC setup. Various hotends. Using Duet 3 hardware running 3.4.6

    undefined 1 Reply Last reply 18 Sept 2021, 07:01 Reply Quote 0
    • undefined
      Gip_86 @fcwilt
      last edited by Gip_86 18 Sept 2021, 07:01

      @fcwilt

      hi Frederick

      this is the message i got:

      Error: Heater 0 fault: temperature rising much more slowly than the expected 1.3°C/sec
      Resume state saved
      Warning: Tool 0 was not driven because its heater temperatures were not high enough or it has a heater fault

      undefined 1 Reply Last reply 18 Sept 2021, 08:54 Reply Quote 0
      • undefined
        Blacksheep99 @Gip_86
        last edited by 18 Sept 2021, 08:54

        @gip_86 Have you run a PID tune of your extruder and bed?

        undefined 1 Reply Last reply 18 Sept 2021, 09:06 Reply Quote 0
        • undefined
          Gip_86 @Blacksheep99
          last edited by Gip_86 18 Sept 2021, 09:06

          @blacksheep99

          yes i have one done for the heater and the bed.

          Bed:
          Warning: heater behaviour was not consistent during tuning
          Auto tuning heater 0 completed after 4 idle and 25 tuning cycles in 5317 seconds. This heater needs the following M307 command:
          M307 H0 B0 R0.957 C113.0 D6.66 S1.00 V24.2
          Edit the M307 H0 command in config.g to match this. Omit the V parameter if the heater is not powered from VIN.

          Heater:

          M307 H1 B0 R2.746 C97.9:59.2 D5.41 S1.00 V24.2

          one question:
          after firmwareupdate now it takes very long to heat up the bed. is this normal?

          undefined 1 Reply Last reply 18 Sept 2021, 12:36 Reply Quote 1
          • undefined
            Blacksheep99 @Gip_86
            last edited by 18 Sept 2021, 12:36

            @gip_86 Have you got a config-override.g in your sys folder with the output of the tuning? You also need a M501 in your config.g if you do.

            undefined 1 Reply Last reply 18 Sept 2021, 17:18 Reply Quote 1
            • undefined
              Gip_86 @Blacksheep99
              last edited by 18 Sept 2021, 17:18

              @blacksheep99

              no, i have put the M307 in config directly..

              ; Heaters
              M308 S0 P"bedtemp" Y"thermistor" T100000 B4400 ; configure sensor 0 as thermistor on pin bedtemp
              M950 H0 C"bedheat" T0 ; create bed heater output on bedheat and map it to sensor 0
              ;M307 H0 B0 S1.00
              M307 H0 B0 R0.957 C113.0 D6.66 S1.00 V24.2 ; disable bang-bang mode for the bed heater and set PWM limit
              M140 H0 ; map heated bed to heater 0
              M143 H0 S120 ; set temperature limit for heater 0 to 120C
              M308 S1 P"e0temp" Y"thermistor" T100000 B4400 ; configure sensor 1 as thermistor on pin e0temp
              M950 H1 C"e0heat" T1 ; create nozzle heater output on e0heat and map it to sensor 1
              ;M307 H1 B0 S1.00
              M307 H1 B0 R2.746 C97.9:59.2 D5.41 S1.00 V24.2 ; disable bang-bang mode for heater and set PWM limit
              M143 H1 S280 ; set temperature limit for heater 1 to 280C

              if i put it in override, what have i to put in?
              and in config should only M501?

              undefined 1 Reply Last reply 18 Sept 2021, 19:29 Reply Quote 0
              • undefined
                fcwilt @Gip_86
                last edited by fcwilt 18 Sept 2021, 19:29

                @gip_86

                It's perfectly fine to put everything in config.g

                The config-override.g file is just to make it a bit easier as a M500 after certain operations makes the needed entries in config-override.g.

                I have never used config-override.g - I move the contents to config.g and delete config-override.g

                Frederick

                Printers: a small Utilmaker style, a small CoreXY and a E3D MS/TC setup. Various hotends. Using Duet 3 hardware running 3.4.6

                undefined 1 Reply Last reply 18 Sept 2021, 20:04 Reply Quote 0
                • undefined
                  Gip_86 @fcwilt
                  last edited by 18 Sept 2021, 20:04

                  @fcwilt

                  after pid tuning i have decided to add "R4700 behind the M308.

                  Now bed has heated really fast. Is there something agains R4700? I had this thing in my old config.

                  Now it looks like:

                  M308 S0 P"bedtemp" Y"thermistor" T100000 B4400 R4700
                  M308 S1 P"e0temp" Y"thermistor" T100000 B4400 R4700

                  undefined 1 Reply Last reply 18 Sept 2021, 20:48 Reply Quote 0
                  • undefined
                    fcwilt @Gip_86
                    last edited by 18 Sept 2021, 20:48

                    @gip_86 said in differences between manual and automatic leveling:

                    @fcwilt

                    after pid tuning i have decided to add "R4700 behind the M308.

                    Now bed has heated really fast. Is there something agains R4700? I had this thing in my old config.

                    Now it looks like:

                    M308 S0 P"bedtemp" Y"thermistor" T100000 B4400 R4700
                    M308 S1 P"e0temp" Y"thermistor" T100000 B4400 R4700

                    Well the R setting is supposed to match the values of the resistors on your board.

                    If you don't have a R setting it is supposed to default to the correct values for your board.

                    Frederick

                    Printers: a small Utilmaker style, a small CoreXY and a E3D MS/TC setup. Various hotends. Using Duet 3 hardware running 3.4.6

                    undefined 1 Reply Last reply 19 Sept 2021, 17:16 Reply Quote 0
                    • undefined
                      Gip_86 @fcwilt
                      last edited by Gip_86 19 Sept 2021, 17:16

                      @fcwilt

                      Ok, machine is now running as aspected (but without mesh compensation)

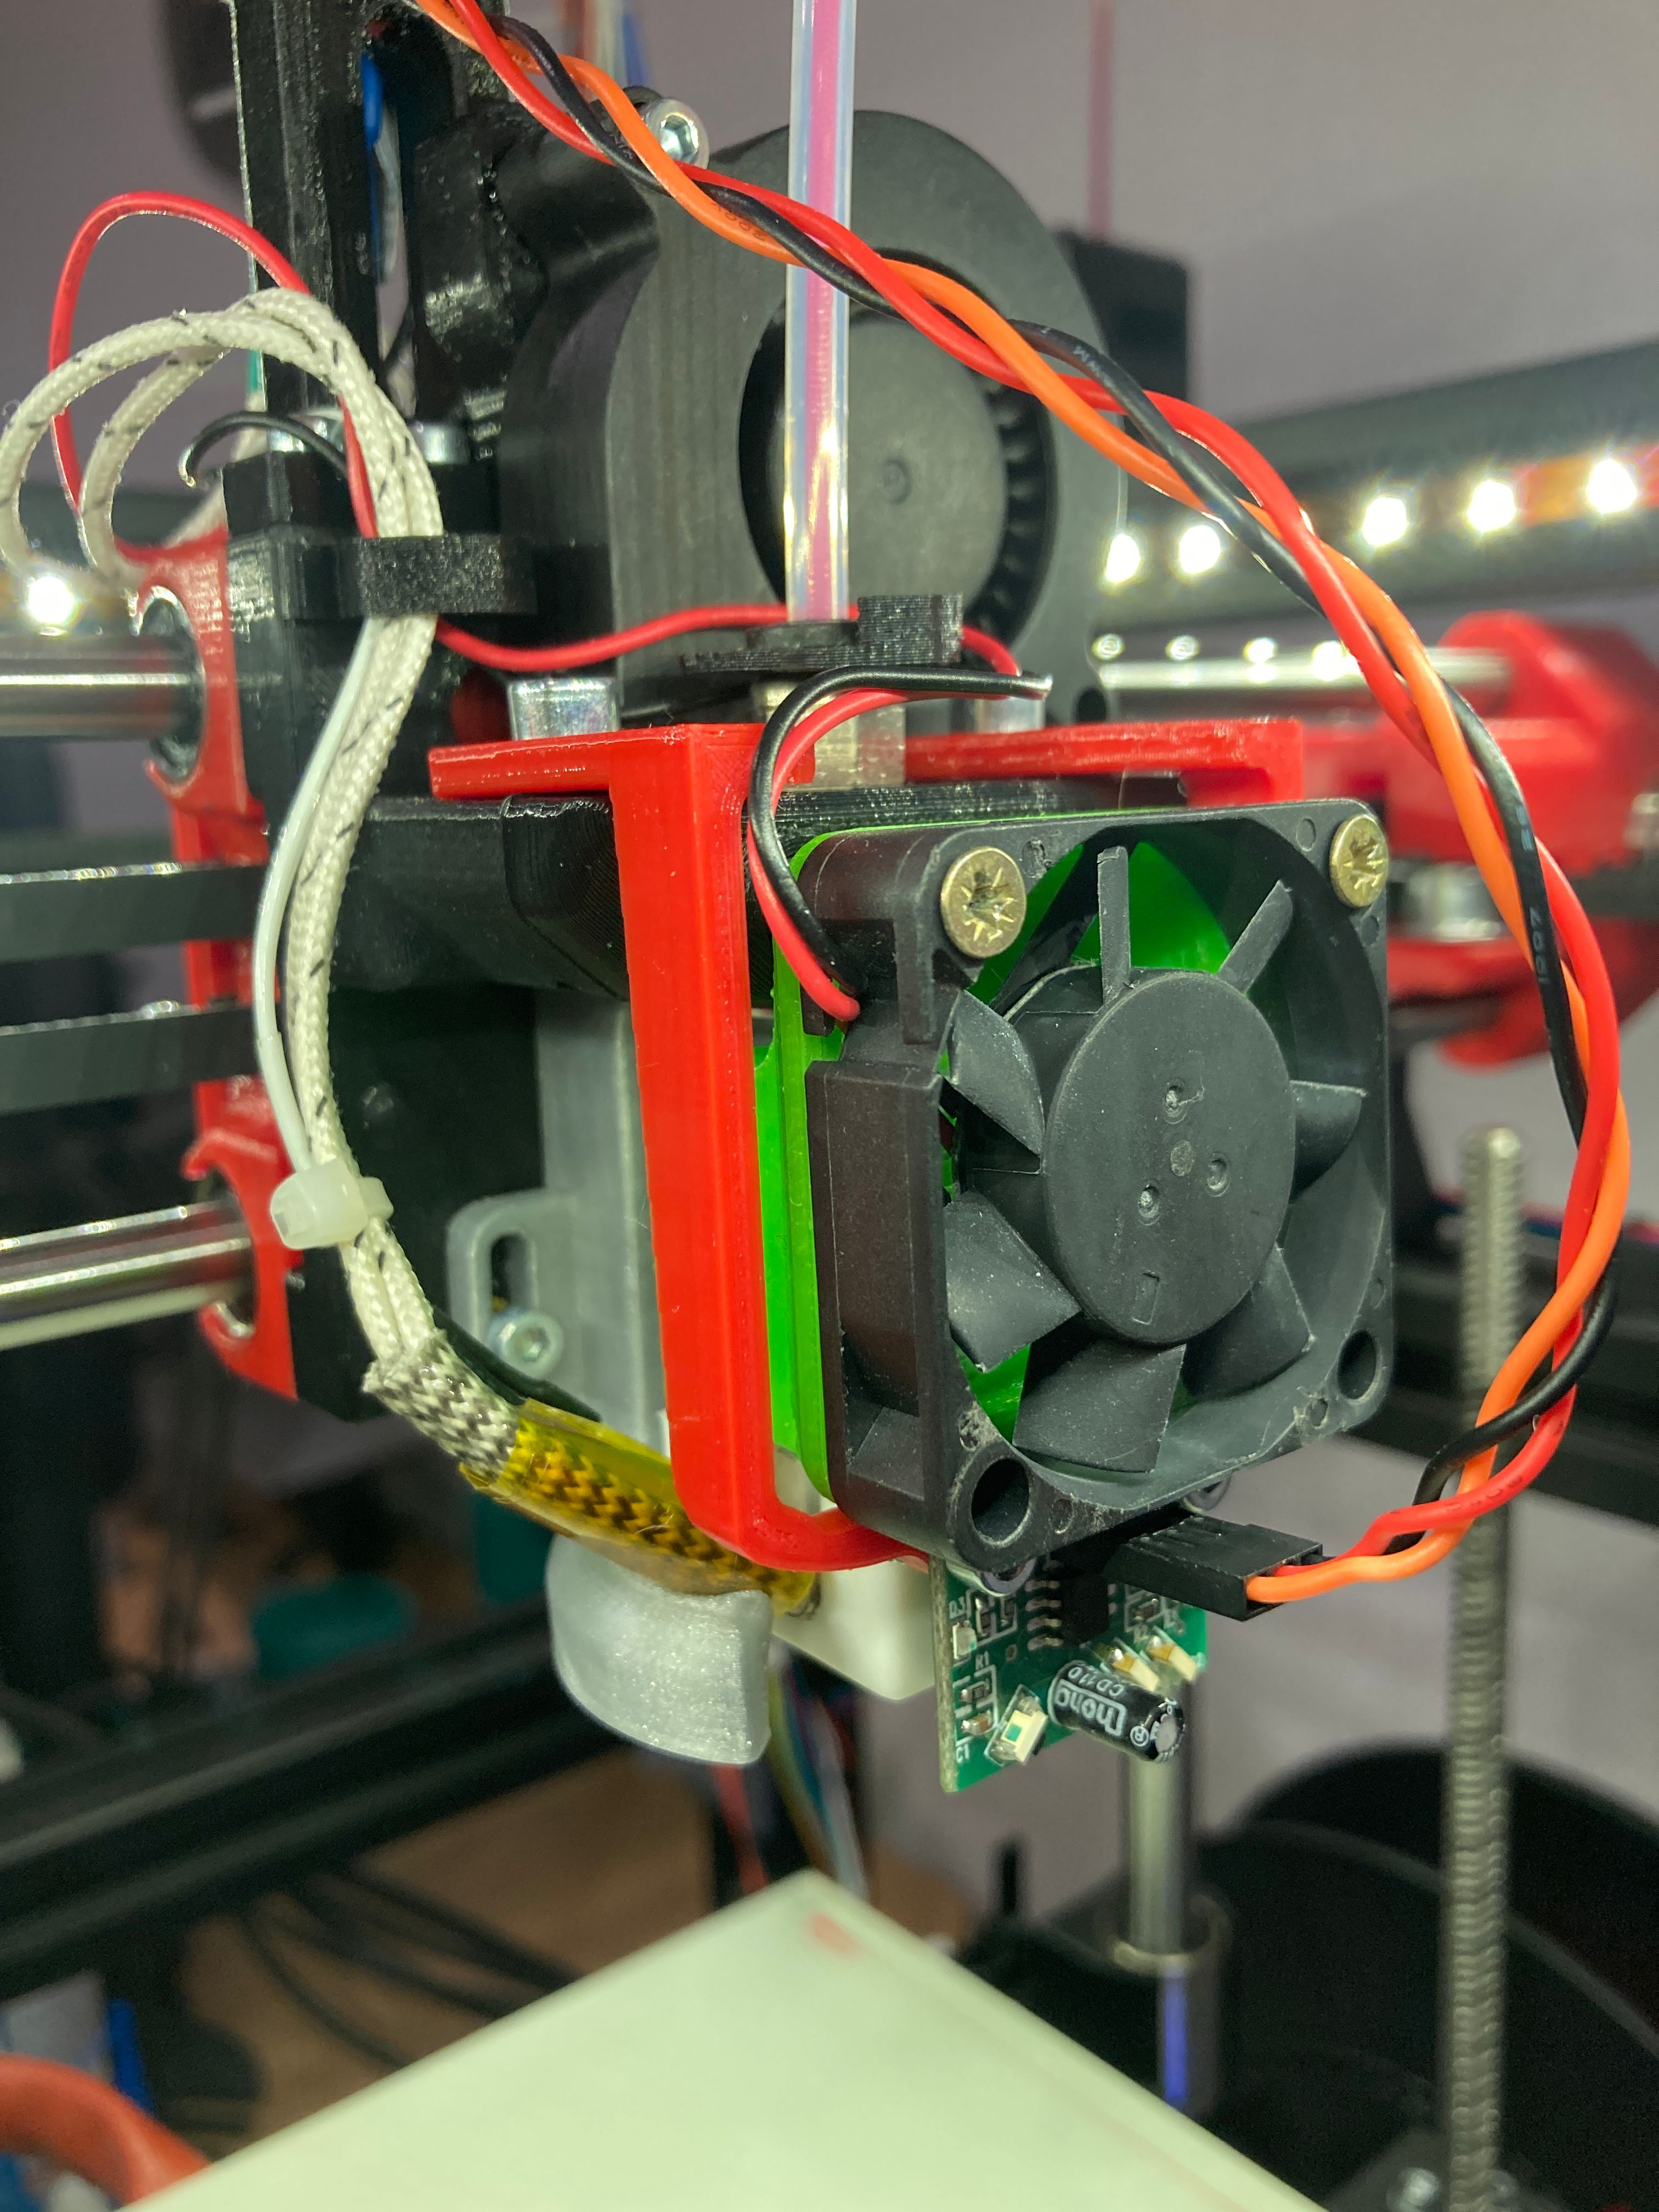
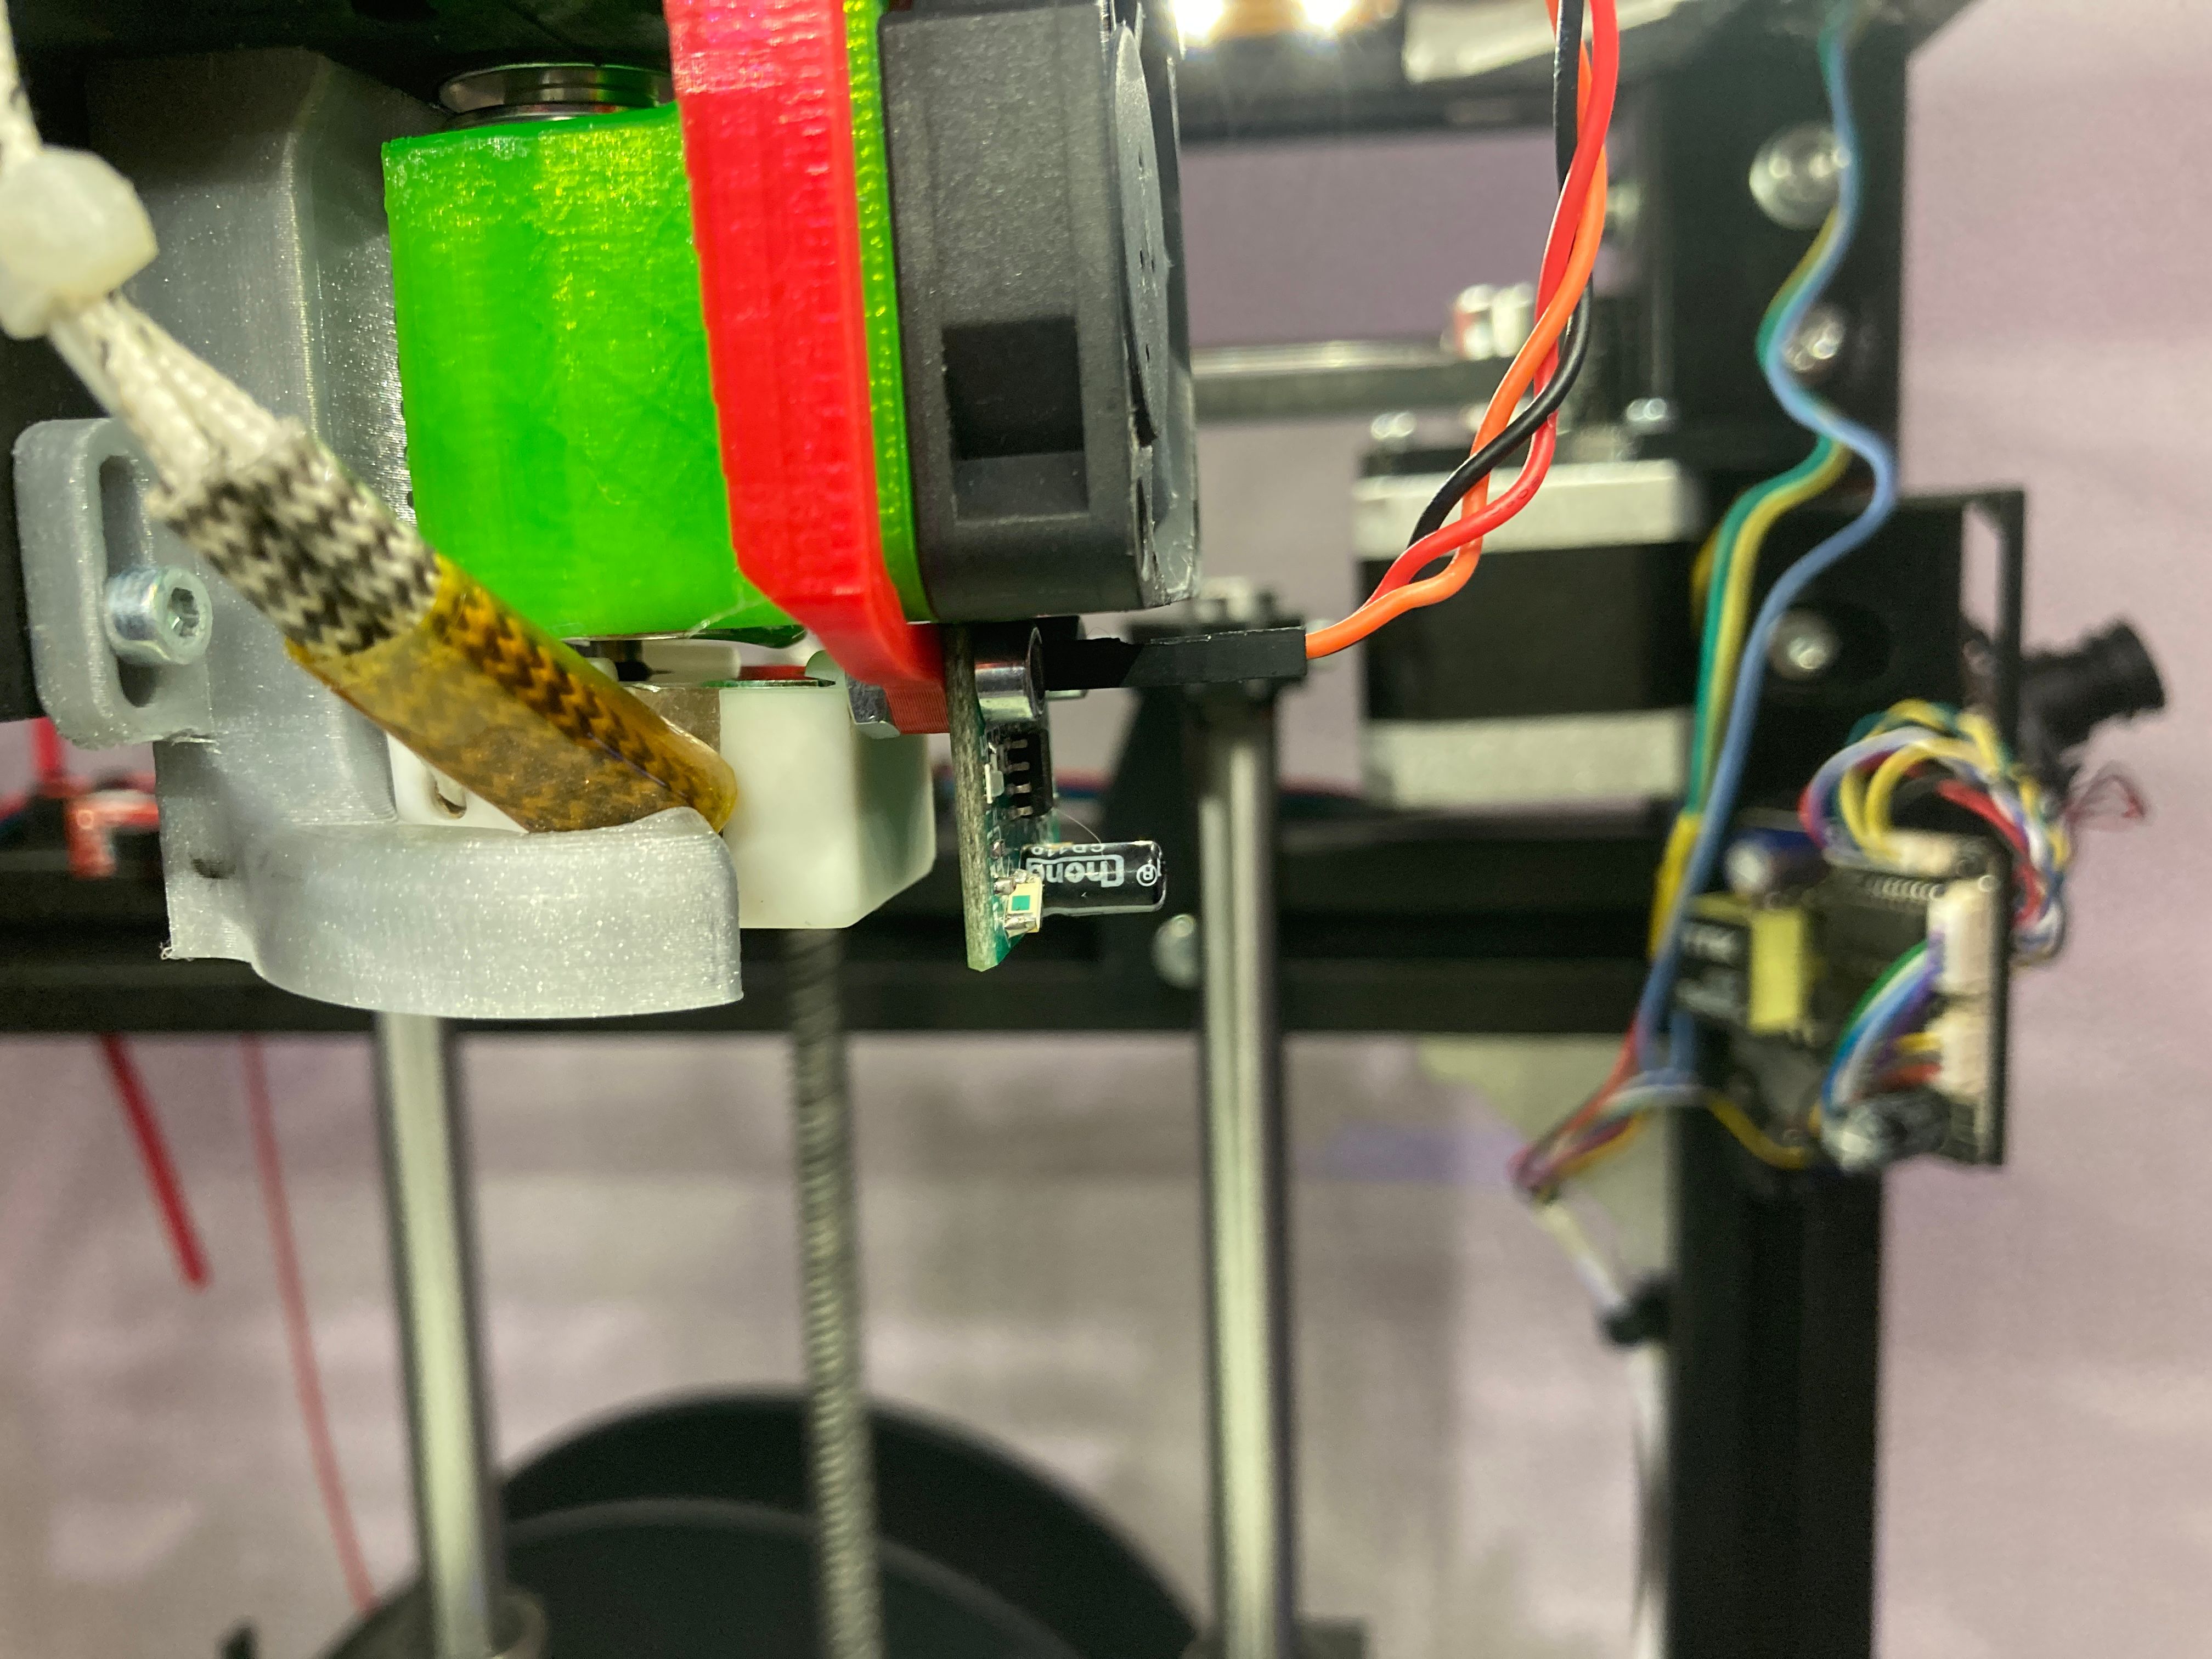
                      I also have designed a new holder for the probe.

                      93795E95-F1FE-4F2A-A746-918B541B058B.jpeg

                      A1C16F5A-1137-4B9F-AAF5-47BAB2640695.jpeg

                      0E0D7CD5-EF38-42D9-AF88-B5EA3406593A.jpeg

                      So and what are the best steps for next?

                      undefined 1 Reply Last reply 19 Sept 2021, 17:40 Reply Quote 0
                      • undefined
                        fcwilt @Gip_86
                        last edited by 19 Sept 2021, 17:40

                        @gip_86 said in differences between manual and automatic leveling:

                        So and what are the best steps for next?

                        Have you made the configuration settings needed to use the Manual Bed Leveling Assistant?

                        Manual Bed Leveling Assistant

                        Once that is done and the bed is level you should then proceed to get Mesh Bed Compensation working.

                        Mesh Bed Compensation

                        Frederick

                        Printers: a small Utilmaker style, a small CoreXY and a E3D MS/TC setup. Various hotends. Using Duet 3 hardware running 3.4.6

                        undefined 1 Reply Last reply 19 Sept 2021, 18:26 Reply Quote 0
                        • undefined
                          Gip_86 @fcwilt
                          last edited by Gip_86 19 Sept 2021, 18:26

                          @fcwilt
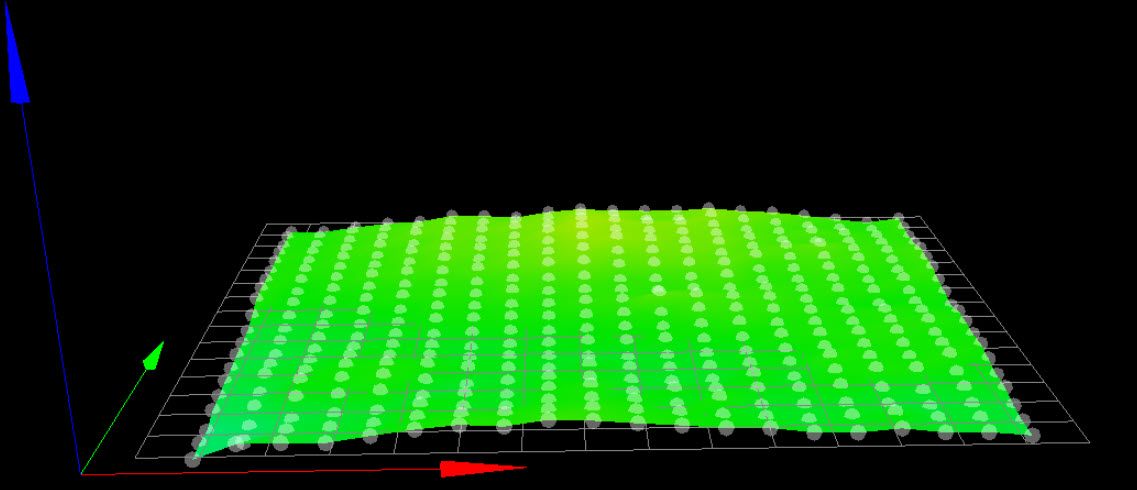
                          ok i had done the neeed config and have leveled it. after several leveling, best i could do was about 0,03mm to adjust.

                          then i had done a G29 and heres the height map:
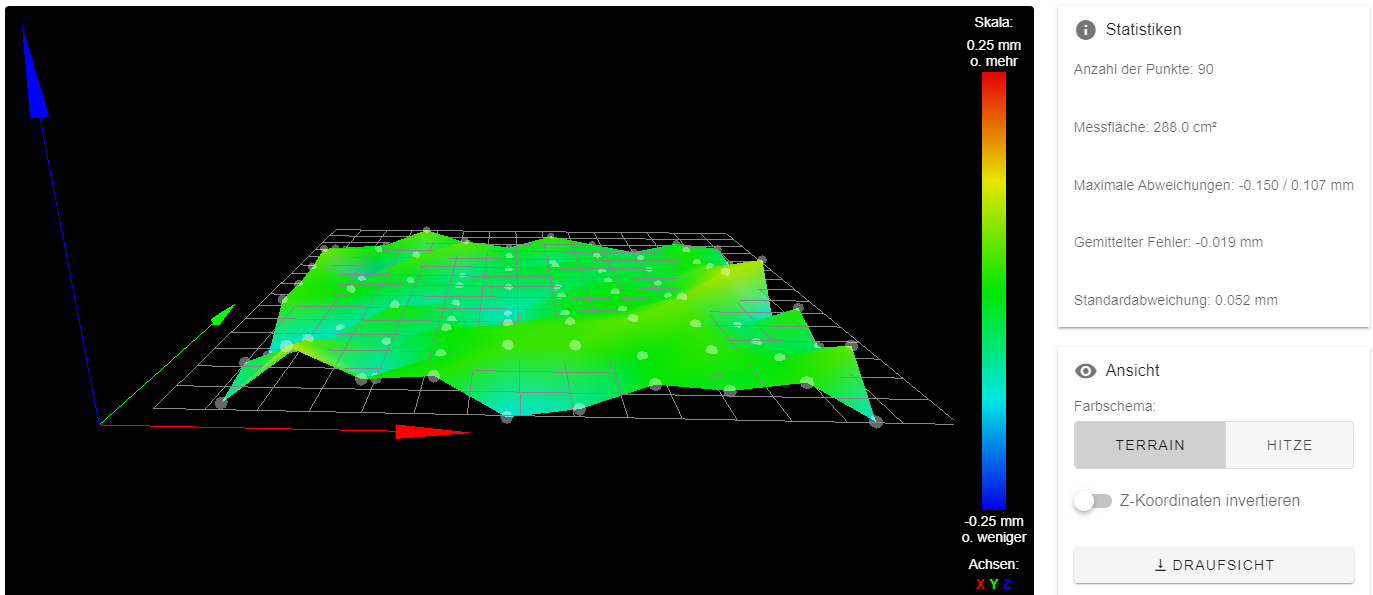
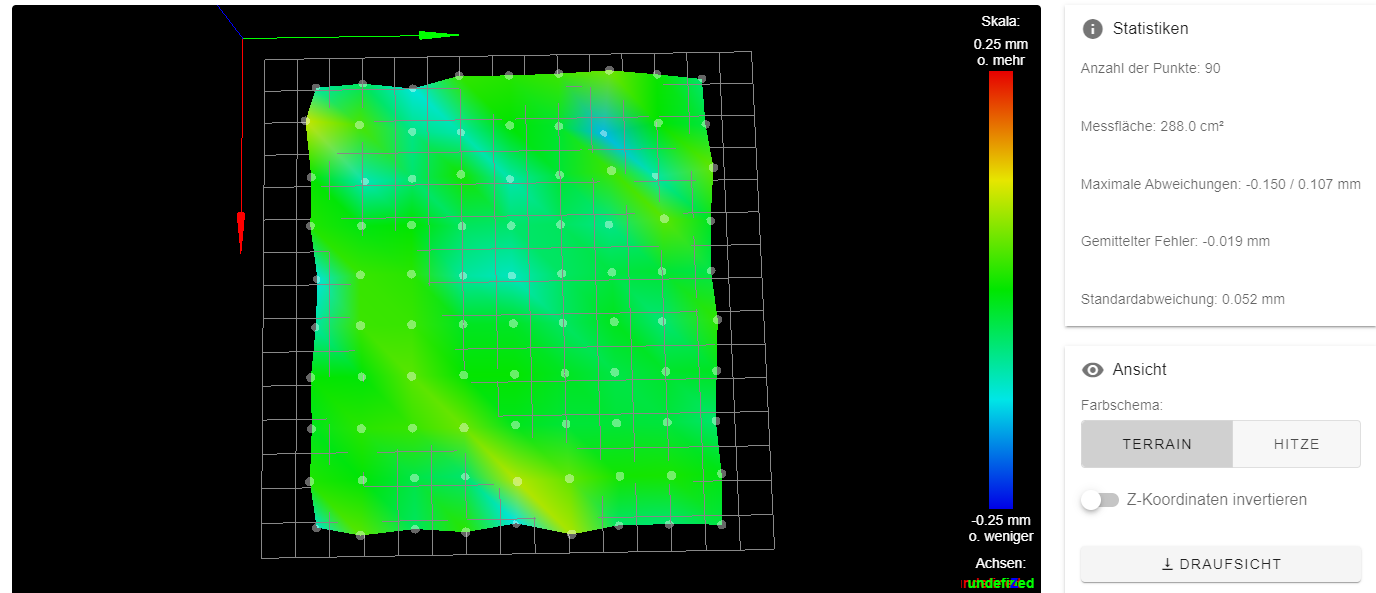
                          3850a325-a4e5-4402-a4f2-e08e425a578f-image.png

                          1d4c2091-f1ec-4bff-a350-f0747dadf08c-image.png

                          Any idears?

                          undefined 1 Reply Last reply 19 Sept 2021, 18:56 Reply Quote 0
                          • undefined
                            fcwilt @Gip_86
                            last edited by fcwilt 19 Sept 2021, 18:56

                            @gip_86

                            I have four different printers all with cast aluminum tool plate for the bed and they all are different.

                            I haven't taken the time to find out why as they all print ok.

                            FT5 Height Map.jpg

                            MF1 Height Map.jpg

                            SAFPRO Height Map.jpg

                            Printers: a small Utilmaker style, a small CoreXY and a E3D MS/TC setup. Various hotends. Using Duet 3 hardware running 3.4.6

                            undefined 1 Reply Last reply 19 Sept 2021, 19:09 Reply Quote 0
                            • undefined
                              Gip_86 @fcwilt
                              last edited by 19 Sept 2021, 19:09

                              @fcwilt

                              Ok, I also have a casted aluminium plate which is on both sides milled. I think my FR4 plate is the reason why it is so different. It’s a bit translucent.

                              Tomorrow I will give a try with the mesh.

                              undefined 1 Reply Last reply 19 Sept 2021, 19:22 Reply Quote 0
                              • undefined
                                fcwilt @Gip_86
                                last edited by 19 Sept 2021, 19:22

                                @gip_86 said in differences between manual and automatic leveling:

                                @fcwilt

                                Ok, I also have a casted aluminium plate which is on both sides milled. I think my FR4 plate is the reason why it is so different. It’s a bit translucent.

                                Tomorrow I will give a try with the mesh.

                                I would agree the FR4 is likely the issue.

                                Frederick

                                Printers: a small Utilmaker style, a small CoreXY and a E3D MS/TC setup. Various hotends. Using Duet 3 hardware running 3.4.6

                                undefined 1 Reply Last reply 19 Sept 2021, 19:27 Reply Quote 0
                                • undefined
                                  Gip_86 @fcwilt
                                  last edited by 19 Sept 2021, 19:27

                                  @fcwilt

                                  Yes but it’s a good Surface to print. 🙂

                                  Could it help to decrease the probing points?

                                  Or could it help to do a sanding of it?

                                  undefined undefined 2 Replies Last reply 19 Sept 2021, 19:57 Reply Quote 0
                                  • undefined
                                    fcwilt @Gip_86
                                    last edited by 19 Sept 2021, 19:57

                                    @gip_86 said in differences between manual and automatic leveling:

                                    Yes but it’s a good Surface to print. 🙂

                                    I use a number of different print surfaces - all of the removable kind held in place by magnetic force.

                                    I like being able to separately chose the bed heater, the bed material and the bed surface - the goal being to have the best combination of parts.

                                    Could it help to decrease the probing points?

                                    No, that would just hide the errors - to get the best results from using mesh compensation you would increase the number of points

                                    Or could it help to do a sanding of it?

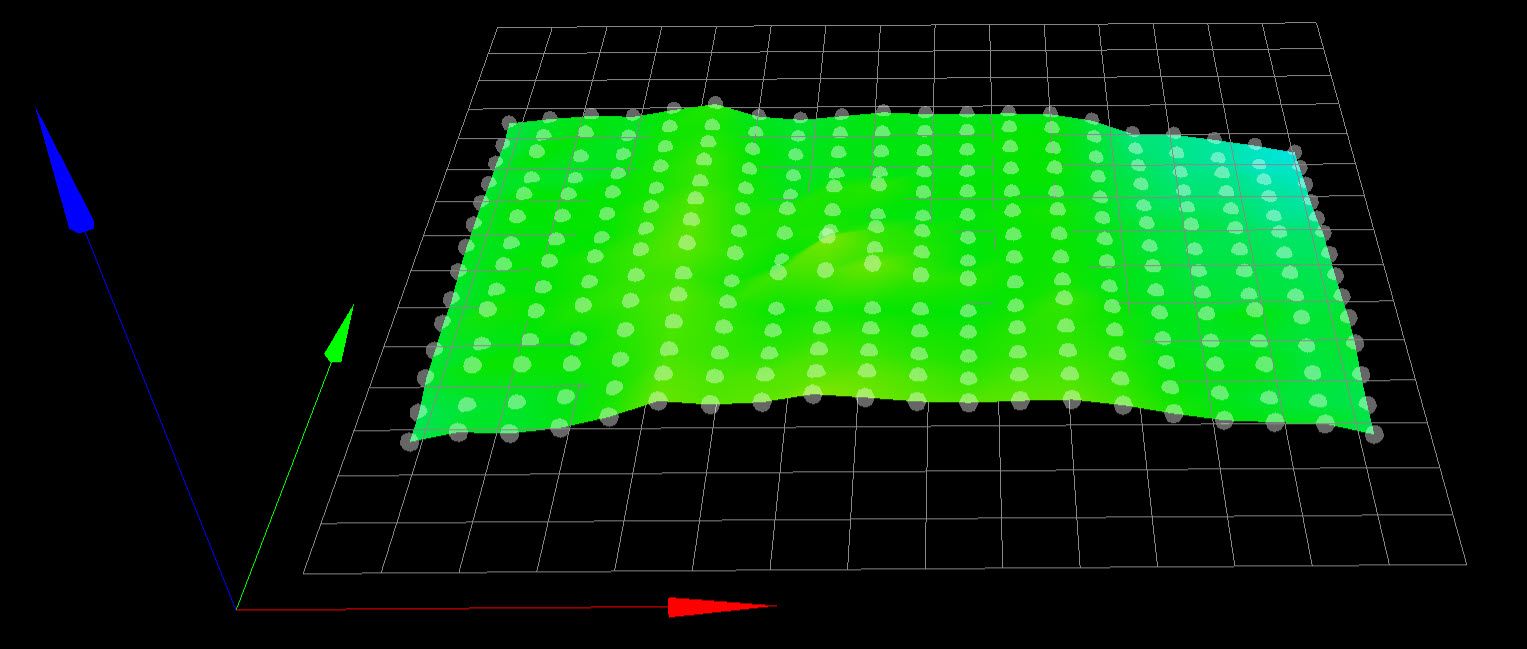
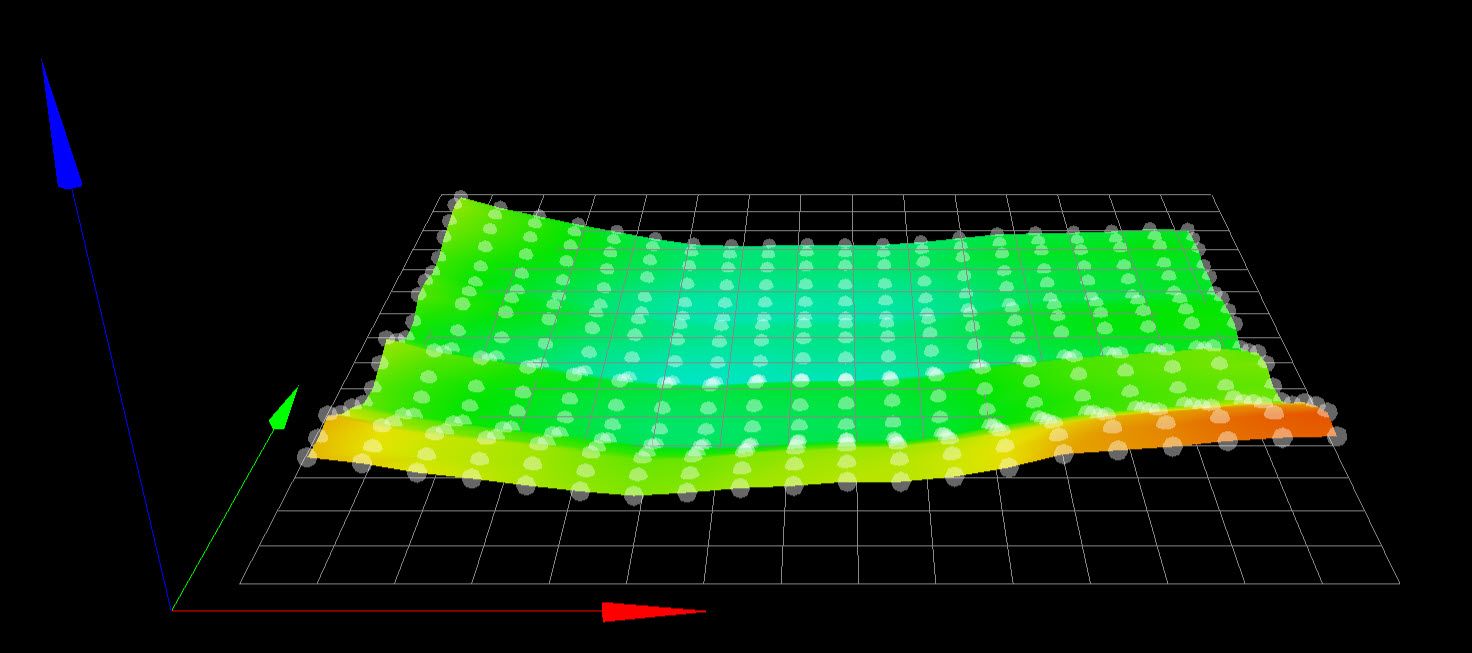
                                    The changes you see in the height map are actually quite small - sanding would likely make things worse.

                                    Printers: a small Utilmaker style, a small CoreXY and a E3D MS/TC setup. Various hotends. Using Duet 3 hardware running 3.4.6

                                    1 Reply Last reply Reply Quote 0
                                    • undefined
                                      engikeneer @Gip_86
                                      last edited by engikeneer 19 Sept 2021, 22:54

                                      @gip_86 as @fcwilt said, I'd increase the probing points a bit. That way you can look for obvious points that are wrong and manually change then in the .csv file

                                      You could also use the A and S parameters in your G31 M558 to do repeated probing at different points to improve accuracy.

                                      Final point, my heightmap on my corexy is a lot worse than yours because my gantry sags a bit. However, I still get pretty good results with mesh compensation enabled so have not bothered to redesign it. Ultimately what matters is if you get good prints, not whether you have a perfectly flat heightmap (though we'd all love that! 🙂 )

                                      Edit: corrected reference to M558

                                      E3D TC with D3Mini and Toolboards.
                                      Home-built CoreXY, Duet Wifi, Chimera direct drive, 2x BMG, 300x300x300 build volume
                                      i3 clone with a bunch of mods

                                      undefined 1 Reply Last reply 23 Sept 2021, 10:16 Reply Quote 1
                                      • undefined
                                        Marcossf @engikeneer
                                        last edited by Marcossf 23 Sept 2021, 10:16

                                        @engikeneer said in

                                        You could also use the A and S parameters in your G31 to do repeated probing at different points to improve accuracy.

                                        I can't see in the Gcode dictionary the A option in the G31 command. How it works?

                                        G31: Set or Report Current Probe status
                                        Usage
                                        G31 Pnnn Xnnn Ynnn Znnn Cnnn Snnn

                                        I'd like to get two/three probes in each probe point having a median to improve the probe accuracy.

                                        undefined 1 Reply Last reply 23 Sept 2021, 10:29 Reply Quote 0
                                        • undefined
                                          engikeneer @Marcossf
                                          last edited by 23 Sept 2021, 10:29

                                          @marcossf apologies, its M558 where you specify the A & S parameters for repeated probing... Will update my post

                                          https://duet3d.dozuki.com/Wiki/M558

                                          E3D TC with D3Mini and Toolboards.
                                          Home-built CoreXY, Duet Wifi, Chimera direct drive, 2x BMG, 300x300x300 build volume
                                          i3 clone with a bunch of mods

                                          undefined 1 Reply Last reply 23 Sept 2021, 10:35 Reply Quote 1
                                          28 out of 41
                                          • First post
                                            28/41
                                            Last post
                                          Unless otherwise noted, all forum content is licensed under CC-BY-SA