Duet3D Logo Duet3D
    • Tags
    • Documentation
    • Order
    • Register
    • Login
    1. Home
    2. Dad003
    3. Best
    • Profile
    • Following 0
    • Followers 0
    • Topics 30
    • Posts 219
    • Best 46
    • Controversial 0
    • Groups 0

    Best posts made by Dad003

    • The Mean Machine

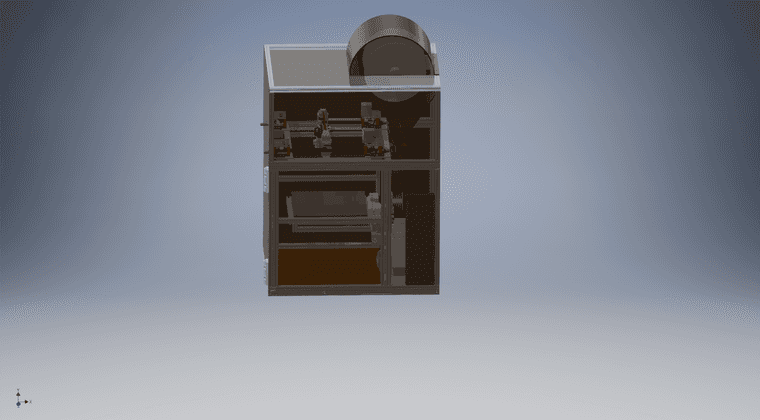
      Here my machine , it has a duet 3 running in stand alone , i had a rostock max v2 before but i always been unhappy with some of the feature or quality of the piece it would print , i started looking at other printer i wanted dual extrusion capability but couldn't find one that had a decent build size , so i started toying around the idea of designing my own , i Used autodesk inventor a lots for drawing parts in the past so i went to work.

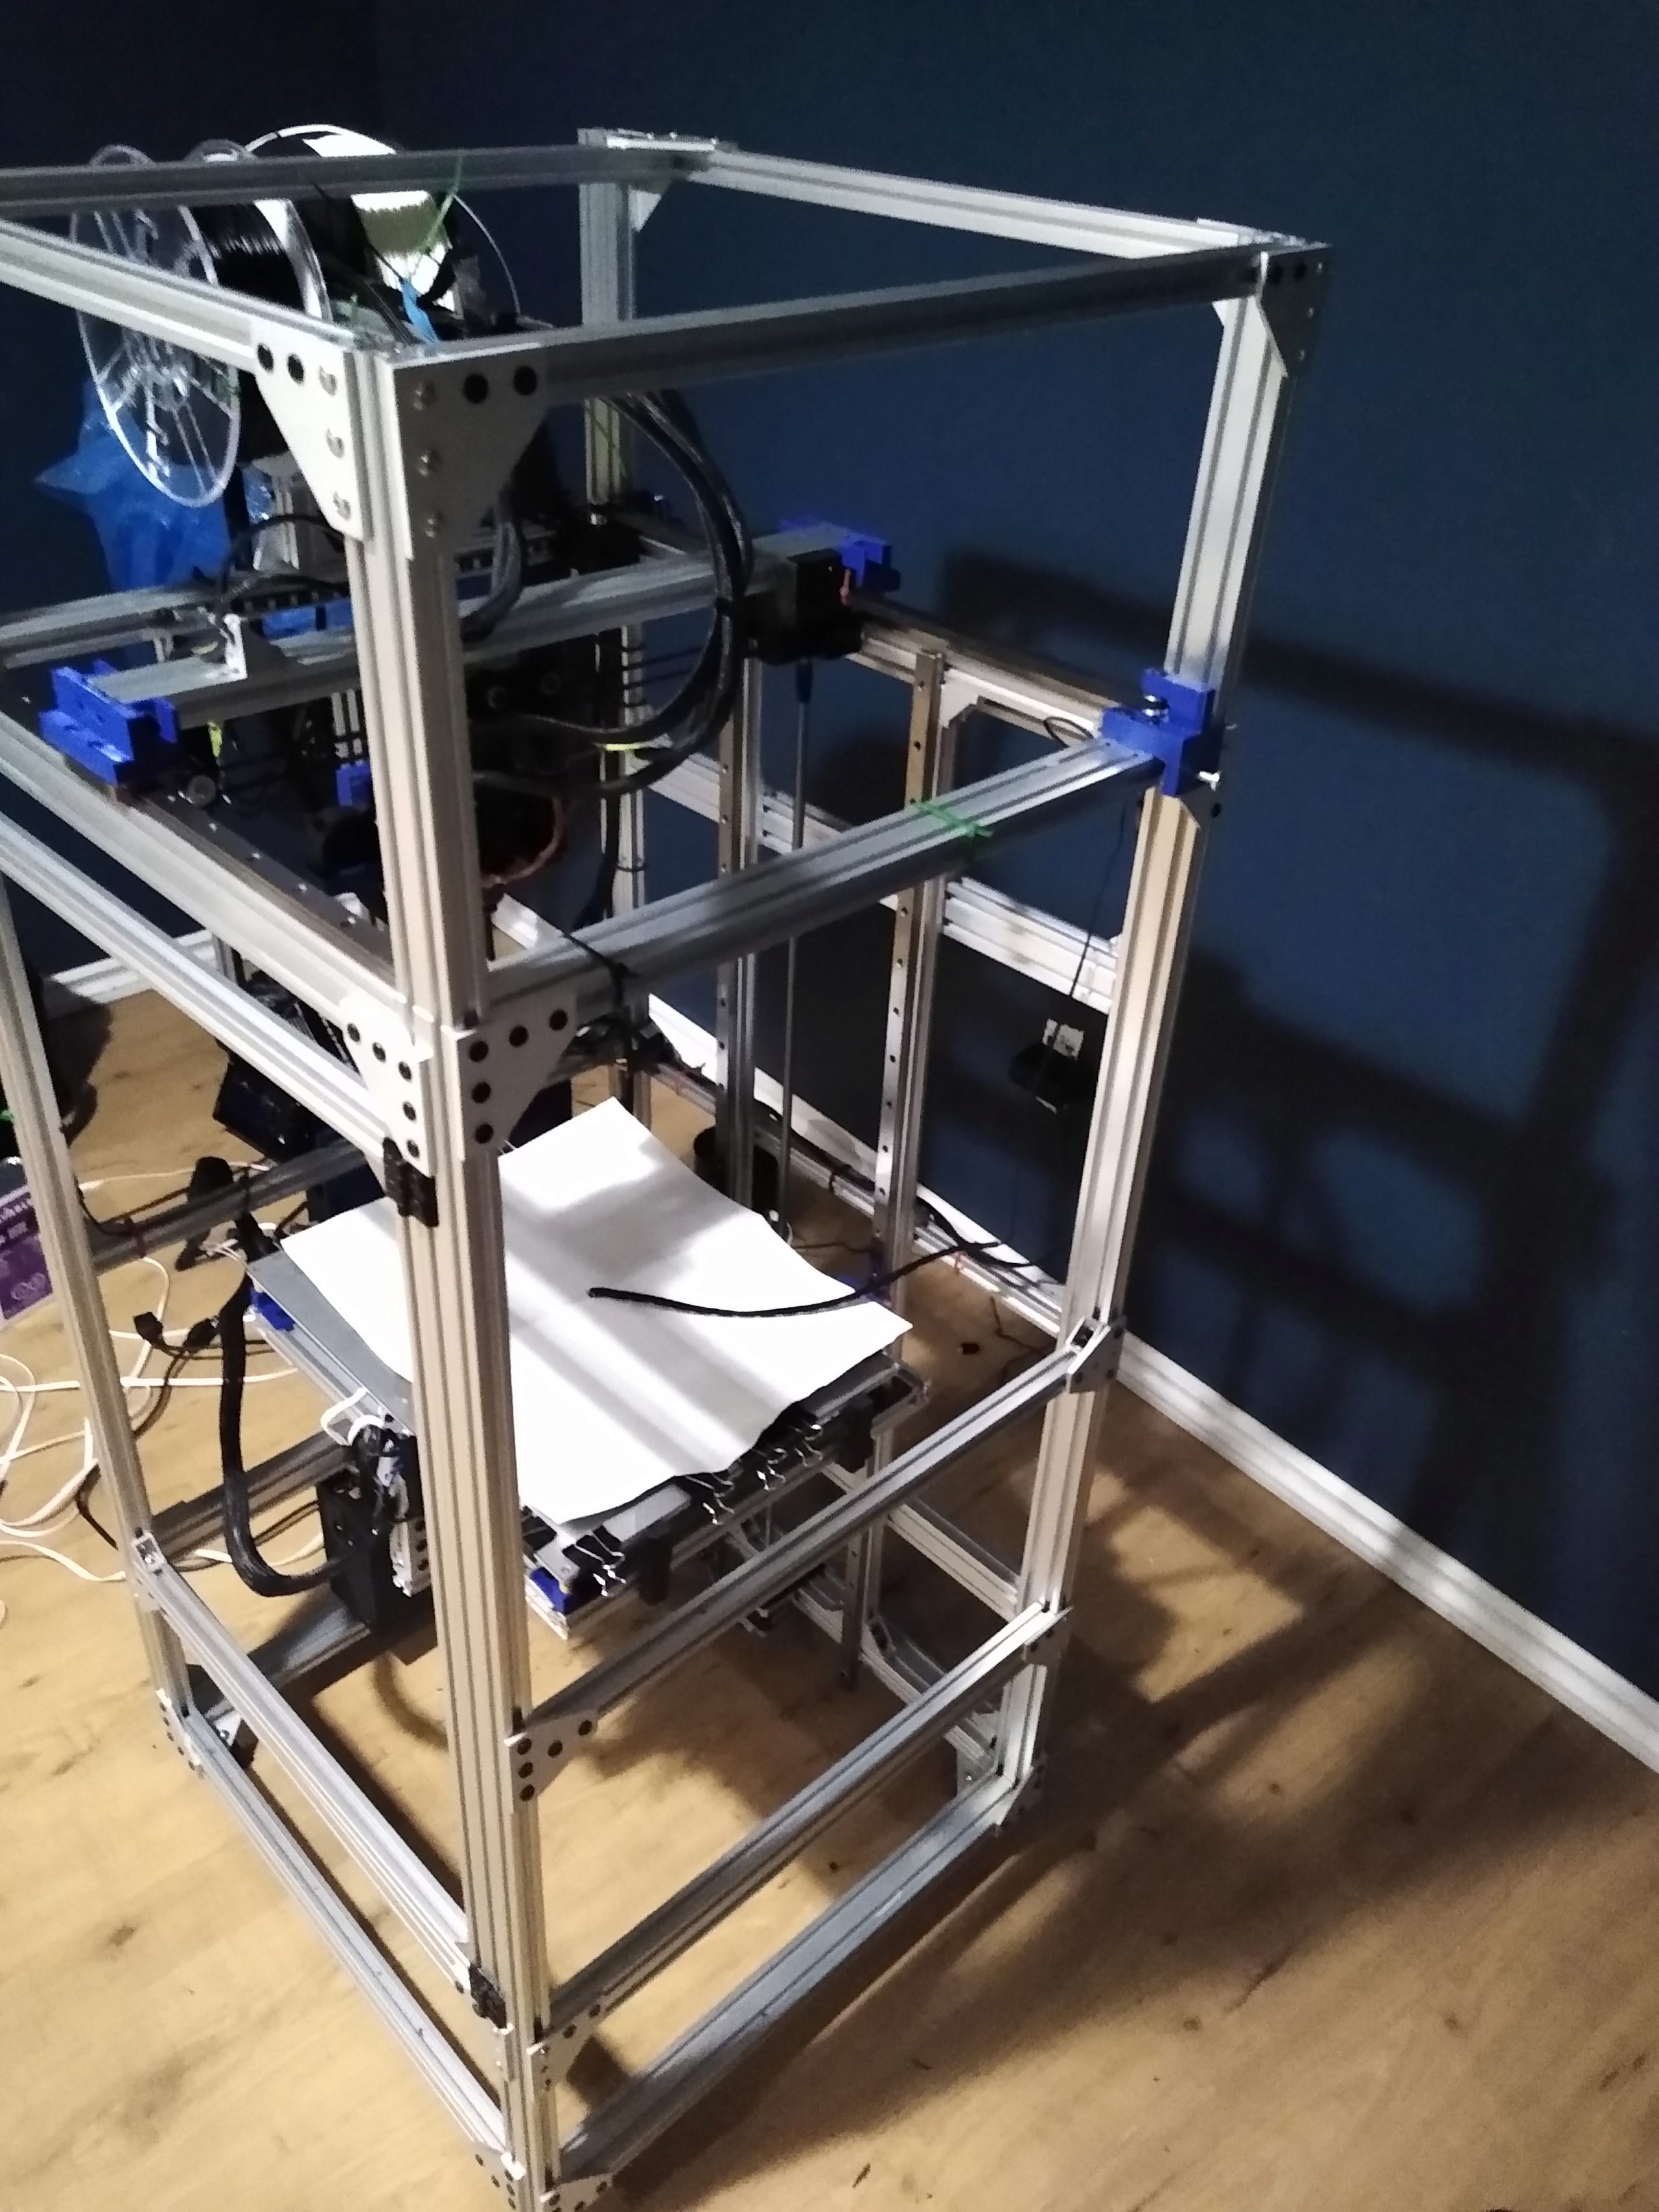
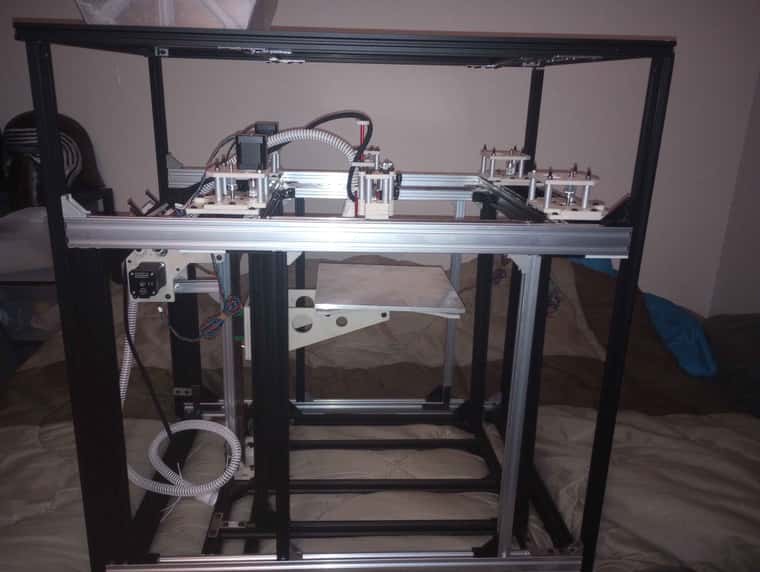
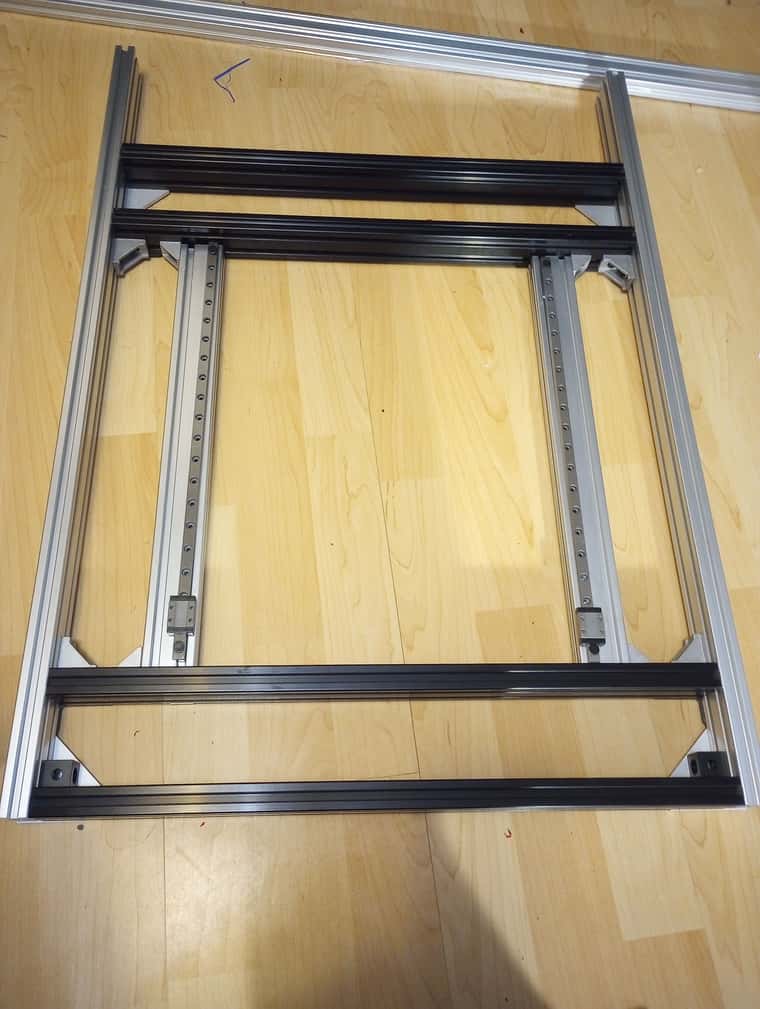
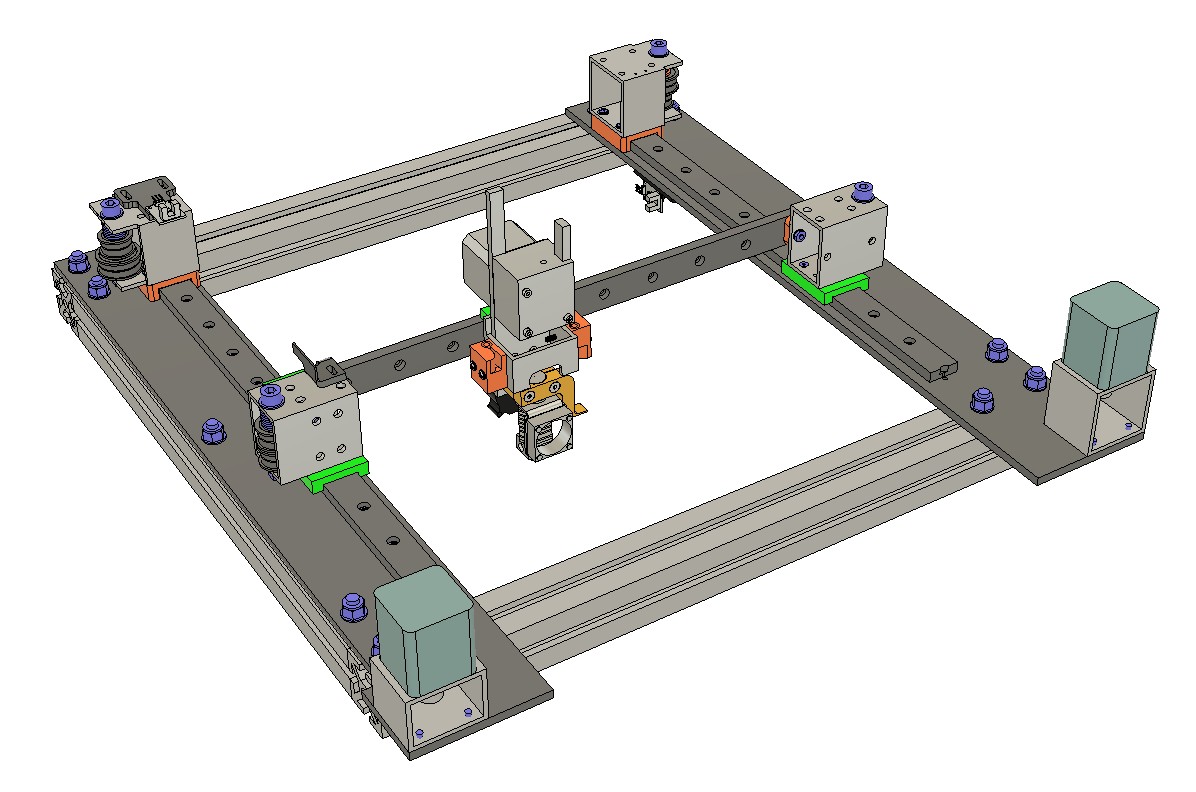
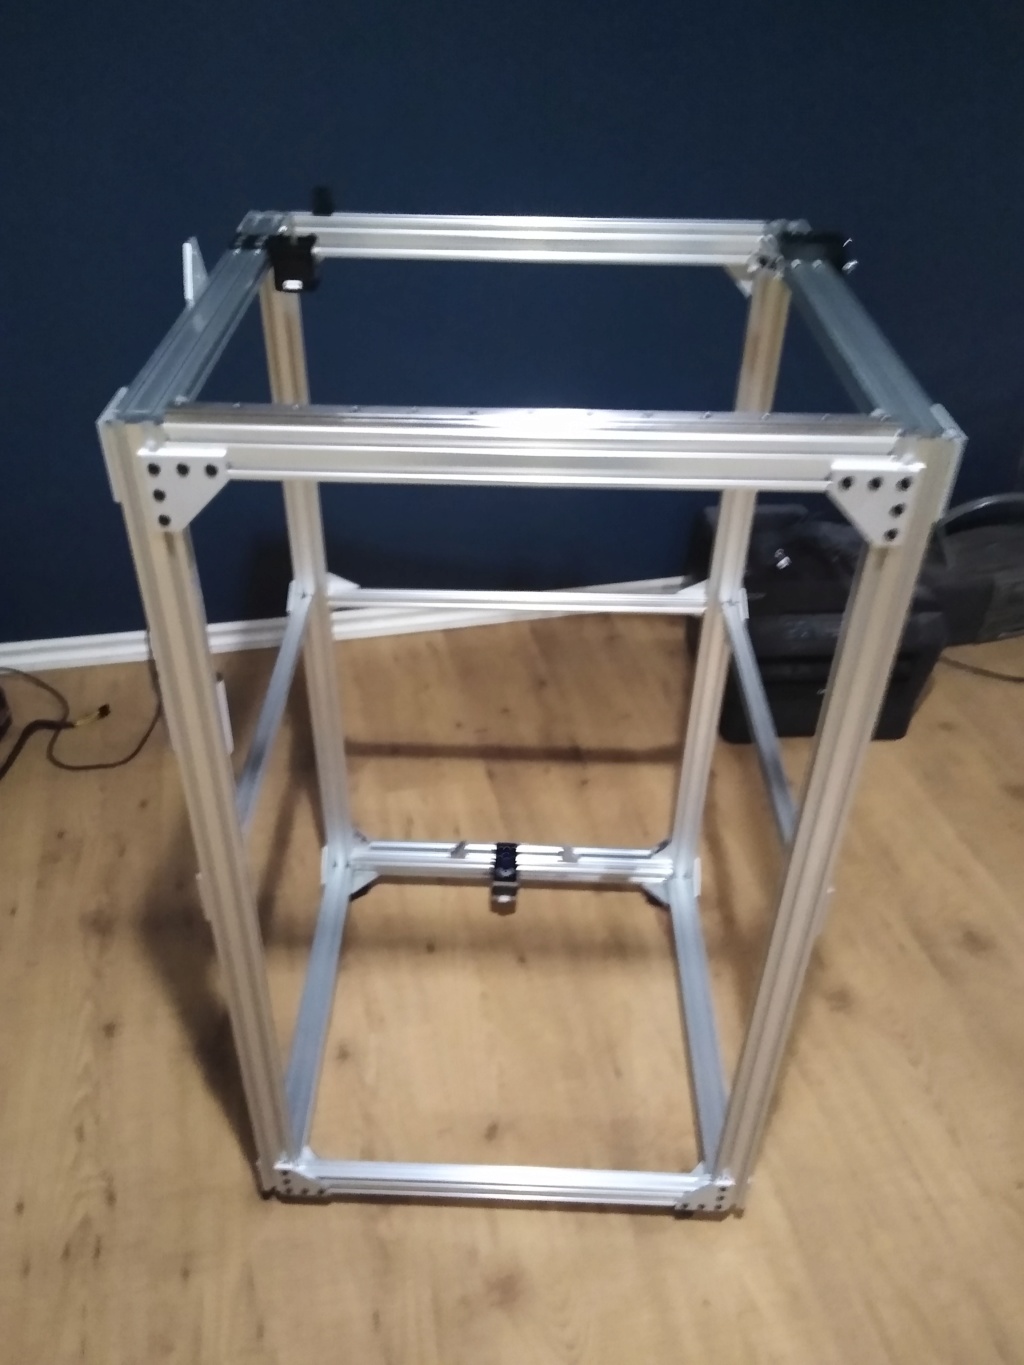
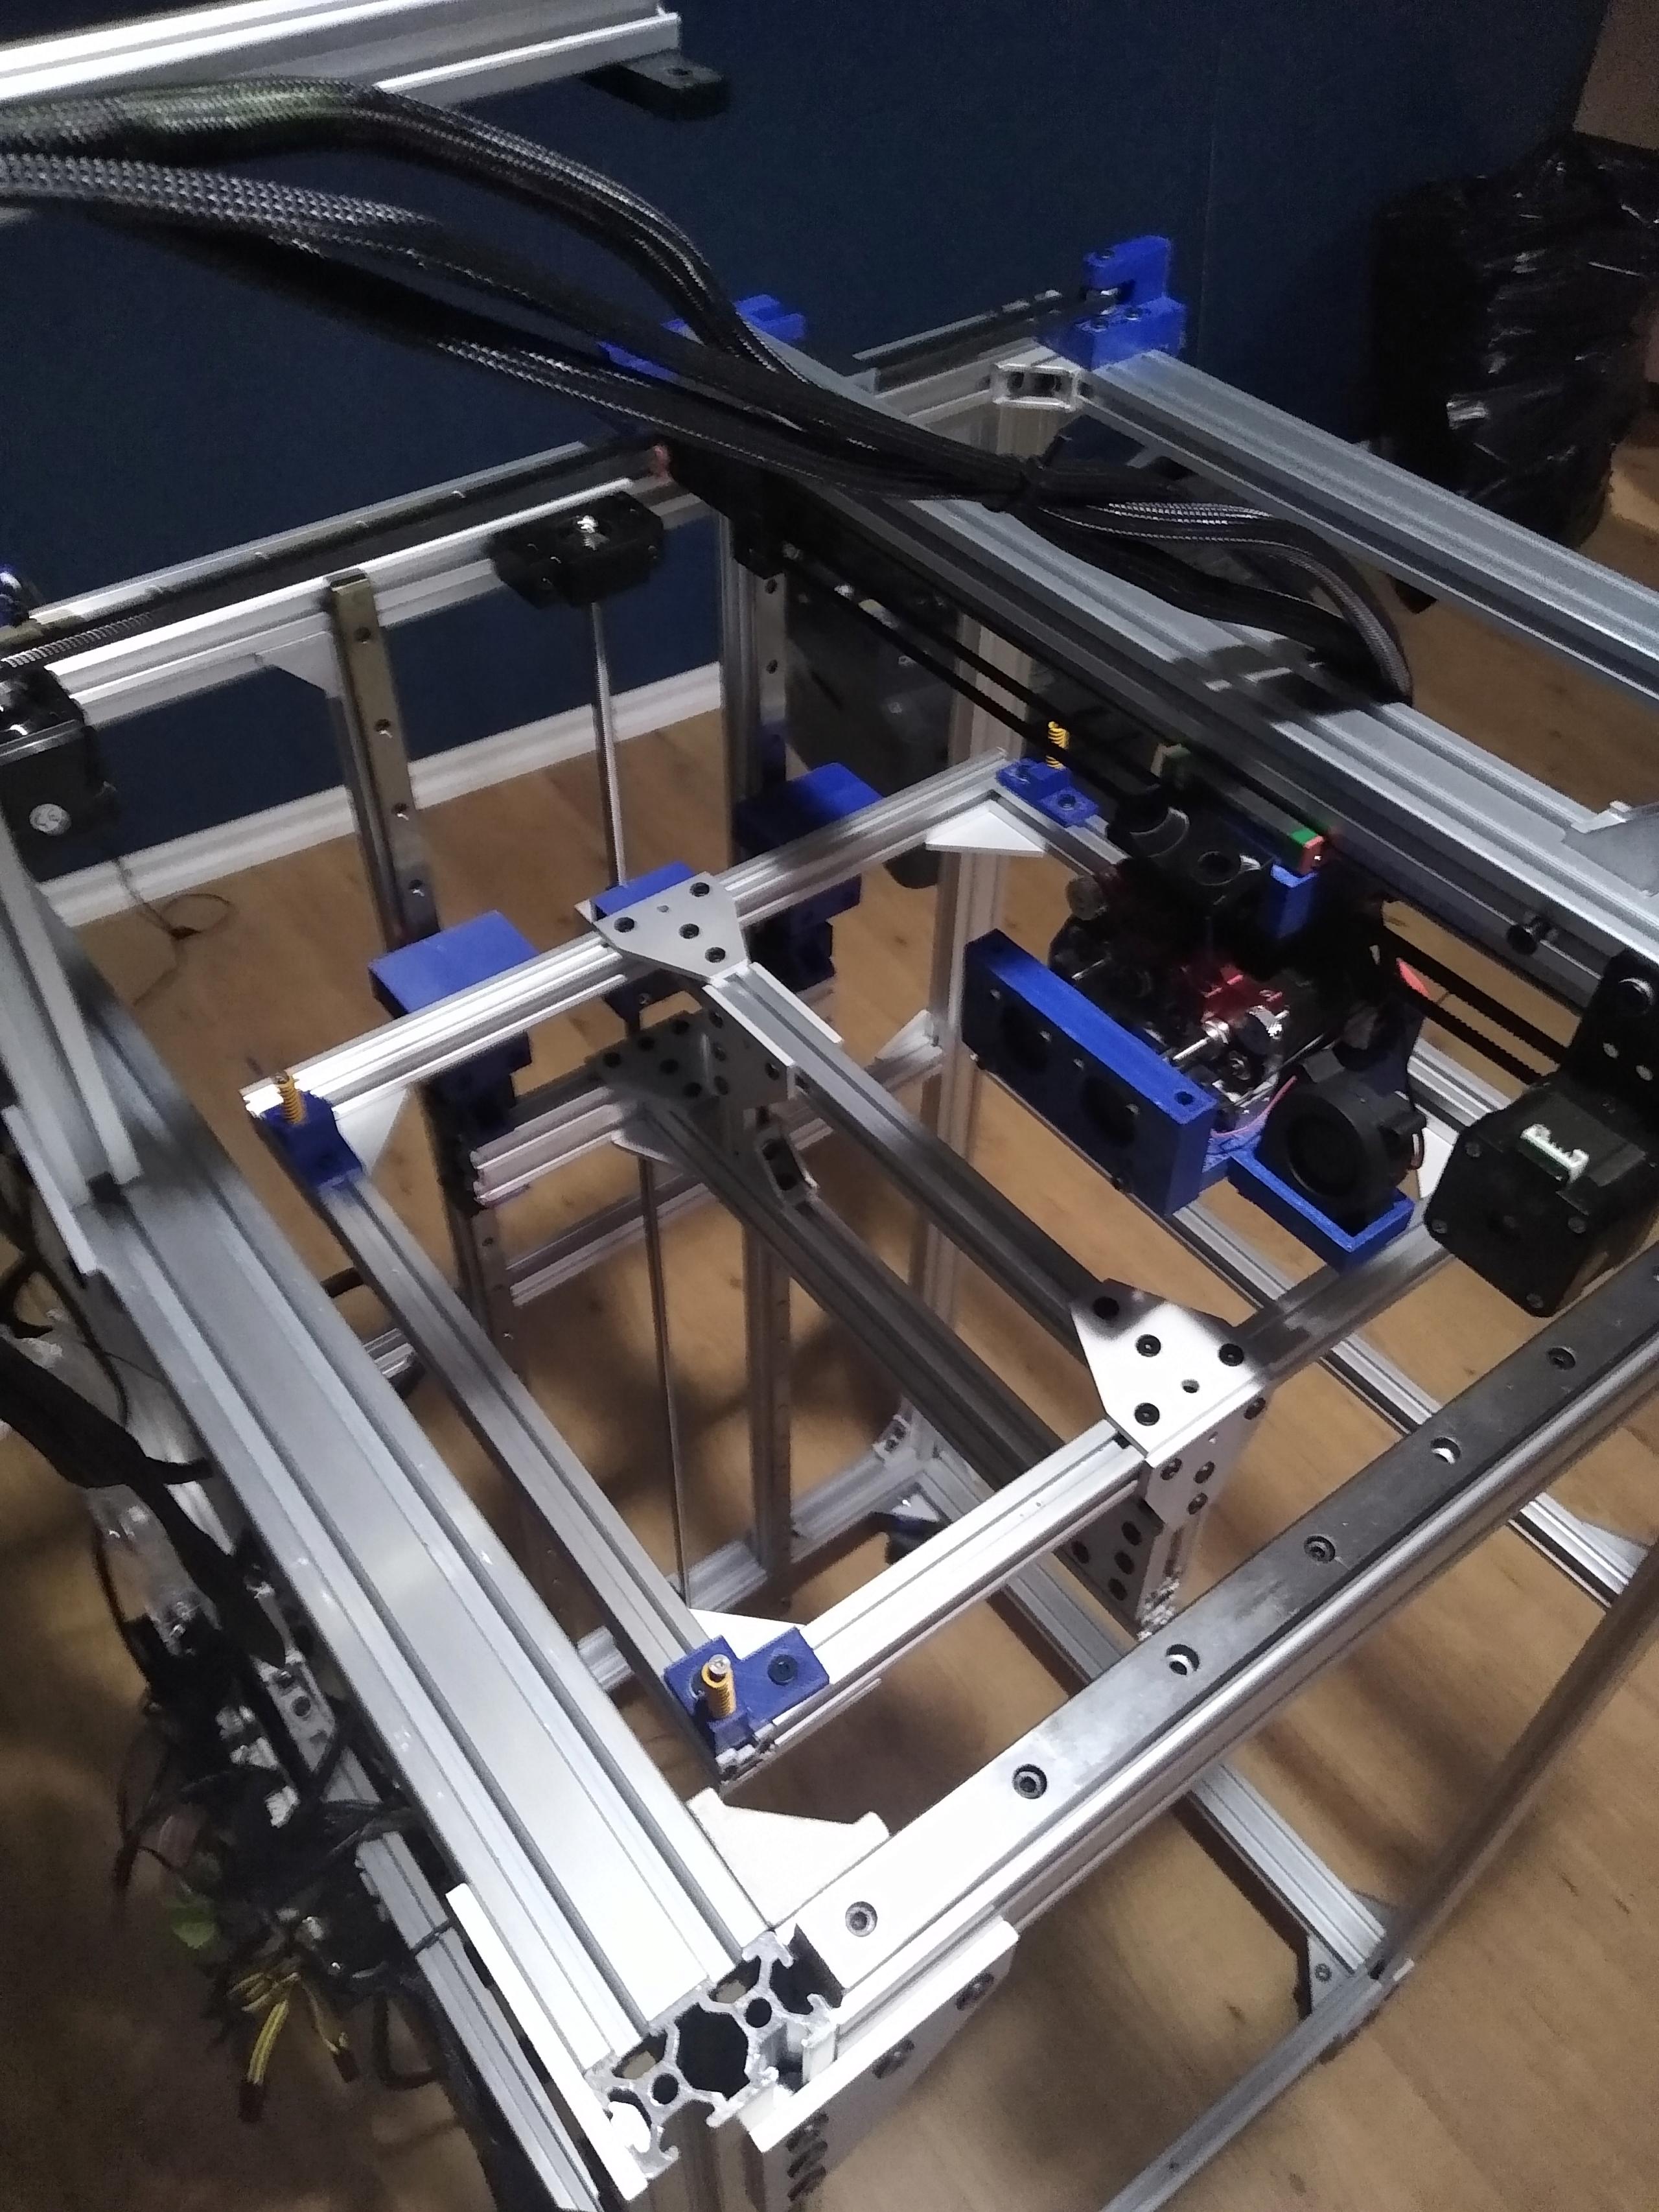
      I looked at a few design and when for a more cube design since they seemed more robust than many other design around , main frame is made of 2040 aluminum extrusion bolted together with corner plate with a few reinforcement in the middle of the section the back one as more since it support the vertical rail. it sit on top of 4 big compression spring that act as leg so vibration is not spread back in the frame

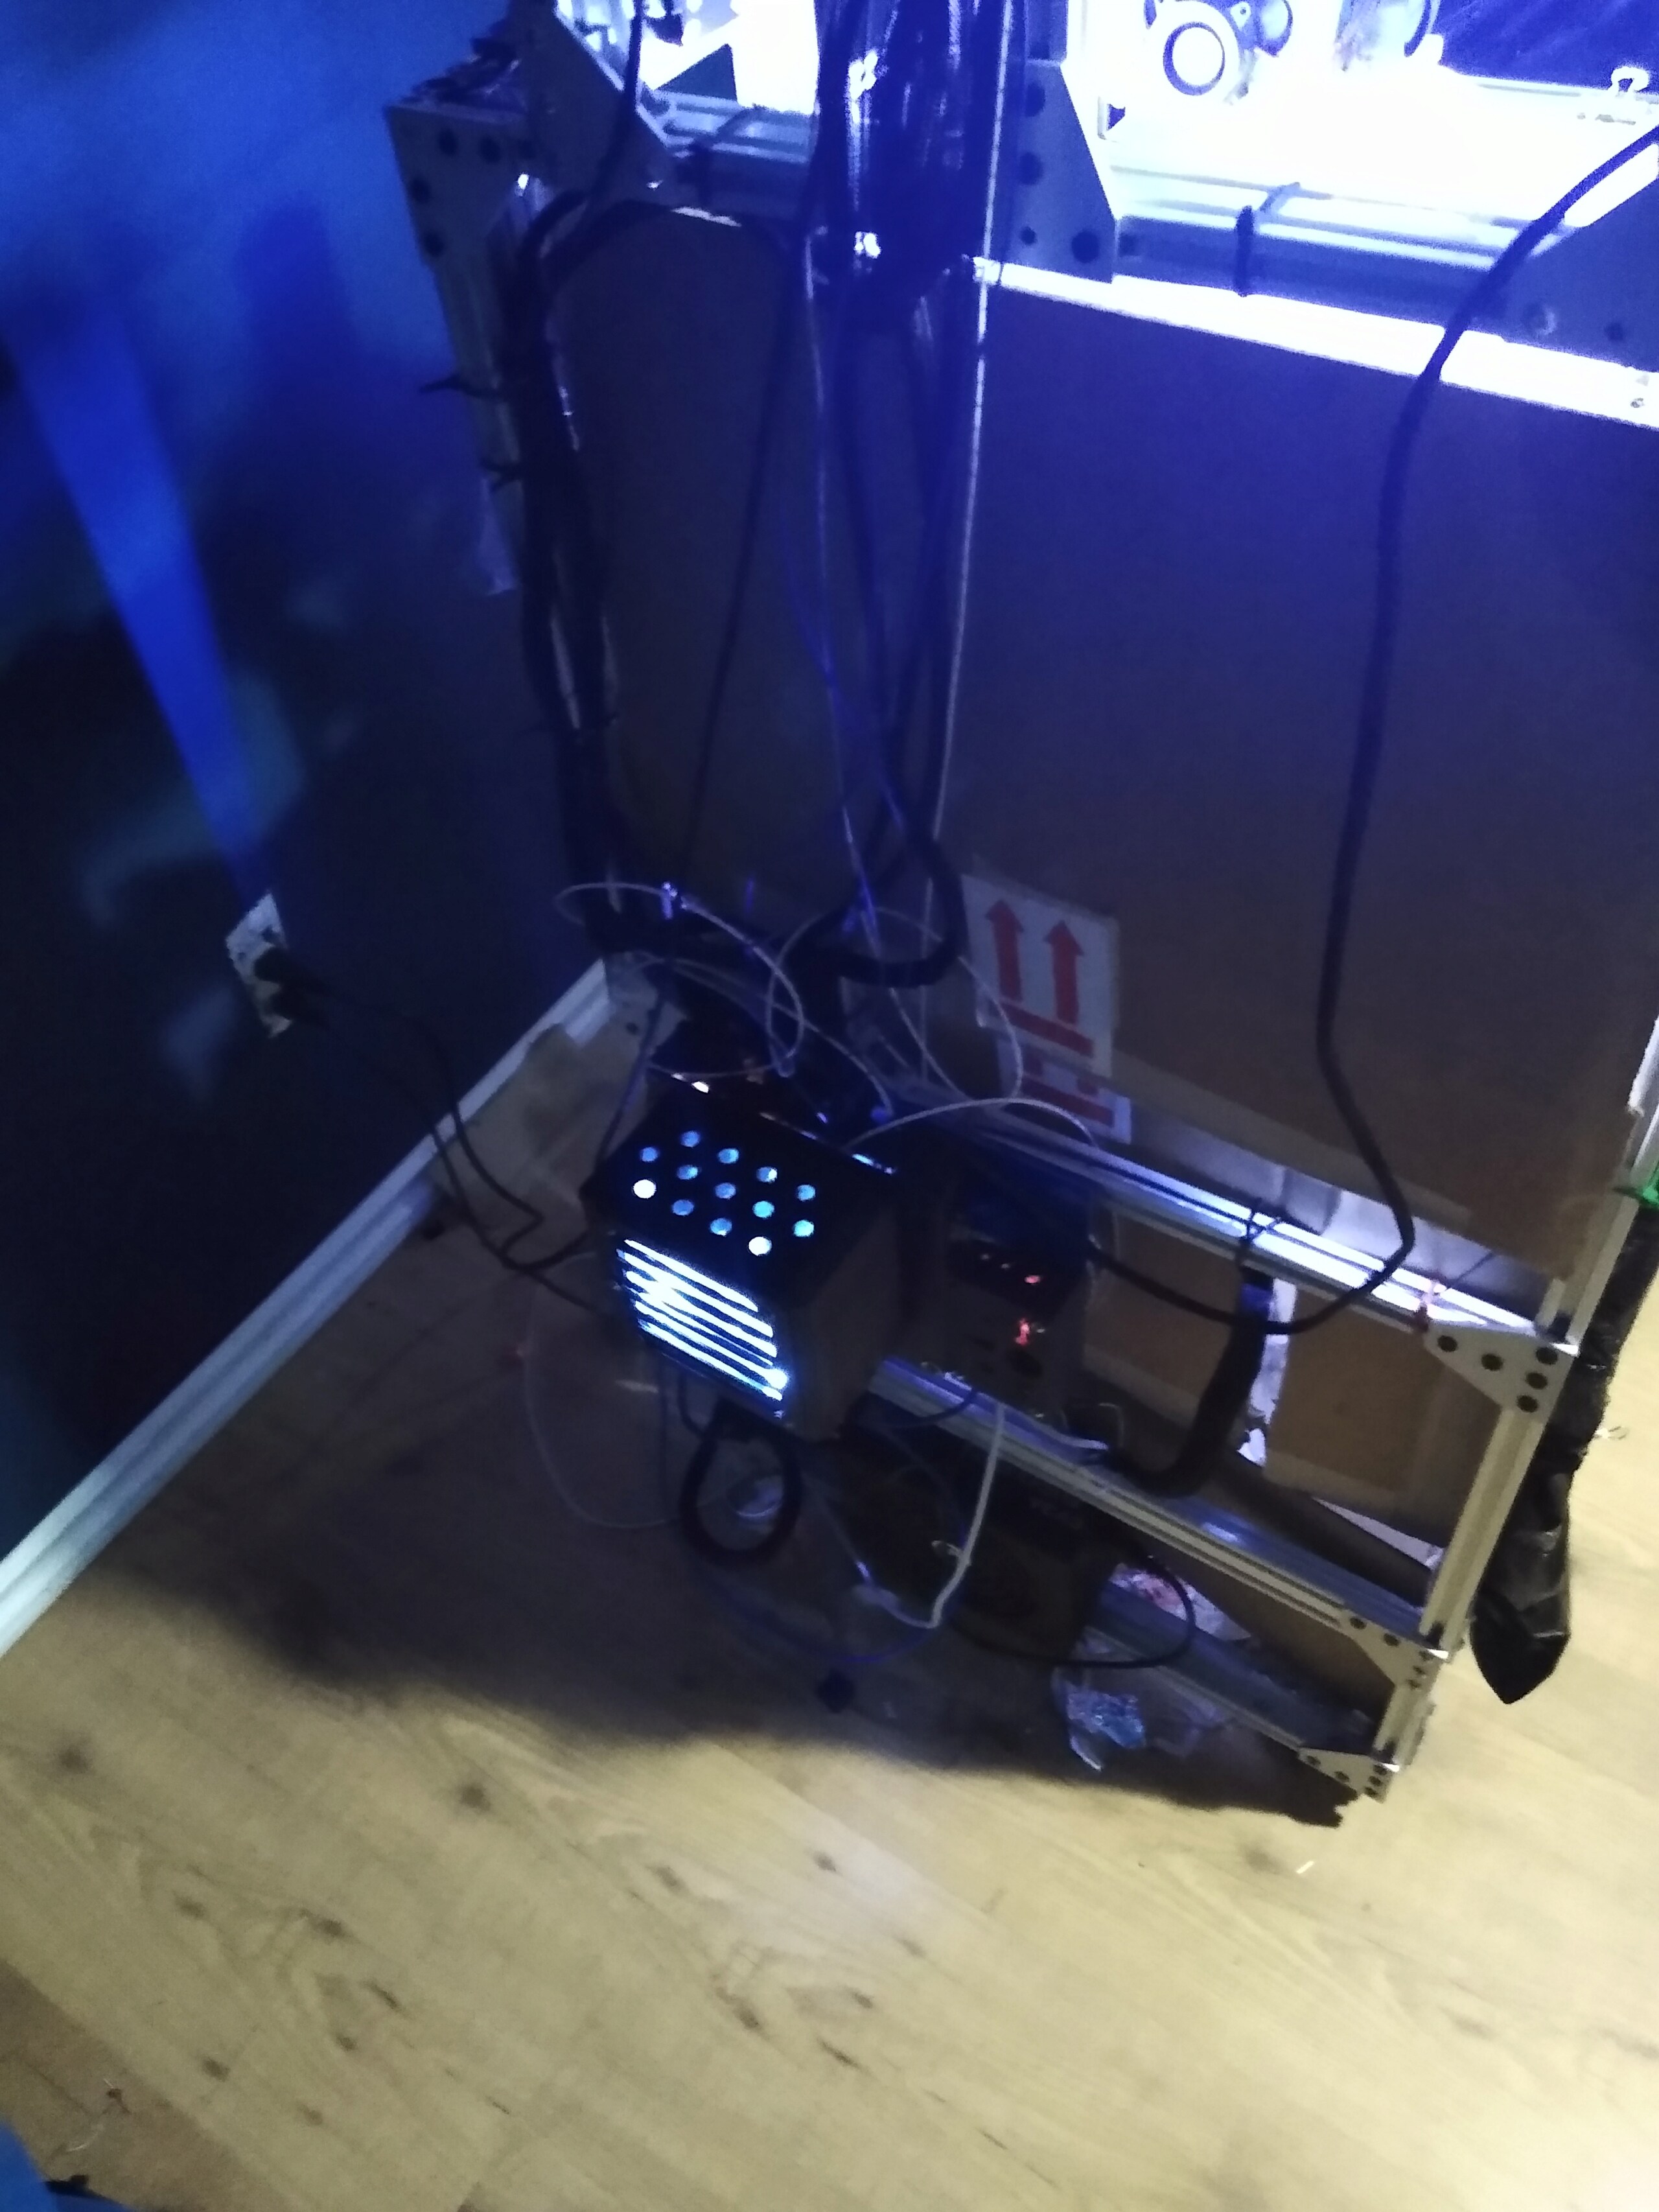
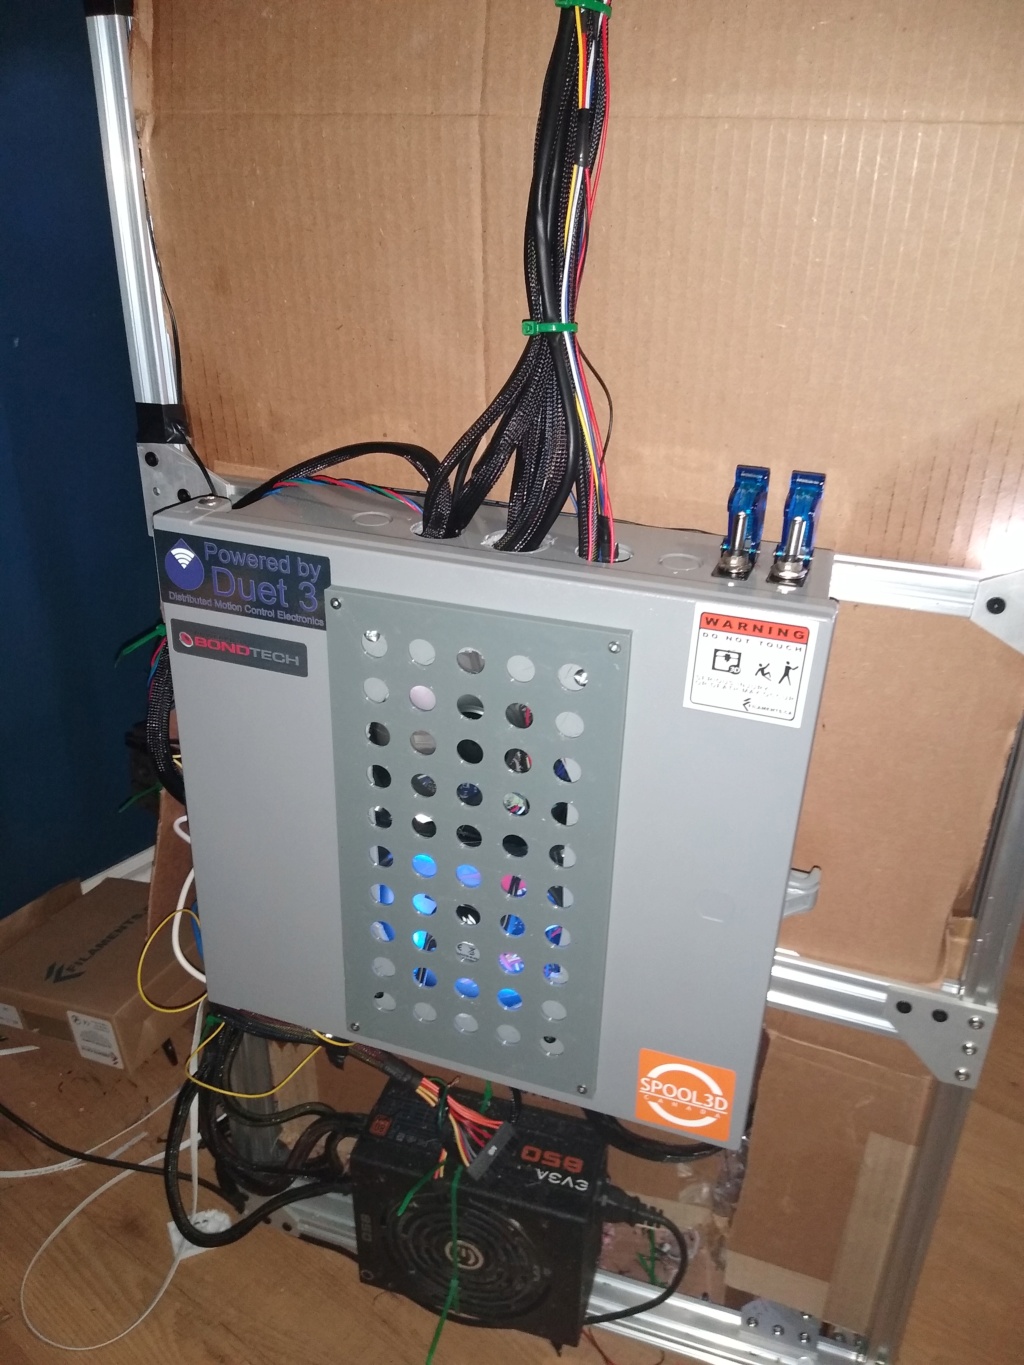
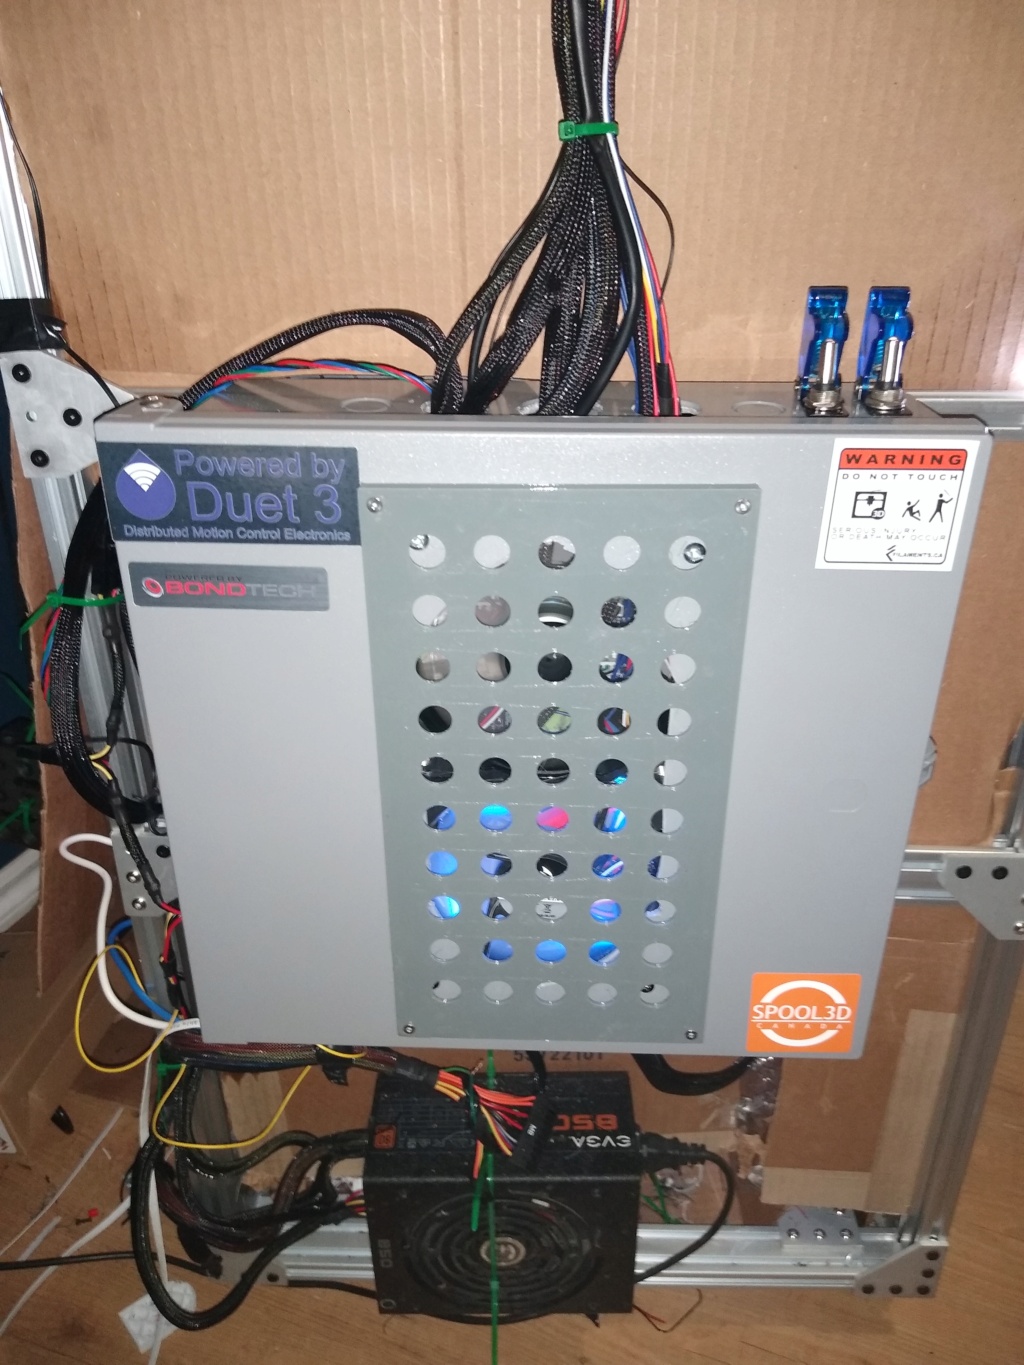
      I wasnt ready for the challenge this build was going to bring me , my plan was to use the power supply i was using for my rostock a 850 watt 12 volt pc power supply , the heat bed it on the bigger side 300x400mm caused me many problem , i had to get a mosfet for the bed , still caused wire to melt , ended up having to buy a better mosfet and a dedicated 24volt power supply for the heatbed , it solve all my wire problem now they stay cool , the rest of the machine is still powered by the 12volt unit ,

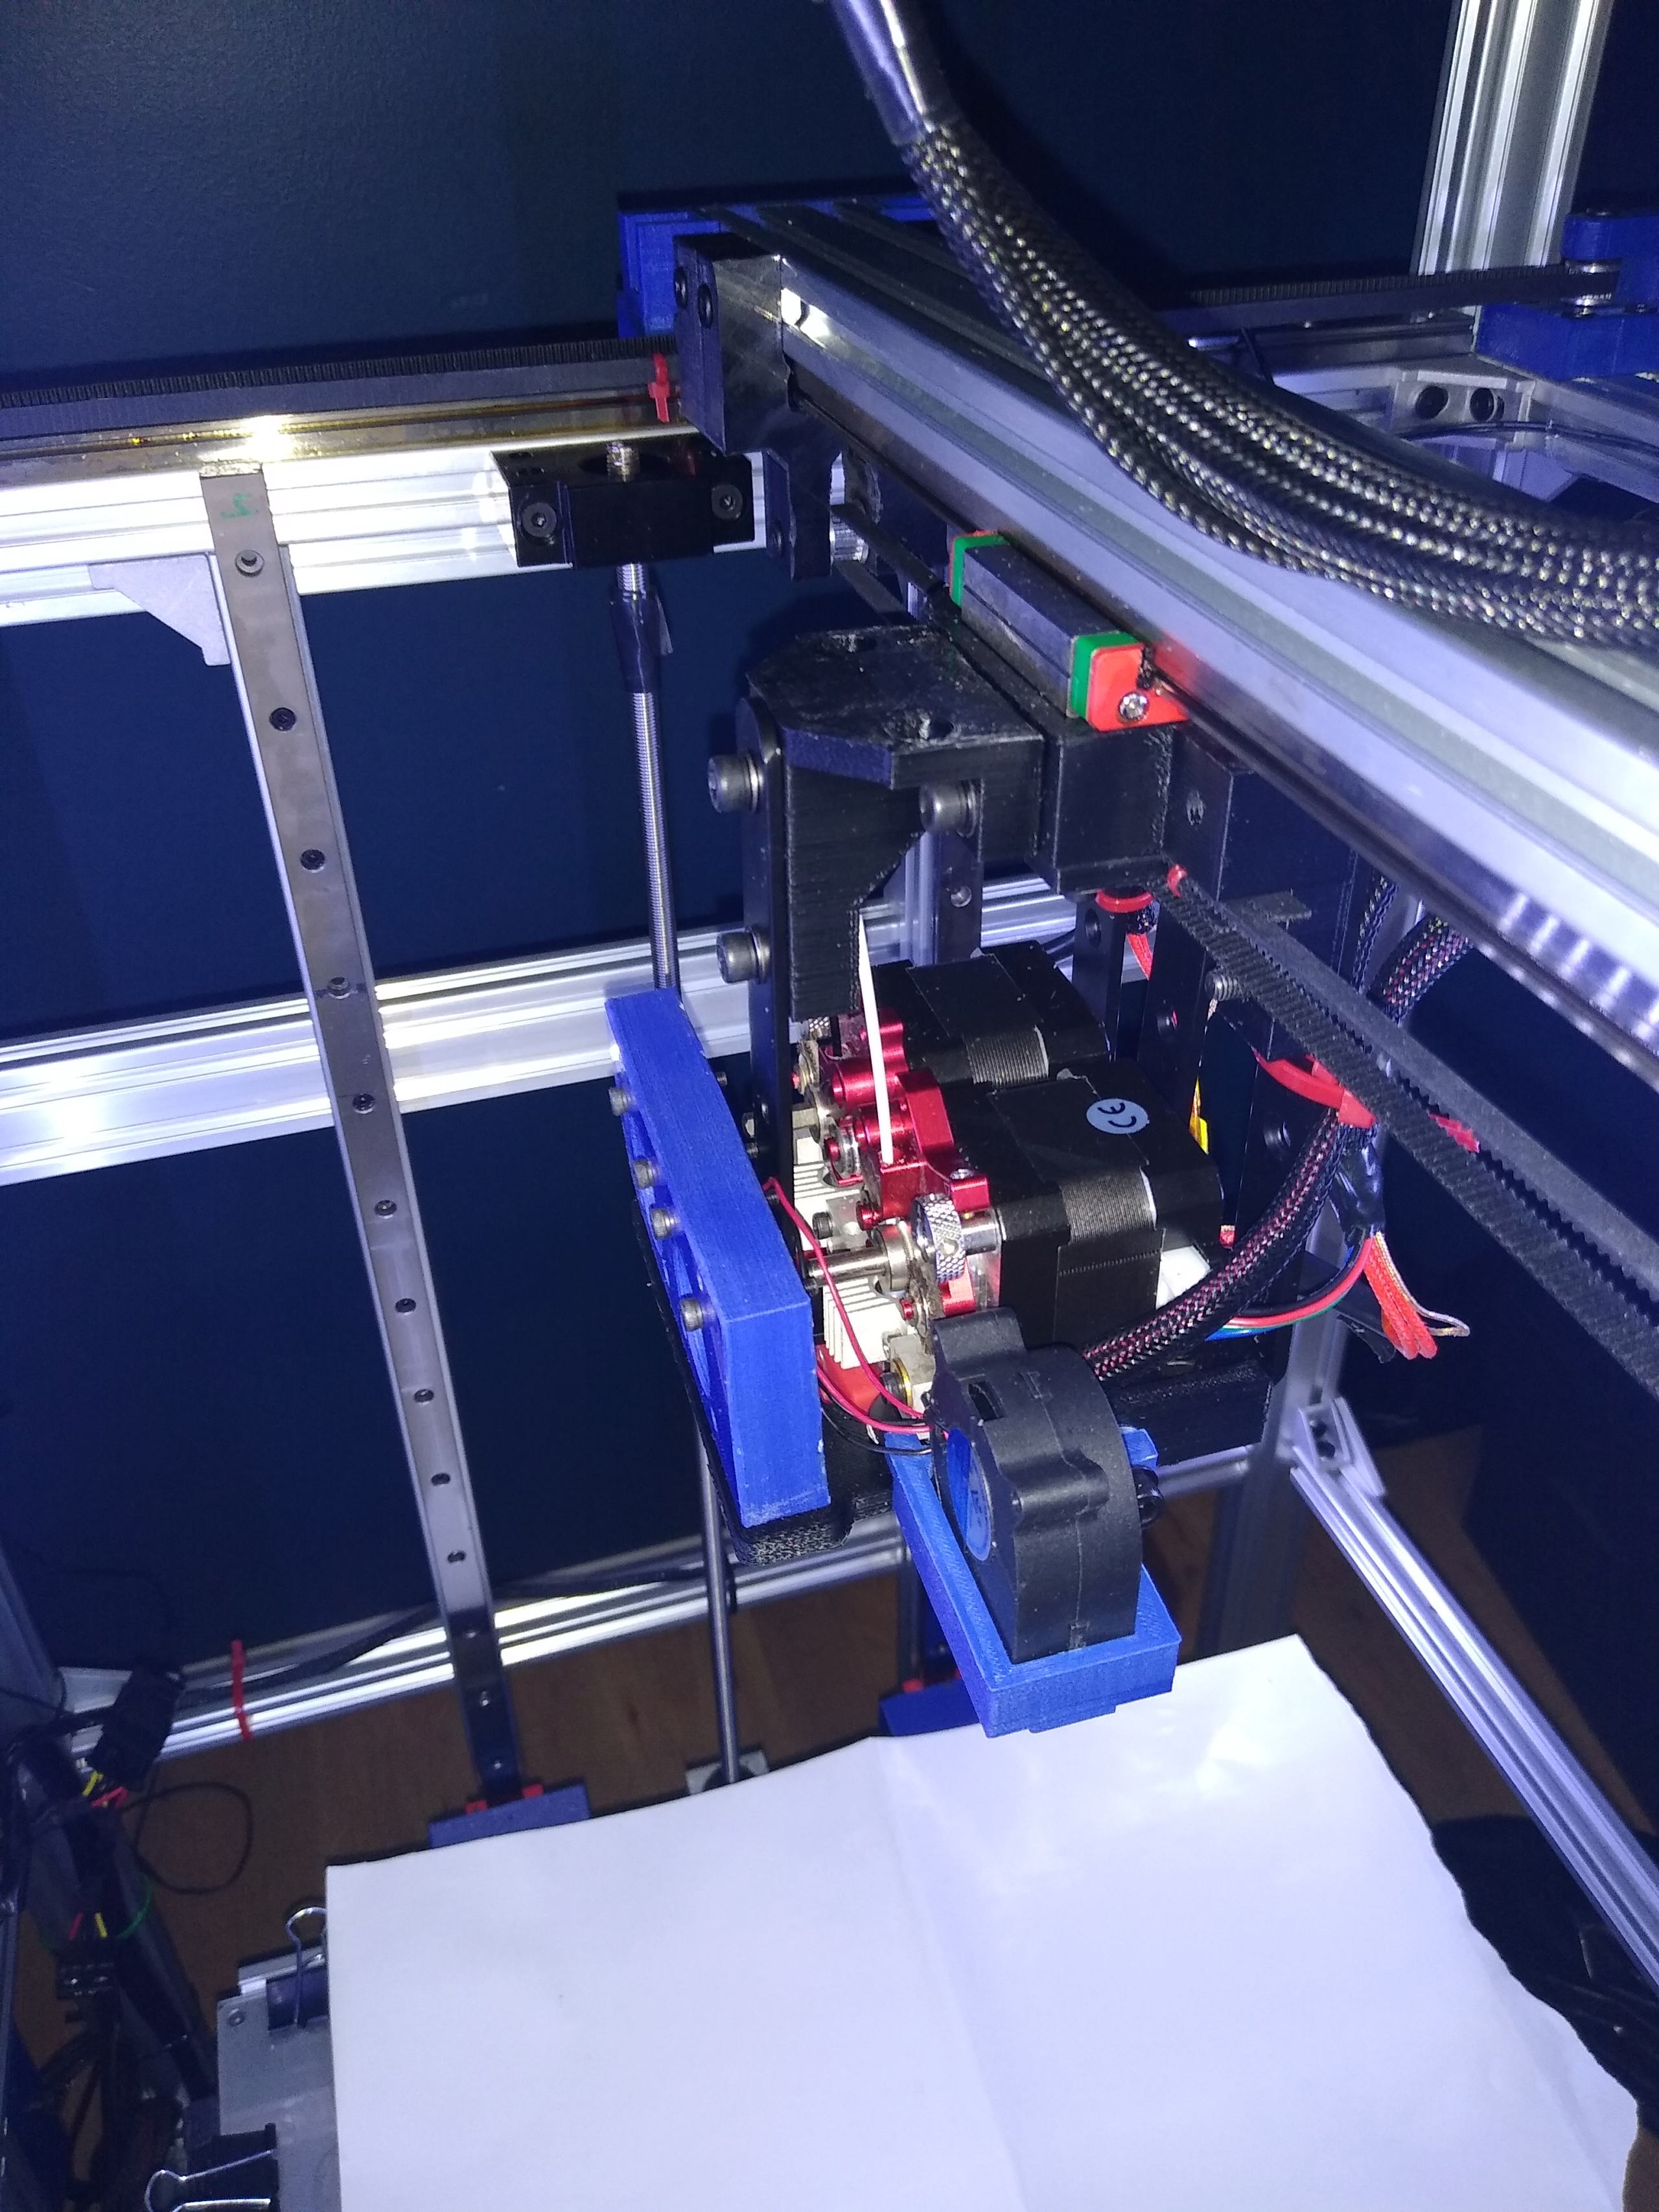
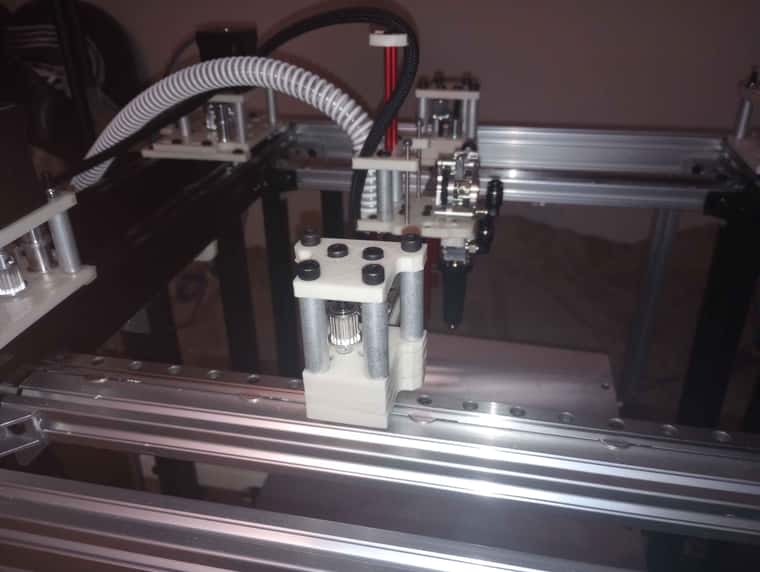
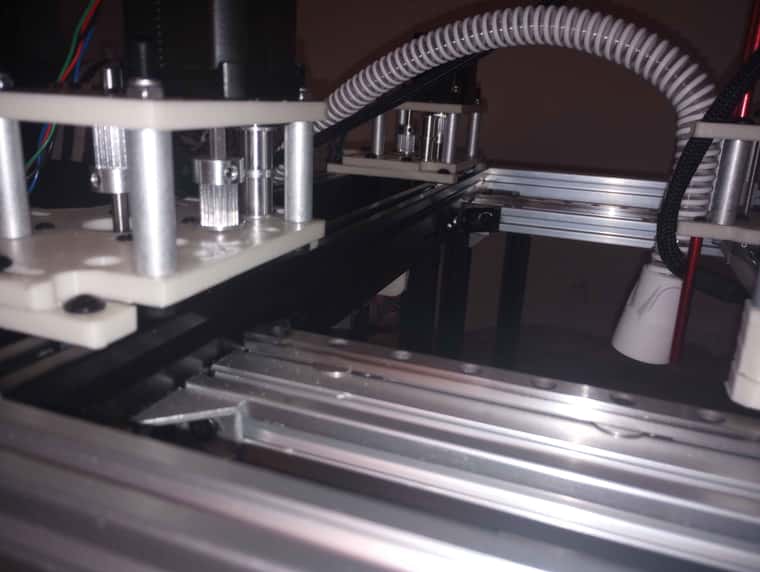
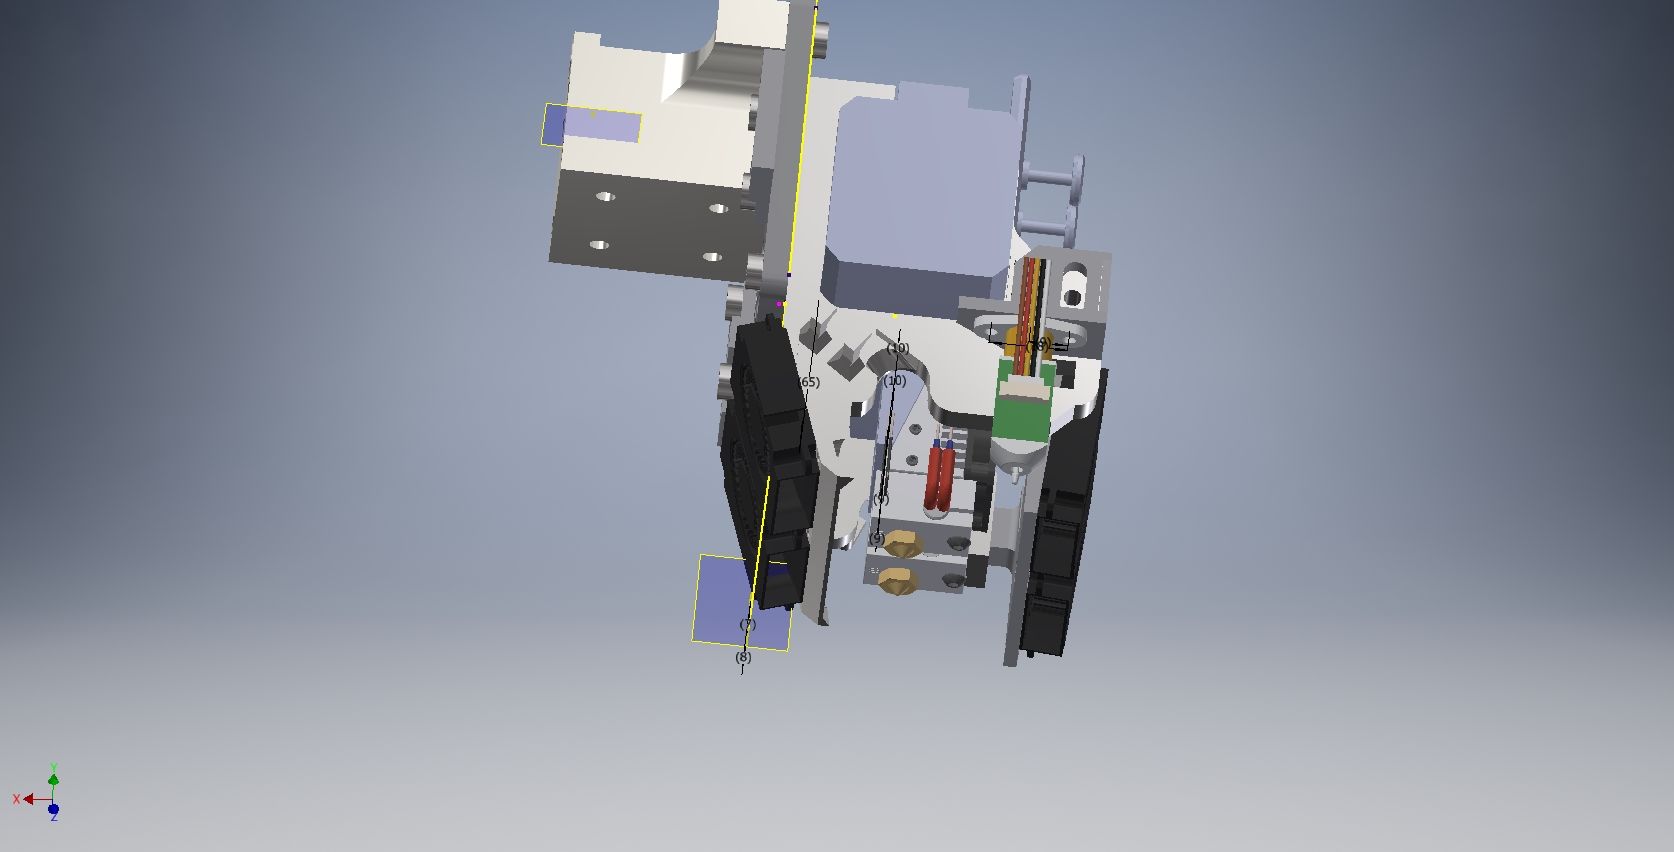
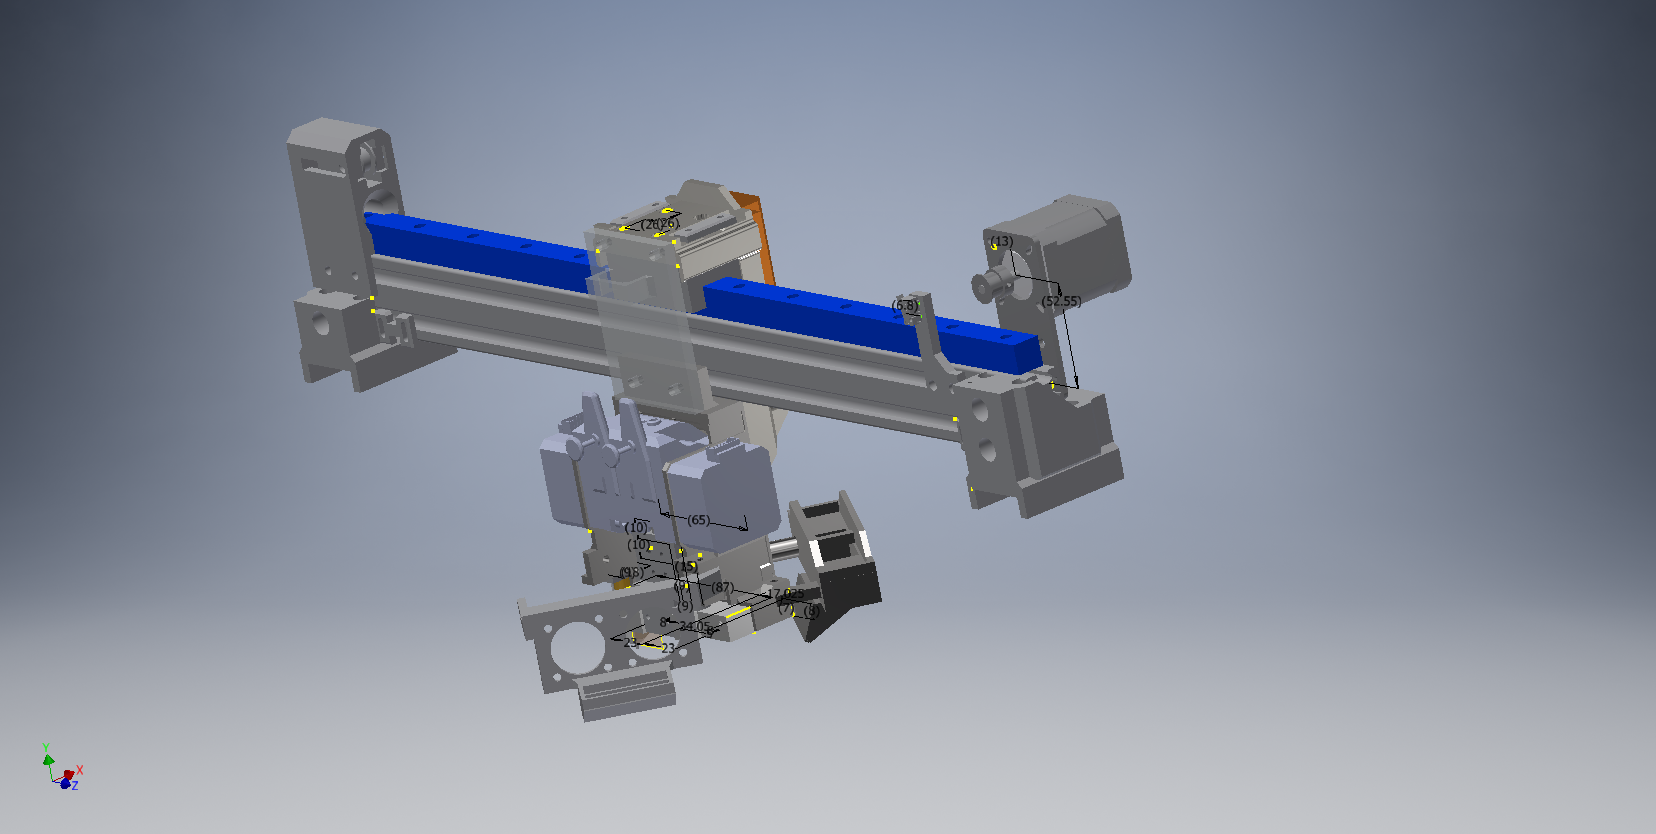
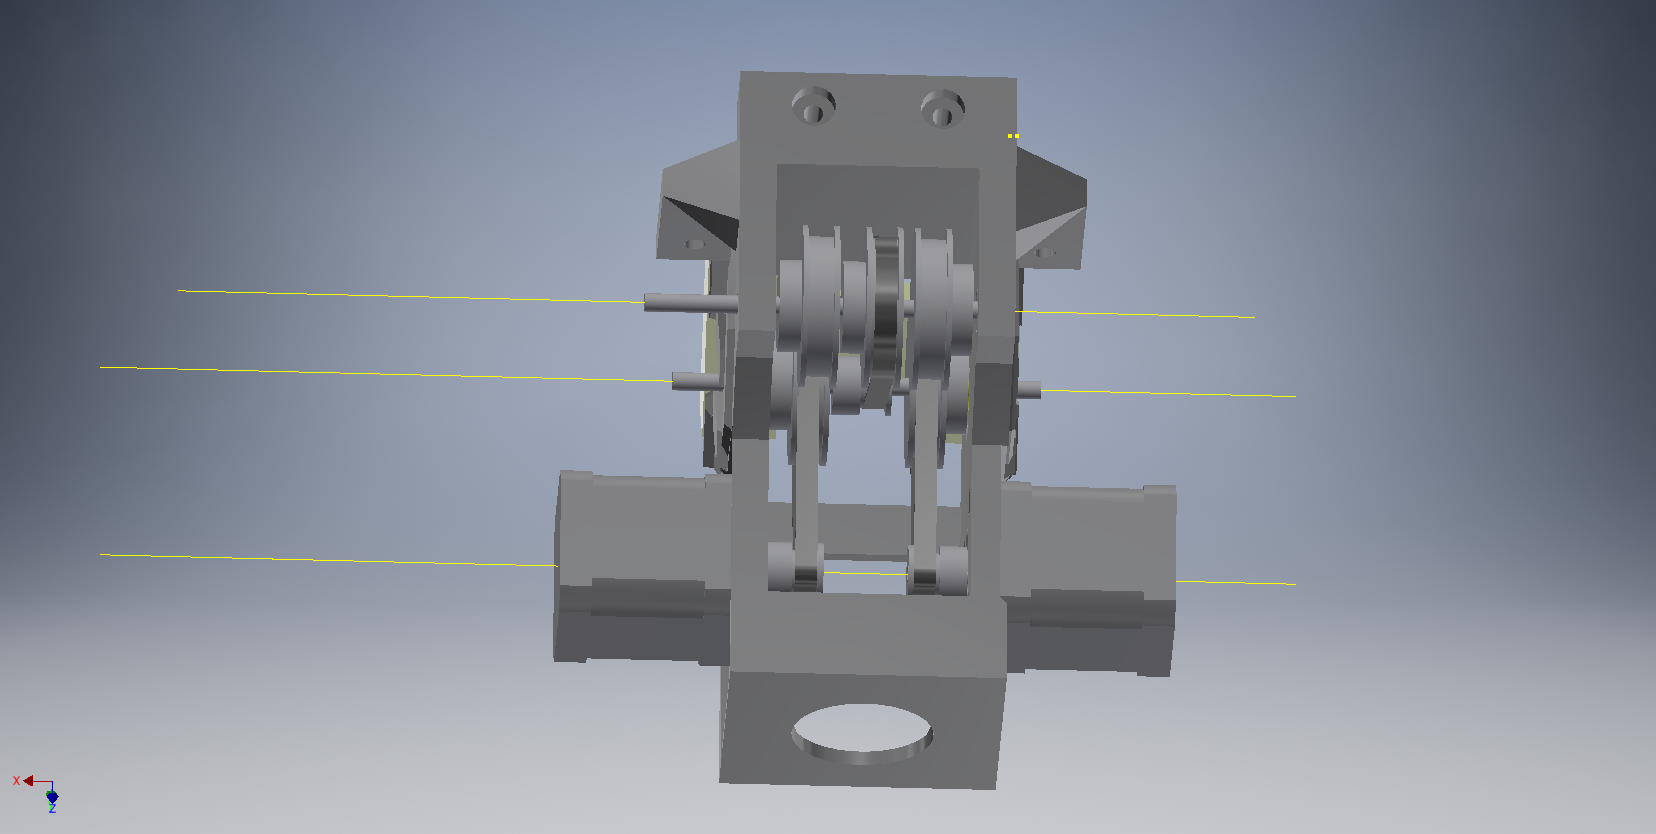
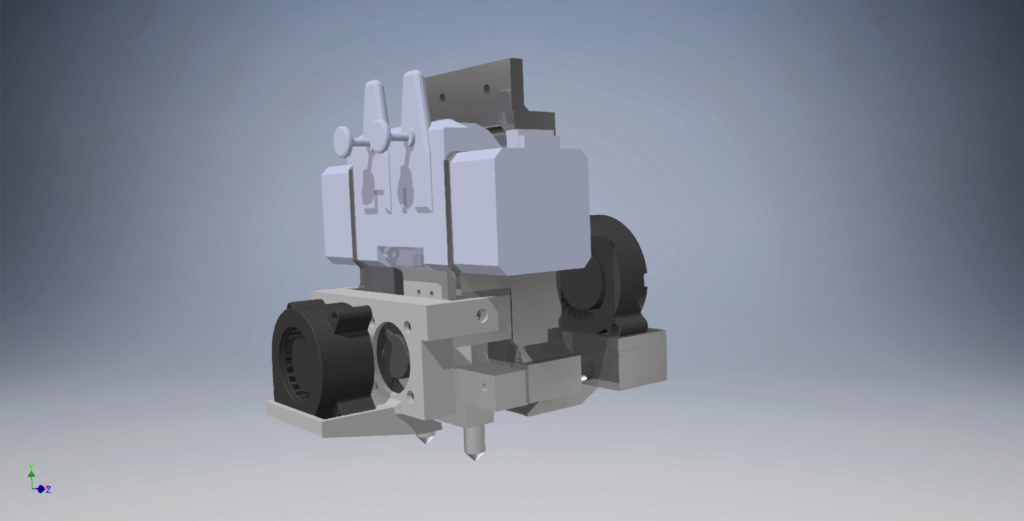
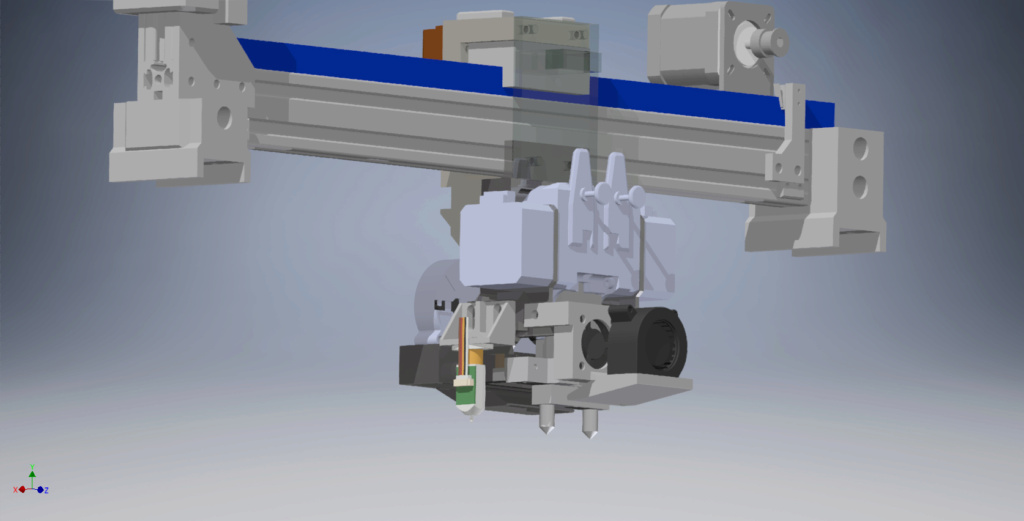
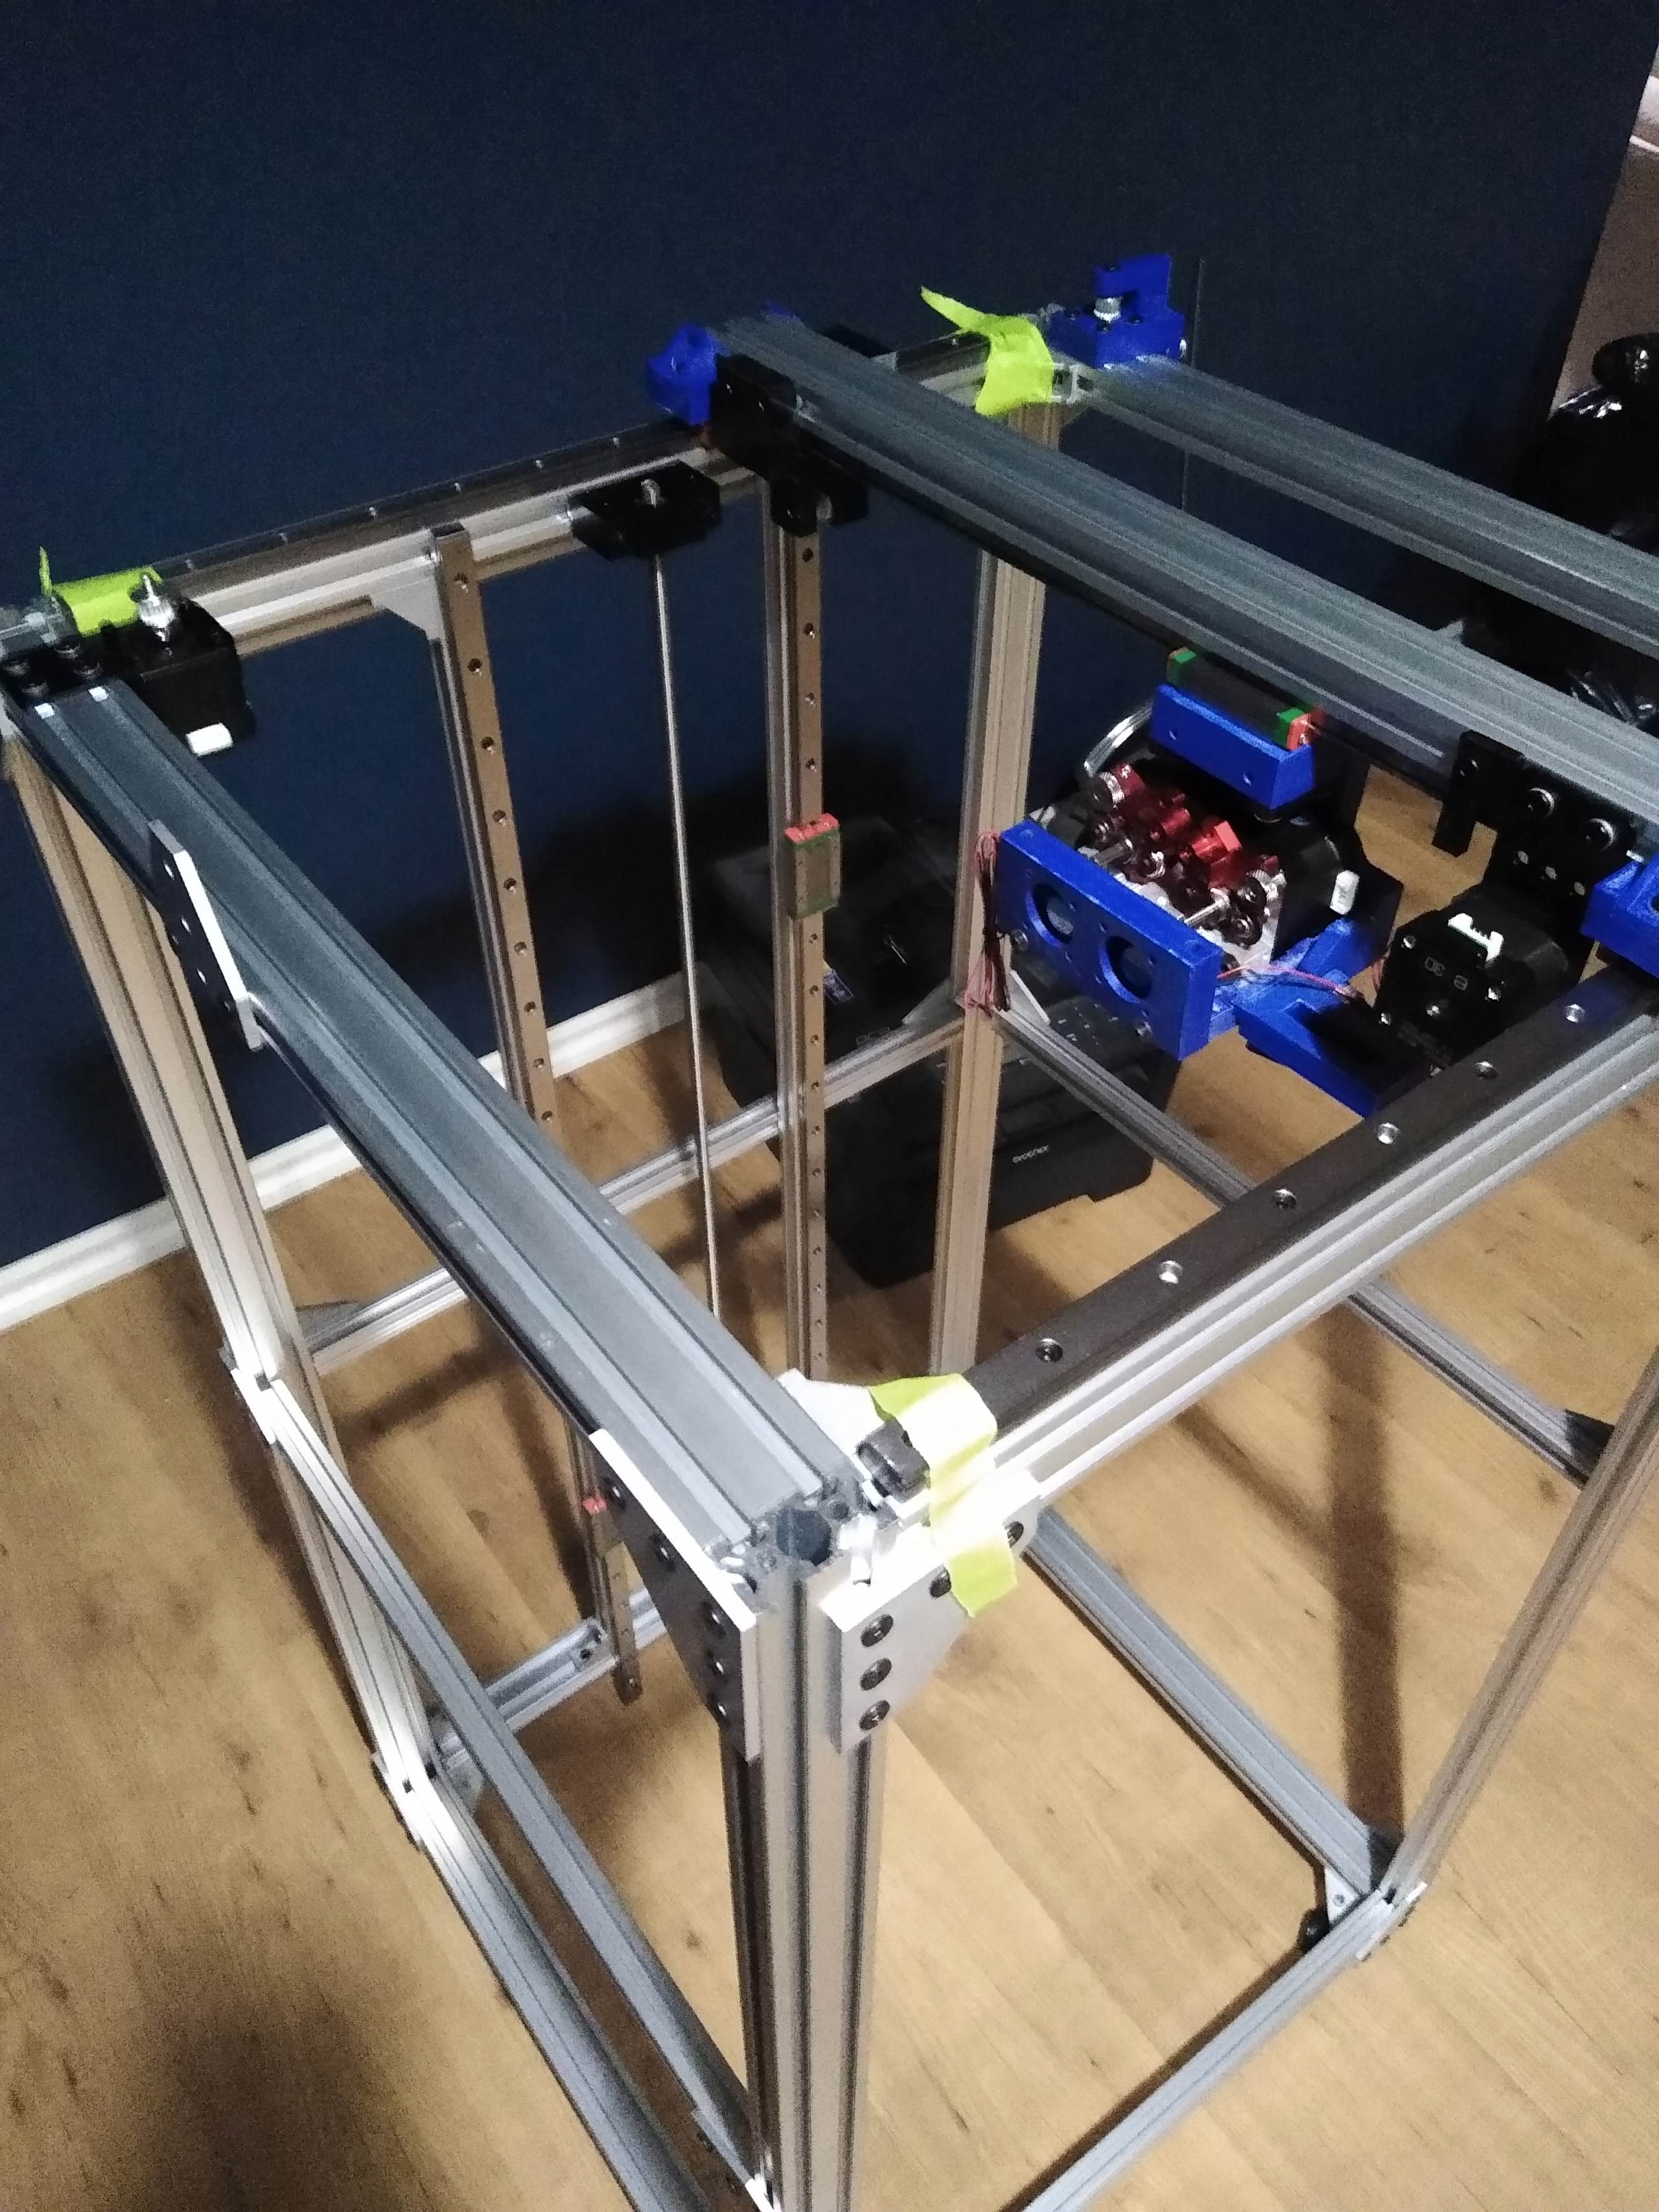
      The Y gantry went throw a few change throw the project. each change solved an issue , each axis was supposed to be powered by only one .9 degree stepper motor but due to the weight and inertia of the gantry i had to add another one for the X axis , this solved many vibration problem , then came the Y axis , my original idea wasnt great to tension the belt and then found that the cheap linear rail on the Y axis had play in it since i had it in a reverse position , (should have bought the real hiwin) , ended up changing a few thing gain some MM in the Y axis , fixed most vibration now ,

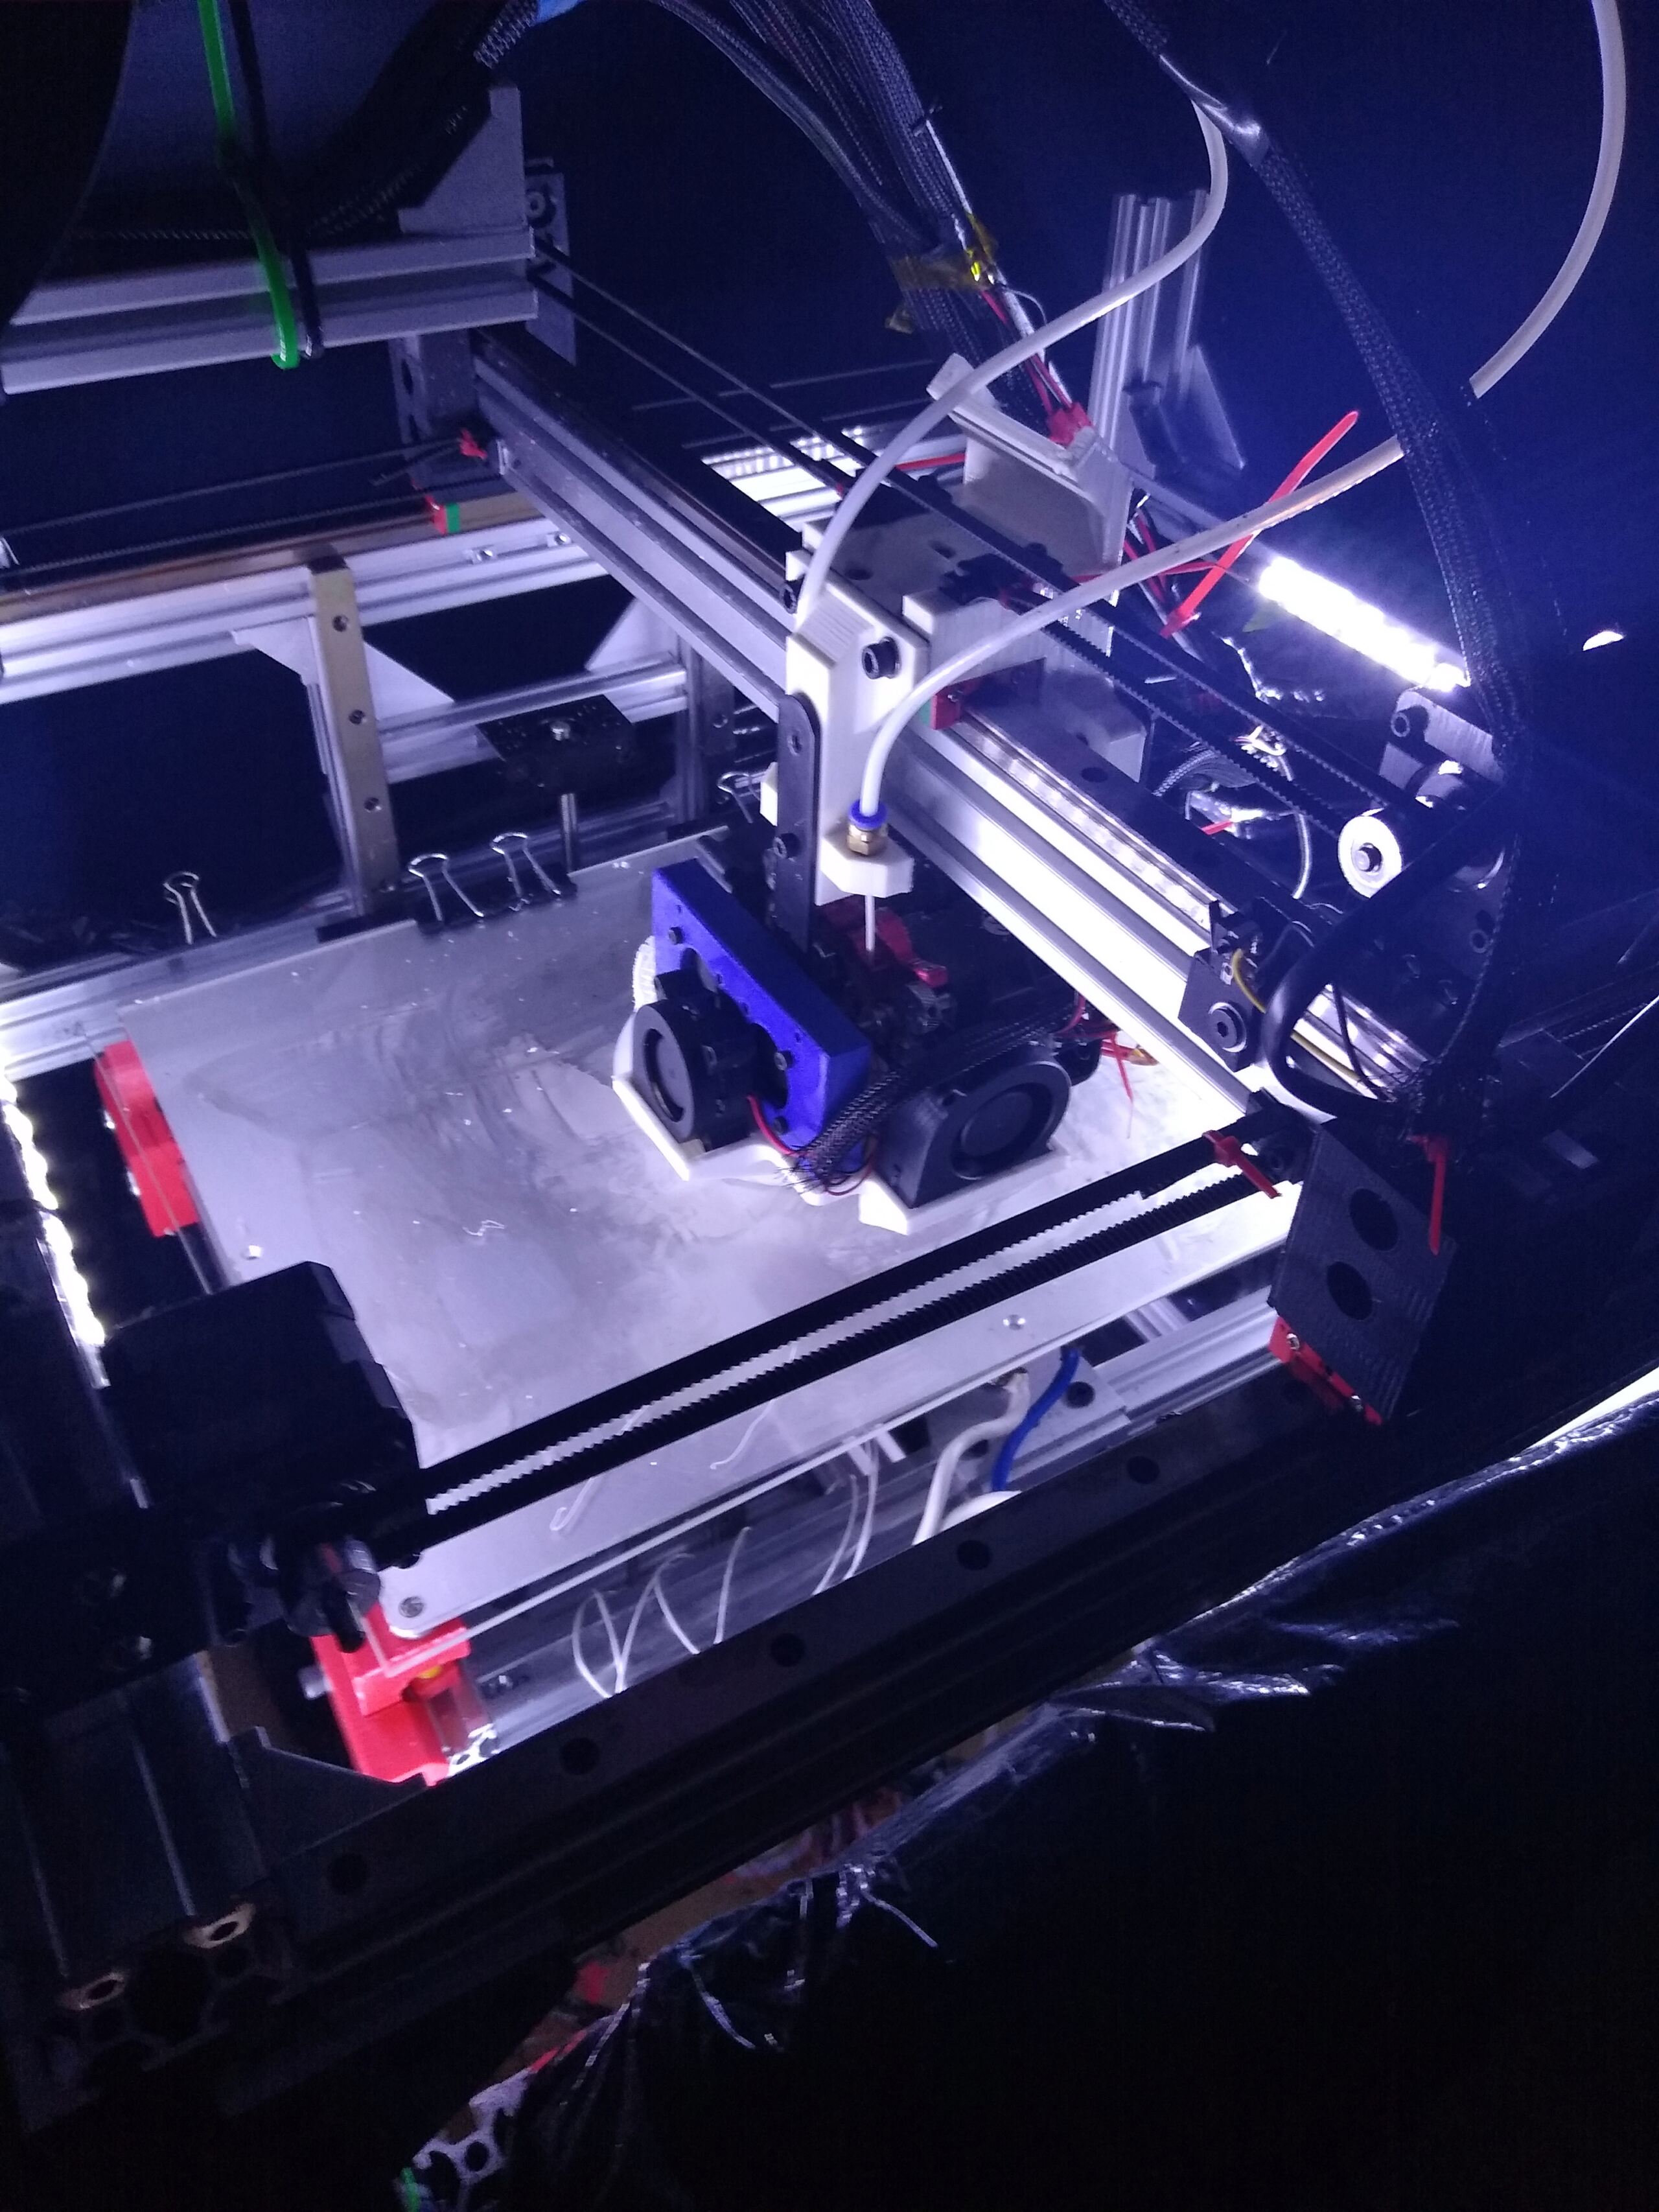
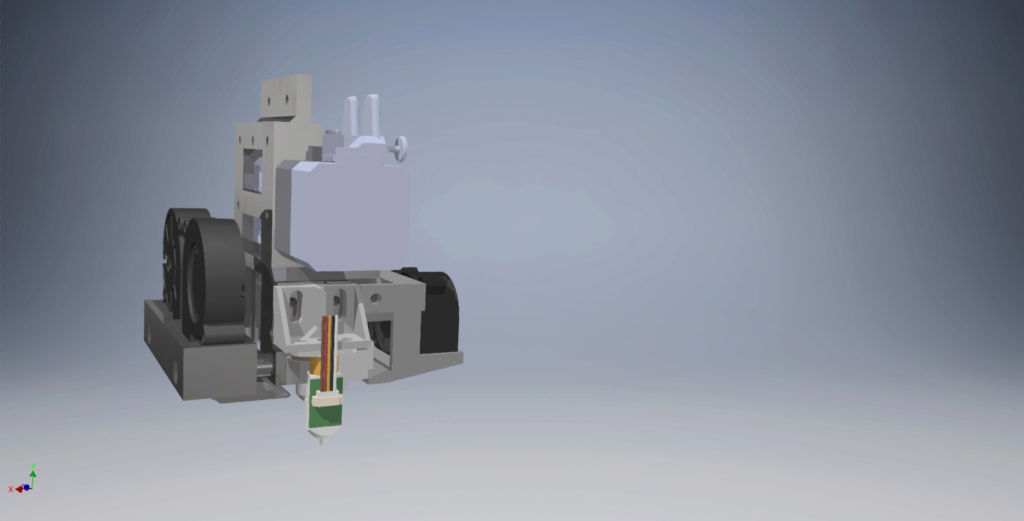
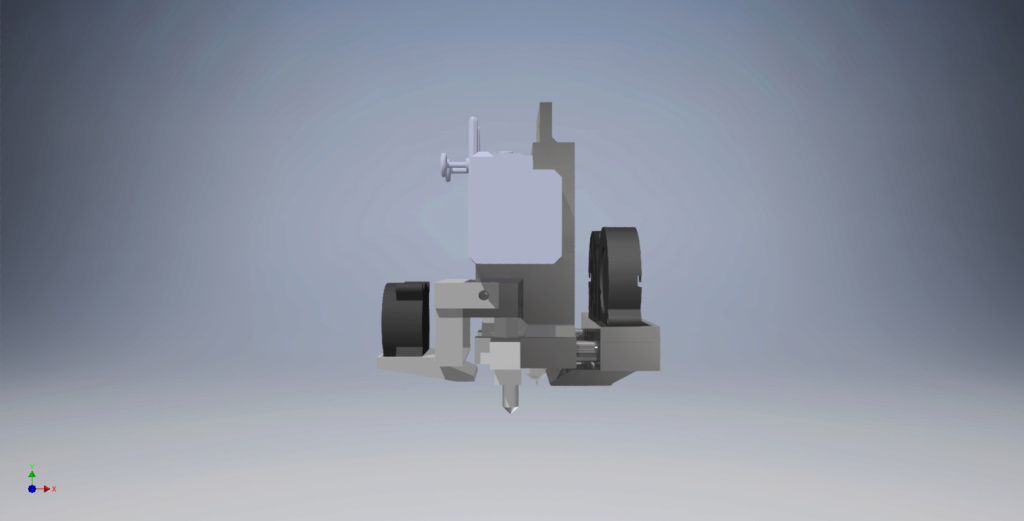
      Printable area so far seem to be around 300x350x600mm .i am using a Flexion HT kit for the extruder. print head has 3 blower to cool the print , 1x40mm and 2 x50mm. All stepper motor are .9 degree. The lead screws is m8 x1 one lead only , it take a while to home and get up but give good resolution on the Z plus the 40mm stepper is sufficient even when power is off to keep the Z up

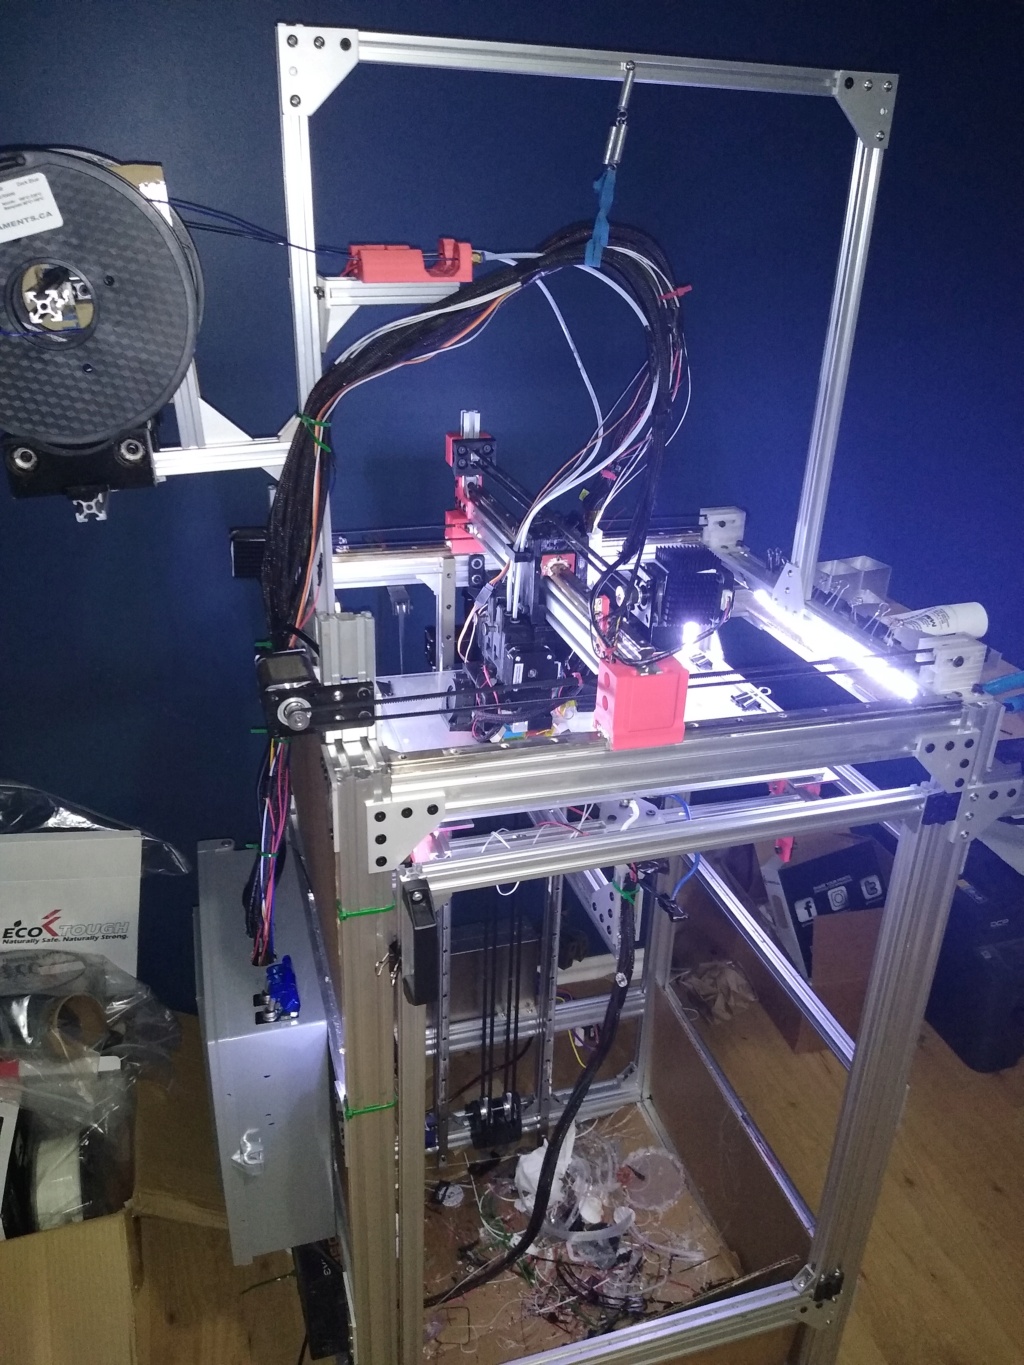
      I still have a few tweak to do here and there but overall it is really close of what i had imagined , i did break my budget a little as well , eventually i will have the whole printer encloses in some Acrylic sheets or similar material, i have 4 set of LED band in the printer as well, all running from the sata connector on the modular power supply ,

      There is still a few things i will likely change and upgrade to my liking just to fix the last few issue and then the rest will be to figure out the best CURA setting for the material i use.

      Here a few picture from the start to the end , it doesnt show everything otherwise there would be too many picture

      alt text

      alt text

      alt text

      alt text

      The way the bed is attached to the rail this is now one big piece
      alt text

      alt text

      alt text

      alt text

      alt text

      IMG_20200803_185423535.jpg

      posted in Example setups and prints
      Dad003undefined
      Dad003
    • My best benchy to date

      Well I believe I've done my best benchy to date with my printer. .15 layer height , petg 30-40mms ! Switching my hot end to 24v has helped a lots since I can finally utilise my cooling with out issue .

      IMG_20220710_182753854.jpg IMG_20220710_182742960.jpg IMG_20220710_182736089.jpg

      posted in General Discussion
      Dad003undefined
      Dad003
    • RE: My Second build (in progress)

      slowly been working on it , here a little update , ive been slowly ordering part, thinking and designing more things .

      IMG_20241031_202912877.jpg IMG_20241031_202620263.jpg IMG_20241031_202632510.jpg

      posted in My Duet controlled machine
      Dad003undefined
      Dad003
    • RE: The Mean Machine

      here a quick picture of the new belt tensionner it does look better ! it print better as well, it seem to have got rid of most of the vibration that i could feel before .
      alt text

      posted in Example setups and prints
      Dad003undefined
      Dad003
    • 24V solved my problem

      Well i think my quest for enough cooling has been finally completed , after many attempt , version and all , swapping the heater from 12volt 40watt to 24 volts 40watt , i can now fully utilize all fan at 100% power and the nozzle keep up with a .8mm nozzle . Doing a benchy now to see the difference versus last few print , then i think i will do a bridge test . i always had issue before with bridge because not enough cooling .

      here a picture from the cad software of my head with the e3d chimera and bl touch

      new bridge  core XY V1.jpg

      posted in General Discussion
      Dad003undefined
      Dad003
    • RE: The Mean Machine

      Here another update , i have ordered a duet 3 expansion board so i could mount a second motor facing the other one in the Pulley box for the Z , with the addition of this i will be able to get rid of the temporary counter weight . my Z will be powered by 2x60mm .09 stepper motor now. i as well redesigned a bit the carriage for a more better look and functionality .
      Added as well pivot area now for the cooling fan in the front and back just need to remove a screw and they will pivot so that they wont be suspending in the air , less chance of breaking those tiny wire and faster access if i have to.

      Since my printer is on the big side , i will be adding a few shelf on the right side so i can put the multiple box of material giving me extra weight on the machine so probably less vibration as well.

      new bridge v2.png

      Z motor box.png

      posted in Example setups and prints
      Dad003undefined
      Dad003
    • Was is worth it ....

      Well I reprinted my motor mount with a few tweak , new y axis in , just need more calibration. Kinda enclosed my top too now.
      I still need to calibrated my config , him at 800 jerk 10k acceleration, my stepper motor are capped with those number I believe , but I have better one on order . before the swap i was running 6k acc

      Firt benchy 35min , .6 nozzle .25 height. in PETG Him still missing some cooling fan but it still pretty good

      IMG_20230226_222112438.jpg

      here was the input shaper give me for data

      input shaper.png

      IMG_20230226_205004984.jpg

      Top is old , bottom new hgr15 vs mgn9 + carbon fiber tube about 1/2 to 2/3 lighter.
      IMG_20230221_193905173.jpg

      posted in General Discussion
      Dad003undefined
      Dad003
    • RE: The Mean Machine

      Swaped out many of my part on the Y axis for what i had redesigned , print are coming better it seem so far , added the last shelf as well , that give a lot more weight to the printer , the whiole machine doesnt move as much as it used to now , vibration should be lower as well. still figuring out how i will finish the enclosure as well got a few idea just cant make my mind lol !

      IMG_20210331_194231277.jpg

      posted in Example setups and prints
      Dad003undefined
      Dad003
    • RE: To SSR or not to SSR

      @Snippy Be very careful with the cheap chinese SSR , quality is really random .

      i use these here for my heat bed and hotend

      https://www.auberins.com/index.php?main_page=product_info&cPath=2_30&products_id=674

      posted in Duet Hardware and wiring
      Dad003undefined
      Dad003
    • RE: The Mean Machine

      Well here another update on my printer , replaced the 6mm belt for the Z axis for some 12mm , and changed the pulley as well to 20 teeth from 60 and had to readjust my e-step seem i gain around 3X the step now , when machine is off my bed doesnt go down anymore with the switch to smaller pulley there enough torque now . next step is to finish the top once i get more extrusion and reprinting my motor mount making them beefier. then it should be fun printing time !

      IMG_20210524_150718056.jpg

      posted in Example setups and prints
      Dad003undefined
      Dad003
    • RE: The Mean Machine

      here a small update , got a few things printed and mounted has well , got more part to print still and waiting for part to come from the mail as well , had to change the spool setup since i decided i was going to install the double extruder in the back as a feeder magazine for the orbiter mosquito combo , just need to make Y filaments guide and a bit of tinkering so i can still have dual material abilities. Spool now sit vertically at the top in the back of the printer , with filaments switch udner it doing a nice curve to the dual extruder than to the orbiter .

      IMG_20230114_220055886.jpg

      posted in Example setups and prints
      Dad003undefined
      Dad003
    • My Second build (in progress)

      Well ive decided to start slowly build another printer from my new design in this thread : https://forum.duet3d.com/topic/35942/to-build-another-printer-or-not/5?_=1722808557537

      Hyperquad 3d printer 300mmv2.png

      to fix some of the shortcoming from my actual printer , since i really want to print poly carbonate so smaller build area about 250x250mmx250 mm , it will include a heated chamber and a water cooled hotend , my motor mount are designed for an AWD setup as well or 6WD . all in a 500x750x 800mm total dimension . Most important part is it will be a 48V system

      Trying to keep designing my part as simple as possible so that once testing and build is done part can be cut out of aluminum plate via waterjet cutting since it is a cheap .

      here the important part the top frame that will hold linear rail and support everything . just need to fully square it and this should not move much overtime , like regular Cube frame that most printer are base of ,

      IMG_20240804_154244839.jpg

      posted in My Duet controlled machine
      Dad003undefined
      Dad003
    • RE: duet 3 endstop wiring

      here something interesting out of the 3 axis stepper , i had to make the wire longer and one motor i only did was to cut the connector to put the duet one in place , so i swapped this connector from the X that was working fine to the Y and the Y suddenly home like it should ! i got rid of the cable and than Z work like it should now , i might have a bad cable it look now

      posted in Duet Hardware and wiring
      Dad003undefined
      Dad003
    • RE: The Mean Machine

      @fcwilt there was play between the bloc and rail causing the head to move of probably 1-2 degree in the X axis , causing lower quality on the Y axis , hiwin rail fixed that , had problem with one of the block on the X axis as well , ball would not roll in it i took it a part and couldnt not find the problem so i replaced it by another one seem to be fine now , tolerance on these chinese block and rail are very poor they work OK when there 2 rail on the axis but only one they have too much play they .

      posted in Example setups and prints
      Dad003undefined
      Dad003
    • RE: My Second build (in progress)

      Well already have some change planned in my design for the x gantry , will redesign a few things so they can use aluminum plate and be waterjet cut only . To reduce cost to a maximum on final machine .

      posted in My Duet controlled machine
      Dad003undefined
      Dad003
    • RE: getting random Error: Board 1 does not have input handle 1100

      @phaedrux said in getting random Error: Board 1 does not have input handle 1100:

      M98 P"config.g"

      M98 P"config.g"
      HTTP is enabled on port 80
      FTP is enabled on port 21
      TELNET is enabled on port 23

      no error is seem

      posted in Duet Hardware and wiring
      Dad003undefined
      Dad003
    • RE: The Mean Machine

      So after a few print i found out that my main problem of poor quality were due to the flexion extruder not having enough pulling force causing extrusion problem .So i ended up ordering a Bondtech BMG-X2 .

      still waiting to get it to double check measurement but here what will most likely be. Bl touch probe will be closer abd on a more solid mount. Had to design an adapter to go from 20mm hole spacing to 34mm so i could use the flexion aluminum bar with my mk10 nozzle as well without having to buy a new hotend.

      alt text

      alt text

      alt text

      alt text

      posted in Example setups and prints
      Dad003undefined
      Dad003
    • RE: My Second build (in progress)

      @mrehorstdmd said in My Second build (in progress):

      @Dad003 You can simplify construction and probably reduce mass by using rectangular aluminum tubing to make the two pulley blocks at the ends of the axis. You can use it for motor mounts, too.

      alt text

      If you bolt the t-slot pieces directly to each other you won't need all those corner braces. Tap the ends of the inside t-slot pieces, and drill tool-access holes at appropriate locations in the outside t-slot pieces. You can use button head cap screws with washers in the slots to connect two pieces together. This assumes that the ends of the pieces are cut/milled square. See: https://www.youtube.com/watch?v=HfcXjYWw5UQ

      ill take that in consideration , but my plan here is to have everything out of aluminum plate , water jet cut since i dont have the equipment to do a lot of drilling or machining , the machine i would need for that at work never has the right setup on it lol , with that process i can easily had a lots of cut to lighten everything since it all on mgn9c block , him still at early design anyway just slowly designing and then printing things and see how it look like , knowing myself i will most likely fill up a whole box of parts again until final design .

      still not sure about what kind of probe i will use becasue of the heated chamber been thinking of a klicky probe since there are high temp switch

      posted in My Duet controlled machine
      Dad003undefined
      Dad003
    • RE: Question about voltage and stepper motor

      Well this morning I ordered a meanwell 600 watt 27v that can be adjusted to 30v , with this I'll be able to achieve the speed I have in mind.

      Thank you for the answer learned a thing or 2 with that emf calculator !

      posted in Duet Hardware and wiring
      Dad003undefined
      Dad003
    • RE: The Mean Machine

      So here another update , ended up swapping the 3d printed elctrical box for an actual box , way bigger , inside it still a mess lol , but at least on the outside it now look cleaner and good , still have ot make my mind on what to use to enclose the printer. still got to tweak 1-2 things , but overall mechanic it working the way i want it or close of it .

      was finally able to put some of the sticker i had laying around , gotta love the one from the folk at filaments.ca

      alt text

      alt text

      alt text

      posted in Example setups and prints
      Dad003undefined
      Dad003