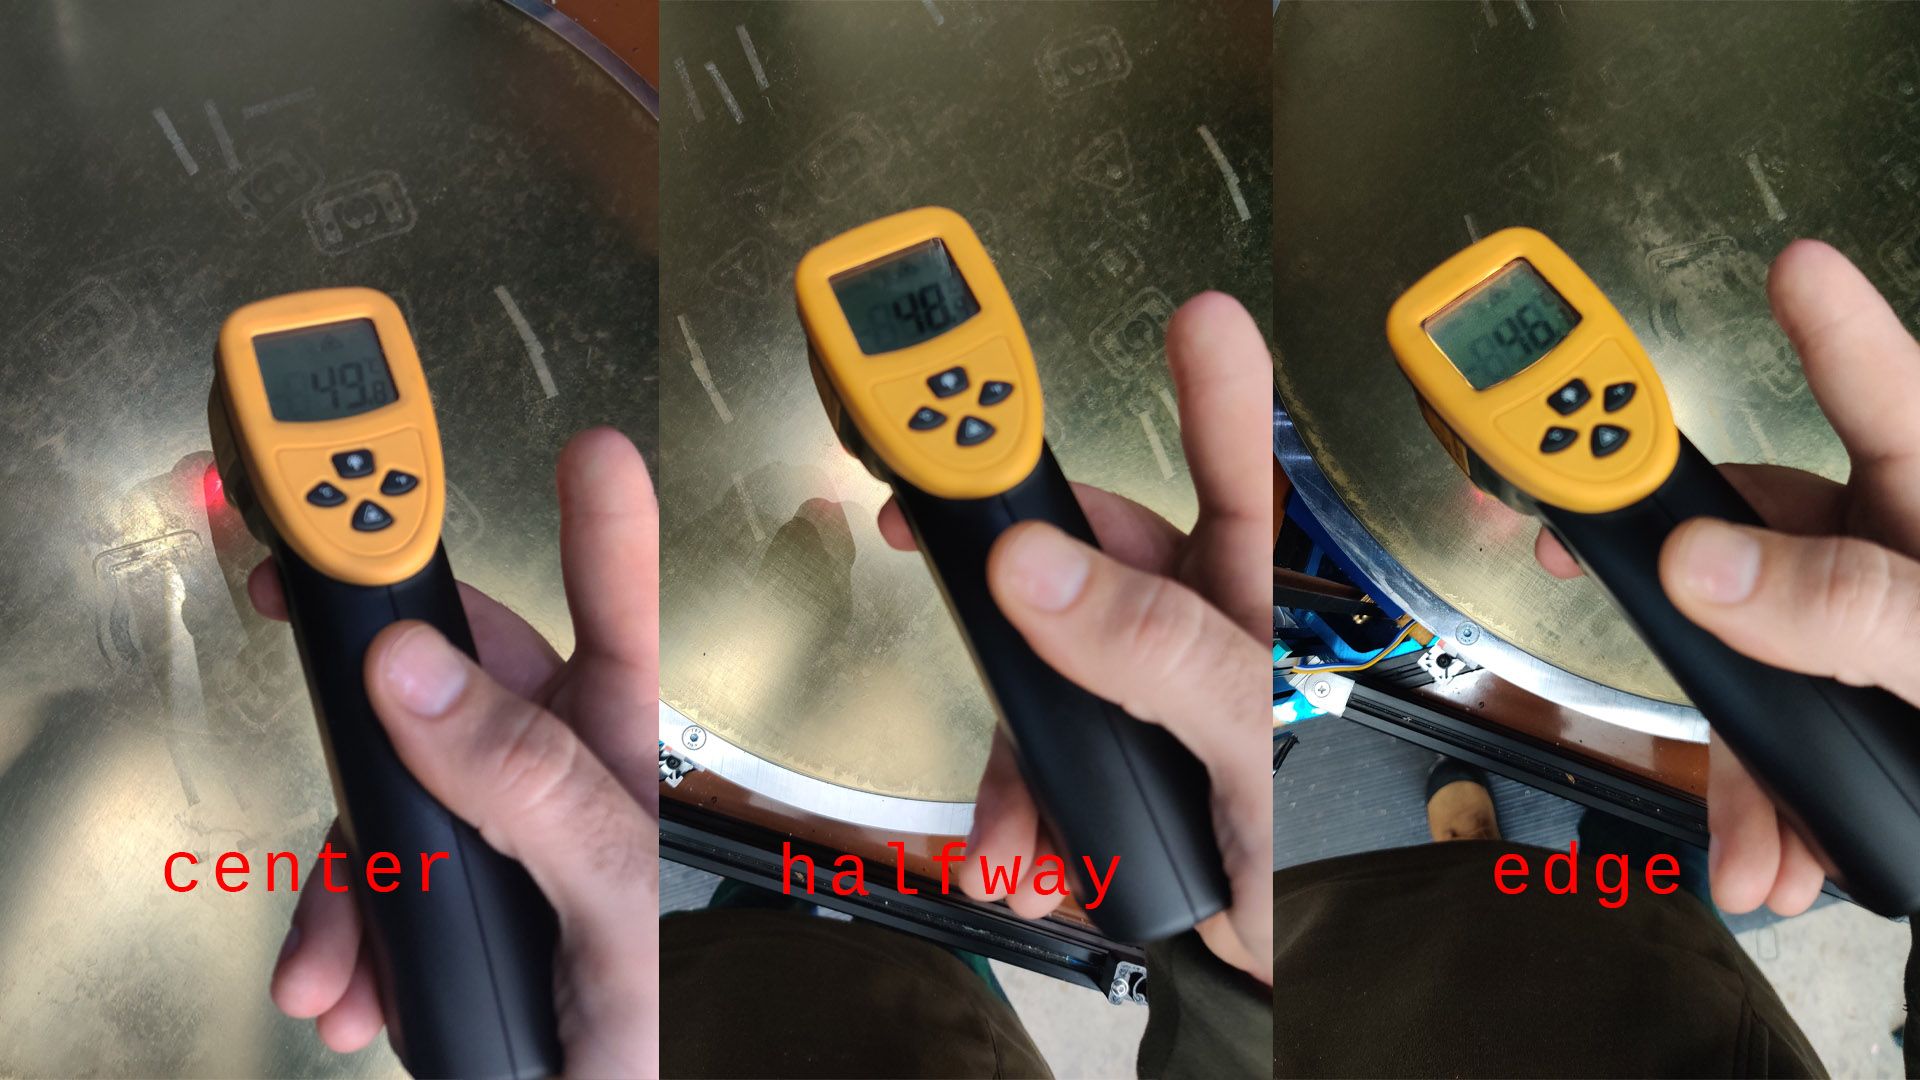
@whosrdaddy The chamber doesn't get to 500c, just the heaters do. They're ceramic IR emitters with built in thermocouples. They heat whatever they're pointed at without doing much to heat the ambient air. Plus the enclosure is enormous and has a filter that recirculates the air from top to bottom, so things don't get THAT toasty in there. Basically, as long as the emitters are on and hot enough, then the object being printed can't dissipate its heat through the air, it can only do so through the build surface. So its internal temperature tends to stay the same as the bed's temperature. Meanwhile the electronics inside the enclosure aren't getting fried. It's been working great for nylon, ABS, PETG, etc with zero warpage, even with very large prints (the bed is 24" diameter).
Best posts made by GoremanX
-
RE: Frequent Heater Faults on High Temp Chamber (500c)posted in General Discussion
-
RE: Retraction... once more with FEELING!posted in Tuning and tweaking
I think I nailed it:

(note: the bottom is wavy because it's only 0.5mm thick and I just peeled it off the hot bed)
Ultimately, the solution was to minimize the amount of time that the nozzle stays in one place, and reduce the possibility of it moving across gaps immediately from the edge of a wall. I upped the speed (3600mm/s), acceleration (1500mm/s2) and jerk (1200mm/min) settings for the extruder, shortened the extrusion distance (1mm), fixed the "combing" setting in Cura (changed to "not in skin"), randomized the Z seam, and upped the outer wall wipe distance from 0.2mm to 0.4mm. Now all the stringing is gone. I still get some scarring on top skin from drooping filament, but it's minimal and literally the only minor blemish. Everything else prints so well, you'd think it was molded. Even tiny details that I used to struggle with now come out crisp and sharp.
Thanks all for the advice!
-
RE: Frequent Heater Faults on High Temp Chamber (500c)posted in General Discussion
@whosrdaddy No, no air blown directly over the print area. The air from the BOFA filter gets blown in through a 90 degree elbow so it gets circulated around the periphery of the enclosure below the heated bed, starting directly under one of the IR emitters.
And no cold air to the heatsink. Ambient air temp rarely gets much higher than about 70c anyways when printing ABS, typically it's more like 40c. This is plenty adequate for cooling the heatsink of the Mosquito Magnum using the stock 25mm fan. I've considered switching to a water cooled Mosquito, but haven't seen a need to yet.
I do however have an external air pump for part cooling, for when I need to do bridging and such. It blows through a tube into a Berd air ring
 .
. -
RE: Retraction... once more with FEELING!posted in Tuning and tweaking
Ok so everyone realizes that this thread was solved months ago, right ?
-
RE: DuetLapse3posted in Third-party software
@Phaedrux said in DuetLapse3:
@GoremanX That was a pretty weird timelapse.
I got bored while waiting for another print to finish, and that acrylic door looked like a great screen to project silly things onto
-
RE: DuetLapse3posted in Third-party software
For fun, my first timelapse using this script:
https://youtu.be/XjBwTqbEZD8 -
RE: External 5v Sourceposted in Duet Hardware and wiring
@oliof Yes. If you're feeding 5v to the board from an external source (either from a Pi or through the ext_5v pin), then you no longer need to use the onboard 5v converter. Removing that jumper disables the onboard converter
-
RE: Retraction... once more with FEELING!posted in Tuning and tweaking
All good points, thank you!
@oliof said in Retraction... once more with FEELING!:
A couple of suggestions:
- I recently stumbled upon an older blog post by Michael Hackney who recommends fast retract and slow unretract. That made oozing skid marks disappear on my Ultimaker
I had tried making the retract slower while keeping unretract fast, but that did not seem to help. I had not considered doing the opposite. I'll try that tomorrow.
- Try varying the temperature by 5C up or down
My concern with that is that when 10c lower in temperature, the resulting parts are much more brittle. CoPa really seems to like being in the upper area of its suggested range (250-270c, I'm running at 260c), especially at its max recommended speed (60mm/s). But it's worth trying to drop 5c to see if it helps.
- Super important: Make sure not to accidentally combine slicer and firmware retract. That happened to me in the past.
There's definitely no slicer retract in the generated gcode files, it's only G10/G11
- Check out KISS slicer's tuning wizard for PreloadVE.
Will do! Looks interesting
- just to complete the list, ensure that your Nylon is dry-dry whole printing. Actively heated filament box during printing and vacuum bag for long-term storage is what people recommended to me.
Oh this filament is dry as dry can be. I dry it in a printdry box for 8 hours at 70c before I use it, and it's inside the heated printer enclosure during printing, along with a bunch of desiccant bags that change color when they absorb moisture. They're all bright orange (dry).
-
RE: M500 Always Failsposted in Duet Web Control
It's also super comforting to know that I'M NOT DOING ANYTHING WRONG and there's nothing wrong with my setup that'll bite me later. That was my main concern.
-
RE: DuetLapse3posted in Third-party software
@stuartofmt One observation: isn't it possible to pull the file name of the current print job through the object model? If so, instead of just processid, could the directory be named "jobfilename-processid"? That way, the directory is easily identifiable as the result of a specific job, but there's still a unique number appended to it for when the same job is run more than once
-
RE: Bed Heater Output for Air Pump?posted in Duet Hardware and wiring
@hypnolobster I ended up running an inductive load (magnetic relay) on out7, since the documentation specifically states that out7 through out9 have built-in flyback diodes. I'm hoping that the documentation is correct since @dc42 's statement here seems to contradict the documentation. I haven't had any issues so far. I ended up running different pumps on out8 and out9 that have brushless motors and only draw 0.5a each, so the issue became moot. I'm currently only running resistive loads on out0 through 3.
out0 may or may not have a flyback diode built-in, but it has its own replaceable fuse with a very high rating, so I'd feel safe running an inductive load on that output. But then I'm no electrical engineer, and would love to have definitive answers as to which outputs have flyback diodes built-in
-
Frequent Heater Faults on High Temp Chamber (500c)posted in General Discussion
I have chamber heaters that can go up to 500c. I have them mapped as chamber heaters using the M141 command. According to the documentation, M141 must come before M143 (which is used to set the max temperature for a heater). However the default max temperature for a chamber heater is something significantly less than 500c. I assume it's 125c, same as for bed heaters.
In any case, when my heaters are above that default (either because they're still cooling down from a print or the print is paused) and I restart the board, I get an instant heater fault on reboot because M141 sets the heater as a chamber heater before M143 sets its max temperature in config.g. This is becoming very frustrating.
Has this order dependency been eliminated in a forthcoming version of RRF?
-
RE: Magnetic filament monitor availability?posted in Filament Monitor
@cdthomas9 I was able to purchase the components, including the hobs, without the housing. That's still available from a few sellers, though you have to ask them directly about it because they don't list it that way. I bought mine from right here, was sent an invoice from Duet3D that I paid with PayPal, and I had the package within a week or so.
-
RE: Bed Heater Output for Air Pump?posted in Duet Hardware and wiring
@dc42 This is great news! However could the official documentation be changed to reflect that? Because right now, it explicitly states that out1 through out3 do not have flyback diodes built-in:
"2-pin JST VH OUT_1 thru OUT_3: these are intended for extruder heaters or fans. Maximum recommended current 6A each. If you connect inductive loads to these outputs, you must use external flyback diodes."
https://duet3d.dozuki.com/Wiki/Duet_3_Mainboard_6HC_Wiring_Diagram -
RE: Forum Suggestion: Proper Code Highlightingposted in General Discussion
@Phaedrux Cool! Would be nice if it defaulted to that when we click the </> button. I couldn't easily find any way to set it to different languages (not that I tried very hard), but now that I know, I'll do so
-
RE: Magnetic filament monitor availability?posted in Filament Monitor
@alankilian Yeah thanks for that
 I ended up having to order a parts kit from the UK because Filastruder had JUST run out
 -
RE: Network Port Not Workingposted in Duet Hardware and wiring
@droftarts You're correct. With my single-extruder printers, config.g contains
G10 P0 X0 Y0 Z0 R0 S0 ; set tool P axis offsets and set active and standby temperatures to SSo active and standby temps are set to 0 by default. but for this dual-extruder setup, RRF-Config gave me:
G10 P0 X-10 Y0 Z0                                        ; set tool P axis offsets
G10 P0 R0 S170                                           ; set initial tool P active (R) and standby (S) temperatures
(and its equivalent for P1)
So when I set a tool as active, its standby temperature becomes its active temperature. Again, there's no good reason for that to prevent the network from coming up. But M106 P0 in tpost0.g is basically just a "wait" command, so I guess the board sits there and waits for the temperature to be reached rather than finish booting.
-
Adding a Toggleposted in Duet Web Control wishlist
When I have an M80 command in config.g, I get this handy "ATX" toggle on the DWC dashboard for turning the power supply on and off. It's a nice feature.
Is it possible to add other toggles? Perhaps something that turns a GPIO pin on and off? Like for example the "out9" fan pin that I use to control an external 110v outlet mounted on my printer? That would be really handy, too.
Right now it's a "fan" with a minimum speed of 255 so that I get a slider in DWC that turns the outlet on when it's set to anything but 0. This works, but it seems kludgy and I'd really like to have a neat toggle.
-
RE: Multiple Objects Printed One at a Time Fail After the Firstposted in General Discussion
@dc42
omg I just spent the entire day on this and I'm sick of it. Used up a crapton of filament, too. But I think I finally figured out what's happening.I tried printing countless batches of rectangular strips in both "One at a time" and "All at once" modes, of various heights and sizes. For the life of me, I could not get it to fail. Sometimes up to 42 strips per job, just to try to get it to fail. Every initial layer on every object was perfect, every time (how many people complain about that?
 )
)Finally, while looking at the DWC status screen for the millionth time, it dawned on me... the firmware was tracking layers differently with my tests vs the actual print job where this issue kept happening (and which I can still get to fail every time).
So here's what I figured out:
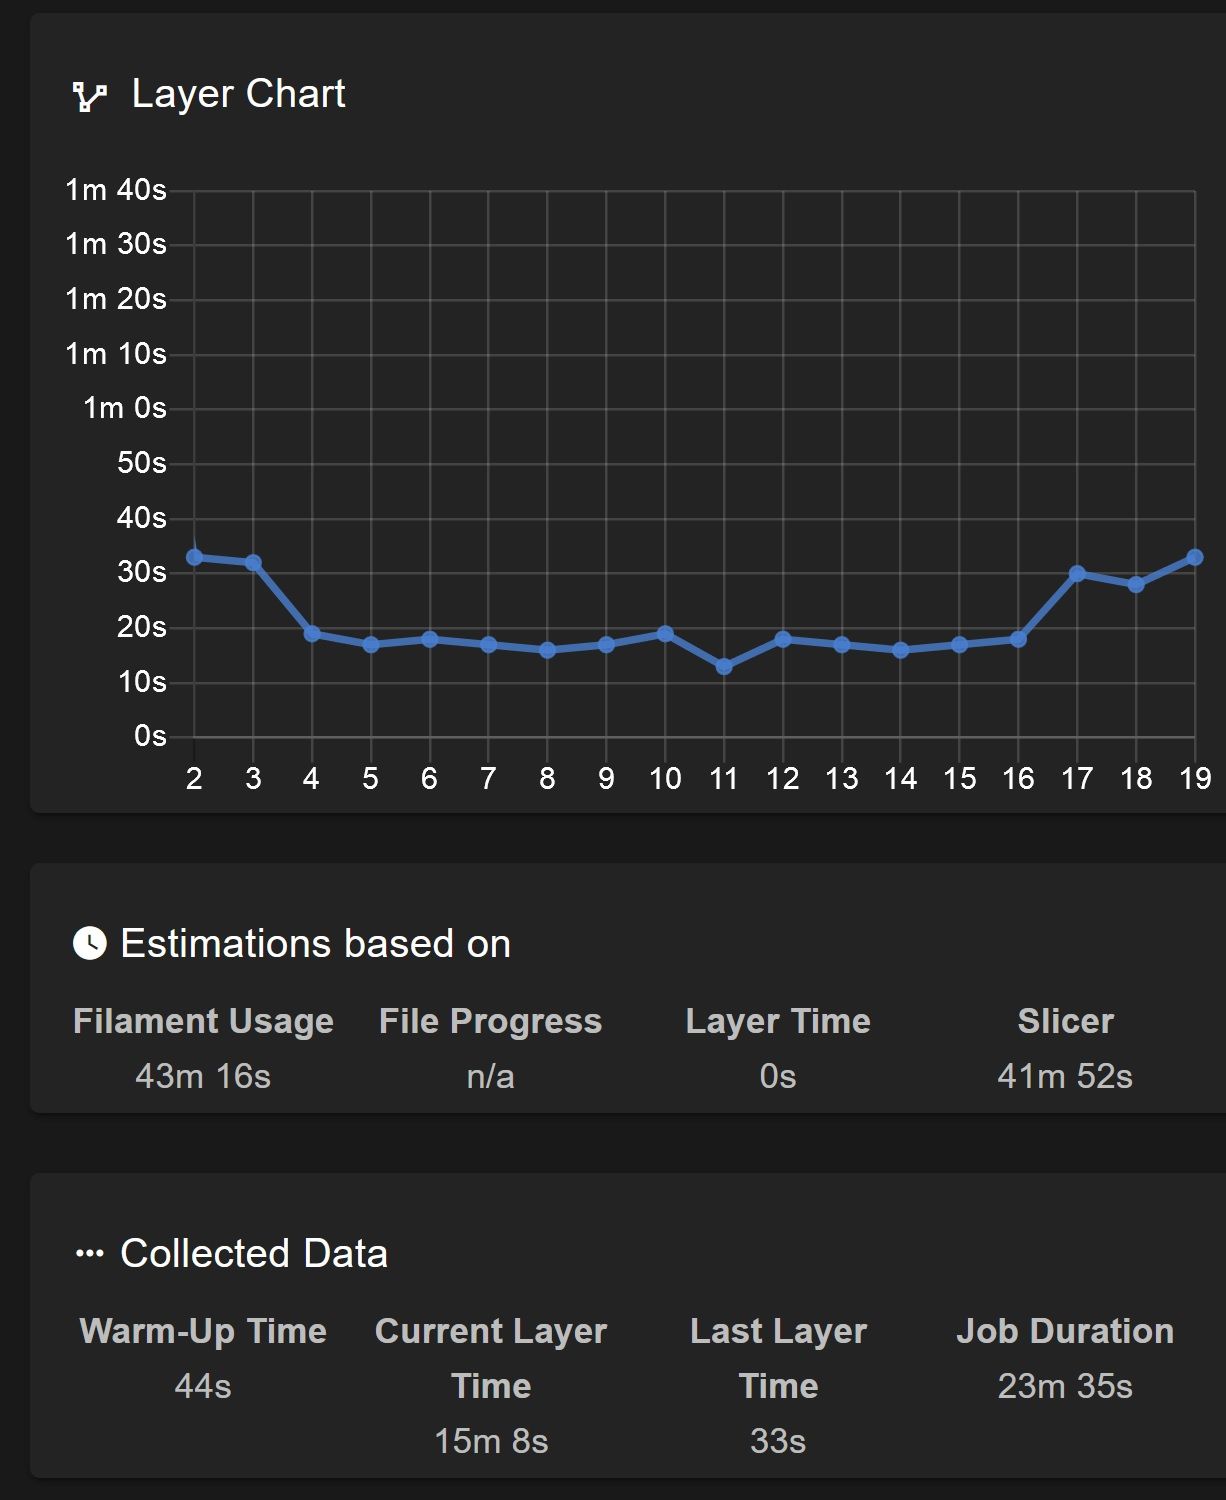
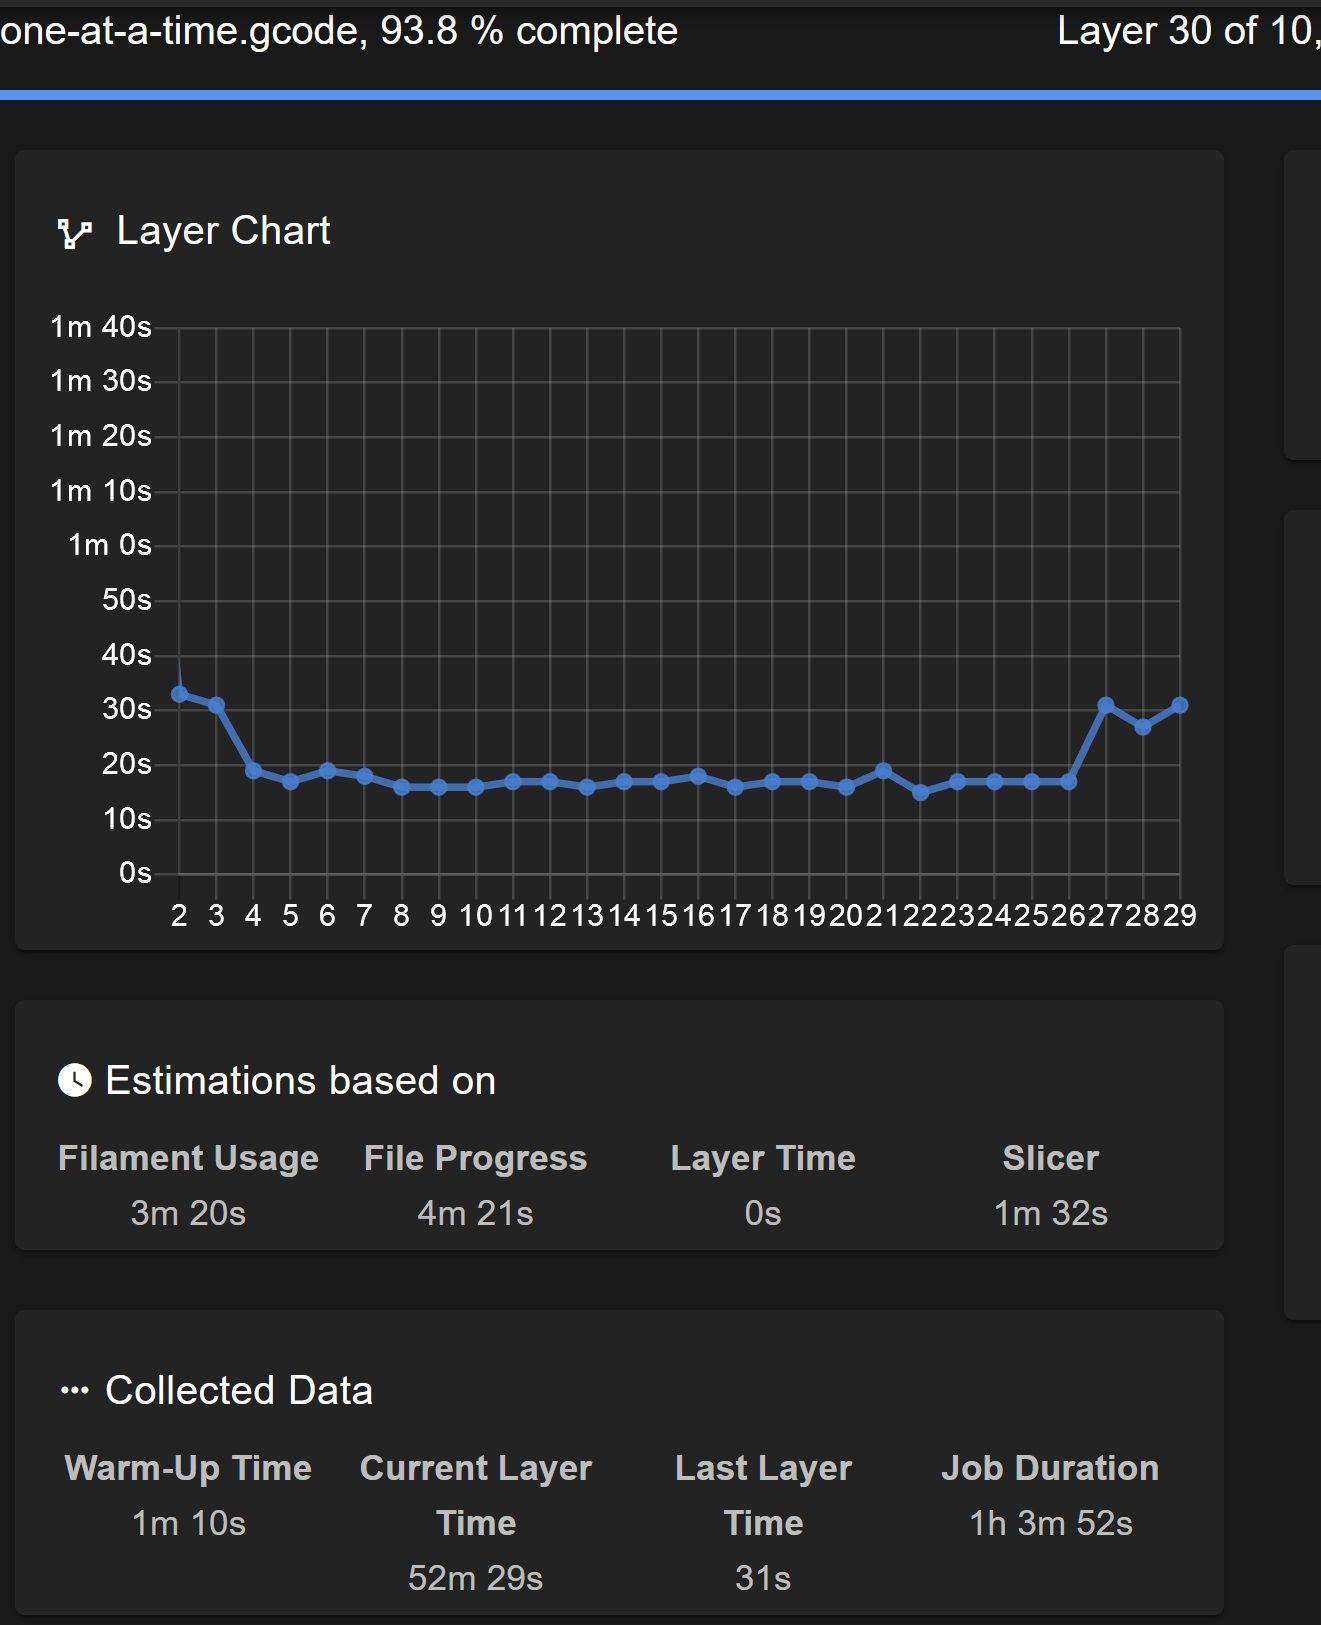
In "One at a time" mode, when all the objects have the same number of layers, then the firmware only reports up to that number of layers and then every other object is reported as being part of the last layer of the first object. For example, if each object has 20 layers of 0.3mm each, then the firmware reports layers (1 of 20, 2 of 20, etc) up to 20 of 20, and every other object after the first is reported as part of that layer 20 of 20. DWC continues to display that last layer constantly so it ends up looking like the never-ending layer.

However, if the objects in the file have a varying number of layers (like for example, the gcode file I referenced above), then the firmware tracks layers up to the top of the shortest object (ie. 10 of 10), and then continues tracking layers beyond that (11 of 10, 12 of 10, 13 of 10, etc) until it reaches the number of layers of the tallest object in the file. It doesn't matter if the first object printed is the shortest one or not, it still reports as high as the tallest object. In my tests, it seemed to stop reporting at layer 30 of 10, which in this case was the top layer of the first and tallest object. At that point, every subsequent layer just gets reported as part of layer 30. But that's still not what screws up the initial layer height on every subsequent object.

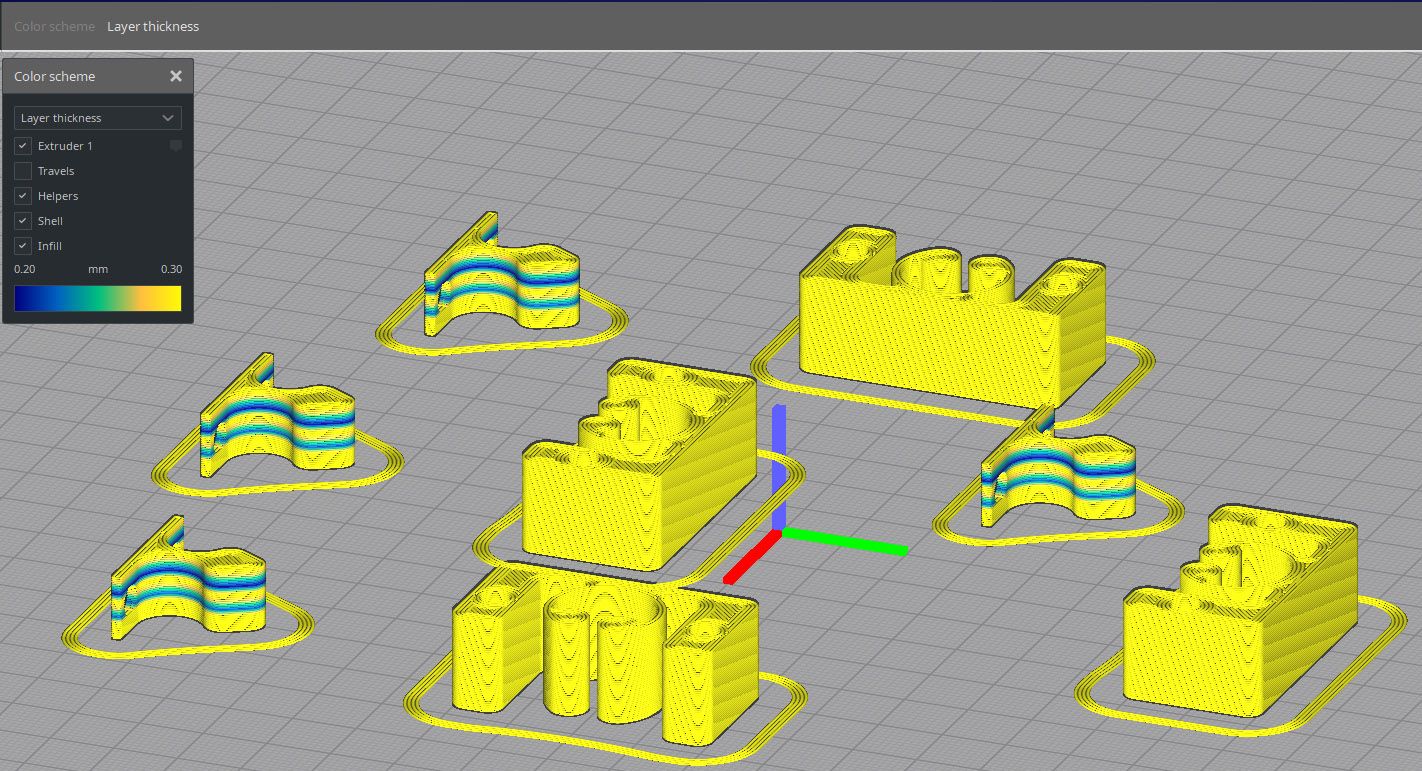
The gcode I posted above has an extra quirk. Not every object in the file has the same layer thickness. When I'm printing something functional that doesn't need to look pretty, I use Cura's "Use Adaptive Layers" feature, which varies layer thickness depending on the features within each layer. Since the smaller pieces in my gcode file have vertical holes, the layers where those holes are were rendered at less than 0.3mm thickness (to a minimum of 0.2mm), but the rest of those objects were rendered with 0.3mm thickness. The larger objects did not have vertical holes, so they were rendered entirely with 0.3mm layers. And I think THAT'S what screws up the initial layer height on subsequent objects.

In this case, a large object is being printed first, which only has 0.3mm layers. My conjecture is that at some point, when printing a layer that's at the same height as a shorter layer on another object, the nozzle moves the correct Z+0.3 (it's pretty obvious to tell by looking at the print), but the firmware counts it as less than that, or an average of the two, or some other form of rounding error is happening. Either way, somehow it ends up losing track of where it's really at, causing it to come down 0.XXmm too high when laying down the initial layer for the next object. It doesn't look like this error stacks between objects, it's probably something in the initial calculation that results in a one-time error after the first object that carries through the rest of the print job. I count about 8 layers in each small object that are less than 0.3mm, which would add up to like 0.5mm or so. But the offset on the subsequent objects doesn't seem to be that big.
In any case, I think I'm done testing this right now.
tl;dr - don't use Adaptive Layers when setting up multiple objects to print One At A Time. Would be nice if the layer reporting in RRF for multiple objects printed One At A Time was fixed to reflect reality.
Also, there's some weirdness in layer reporting when printing a single object with Adaptive Layers. It seems to report non-existent layers as 0 seconds, as if to force an assumption of equal layer heights for the entire object even if that's not the case.
-
RE: Multiple Objects Printed One at a Time Fail After the Firstposted in General Discussion
@dc42 Well then I'm afraid I can't help you, I'm done testing this. The gcode file I shared earlier causes every subsequent item in the print to start higher than the first. That's all there is to it. I printed over a dozen tests, some with way more items that were larger and took longer to print, all with Adaptive Layers turned off, and they all turned out fine. But that one I posted above shows the issue every time. I don't think the suggestions about thermal expansion apply here:

As far as I'm concerned, I've solved this enough for my needs: variable layer heights on multiple objects printed one at a time breaks the expected behavior. I won't use it. 8 hours of my life and half a reel of filament on this already. No thank you.