Duet3D Logo Duet3D
    • Tags
    • Documentation
    • Order
    • Register
    • Login
    1. Home
    2. grizewald
    3. Best
    • Profile
    • Following 0
    • Followers 0
    • Topics 10
    • Posts 200
    • Best 40
    • Controversial 0
    • Groups 0

    Best posts made by grizewald

    • A case for the Duet2 WiFi and Duex boards

      I'm in the process of upgrading my printer and realised that I'd need a Duex expansion board as I'd run out of stepper motor connections. Adding the Duex also meant that the case I'm currently using for the Duet2 WiFi wouldn't be big enough.

      So I turned to Thingiverse to see how others had thought about housing the two board combo. I found a design by Havoc340 which I rather liked. It mounts the boards back to back as intended and provides easy access to both boards. It uses a 60mm fan at the bottom of the case to cool the back of both boards. That design is here: https://www.thingiverse.com/thing:2825560

      There were a few things which I thought the design needed, so I made a remix. I moved the mounting holes so I could mount it at the rear right of my frame. I removed the cable entry from the rear of the case and added two on each side. I also felt that the case didn't provide good enough ventilation for the front of the boards, so I added convection air intake and exit slots at the lower front and top of each half of the case.

      Most importantly the case needed a Duet3D logo! 🙂 I found the logo already modelled as an STL here: https://www.thingiverse.com/thing:2815313 so I used that to add the logo as a relief to the front case. I also had filament which was just the right colour to match with the official logo's colour.

      In the photos that follow, I ended up painting the white parts of the logo as the plastic parts I'd designed to slot in didn't fit well enough due to me printing the case with no support for the rings in the logo.

      alt text

      alt text

      alt text

      alt text

      I've uploaded the design to Thingiverse as a remix, but I cannot publish it until 24 hours from now as I used a new account. Once I can publish it, I'll add the link!

      This is now published at: Thingiverse
      posted in My Duet controlled machine
      grizewaldundefined
      grizewald
    • RE: Help to setup BMG clone extruder

      @droftarts said in Help to setup BMG clone extruder:

      I have been wanting to try out the Bondtech extruder, but the price for something I planned to 'experiment' with meant that I've recently fitted a BMG clones to my Delta...

      While I'm happy to hear that you now think the idea is good enough that you'll actually buy the genuine item from the small Swedish company that invented it, I really don't understand people buying clones of specialised products like this to evaluate them.

      If the clone extruder had turned out to be rubbish, maybe you would have dismissed the Bondtech extruder based on the poor execution of the Chinese cloner. It's hardly a good way to see if a product is any good.

      Then there's the simple fact that if people like Bondtech get sick of seeing their innovation stolen and people's cash going into the pockets of Chinese cloners instead of theirs, they are likely to stop making things for 3D printers and the market loses another innovator.

      Of course, your money is your money and you are entitled to spend it as you wish. I'm just pointing out the effects of buying the cloner's products. The 3D printing world is not the first young market I've seen where the genuine innovators left to do something else which would actually put food on their table to the detriment of everyone in that market when they withdrew their innovation from it.

      And before anyone says "I buy the clones because the original is too expensive", we're talking about hobby 3D printing here, not things which are essential to living. If people can't afford the hobby without encouraging the cloners, maybe they should find a cheaper hobby.

      posted in Duet Hardware and wiring
      grizewaldundefined
      grizewald
    • RE: ferruled connectors

      @mihaitintea said in ferruled connectors:

      The out-of-the-box ferrule connector is a hollow tube. One end of this tube is factory-crimped to the wire, and the other end of this tube is free and goes into Duet's terminal blocks.

      Do I tighten this free end of the tube in the Duet board's terminal block until the tube gets mechanically deformed ? Or do I do the flattening myself (e.g., using pliers) until the connector gets shaped as a flat rectangle, and put that flattened end of the connector in Duet's terminal blocks and then tighten those screws ?

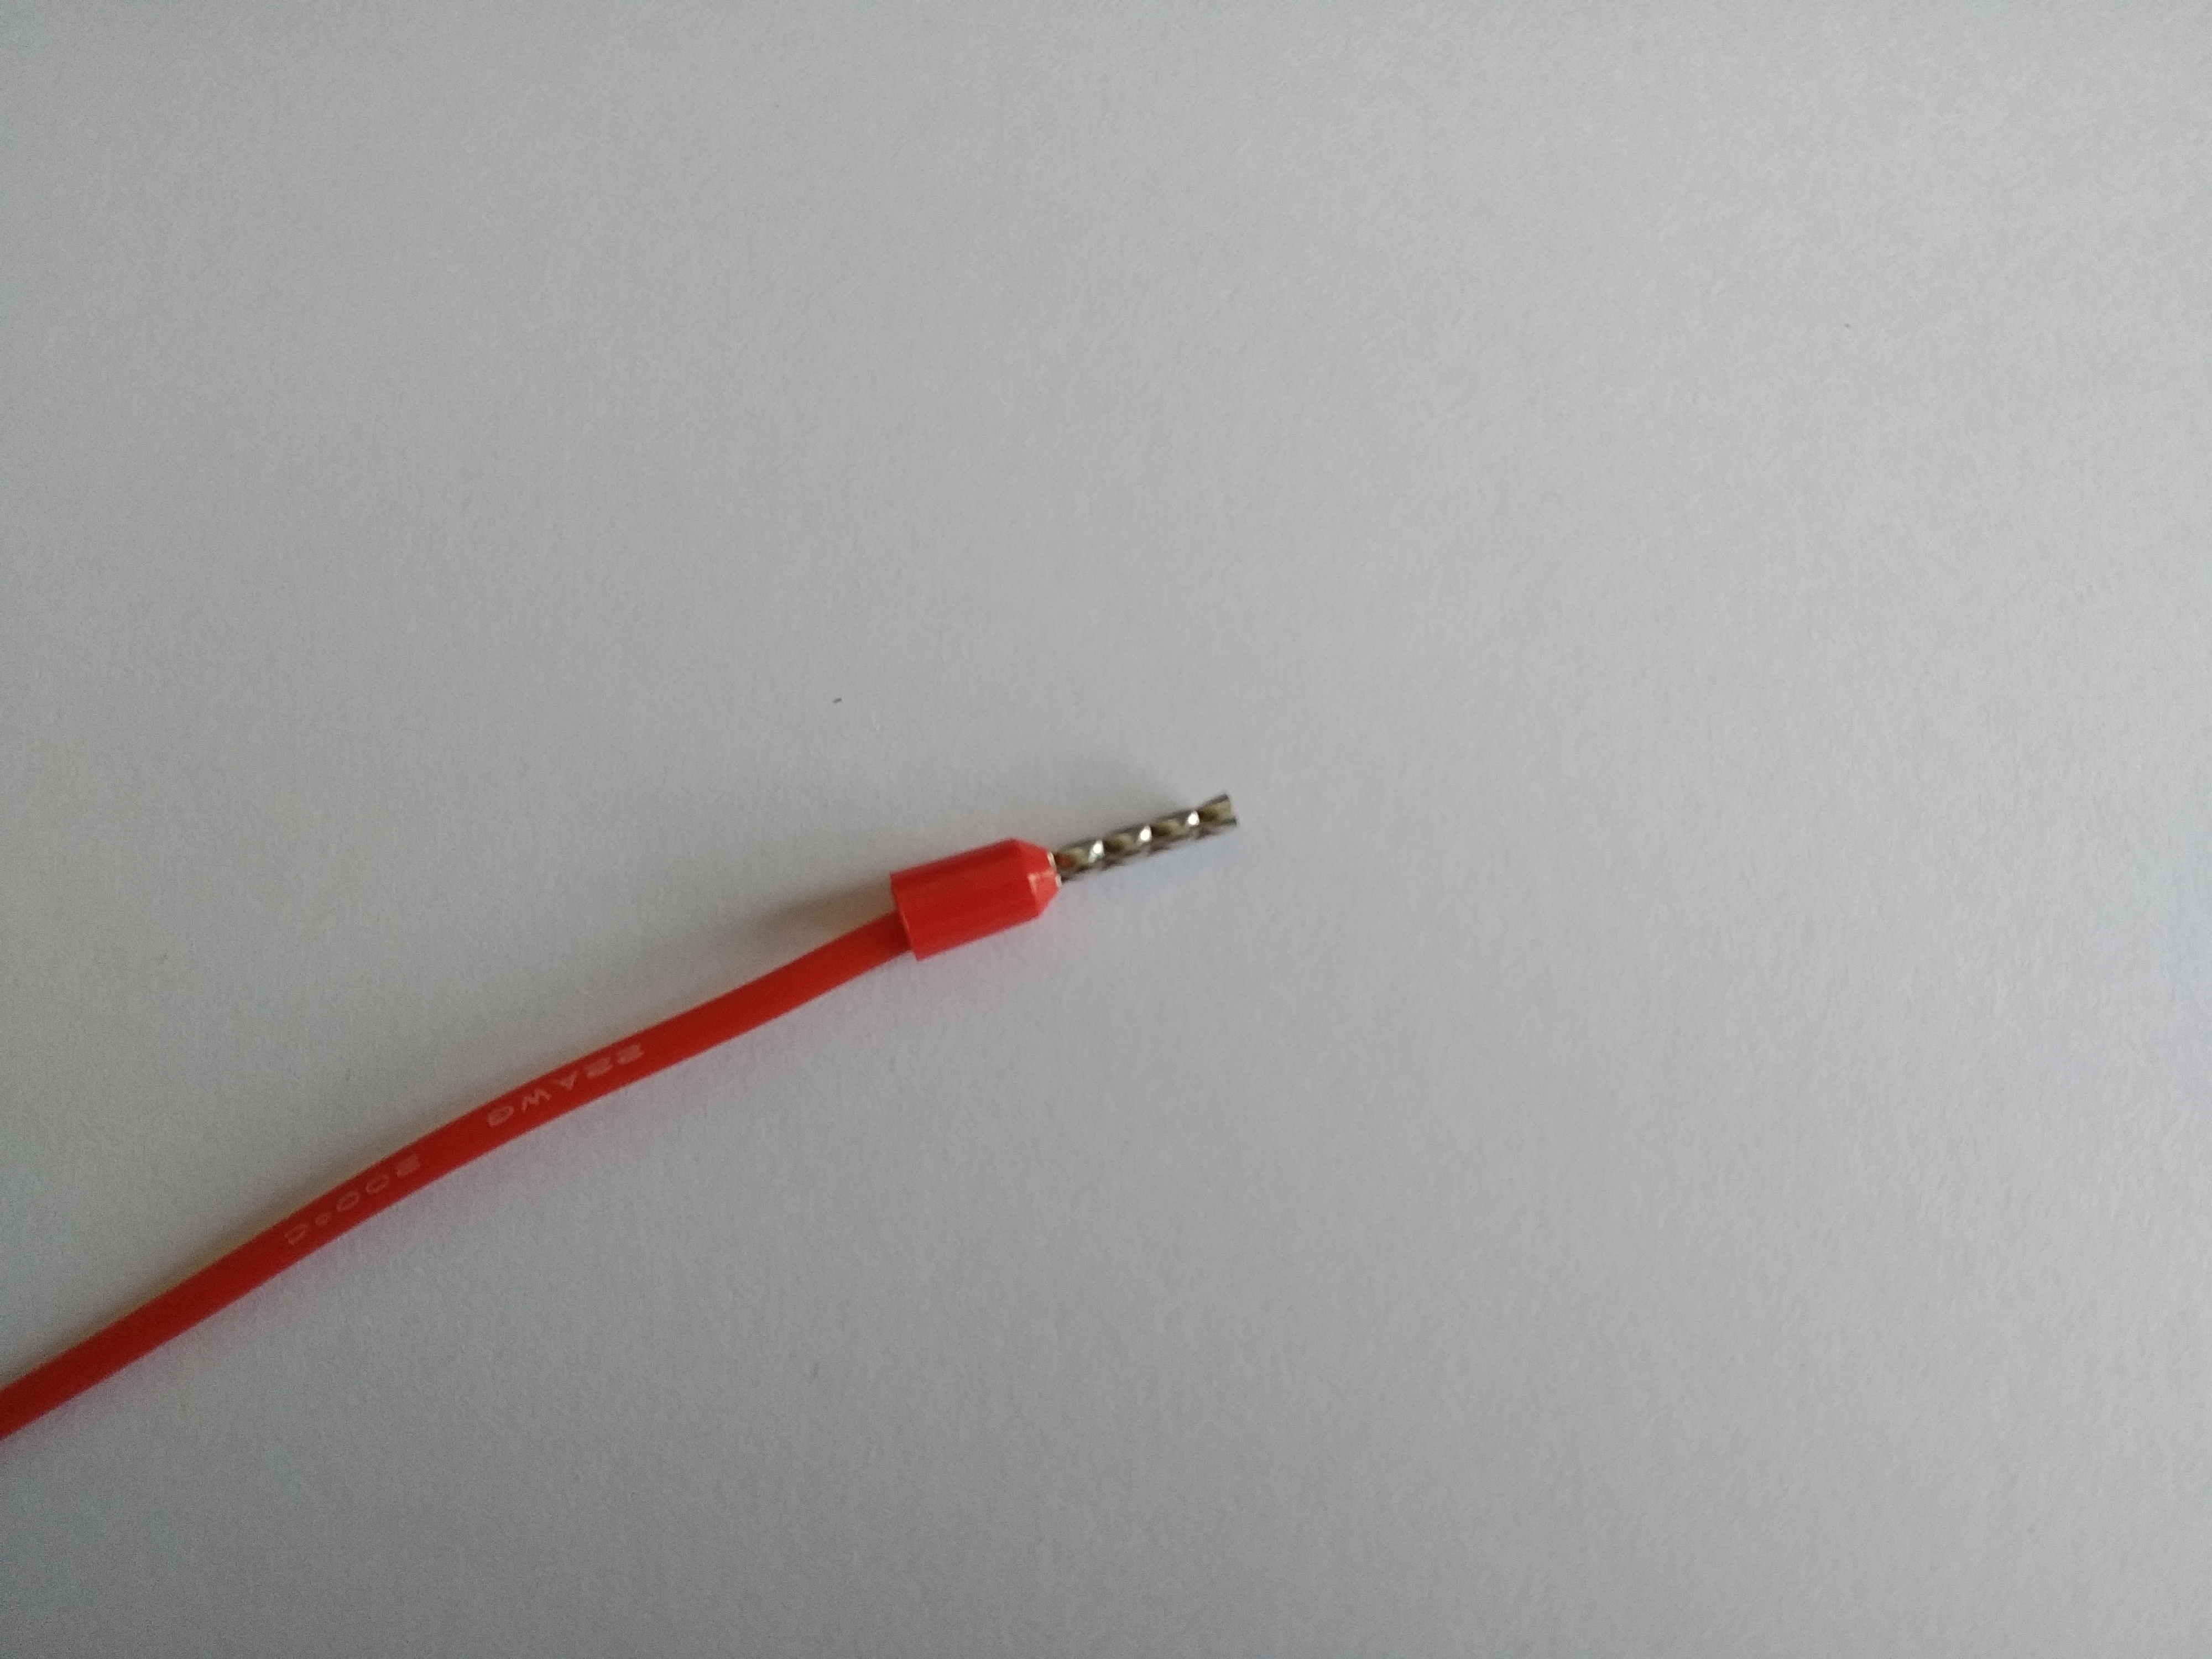
      Here's the kind of ferrule that you should be using:

      alt text

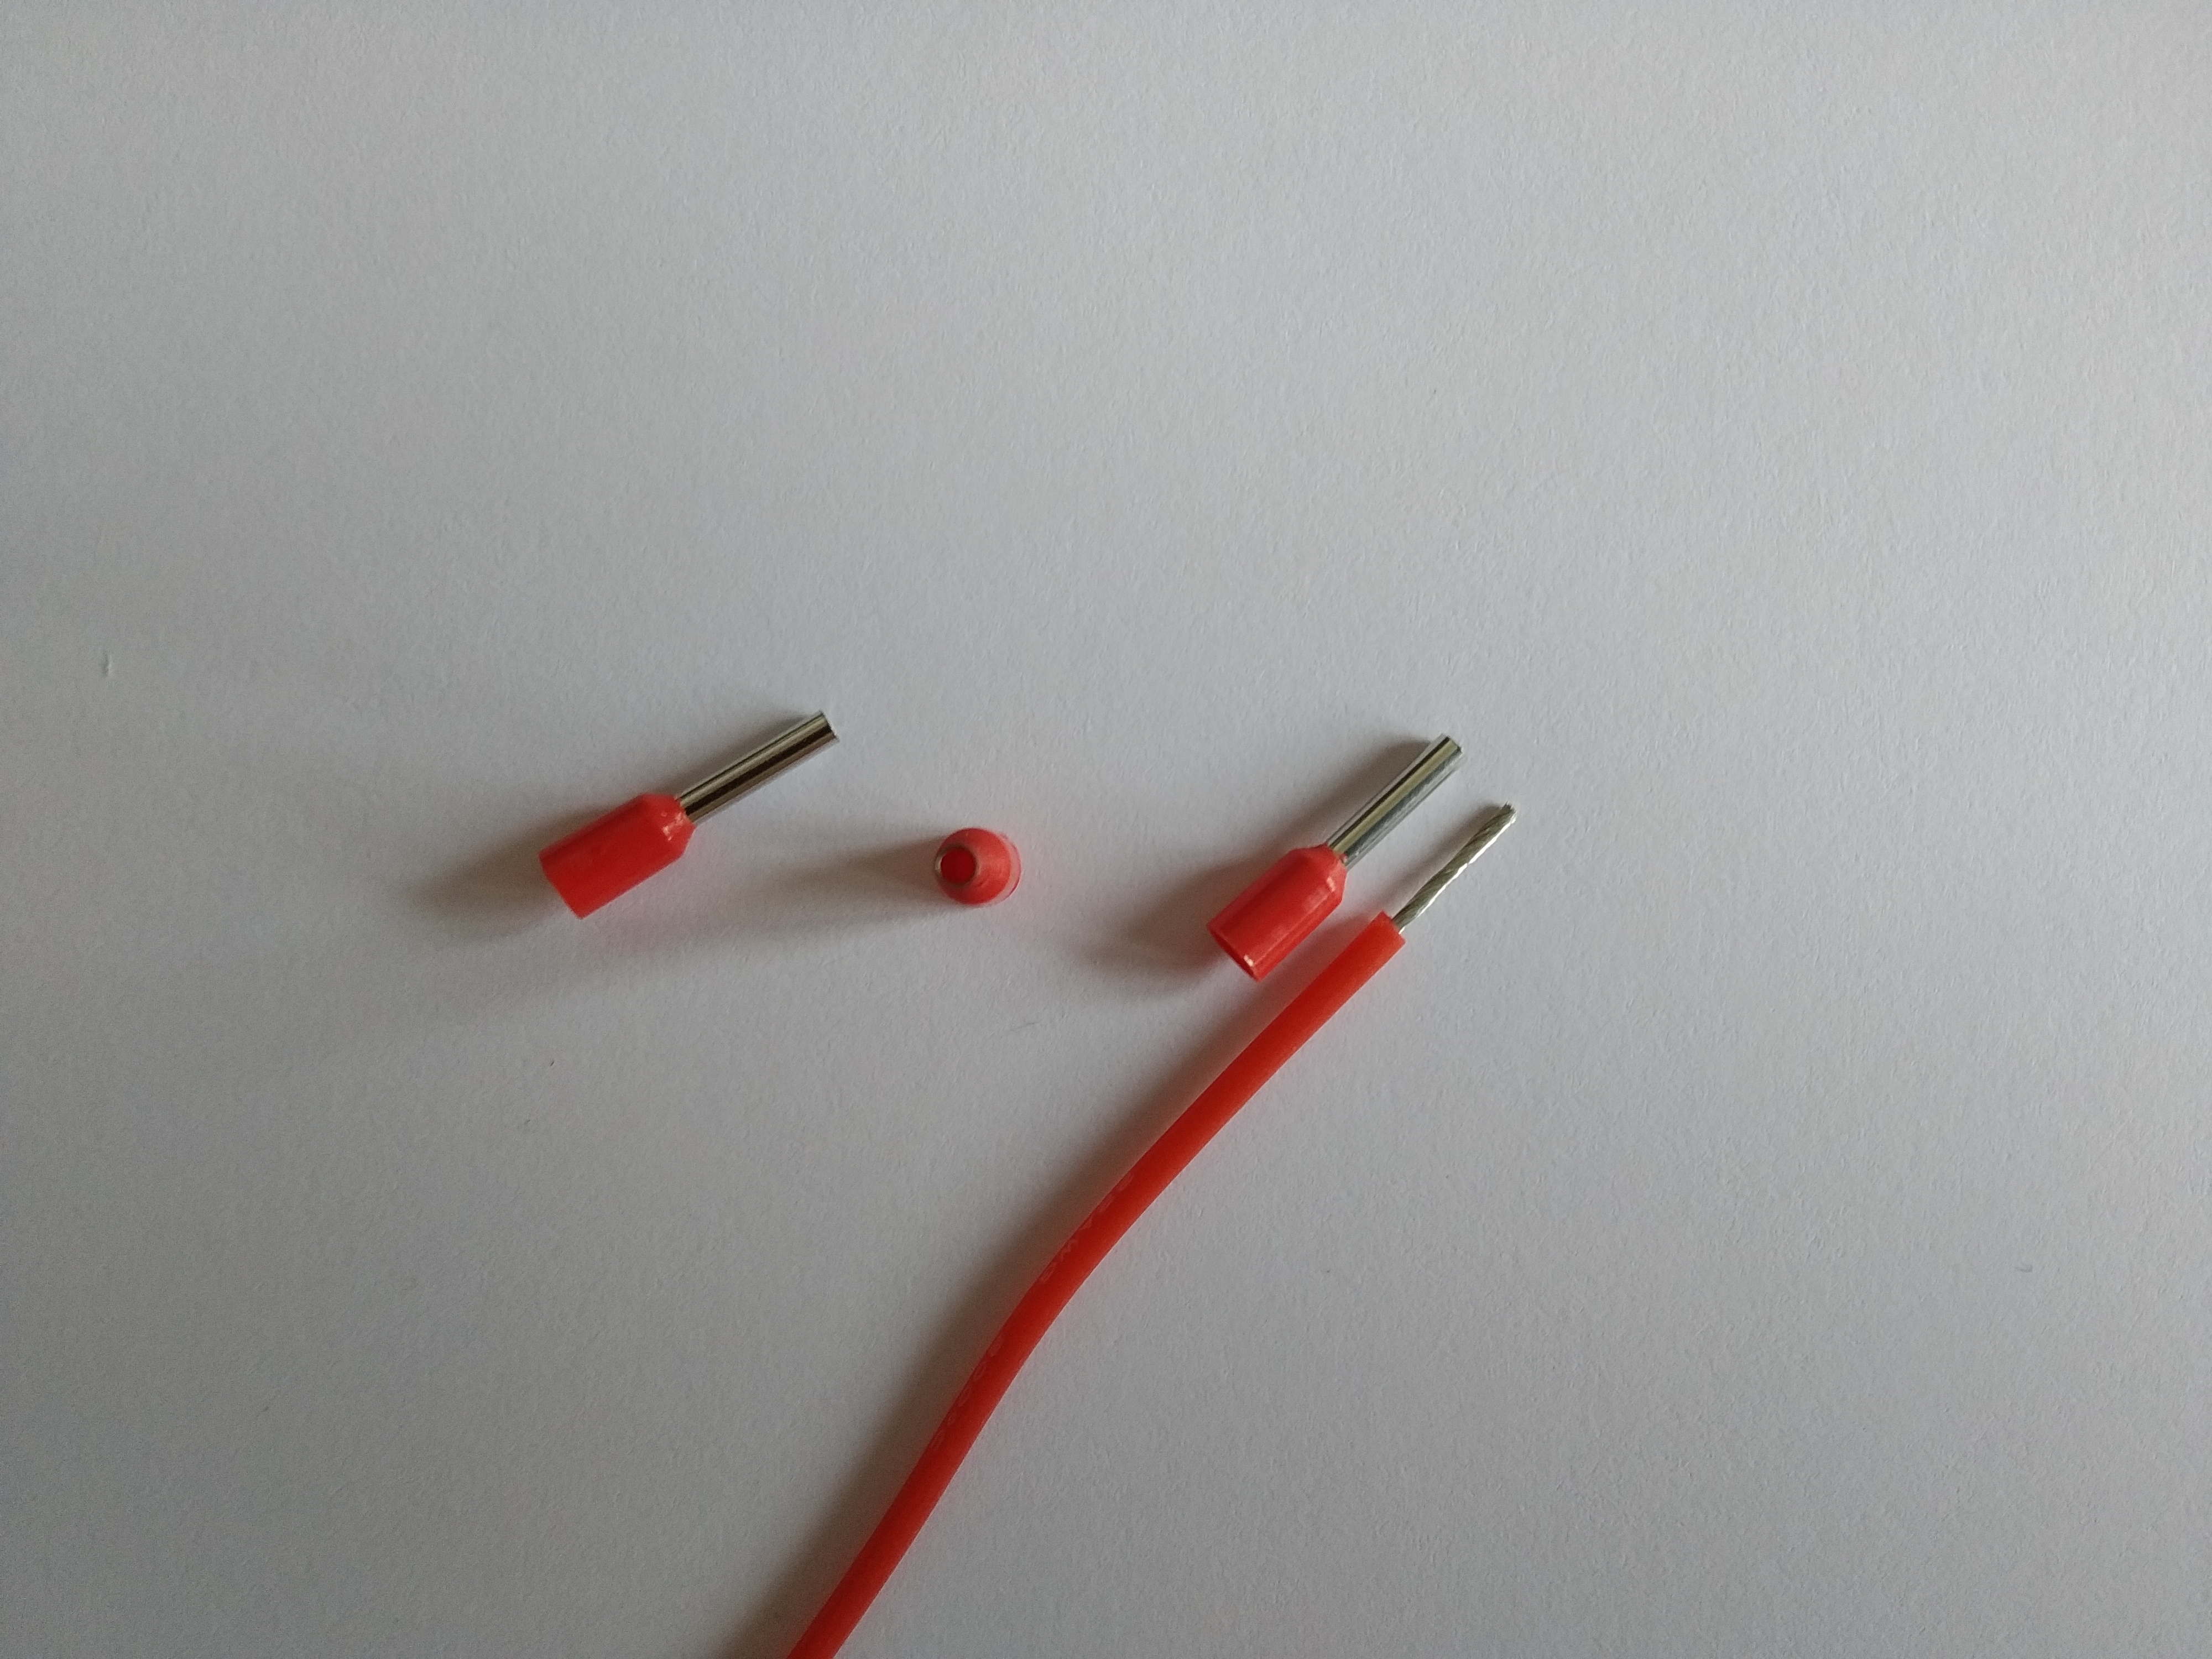
      One end is insulated to prevent any chance of a short. The wire is then stripped so that the wire is the same length as the exposed metal part of the ferrule. The wire is inserted into the ferrule and crimped.

      alt text

      If the manufacturer didn't strip the wire long enough, so that metal tube is not filled all the way to the end with wire, simply cut the end of the ferrule off with some side cutters so that you can see the crimped wire at the end of the metal tube.

      Then insert the ferrule into the connector and tighten down the retaining screw while supporting the connector against the force of tightening the screw down.

      posted in Duet Hardware and wiring
      grizewaldundefined
      grizewald
    • DWC 2 "Dark Theme" Cursor colour in editor

      @chrishamm Is it possible to change the colour of the cursor when using the dark theme?

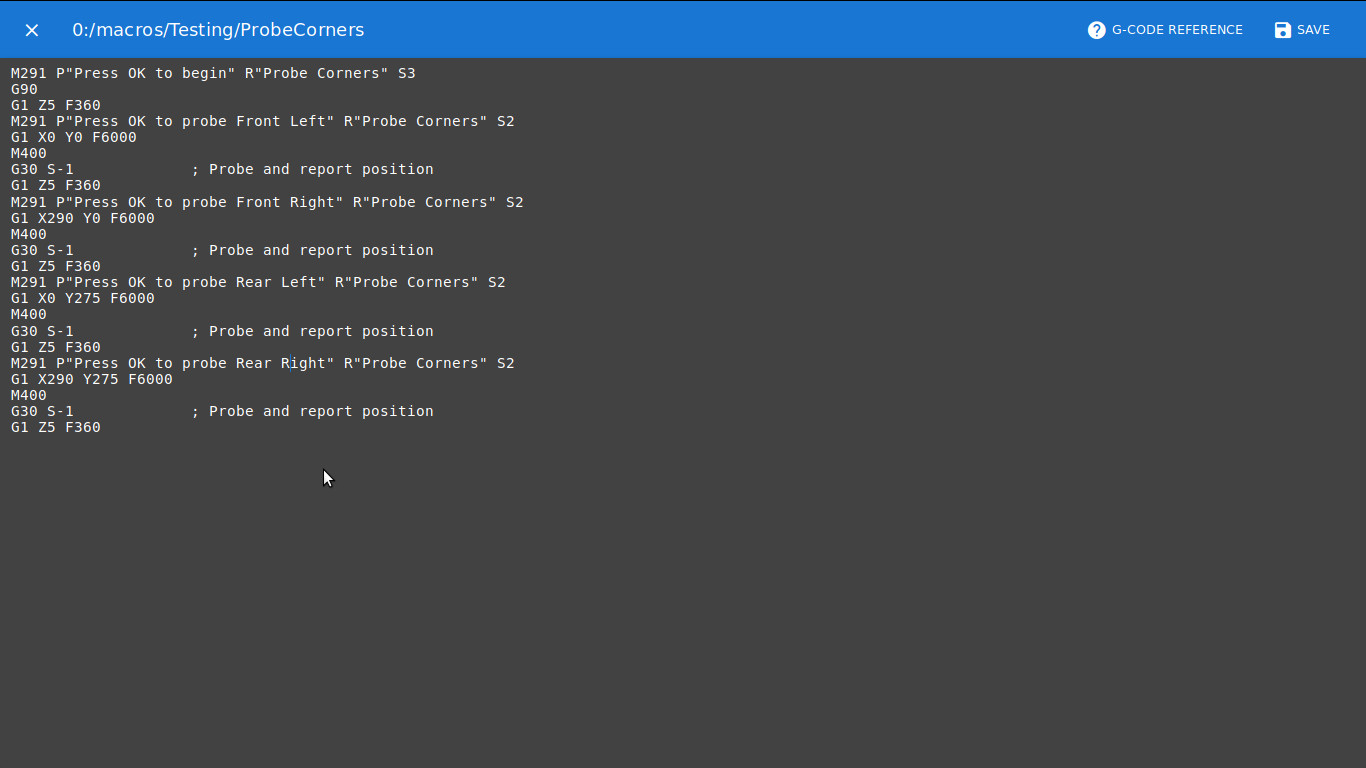
      I honestly have large amounts of trouble seeing where the cursor is sometimes as it a) flashes on and off very slowly, b) even when it is visible, a dark purple cursor on a dark background is far from obvious.

      alt text

      posted in Duet Web Control
      grizewaldundefined
      grizewald
    • RE: Anycubic I3 Mega Mod questions

      @pauledd In your homez.g you have:

      M584 Z2:3 U3 P4
      G1 Z-205 U-205 F100 H1
      M584 Z2:3 U3 P3

      That should be:

      M584 Z2 U3 P4
      G1 Z-205 U-205 F100 H1
      M584 Z2:3 P3

      posted in General Discussion
      grizewaldundefined
      grizewald
    • RE: Precision piezo auto bed compensation issues. Please help.

      @PeterA said in Precision piezo auto bed compensation issues. Please help.:

      @PeterA said in Precision piezo auto bed compensation issues. Please help.:

      Error: Z probe was not triggered during probing move

      Still problems.
      My piezo wors as it it triggers great. Red led on, touches bed blue flashes and when homing it works.
      When using home all or home z it works beautifully with the homez.g settings bellow. however my config.g has to have this line
      M574 X1 Y1 Z1 S0 ; Set active low endstops

      If I put M574 Z1 S2
      Then when homing it pushes down into the bed.

      The problem is trying to set it on auto mesh, the z triggers (blue light as touches the bed) but it pushed down at least 5mm. The error is as before Error: Z probe was not triggered during probing move But I can see it was and when normal homing it triggers and works correctly.
      The auto mesh starts and homes, triggers great and sets itself, then it moves on to the first point and moves down onto the bed, blue light triggers as before, but it goes down a further 5mm.
      I’ve tried @grizewald settings but it drills down into the bed on homing unless I change the m574 to z1 s0. Then back to the original problem. Homing then works but everything else drills down into the bed.

      My homez.g
      ; generated by RepRapFirmware Configuration Tool on Mon Dec 24 2018 18:36:17 GMT+0200 (South Africa Standard Time)
      ;G31 Z0 P1000 ; peters attempt and the piezo
      G91 ; relative positioning
      G1 Z3 F800 S2 ; lift Z relative to current position
      G1 S1 Z-275 F400 ; move Z DOWN until the endstop is triggered
      G1 Z2 F300 S2 ;LIFT Z FOR SECOND PROBE
      G1 S1 Z-5 F80 ; move Z DOWN until the endstop is triggered
      G92 Z-0.2 ; set Z position to axis minimum (you may want to adjust this)

      Your homez.g is using the probe as an end stop and not as a probe. If you look again at my homez.g you will see that I use the command G30 to home the Z axis. G30 means "probe the bed". You are telling the printer that you are using a Z end stop and not a Z probe.

      You must configure the probe as a probe and use it as a probe. It is not an end stop!

      posted in Duet Hardware and wiring
      grizewaldundefined
      grizewald
    • RE: Blobs with PA and w/o

      @felt342 That's a very impressive tune for such a long Bowden tube. I gave up trying to get such a long tube to work on my CoreXY and converted it to direct drive instead.

      It wasn't that I couldn't get the machine to print nice cubes (and without the warping you have on the bottom of yours), but what worked for one print wouldn't work for the next one.

      Direct drive fixed all that and made the printer much more consistent.

      Ringing is fixed in two ways: slow down or stiffen up!

      If there is a resonance problem, DAA can fix that. If there are other problems with the mechanics or simply exceeding the acceleration that the frame can tolerate, then DAA will not help you.

      If slowing down doesn't cure the problem, then you need to look hard at the motion system.

      If it helps, these are my settings for the motion system from my V-Core CoreXY. It can print close to 300x300x300mm and runs on 24V with beefy 2A 4.8Kg/cm NEMA17 stepper motors which drive 9mm wide belts.

      The theoretical maximums were calculated using wilriker's Maximun Accelleration calculator and other calculators available at reprapfirmware.org and reprap.org

      ; Motion settings
      ;
      ; The V-Core is theoretically capable of the following settings:
      ; M566 X1200.00 Y1200.00 Z100.00 E3600.00     ; Maximum instantaneous speed changes (mm/min)
      ; M203 X18000.00 Y18000.00 Z600.00 E3600.00   ; Maximum speeds (mm/min)
      ; M201 X5800.00 Y5800.00 Z180.00 E3600.00     ; Maximum accelerations (mm/s^2) for X and Y. Z and E are best guesses
      
      M566 X600.00 Y600.00 Z100.00 E3600.00       ; Set maximum instantaneous speed changes (mm/min)
      M203 X18000.00 Y18000.00 Z600.00 E3600.00   ; Set maximum speeds (mm/min)
      M201 X600.00 Y600.00 Z180.00 E3600.00       ; Set accelerations (mm/s^2)
      M906 X1600.00 Y1600.00 Z1800.00 E595.00 I30 ; Set motor currents (mA) and motor idle factor as percentage of normal current
      

      My print speeds are dynamic and depend on things like if the printer is printing infill, outer perimeters or bridges. Print speeds range from 30 - 100mm/s with travel moves at 200mm/s. I use Prusa Slicer and take advantage of the volumetric speed limit to restrict the maximum volumetric speed when slicing to what I know the particular filament is capable of. I find this gives me much more consistent dimensions and interlayer adhesion.

      posted in Tuning and tweaking
      grizewaldundefined
      grizewald
    • RE: Multiple extruders, the overview

      I'm still only using one extruder, but what I can say is this: if you already know Slic3r, then the Prusa Slicer is far from "only geared towards the Prusa printers".

      I've been using Cura exclusively for several years, but recently got bored with the fact that the materials settings and print profiles don't really work in any useful way if you have a custom printer. I'm sure they work fine if you have an Ultimaker.

      So, having previously found Slic3r to be unpredictable, to say the least, it was with some trepidation that I downloaded Prusa Slicer...

      It turned out that my fears were misplaced. The latest 2.1.0 version is very good indeed! The Print, Filament and Printer settings mesh together logically and efficiently. You absolutely don't need a Prusa printer to take advantage of the settings system. My printer is a big CoreXY with a Mosquito hot end and BMG extruder. It's working very nicely with my printer and producing some great prints.

      I particularly like the volumetric speed limit; it's great for ensuring that you don't accidentally break the speed limit on touchy filaments like Colorfabb's PA-CF.

      In contrast to Cura, Prusa Slicer doesn't roll over and die every time my machine gets an update for the MESA OpenGL libraries. If it carries on pleasing me like it has done over the last month or so, I may be removing Cura from my computer and switching to it permanently.

      posted in General Discussion
      grizewaldundefined
      grizewald
    • RE: Trying to edit post gets detected as spam!

      @T3P3Tony Nice one. 👍

      I'll post in this thread if I see it again.

      posted in Off Topic
      grizewaldundefined
      grizewald
    • RE: New RepRapFirmware 3.0 early beta

      @noskillzengineer said in New RepRapFirmware 3.0 early beta:

      Too bad the duet forum can't be merged with like a Discord server, that would be pretty cool and pretty convenient with how you can like tag or pin people or everyone in that particular thread, I'd be way more active on a Discord server, just saying, phone mobile notifications for the discord app are kinda nice, I have it notify my only when someone specifically tags me.

      I for one would object to this very much, for several reasons:

      1. The T&C for using Discord are "all your comments belong to us".
      2. Mobile devices with their ultra slow on-screen keyboards are an incredibly frustrating experience for reading and creating textual and graphic content. Give me a computer with a proper keyboard every time.
      3. Things like Discord servers and F***book are awful for storing information in a form where you can search for it and organise it in a structured way. They might be good for people with an attention span of minutes, but not for structured discussions.
      4. Discord and other such platforms are not indexed by web search engines, making any information that they hold even more inaccessible.
      posted in Firmware wishlist
      grizewaldundefined
      grizewald
    • RE: Mesh Calibration Issues (Duet Maestro 1.0, FW 2.02, BLTouch)

      @classicstyle

      G32 causes the macro 'bed.g' to be called. There's nothing that requires you to perform a mesh levelling before every print, that's the whole idea with having a command to load a saved mesh.

      This is what my bed.g looks like:

      ; bed.g
      ; called to perform automatic bed compensation via G32
      ;
      M561 ; clear any bed transforms to start levelling from scratch
      G28 ; Home all
      G29 S1 ; Load heightmap.csv and activate it

      That's it! I create a new levelling mesh every once in a while via a separate macro which warms up the bed and print head to 60C/130C before it probes a grid of 196 points.

      My homeall.g macro, which is called when G28 is run, performs a lead screw compensation after the initial homing of X, Y and Z. Once the lead screw compensation is done, it levels Z again, just in case the lead screw compensation changed the Z homing height.

      So, my slicer's start code contains a G32, but the macro only loads and activates a previously created mesh rather than creating a new one.

      Oh, one last thing. My slicer's start code also warms up the bed and print head to 60C/130C before the G32 is executed. That way, everything is set up to match the conditions under which I created the stored mesh.

      After returning from the G32, the start code then sets the bed and print head to the actual printing temperatures before the print itself starts.

      posted in Tuning and tweaking
      grizewaldundefined
      grizewald
    • RE: Anycubic I3 Mega Mod questions

      If you have axes X, Y and Z and then you create a fourth axis, the end stop for that fourth axis will be the first unused end stop in order. So, if you don't have your second Z end stop connected to the E0 end stop input, then you should connect it there.

      That's why it's showing you an E0 end stop.

      posted in General Discussion
      grizewaldundefined
      grizewald
    • RE: Is this board Genuine or Clone?!

      @droftarts said in Is this board Genuine or Clone?!:

      Duex5 looks similar to my genuine one, except for the heatsinks on the stepper drivers. Do these actually make any difference to? I thought the stepper drivers conducted very little heat through their plastic tops, mostly through their bases into the PCB, and had read that you get better cooling by mounting the heatsinks on the other side of the PCB!

      Ian

      Precisely so! The stepper drivers have a large metal pad on the bottom to conduct heat away through the PCB. That's also why there are all those small holes underneath each stepper driver - they're called "thermal vias" and serve to increase the surface area of the connection between the chip's power dissipation pad and the copper of the PCB.

      Putting heat sinks on top of the drivers is quite pointless if the PCB is correctly designed (which it is in the Duet3D hardware).

      Putting them on the bottom might help with the tiny little plug in stepper driver boards used on other hardware, but compared to the size of the PCB on the Duet/Duex boards, I wouldn't imagine they would make any significant difference.

      posted in Order discussion
      grizewaldundefined
      grizewald
    • RE: PanelDue 7i bricked

      @tkamsker I hope it solves your problem! I've updated my 7i panel several times now and it's a painless process. I just followed the normal sequence of "erase", "reset", "run bossac".

      The other thing is the current limit which dc42 mentioned. I use a USB3 port to update the panel's firmware as the USB3 standard specifies that a minimum of 900mA must be available for a device. That's more than enough to drive even the big 7 inch panel.

      posted in Firmware installation
      grizewaldundefined
      grizewald
    • RE: Motor noise and print quality

      @bot That's an interesting observation.
      I'm not sure it would really work with the print in question. I normally print this particular PLA at 200C, but I bumped it up to 205C so that the extruder would have a chance of melting the filament fast enough to put down layers without under-extrusion at 120mm/s.

      Even if the quality differences were explained by the print temperature, it can't affect the sound that the motors make.

      posted in Tuning and tweaking
      grizewaldundefined
      grizewald
    • RE: Anycubic I3 Mega Mod questions

      @pauledd said in Anycubic I3 Mega Mod questions:

      Thanks a lot for your help.

      My pleasure!

      My i3 Mega came with the Mega2560 controller board, so I could flash a custom build of Marlin to add a BLTouch probe and things like that, so I never considered upgrading the board. I did swap out the stepper drivers for TMC2208s though which made a real difference in terms of noise. To keep everything nice and cool, I reworked the cooling inside the case. From the beginning, it would make terrible noises when it was cold and the cooling for the stepper drivers was very poor.

      I also upgraded the bed holder and added a drag chain for the bed heater wires. At the same time, I swapped out the bearings for the Y rails with new, better quality ones and only three of them instead of four.

      Then I swapped the bearings on the X axis and replaced the entire hot end assembly to add a BLTouch and a genuine E3D V6 full metal hot end all in a 3D printed mount.

      After about three months, the power supply died and was duly replaced with a good quality Mean Well supply.

      It's now a very stable and reliable little machine and it made most of the printed parts for my big Core-XY printer which dwarfs the Anycubic in every way.

      I hope you enjoy your Duet powered machine! If you want details of any of the improvements that I made, just drop me a PM. I think I have pictures of most of what I did.

      posted in General Discussion
      grizewaldundefined
      grizewald
    • RE: Piezo as Z Endstop & as Z-Probe config

      @sinned6915 I'm going to disagree with Phaedrux here.

      I use a Precision Piezo Orion on my CoreXY printer and trying to home or probe with any plastic on the nozzle, regardless of temperature, leads to inconsistencies. The Orion is very sensitive and even molten plastic leads to the Z homing point being set too high.

      Therefore, I always ensure that my nozzle is completely free of plastic before starting a new print. If there is any plastic left from the previous print, I briefly heat up the nozzle to printing temperature and wipe off any dribble with a paper towel and continue wiping until the nozzle cools down to below ooze temperature.

      My starting g-code for each print heats the nozzle to 130C and the bed to 60C and when the temperatures are reached, it homes X, Y and Z, performs two probes to level the bed in the X direction between the two lead screws which drive it, re-homes Z and then loads the saved height map.

      Once that is done it sets the heaters to printing temperatures before the actual print code begins.

      My end g-code performs a 1.5mm retract before moving the head away from the print and this normally leaves the print head free of plastic, ready for the next print.

      Creating the height map is something I do via a macro when needed. I create the height map at 130/60C and it works just fine. If there is any expansion after 130/60C, it is small enough to be of no consequence.

      posted in Duet Hardware and wiring
      grizewaldundefined
      grizewald
    • RE: Motor noise and print quality

      Turns out it was my mistake with the print head hitting my supports. For some reason, the "avoid supports when travelling" option only works if you enable combing.

      To get the zits hidden, I'll need to manually position the seam. Cura seems to have trouble working out where the sharpest corner of the model is sometimes.

      I've been playing with the latest Slic3r recently, but I find that the code it produces doesn't print anywhere near as well as Cura does. On the other hand, Cura's material settings don't really work like I'd expect them to. The relationship between print settings, printer settings and material settings is much more logical in Slic3r than in Cura.

      I've not tried S3D as I'm allergic to software running on my Linux systems that has phone home licensing systems and I'm yet to be persuaded that it's worth $150 more than free.

      posted in Tuning and tweaking
      grizewaldundefined
      grizewald
    • RE: Behavior of drivers at high speeds

      What a fantastic piece of living art!

      Brilliant.

      posted in General Discussion
      grizewaldundefined
      grizewald
    • RE: Hobby servo behavior

      I don't see any results from your testing with microseconds, but anyway, you can't set this servo to 0, 90 and 180 degrees.

      From the Pololu page:

      "The FS90R continuous rotation servo converts standard RC servo position pulses into continuous rotation speed. The default rest point is 1.5 ms, but this can be adjusted by using a small screwdriver to turn the middle-point adjustment potentiometer. Pulse widths above the rest point result in counterclockwise rotation, with speed increasing as the pulse width increases; pulse widths below the rest point result in clockwise rotation, with speed increasing as the pulse width decreases."

      You will need to look for a standard servo in the same size. The one you have either stands still or spins constantly in one direction or the other, the speed of rotation being controlled by the pulse width.

      posted in Duet Hardware and wiring
      grizewaldundefined
      grizewald