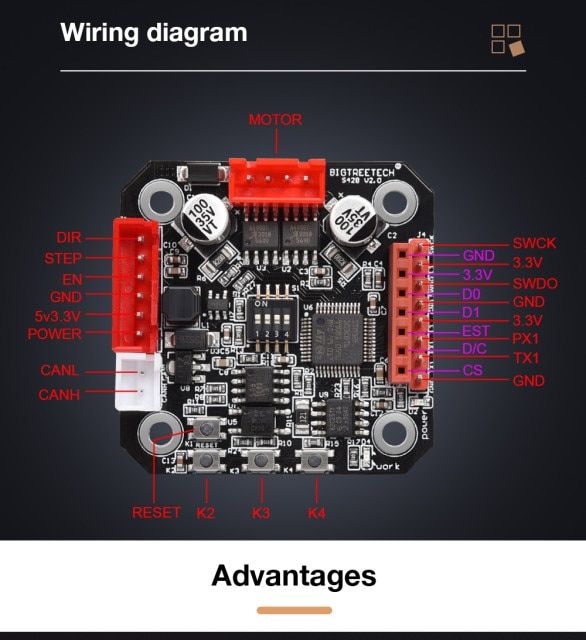
@alankilian @I have 5 closed loop stepper drivers for context. Can I connect all of the closed loops stepper drivers to the same 5V and Ground Terminal or would that break something?
Posts made by Gost101
-
RE: Duet Wifi Closed Loop and Panel Dueposted in Accessories and Add-ons
-
RE: Duet Wifi Closed Loop and Panel Dueposted in Accessories and Add-ons
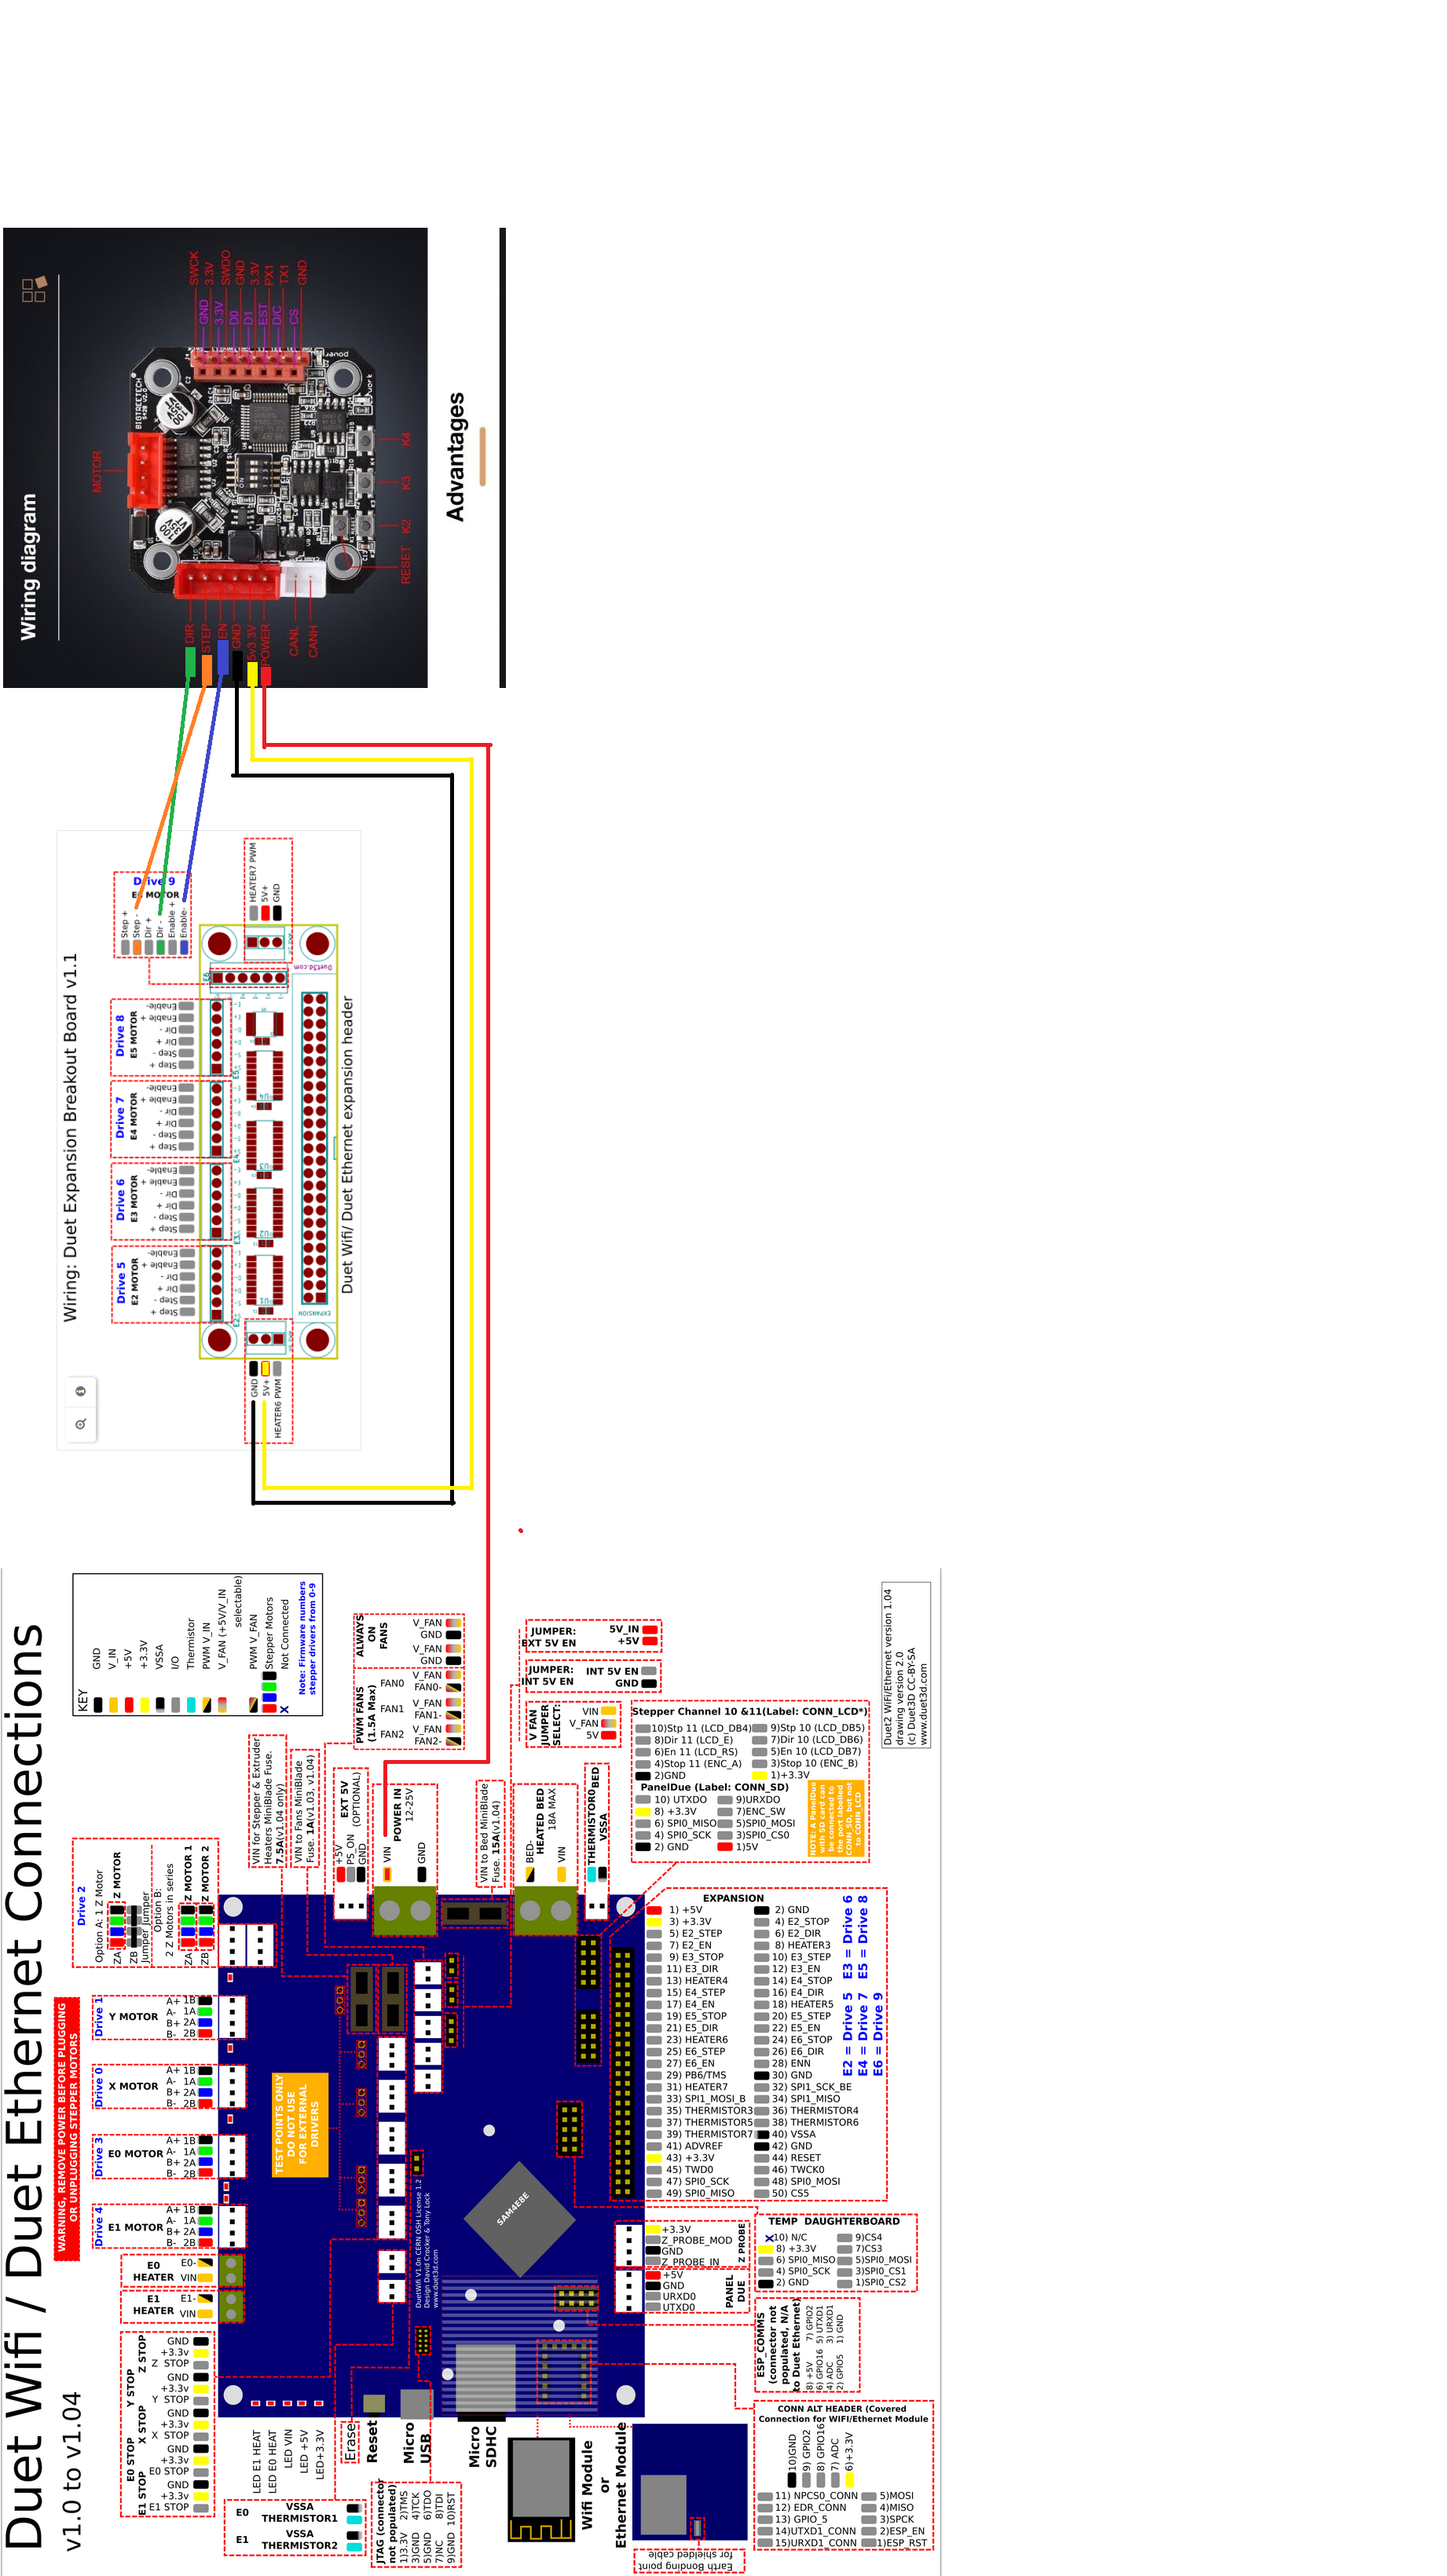
I made a quick wiring diagram in paint.
-
RE: Duet Wifi Closed Loop and Panel Dueposted in Accessories and Add-ons
@alankilian Thats what I thought but wasn't entirely sure. I'll let you know if it works, when I get back home.
-
RE: Duet Wifi Closed Loop and Panel Dueposted in Accessories and Add-ons
@alankilian Is there a 12v connector on the board I can use?
-
RE: Duet Wifi Closed Loop and Panel Dueposted in Accessories and Add-ons
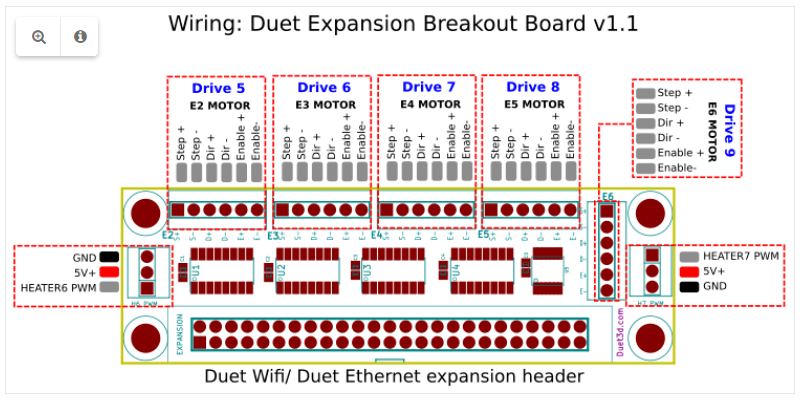
@alankilian Which Pin connector should the GND, 5V/3.3V, & Power 12V/24V connect to on the Expansion board?
-
RE: Duet Wifi Closed Loop and Panel Dueposted in Accessories and Add-ons
@alankilian @JoergS5 Does this mean you guys can help me? I have no idea as per which connector on the breadboard connects to which connector on the closed loop board.
-
RE: Duet Wifi Closed Loop and Panel Dueposted in Accessories and Add-ons
@phaedrux I have seen that post and no I am not familiar with the wiring of the closed loop driver that's why I asked LOL. Do you know anyone who might be?
-
RE: Duet Wifi Closed Loop and Panel Dueposted in Accessories and Add-ons
@phaedrux The Panel Due now works. Thanks. But how should I wire the stepper motor drivers from the breakout board?
-
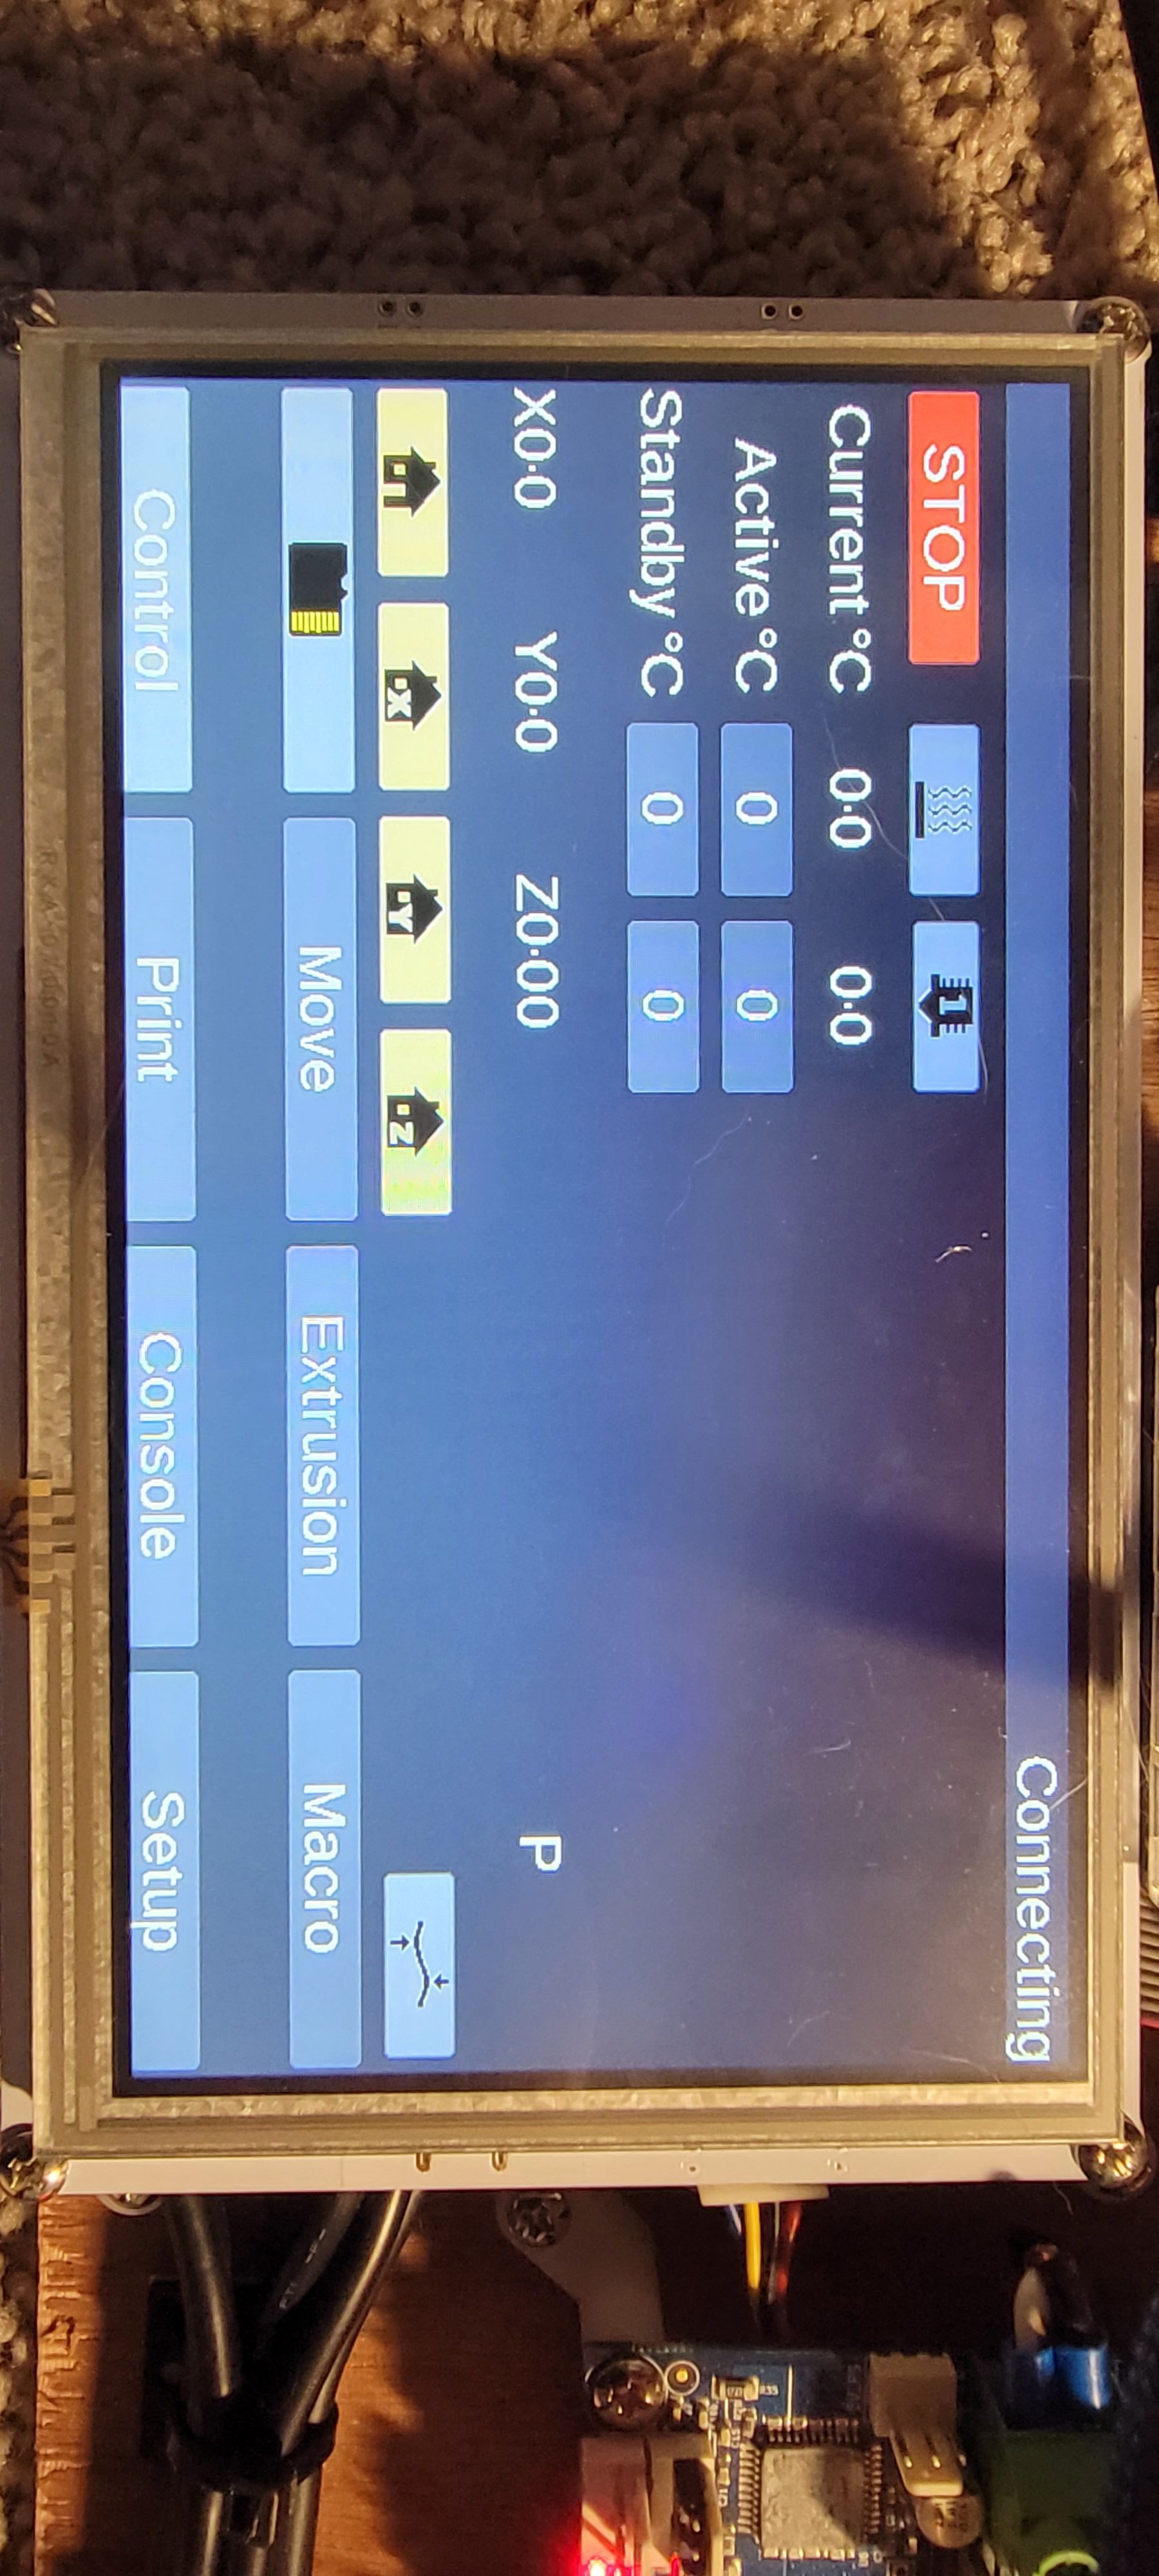
Duet Wifi Closed Loop and Panel Dueposted in Accessories and Add-ons
Good Day everyone,
I am once again asking for your help.
I bought 5 of these closed loop drivers for the breakout board and do not want to screw up the wiring.
In addition, I have a 7" panel due that is connected over the ribbon cable as the guide suggests and I have added the ```
M575 P1 S1 B57600 Here is a print out from the YAT terminal: FIRMWARE_NAME: RepRapFirmware for Duet 2 WiFi/Ethernet FIRMWARE_VERSION: 3.3beta1 ELECTRONICS: Duet WiFi 1.02 or later FIRMWARE_DATE: 2021-02-14 16:00:49<LF>ok<LF> What should I do? -
RE: Print Problemsposted in Tuning and tweaking
@fcwilt @Veti @droftarts The belts were pretty tight but apparently not tight enough. I tightened the y axis a little more and most of the y axis problems went away. However I cannot tighten the x axis it's basically impossible. I ordered a tension kit for it though. In addition here is the latest print with these changes.


-
RE: Print Problemsposted in Tuning and tweaking
@droftarts The benchy was in the center of the bed with the front of the boat facing x + (eg 400). All belts and pullys are tight.
-
RE: Print Problemsposted in Tuning and tweaking
@Veti It requires a decent amount of force to move.
-
Print Problemsposted in Tuning and tweaking
@droftarts @fcwilt @Phaedrux Hello guys. I started a new thread due to a different problem. I'm noticing a lot of vibrations, small blobs in my prints. In addition this is something that had occurred before any of the recent changes to the printer. Regardless of speed changes or jerk control this occurs.

-
RE: Independent Z axis Homing using BL Touchposted in Tuning and tweaking
@fcwilt Thanks for your help. Question though for my z probe offset height is set to 2.250 but Everytime I start a print I have to lower the z axis to -0.15. do I increase the offset hight or decrease it?
-
RE: Independent Z axis Homing using BL Touchposted in Tuning and tweaking
Then I will work on the ultimate printer project which will take 1 year + to finish. I appreciate all the help that you all provide @fcwilt @droftarts @Thalios @Phaedrux @dc42. Will there be an expansion board in which I could plug in my own stepper driver? Curious about testing a closed loop system.
-
RE: Independent Z axis Homing using BL Touchposted in Tuning and tweaking
Once I'm done I will create a new thread for people in the future to look at for my printers configuration.
-
RE: Independent Z axis Homing using BL Touchposted in Tuning and tweaking
Here is my Slicer Settings:
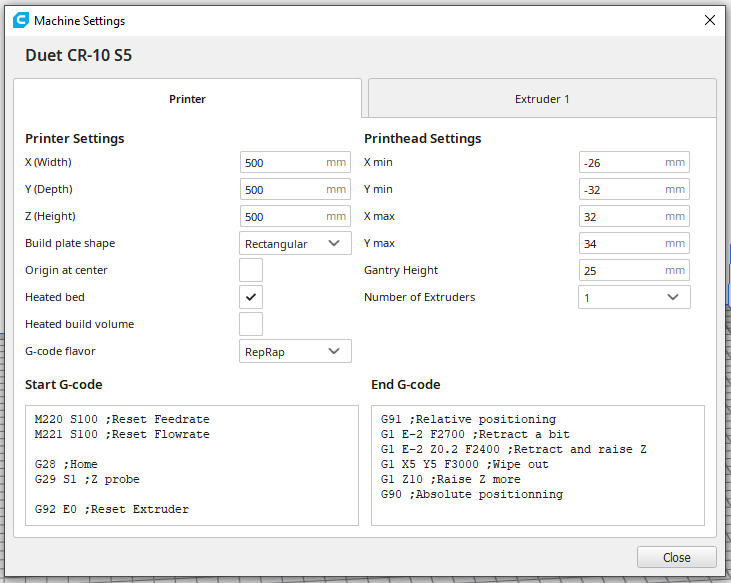

Start:M220 S100 ;Reset Feedrate M221 S100 ;Reset Flowrate G28 ;Home G29 S1 ;Z probe G92 E0 ;Reset Extruder G1 Z2.0 F3000 ;Move Z Axis up G1 X10.1 Y20 Z0.28 F5000.0 ;Move to start position G1 X10.1 Y200.0 Z0 F1500.0 E15 ;Draw the first line G1 X10.4 Y200.0 Z0.28 F5000.0 ;Move to side a little G1 X10.4 Y20 Z0 F1500.0 E30 ;Draw the second line G92 E0 ;Reset Extruder G1 Z2.0 F3000 ;Move Z Axis upEnd:
G91 ;Relative positioning
G1 E-2 F2700 ;Retract a bit
G1 E-2 Z0.2 F2400 ;Retract and raise Z
G1 X5 Y5 F3000 ;Wipe out
G1 Z10 ;Raise Z more
G90 ;Absolute positionning

G1 X0 Y{machine_depth} ;Present print
M106 S0 ;Turn-off fan
M104 S0 ;Turn-off hotend
M140 S0 ;Turn-off bed

M84 X Y E ;Disable all steppers but Z