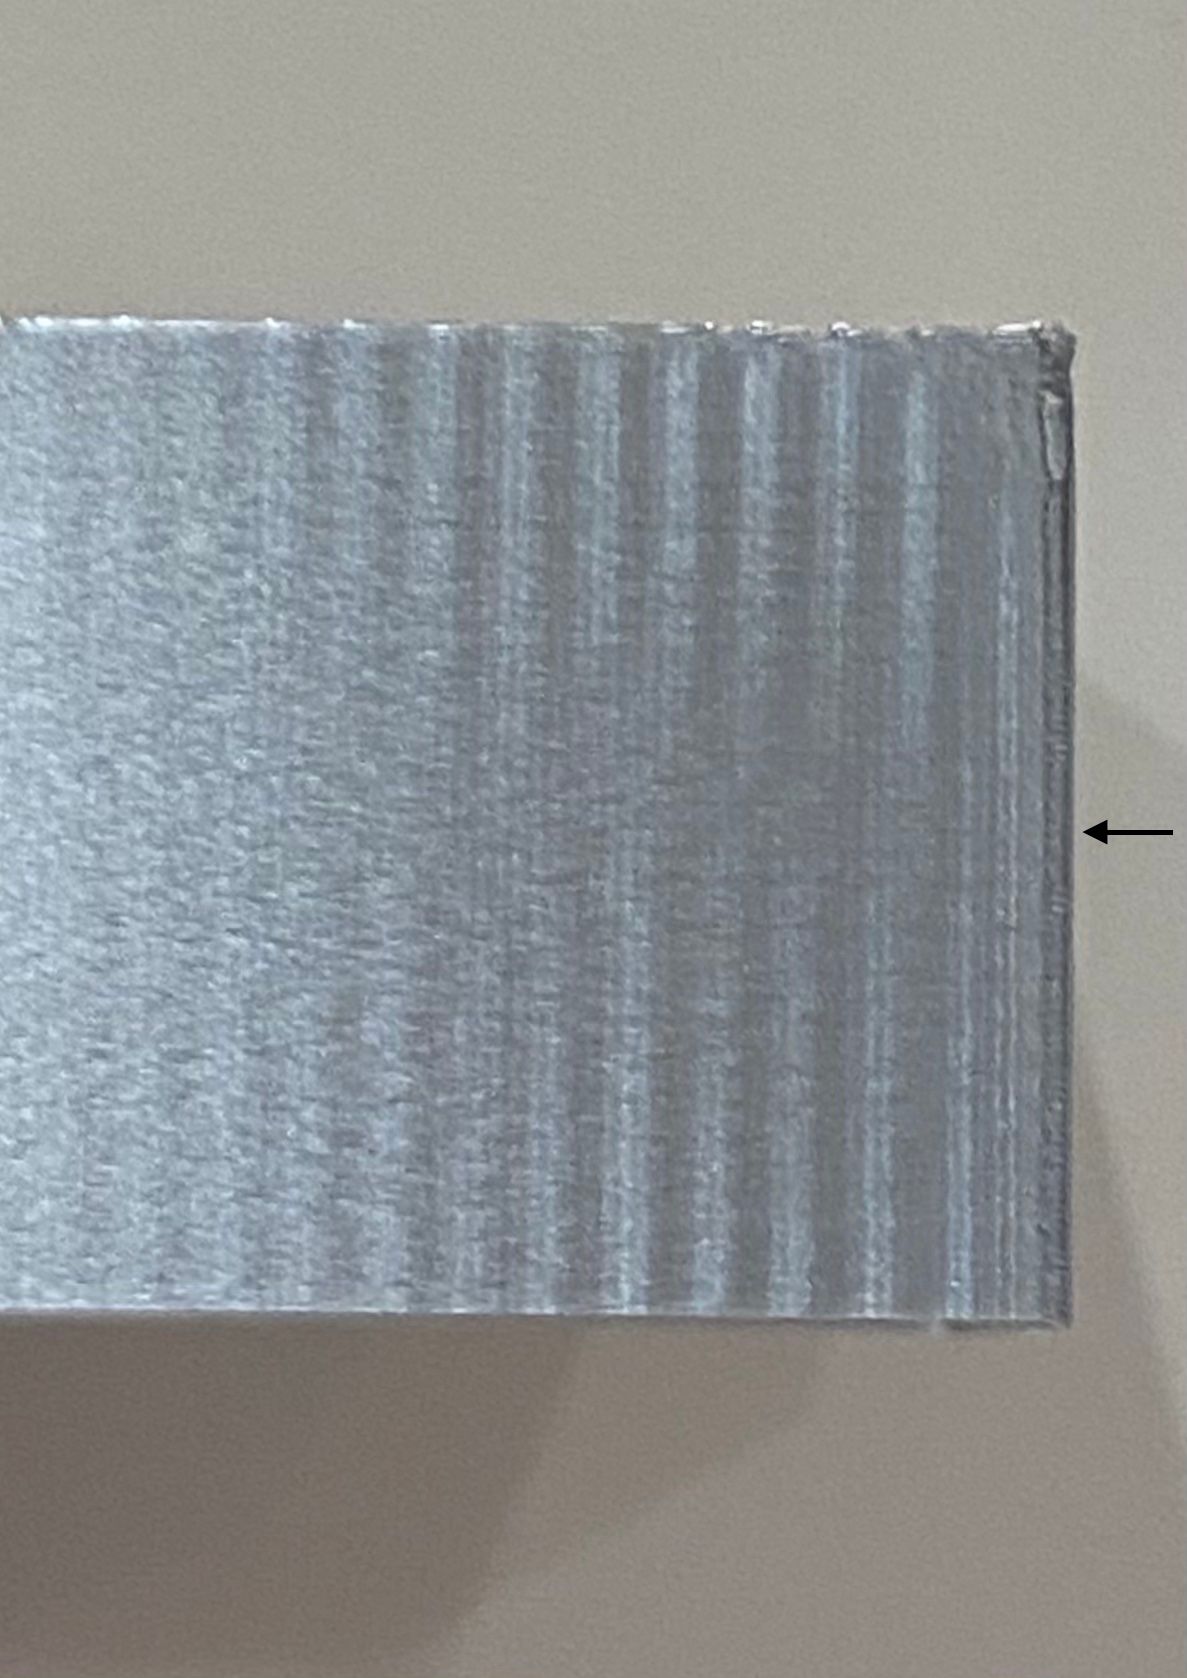
Some background. One of my 3D printers is a fairly large delta printer (Ultibots D300VS+, ø300mm, 1000mm verticals) with a direct drive extruder (Titan Aero). This printer hasn't gotten much use since the heavy end effector combined with the long motion arms make it very susceptible to ringing and overshooting even at very moderate print speeds.
One of the key reasons for the lack of rigidity on this specific printer was that the original delta carriers were manufactured in a somewhat flexible material. A few weeks ago, I machined new ones in aluminum, and while this dramatically improved the rigidity and printing performance, ringing was still significant. I contemplated converting it to a Bowden design, but before doing that I wanted to test an idea I've had for a while but never really had the chance to develop: Could we reduce ringing by making the motion control be more aware of the dynamics of the mechanical system?
The general idea is that 3D printer mechanics can be modeled as mass-spring-damper systems, with the "spring" coming from the electrical field in stepper motors, elasticity in belts and the flexibility in other motion components. For deeper discussion and analysis, I did a little bit of modeling and simulation, summarized in this short write-up:
https://digitalvision.blog/spring-damper-control
The approach from that analysis turned out to be remarkably simple and like many other ideas seems to work well in theory, but as we know, the difference between practice and theory is always greater in practice than theory. To get some signal on the practical validity, I prototyped a test on the actual printer, and here are the first results.

A (somewhat janky) video showing the method running live: https://youtu.be/3ze9RwqkLqU
The specific parameters for the correction above was f_n=40.4 Hz, zeta=0.
I got these results without making any FW changes. I instead abused the motion planner by feeding it G-code that simulated the required motion profiles. I think the results look pretty interesting and this is probably worth pursuing further.
One interesting aspect is that this approach has many similarities to extruder pressure advance. One key difference is that mechanical motion is generally underdamped (zeta<1), while pressure advance is probably overdamped (zeta>1), although I've certainly seen cases where the extruder has a pulsing or oscillating behavior.
It should be noted though that there are two big limitations to this approach.
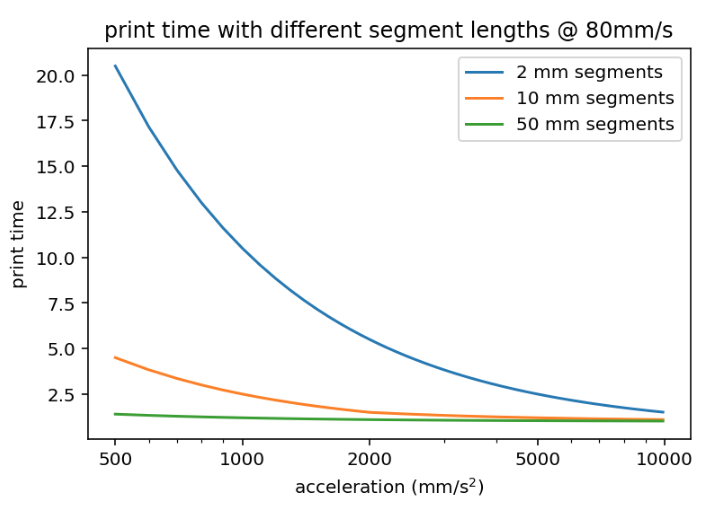
- This approach does in theory rely on s-curve acceleration profiles (continuous acceleration profiles) in order to give a continuous control signal. It's possible that an approximation will allow it to work reasonably well with classic constant-acceleration profiles (the simulation indicates this), but s-curve acceleration is certainly preferred. Maybe this will end up being the key value proposition for s-curves.
- For a similar reason, this approach is incompatible with the "instantaneous velocity change" method that we are used to. I'd like to write a bit more about this later, but the tl;dr is that I think it's time to move away from instantaneous velocity change toward a more general profile smoothing approach. That will have other nice side-effects too.
Anyway, I thought I'd look for some feedback here before proceeding to explore prototype an actual FW modification.